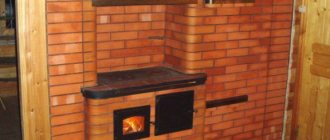
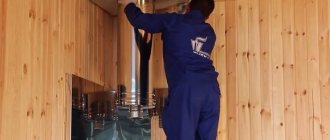
Of course, one of the most important elements in arranging a bathhouse is the stove.
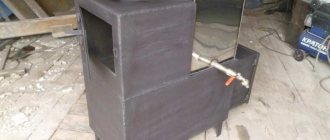
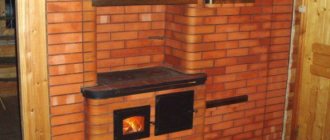
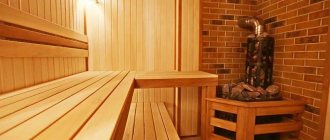
Metal stove lined with brick (in the steam room)
Before you begin to study the instructions for proper brick laying, you should answer the main question: why is it necessary to line the stove in a bathhouse with bricks? Perhaps your particular stove model does not require this action?!
Before and after
Compared to metal, brick retains heat much longer, which means the stove will cool down much longer.
The stove in the bathhouse plays no less important role than in the house. The effectiveness of all bath procedures and a comfortable atmosphere depend on how quickly it heats up and retains heat. Being in a cold room is unpleasant, and being in an excessively overheated room is dangerous to your health.
Metal stove in a steam room with 1/2 brick
Is it really worth covering the stove with bricks?
The answer to this question is very simple. First of all, brick lining of stoves is carried out so that its base does not cool down for a long time, and the firebox does not overheat during operation. It is important that the selected material is well fired, so raw brick is not suitable for such purposes. For such work it is also not allowed to use silicate, hollow and slotted bricks.
If you line a sauna stove with brick, the user receives certain advantages over using metal units:
- Since the brick warms up gradually, the heating of the room is carried out evenly and not much at a time. Such a structure will pleasantly fill the room with warmth and will not produce sudden heat.
- The base of the brick retains heat for a very long time, so constant heating is not required.
- Using stoves lined with brick is much safer than metal ones, because there are no surfaces with maximum temperatures. The risk of fire from heated metal surfaces is also reduced.
- The laid stones in the bath will heat up more thanks to the brick structure.
All these positive aspects will provide a pleasant microclimate in the bathhouse with the required humidity. Many people perform such work not only for convenience, but also to achieve certain design solutions. If you choose the right material, a room with a brick firebox will be transformed and will look stylish and cozy.
How to assemble a protective screen yourself
The essence of the assembled protective structure is its multi-layered nature. After everything is installed, you will get a kind of pie, if you count from the surface of the wall: a ventilation gap directly at the partition, non-flammable heat-insulating material, decorative cladding. It is this finishing of the walls in the bathhouse around the stove that allows you to maintain a uniform design style for the entire room and maximally protect the wooden partitions from fire.
The structure is easy to assemble. Pieces of fire-resistant material are mounted on the walls as the foundation of the entire structure. Next, a sheet of thermal insulation material, for example, a glass-magnesium sheet, is attached. After this, the outer surface of the sheet is decorated with decorative material - tiles, porcelain stoneware or soapstone.
The last option is the most beautiful and durable, but it costs more than the others.
If the wall of a sauna or bathhouse near the stove is decorated with a material such as ceramic tiles or porcelain stoneware, one of its properties must be taken into account: the material itself practically does not change its size when heated, but the solution in the seams between the tiles can expand significantly. Therefore, the seams should not be very thin - when expanding, the composition can cause the glued tiles to peel off from the base
In addition, you should use porcelain stoneware with caution - if water splashes on it during steaming, it may crack
Basic criteria for choosing bricks for lining
To answer the question of which brick to line an iron door in a bathhouse, you need to take into account some points. In such a room there are very high temperature loads. Most often, the user chooses from several options.
- Regular red brick. Due to its heat resistance and excellent heat capacity, this type of material can be used to create a screen. The best option is red solid brick, but the hollow version should not be used. The latter heats up very quickly, but also cools down quickly. This option is also characterized by an excellent appearance; with proper installation, you can create a very attractive device that can decorate your visit to the bathhouse.
- Sand-lime brick. It is not recommended to use it for lining a sauna stove, since the components included in its composition do not tolerate high temperatures very well, especially critical ones. The appearance of the finished product will require additional cladding.
- Fireproof grade. This option is the most optimal option from an operational point of view, but it is much more expensive than regular red. This is the most desirable type of brick if the question is how to line a stove in a bathhouse.
Refractory brick is excellent for lining a stove, but it is much more expensive than usual.
When the main material has been selected, you should start preparing auxiliary tools and materials that will help line a metal stove in a bathhouse.
Successful lining of the furnace will be guaranteed if you prepare before work:
- Kiln brick;
- A mixture of clay and cement;
- Metal corners;
- Asbestos-based cardboard;
- Special tools: pick, trowel, plumb line and others.
Foundation for partition
To cover the stove in a bathhouse with bricks, you need to build a solid foundation. Placing heavy masonry directly on the wooden floors of the steam room is allowed if several conditions are simultaneously met:
- the size of the wood heater and, accordingly, the weight of the screen is small;
- if a lightweight version of the screen with openings between the bricks is selected;
- floor joists and covering boards must be strong enough to bear increased loads.
If your stove or sauna boiler is installed directly on the floor, it will have to be temporarily dismantled and put aside. Laying the foundation is carried out in the following order:
- Cut an opening in the floor to the size of the future masonry. Dig a hole in it to the depth of a stable layer of soil.
- Place sand at the bottom to a height of 10 cm and compact it with a tamper.
- Fill the pit with broken stone to ground level, and then pour it with a liquid solution of cement or clay.
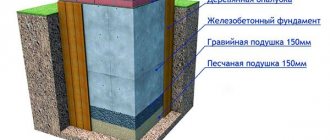
- After the mortar has hardened, lay 2 layers of roofing felt waterproofing on the rubble base, and then lay a brick foundation to the level of the clean floors, as shown in the diagram.
- Fill the internal cavity of the masonry with rubble concrete, as described in paragraph 3.
- Lay a sheet of galvanized iron on top of the finished foundation.
When installing the base of a stove in a bathhouse, keep one thing in mind: between the walls of the heater and the partition there must be an opening for air at least 2 cm wide. Accordingly, the size of the foundation is equal to the dimensions of the potbelly stove + brick width 12 cm + air gap 2-5 cm.
Types of masonry
If you decide to line a metal stove with bricks, then you should decide on a method that will serve as a guide for laying out the masonry in the bathhouse. Cladding a metal furnace with brick is often called creating a screen. There are several technologies for performing such work. Basically, two options are used: continuous masonry method and discharge cladding. But in any case, the distance from the screen to the oven should be 3-10 cm.
Continuous cladding
This type of masonry significantly reduces the thermal efficiency of the furnace. The design of the device is designed for faster heat transfer, and when creating the cladding, a significant obstacle appears in the path of warm air. The warm air has no choice but to go into the chimney. This option is used very rarely when the efficiency of the furnace is not of great importance. For example, if the stove is used only for decorative purposes. For such masonry, a foundation is required. To speed up the heating process with solid masonry, you can use a little trick - leave windows closed with special doors or bricks.
Facing in discharge
This is a more acceptable option for lining a furnace if quick heating of the room is required without loss of heat. Laying in discharge means that windows will be left in the wall of the screen. Their location is chosen arbitrarily; some manage to create beautiful drawings. In this case, the room will heat up very quickly, but the radiation will be very harsh.
Advantages of a brick “casing”
Now, after the new stove has already been tested in action, I want to say that it was in vain that I did not make a brick “casing” earlier. What are the advantages of this solution? Let's do the math:
- The heat from the stove comes out evenly, because first the brick accumulates heat and then emits it. The burning heat has disappeared, so at any point in the steam room you feel only pleasant (sometimes strong, but still pleasant!) warmth.
- The stones heat up faster and more efficiently, so sufficient amounts of moist steam are provided.
- The heat accumulated by the bricks lasts longer, therefore, having heated the bathhouse thoroughly, I can steam there for several hours in a row, without worrying about the need to increase the temperature.
- The stove becomes safer. A hot iron stove is a rather unpleasant thing if you accidentally touch it, so a layer of brick acts as a protective barrier against excess heat and accidental injury.
The only thing is that the iron stove with a brick frame takes longer to heat up. However, to be honest, it's not particularly noticeable. During the fire, you can always go about your business and then time flies unnoticed. And once the sauna is heated, you can completely relax - you don’t need to do anything else, the heat will last perfectly until the end of the sauna procedures.
Alexander S. (experienced amateur bath attendant)
Calculation of material consumption
To calculate the amount of material required for masonry, you will need to take into account some factors. First of all, these are the physical dimensions of the kiln itself, as well as the method of laying the bricks.
To determine the amount of material required, the volume of the oven is multiplied by the height and divided by the size of the side of the brick. The result obtained is multiplied by 5-10%.
This will help compensate for brick breakage during work and transportation. When calculating, you should also take into account the brick for lining the foundation and chimney. When laying in discharge, naturally, much less material is needed.
Insulation methods
There are several techniques that allow you to reliably insulate wooden structures from the heat of the stove. Some of them involve a fairly large amount of work, while others are much simpler.
- Creating a protective box from brick or stone.
- Installation of a special industrially manufactured screen.
- Creating a protective structure with your own hands from non-combustible materials.
The construction of a box made of brick or stone will require the most time - it will be necessary to lay out several walls that will protect the wood from heat. In addition, this protection option requires a gap between the wood and the brickwork from 5 to 15 centimeters. There should be about 10 centimeters between the casing being built and the walls of the stove. All this eats up useful space and requires some mason skills to work on.
Factory screens are installed quite simply and are not that expensive. They could be an ideal solution if they did not require even larger technological gaps between different surfaces. Therefore, such finishing of the wall near the stove is possible only in a fairly spacious bathhouse. If you need to save space, it is better to look for another solution that allows you to reduce all the gaps from wooden partitions.
The third option allows you to reduce distances to 15 centimeters, which is already more acceptable
At the same time, this method allows you to create the most beautiful design, which is important. However, there will be a lot of work and the costs in this option may be much higher than in the previous ones. In addition, this insulation method requires a more detailed consideration due to the features of the assembled structure
In addition, this insulation method requires a more detailed consideration due to the characteristics of the assembled structure.
Features of preparing mortar for bricklaying
To get the desired result, it is necessary not only to choose the right brick, but also to prepare the mortar for masonry. You will need to take clay and sand in equal proportions. In total, you should get about half of a 10-liter bucket. For this volume add 100 grams of salt. Without special experience, making a clay mortar correctly is quite difficult, so you can go to a hardware store and buy a ready-made mixture. They initially contain all the ingredients required to obtain strong and reliable masonry that can withstand high temperatures.
For masonry, you can use cement, to which glue for porcelain stoneware or fireclay clay is added.
It is not worth preparing the mixture a lot, as it quickly hardens and becomes unsuitable for work. Sometimes there are situations when it is not practical to use masonry mortar. This is the case when the stove is made of very thin steel. The metal gradually wears out during operation, which will require repairs. If the cladding is done using a dry method, then disassembling the cladding for repairs will not be difficult.
Laying brick rows
I laid the brick rows in half a brick in a checkerboard pattern - this is enough for normal heat exchange. In principle, if there is a shortage of bricks, you can try to lay the bricks on edge, but then the protective screen will be thinner and, accordingly, all its positive properties will be reduced. In general, if you want to do everything wisely, then lay out the screen in half a brick - don’t skimp.
During operation, the oven seems dirty from the solution, but that’s okay - it’s easy to fix in the future!
It is important to maintain the correct distance between the brickwork and the metal screen of the furnace. Various information sources recommend leaving a gap of 1 to 10 cm
The meaning here is this: too small a distance (up to 1 cm) can lead to excessive heating of the metal screens of the furnace and, accordingly, to a decrease in its “life”, and with a large distance the bricks will take too long to heat up. I left a gap of 5 cm - and did not regret it!
When you lay bricks, it is advisable to pre-soak each of them in water to strengthen the adhesion of the mortar to the brick surface. Grout the seams immediately with the same solution.
The photographs show that the masonry is not continuous, but with ventilation holes so that air circulates normally between the brickwork and the metal of the stove. To do this, in the areas of future “windows”, the brick is not laid flat as usual, but with the end facing forward. This creates two improvised holes in each “window”. On each side of my stove there are two such “windows” (4 holes each - this is clearly visible in the photo) - bottom and top.
After each row, I laid reinforcing mesh cut lengthwise onto the bricks for strength. This is done for reinsurance, so, in principle, it is not necessary to use a net.
Through each row, a thin reinforcing mesh is laid on the surface of the brick.
Plating technology
The process of lining a stove with bricks is a complex multi-stage process that anyone can handle if they have certain skills and knowledge. Instructions for making masonry near a metal stove are as follows:
- If necessary, at the first stage of the work, a foundation (foundation) should be created on which the cladding walls are located. The weight of the brick lining of the stove can be impressive, so it is important not only to make a base for the lined bathhouse, but also to calculate whether the floor will support the masonry. If in doubt, additional supports should be installed under the floor beams first. It is important to know how to do this correctly.
- Then the location of the bricks is marked on the floor so that the resulting wall is located at a distance of 3-10 cm from the stove itself.
- If the floor near the stove is made of wood, then a metal sheet should be laid at the base. Its edges should cover the markings with a margin. Cardboard with asbestos is laid on top of the metal. If the bathhouse has a concrete floor, then the use of metal and cardboard sheets is not required.
- Now you can mix the mortar for masonry. The clay solution should not be too thin or greasy. If you roll a ring from a clay cord with a diameter of about 5 cm, it should not crack a little, but at the same time it should not fall apart.
- The first row of masonry should be laid with holes that will serve as ventilation. There should be two of them on three sides, and on the fourth side there should be a hole that will not interfere with servicing the stove. Metal corners are placed on top of such an opening, which will serve as support for the bricks. You can decorate a metal door, but this point is not required, but most likely is an aesthetic option and decor.
- The laying is carried out gradually to the height of the furnace.
Do-it-yourself bath work is within the capabilities of everyone. Knowing all the features of the work, anyone can line a stove in a bathhouse with bricks.
Nuances you need to know when starting cladding
In general, laying bricks for cladding in terms of technology is no different from laying stove walls.
However, when deciding to line a cast-iron or iron stove with bricks, pay attention to the important points listed below
Every 4th row of facing masonry is recommended to be reinforced with wire or steel strip.
The firebox opening (including the opening of the remote firebox) is reinforced with a metal corner. During the cladding process with your own hands, you will need a heat insulator. You can use asbestos or basalt cardboard as it. Review all purchased bricks for defects (chips, cracks, etc. ). Take the time to lay out the material on the floor, adjusting brick to brick so that the pins touch with the smallest possible gap.
Follow the same order when laying bricks on the mortar. The mortar for masonry should match the chosen type of brick. However, you won’t have to rack your brains here. Usually, when purchasing building materials, you will immediately be offered a dry mixture, which you only need to dilute with water according to the instructions. Watch the thickness of the seams, do not make them too wide. The thinner the seams, the better thermal conductivity the cladding will have. Be sure to check the verticality of the corners with a plumb line, as well as the horizontality of the rows with a level.
Criteria for choosing a full or partial furnace lining
Many bathhouse owners, having decided to line the stove with brick, doubt what type of cladding to choose. If you surround the device with brick walls on all four sides, you will get a complete one, otherwise it will be partial.
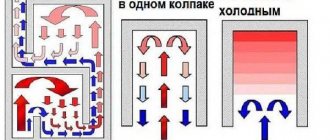
Whichever option is chosen, the difference will be in the control of convection. In simpler terms, problems may arise for lovers of Russian baths. If a controlled convention is organized, then it is possible to close it, in this case the hot air heats not the steam room room, but the brick casing, transferring the heat into the steam room softer.
To control the flow of warm air from bottom to top, special openings should be provided. If necessary, they are closed or opened using special doors or pieces of brick.
But open cladding, when the stove is not closed on one or more sides, is most likely an aesthetic aspect and a safety issue, since it is less likely to get burned from a brick than from hot metal.
Additionally: how to line an iron stove in a bathhouse with stone
Here we see two options:
- or you line it with brick, and then put decorative tiles made of natural stone on top - this will simultaneously increase the heat capacity of the casing, increase the heating time, and also change the design of your stove;
- or you should purchase one of the ready-made stone casings for stoves, which are cut in workshops to fit any model, as well as from any available stone. The most popular are casings made of soapstone (soapstone is softer, magnesite is better in this regard) and coils. However, you can find interesting options from other rocks.
For more information on using stones for lining, see this article.
Features of the stove lining installed on a wooden floor
When the bathhouse has a concrete floor, there are no questions about the arrangement of the base of the stove and the cladding around it. But with wooden flooring, before you start laying around a metal stove, you should consider a lot of questions.
First of all, it is important to decide whether a foundation is needed. To do this, the weight of the brick structure is calculated and the endurance of the wooden floor is assessed. In some cases, it is enough to simply additionally strengthen the load-bearing logs. But the safest thing to do is to pour a foundation under the brickwork. It is up to the owner to decide what it will be: strip or pillar.
If the foundation was not laid during construction, then it will be necessary to dismantle a certain part of the floor and dig a pit, since the foundation for the furnace formwork must be located at the same depth as the base of the building itself. In size, it should be 15-25 cm wider than the furnace screen itself.
First of all, you should calculate whether the floor will support the weight of the foundation
The foundation of the stove should not be connected to the main one; if the firebox is located near a load-bearing wall, then a distance of at least 5 cm is provided between the two foundations. The gap formed between them should be filled with heat-insulating materials. The height of the stove foundation should be 10-15 cm below the floor level.
It should take about a month for the foundation to dry completely. And only after that work continues. Several layers of roofing felt or roofing felt are laid on top as a moisture-proof material. Then two rows of bricks are laid, each subsequent brick of the second row is laid offset relative to the previous one so that the seams overlap. Now the foundation for the furnace screen is ready.
Even if the floor and foundation joists seem strong and reliable, capable of supporting the weight of a brick screen, a number of preparatory work will be required. A base for installing the oven and screen is being organized. The base must be non-flammable and strong; the following materials can be used:
- A sheet of metal fixed over a thermal insulation layer;
- Two rows of brickwork that are laid on a wooden floor;
- Ceramic tiles resistant to high temperatures;
- Artificial or natural stone.
Calculation of dangerous load on floors (kg/m2)
To assess how much load your floor can support, the technician needs to know what kind of joists are used. In the table below you can see the capabilities of different types of joists to support weight in kilograms per square meter.
| Section (cm) | Beam length between supports | ||||||
| 2 m | 2.5 m | 3m | 3.5 m | 4 m | 5 m | 6 m | |
| 10×5 | 734 | 585 | 490 | 420 | 367 | 325 | 293 |
| 15×5 | 1650 | 1321 | 1101 | 942 | 827 | 733 | 665 |
| 20×5 | 2930 | 2347 | 1955 | 1675 | 1464 | 1303 | 1172 |
| 20×10 | 4867 | 4690 | 3910 | 3353 | 2933 | 2733 | 2607 |
| 20×20 | 11730 | 3987 | 7821 | 6705 | 5866 | 6215 | 4691 |
| Cylindrical shape 20 | 6912 | 5528 | 4608 | 3950 | 3456 | 3070 | 2765 |
| Cylinder. f. 22 | 9200 | 7360 | 6132 | 5256 | 4600 | 4090 | 3682 |
Making masonry for a furnace with a remote firebox
Sometimes there are stoves in which the main part is located in the steam room, and the firebox is placed in the dressing room or outside. In this case, the cladding is performed using a slightly different technology.
- After defining the furnace and completing the foundation, an opening for the firebox is made. It must exceed the dimensions of the firebox by 25 cm on each side.
- The stove is installed level so that the edges of the firebox do not protrude beyond the limits. After installation, you can begin to perform insulation. Insulation work is carried out using basalt cardboard, ceramic fabric, aluminum foil and mineralite sheets. The latter is one of the most modern insulating materials, which, when heated, does not release toxic trace elements into the atmosphere. Basalt cardboard is cut into wide strips and secured with a stapler to the walls of the hole. The protruding edges are carefully wrapped. A similar procedure is done with ceramic fabric, and then with foil.
- Holes corresponding to the size of the firebox are cut out in two sheets of mineralite and secured with self-tapping screws on the side of the steam room.
- The brick is placed in water for half an hour. At this time, the solution is prepared. The work starts outside. The first row is laid in half a brick. To form a decorative protrusion, the last brick is laid across the row. When making the second row, leave a protrusion for the ash pan, which will ensure air circulation. When making masonry, maintain a distance of 3 cm between it and the stove in order to maintain the integrity of the masonry longer and also to prevent overheating.
- After the masonry is slightly higher than the firebox, two steel corners are laid. They should not come into contact with metal. Then the masonry continues to the desired height.
- After the masonry is completed, the protruding edges of the thermal insulation should be removed, and the resulting gaps should be filled with basalt wool.
- Then work continues inside the steam room. The type of masonry depends on the choice of the owner. Before starting cladding, install the stove and mark the location of the masonry itself.
As you can see, lining a stove with bricks on your own is not as difficult as it might seem at first glance. If you know how to properly line an iron stove in a bathhouse with bricks, then no questions will arise. The main thing is to prepare thoroughly and carry out all work in compliance with the rules and regulations.
Iron stove shielding effect
The filling screen is often advertised as the most convenient and safe for use in home baths. Most home-grown experts believe that finishing the walls and iron stove with rubble or crushed basalt best ensures heat transfer into the air and at the same time reduces the surface temperature of the heater. In reality, an iron stove, after being lined with crushed basalt or quartzite, produces very strong heat in the immediate vicinity of the stove, while at a distance of up to one and a half meters the air in the steam room does not warm up well enough.
Lining the stove in a bathhouse with brick gives a somewhat different effect:
- A thermal gap of several centimeters is created between the iron wall of the housing and the brick lining, due to which a third of the heat is transferred into the air flow flowing around the stove. Therefore, if you cover the stove in a bathhouse with your hands according to all the rules, the amount of heat produced will not decrease, but the outer brick surface will be much colder than the iron one;
- The smooth flat surface of the brick lining, like the smooth iron wall, has a concentrating effect, so instead of chaotic dispersion, radiant heat easily reaches the most remote corners of the sauna steam room.
Advice! If, after lining an iron stove with bricks, it suddenly turns out that the radiation from the iron stove causes the parts of the room that are too far away to warm up weakly, in this case the outer surface of the brick screen can be lined with heat-resistant tiles.
Any smooth plane, no matter whether it is metal or polished malachite, which is used as cladding and lining for expensive cast iron structures, gives off the bulk of the heat in the form of radiation. Therefore, the iron walls of a not very hot stove quickly dry out the floor and make the air too hot to breathe. Even at a distance of a meter and a half, the radiated heat of a stove that is not equipped with a brick screen severely burns the legs, arms and face
Even at a distance of a meter and a half, the radiated heat from a stove that is not equipped with a brick screen severely burns the legs, arms and face.
Iron furnace lining design
The weight of a steel or cast iron stove rarely exceeds 80-90 kg; another 40 to 100 kg can be provided by filling the heater. Without a brick lining, the stove structure can be freely installed on a heat-resistant, durable pallet without fear of damaging the joists or wooden floor boards.
In order to line an iron stove, you first need to decide on the basic design parameters:
- Dimensions and width of the lining. The shielding wall of the furnace can be laid out in half a brick, or in a quarter of a one and a half block. In the first case, the thickness of the lining is 12 cm, in the second it is only 8.8 cm;
- The size of the gap between the lining wall and the iron body of the furnace. Depending on the slot parameter incorporated into the design, a “cold” or “hot” brick screen is obtained;
- Choose a method to strengthen the base. It is impossible to lay the lining directly on the floor of the steam room, for reasons of the strength of the wooden base and the requirements of fire safety regulations.
In the first two rows of the lining, special air intake windows are made, through which cooler air near the floor, due to thermal suction, enters the gap between the iron wall of the stove and the brick screen, is heated and thrown out through the top layer of the heater under the ceiling of the steam room. Thus, overheating of the lining brick is eliminated, and at the same time good heat transfer of the furnace is ensured.
But you should not abuse the number of windows; it is enough to make one window in the lower tier of the lining and one in the middle part of the masonry to improve the operation of the heater. To improve heat extraction, additional steel pipes - “locomotives” - are installed from the lower rows of stone into the heater.
If you pour boiling water into the pipe, the heater practically “explodes” with a huge amount of hot steam due to the sudden evaporation of water and hot air passing through the gap between the brick lining and the iron wall of the stove.
Important! Practice shows that if you properly line a metal stove in a bathhouse, the heating time of the room remains virtually unchanged.
If a corner location is chosen for the steam room, the iron stove is tightly shielded from the walls. For normal airflow of bricks closed in the corner, a sanitary gap of 100-120 mm is left; windows for steam and air intake are not covered on this side.
Bookmark order
You have selected the largest specimens and are going to put them on the bottom. Their shape is arbitrary, often elongated to one side.
When installing, observe the following recommendations:
- Do not place oblong stones flat. It’s better to place them end-to-end, with the narrower side down. The rule is due to the greater speed of thermal energy propagation along the layers, and not across them. Another reason for this choice is the need for free passage of hot air between the stones. End masonry increases the number of gaps between specimens.
- In the bottom row you need to place rocks that will not quickly collapse from high temperatures. For example, it is a pity to put jadeite near the fire, because the stone is expensive, and such an arrangement will quickly crumble. For the bottom row, dunite, peridotite, and porphyrite are more suitable. These breeds are more adapted to high temperatures.
- After placing the first row, proceed to the second. Here, stones should also not be placed tightly. This is necessary for air circulation. Also, the distance between the stones is necessary to prevent destruction of the stove. The material expands when heated, and dense packing increases compression.
Conclusion
The importance of the above-mentioned bath structure cannot be overestimated, therefore the design of this stage of construction should be carried out at the very beginning. Remember that the safety you provide is precisely the factor that will allow you to enjoy your bathhouse and your work for many years!
During the heating of the bath, the surface of the stove heats up to 300-400°C
At the same time, it begins to emit infrared rays and itself becomes a source of heating. The coming heat is distributed throughout the steam room, but first of all it hits the walls adjacent to the stove. If the walls are wooden, then under the influence of high temperatures their charring begins. And there it’s already a stone’s throw away! The only truly effective way to insulate wooden walls from heat is to create protective screens and cladding from non-combustible materials in the bathhouse.
During the heating of the bath, the surface of the stove heats up to 300-400°C. At the same time, it begins to emit infrared rays and itself becomes a source of heating. The coming heat is distributed throughout the steam room, but first of all it hits the walls adjacent to the stove. If the walls are wooden, then under the influence of high temperatures their charring begins. And there it’s already a stone’s throw away! The only truly effective way to insulate wooden walls from heat is to create protective screens and cladding from non-combustible materials in the bathhouse.
Care of the heater
To continuously enjoy your stay in the steam room, you should periodically sort through, wash, clean and replace cracked stones. Assessing the steam quality helps determine the need for overhaul.
If it becomes hard or the heater begins to heat up poorly and cools down quickly, then it is time to replace or rebuild the material.
As a result of prolonged use, stones begin to fade, crack and lose their abilities. It’s not for nothing that kiln masters sometimes call burnt out stones “dead”.
Please note! The smaller the stone, the more often it needs to be sorted and replaced earlier.
Is it possible to mix different breeds?
The purpose of mixing different types of stone is to save money. Filling a large oven with expensive rocks is quite expensive. Therefore, the volume is diluted with minerals of lower cost.
You can stack the stones mixed or in layers. Rocks that heat up faster are laid down. Other varieties are placed on top.
From an aesthetic point of view, beautiful stones are placed along the edge so that they are visible and pleasing to the eye. Nondescript varieties are hidden inside.
