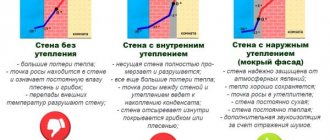
Siding is a good protection for any thermal insulator. Therefore, finishing with foam plastic followed by cladding with vinyl panels is very advisable. Insulating a building from the outside can be considered one of the main stages in the construction of any house, since without additional protection, wood, brick and even reinforced concrete will gradually collapse under the influence of harmful environmental factors. The use of siding can qualitatively extend the life of load-bearing walls of any structure.
Penoplex for siding - warmth in the house
Insulation of houses is considered a pressing issue for latitudes with a continental climate. In addition to mineral wool and polystyrene foam, there are new generation insulation materials that are used by developers.
Penoplex is considered an improved version of polystyrene foam, since it is characterized by reduced thermal conductivity.
It is no secret that it is extremely economical and quite simple to independently insulate external walls using penoplex with siding. This is because it becomes possible to use slabs with a thinner material thickness.
EPPS is more popularly known as extruded polystyrene foam, which has even lower thermal conductivity.
That is why this material is perfect for external and internal insulation of buildings. EPS insulation is produced through a press, so the density of this insulation is much higher than polystyrene foam.
What is siding and why is it needed for cladding? Siding is the external cladding of the walls of a building, which performs several functions:
- Protects the building from external influences, as well as precipitation and other weather conditions;
- The aesthetic component is the representative decor of the façade of the building.
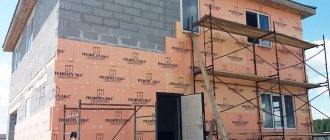
To insulate an old house and give it a modern look from the outside, there is nothing easier than penoplex and siding. Both of these materials are easy to install and can last up to 50 years. Insulating walls outside or using penoplex under siding is a fairly well-known method, although it cannot be called economical. Extruded polystyrene foam is not the cheapest of insulation materials, but this is more than compensated for by its heat-insulating properties.
Before diving into reading the material in this article, we suggest that you read our other material about the finishing of façades insulated with polystyrene foam. Surely this will be a useful addition. When deciding to carry out modern insulation with penoplex, it is worth remembering several things:
- Extruded polystyrene foam with conventional wall insulation is suitable only for the lower tier of the house, the basement;
- If you intend to use it on higher tiers, the structure must be ventilated, and it should not just be polystyrene foam under the siding, but façade slabs;
- For private, cottage housing construction, vinyl siding is usually used; for finishing multi-storey buildings, insulation under metal siding is included in the system of suspended facades in the form of facade slabs;
- The technology for assembling penoplex for cladding does not require reinforcement, in contrast to cases when plaster is used as finishing;
- Extruded polystyrene foam does not conflict with concrete and aerated concrete, silicate and clay bricks. It is possible to insulate walls with penoplex taking into account the siding in wooden houses, but you need to act extremely carefully, since wood is extremely distrustful of modern insulation materials.
A little about polystyrene foam
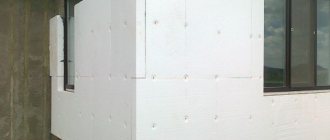
Installing expanded polystyrene boards under siding is a profitable solution for creating an optimal thermal insulation layer. In addition, the material has good sound insulation characteristics, is environmentally friendly and is not subject to combustion.
Despite the fact that polystyrene foam is not flammable, it melts when exposed to high temperatures or open fire. At the same time, combustion products are released into the atmosphere, which, if they enter the human respiratory system, can cause injuries incompatible with life. Currently, two types of polystyrene foam boards are used in individual construction; any of them can be used to insulate your own home from the outside, followed by finishing for siding:
- Regular foam;
- extruded.
| Type of insulation | Thermal conductivity, W/(m*K) | Water absorption,% | Density, kg/m3 |
| Styrofoam | 0,03 | 0,1-0,2 | 25-35 |
| Extruded polystyrene foam (expanded polystyrene) | 0,028 | 0,3-0,5 | 32-38 |
The table shows the average values of material coefficients; depending on the manufacturer, they may differ slightly from those indicated.
Characteristics of blow-in insulation
Ecowool is a new material made from cellulose fibers. It contains a binder - lignin, fire retardants and boric acid as an antiseptic. Ecowool is a loose mass that is applied dry or “wet” method.
Ecowool
Penoizol and polyurethane foam have a cellular structure and are applied to walls in liquid form. They are light in weight, so they exert almost no load on the base, but at the same time cover the entire area with a dense, uniform layer. With this method of insulation there is no need to level the walls and install wind protection, which greatly simplifies installation.
Urea-formaldehyde foam - universal insulation
Insulating a house with foam insulation
Pros:
- absence of cold bridges;
- durability;
- low thermal conductivity;
- speed of installation.
Minuses:
- these materials are more expensive than other insulation materials;
- For application it is necessary to have special expensive equipment and experience working with it.
Thermal insulation with polyurethane foam
| Options | Ecowool | Penoizol |
| Thermal conductivity | from 0.037 to 0.042 W/(m*K) | from 0.031 to 0.041 W/(m*K) |
| Layer density | 28-65 kg/m3 | 5-75 kg/m3 |
| Vapor permeability | 0.3 mg/(mhPa) | 0.21–0.24 mg/(mhPa) |
| Flammability degree | G2 | G1 |
| Working temperature | from -40 to +120 0С | -60 + 80 ᵒС |
Installation work
Before laying insulation on the walls, no additional surface preparation is required, since the siding is subsequently attached to the sheathing, and it can be leveled directly.
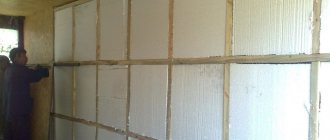
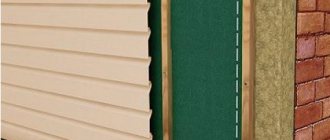
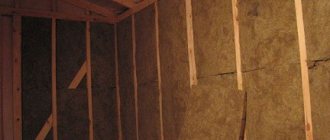
Installing the frame and laying insulation
The lathing for heat insulation and cladding can be either metal or made of beams.
Important! A frame made of galvanized profiles will cost several times more than a wooden one, but it will also last much longer.
The thickness of the lathing, as with any type of insulation, depends on the thickness of the heat insulator.
Advice! When installing a wooden frame, it must be thoroughly treated with an antiseptic and fire retardant spray.
The optimal thickness of insulation depends on its own properties, the design and material of construction and the climatic zone of the house. If you calculate it correctly, the desired temperature will be maintained in the premises in any season.
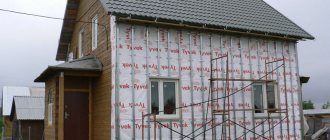
The insulation is placed between the sheathing beams as tightly as possible. To secure it, you need glue and disc screws or dowels. Some thermal insulation materials must be protected from incoming moisture. To do this, they are covered with film or a special membrane.
A diffuse membrane, unlike simple polyethylene, requires an air gap up to 5 cm thick to be effective. To do this, another one is additionally attached to the existing sheathing.
About the cross frame
To avoid the appearance of “cold bridges,” the walls are insulated using a cross frame. This method includes the following steps:
Insulation of walls using a cross frame is better, but also expensive.
- installation of the sheathing frame and installation of the heat insulator, as with conventional insulation;
- fastening the second frame perpendicular to the first;
- laying insulation between the beams or profiles of the second sheathing.
This insulation system is more expensive, but also of better quality, because all the seams and joints of the lower layer of insulation are covered by the upper one.
Thus, if you choose the right materials and installation method, you can insulate a house correctly and reliably for subsequent cladding with your own hands. Many owners, before insulating walls under siding, watch videos, study forums and learn all the intricacies of this process. If you follow the advice of professionals, everything should definitely work out.
About the heat insulator
The material is popular both in private construction and on an industrial scale. All thanks to a number of advantages that penoplex has:
- Minimum heat conductivity values. Due to this, it retains all the warm air inside the house.
- Moisture-repellent properties. The material does not absorb moisture at all, which means it is not afraid of either mold or mildew, which like to settle in a warm and humid environment.
- More durable than foam.
- Long service life.
- Can be used to insulate buildings made of gas and foam concrete, as well as sand-lime brick.
- The presence of noise-insulating properties.
- Easy to process and install. There is no need to acquire specific tools if the developer does all the work with his own hands.
Apparently, Penoplex really deserves to be popular, since there are a lot of positive characteristics.
Manufacturing technology
Insulation is a close relative of polystyrene foam, since it is also made from polystyrene beads. But there are some differences in the technological process that make it possible to create a material with improved characteristics.
- bunker – polystyrene, fire retardants (reduce the flammability of the material) and other additives are loaded. Everything is mixed up here;
- extruder - in this machine the components are fused and mixed several more times. In addition, another component is added - a foaming agent, which creates a large number of cells filled with air;
- forming sheets using rollers or plates.
Thanks to this production, penoplex is obtained, suitable for insulating almost all buildings and important communications.
Design features
As mentioned above, it consists of a large number of cells filled with air. About 98% of the foam splash volume is air, and only 2% is polystyrene itself. At the same time, the cut clearly shows that the structure is homogeneous, and the bubbles are evenly distributed throughout the entire layer of insulation.
It is known from physics lessons that air is a poor conductor of heat, that is, it takes a long time to heat up and cool down. Thanks to this, the material has thermal insulation properties.
Scope of application, is it possible to do the work yourself, with your own hands?
Since penoplex has a large number of positive characteristics as a thermal insulation material, it is used for insulation:
- Facades in private construction.
- Plinths and foundations.
- Loggias and balconies.
- External walls of industrial facilities and public buildings.
- Various pipelines.
- Required Tools
When insulating the outside of your house with penoplex yourself under the siding, you don’t have to buy any special tools. The usual set that any responsible owner has is quite sufficient. You will need the following tools:
- pencil or mark, for marking;
- tape measure;
- building level and plumb line to determine the horizontal and vertical;
- hammer or screwdriver;
- hammer drill for making holes for brackets;
- a stationery knife or an ordinary sharpened knife, a hacksaw for cutting foam sheets.
What you definitely need to purchase at a hardware store are fasteners, that is, umbrella dowels.
Installation of profiles for siding
That's all, you have completely insulated the walls of your house. And most importantly, I would like to hope that these instructions helped you. But that’s not quite all; you have an equally complex and responsible job to do - covering the house with siding and insulation.
In fact, installing profiles for siding is not such a difficult job, provided that you do everything slowly and think through every step. By the way, if price is an important criterion for you and you want to save a little, then this can be done on profiles. Instead, with no less success, you can use timber measuring 20X40 or 20X50 . You will, of course, save on price, but it is also worth considering that the timber is not as durable as a galvanized metal profile.
Work on installing profiles should begin from the corners of the building.
Installation of galvanized profiles under siding
We hope that our article helped you in your work, and you have successfully completed all the insulation of the external walls of your house with penoplex and improved the appearance of the siding you have chosen. If you still have any questions, then the detailed video in this article will help you understand everything completely (find out also whether polystyrene foam is harmful as insulation).
Advice from professionals
To insulate a house using penoplexes, there is absolutely no need to select special weather conditions. It is enough that it does not rain or snow. The duration of drying of the adhesive solution will depend on the ambient temperature, but the quality of adhesion does not affect.
Before you buy material and do everything yourself, still consult with professionals. Maybe for a particular building it is better to choose a different insulation or finishing material. In addition, a master who knows his business will help you accurately calculate the amount of materials and the thickness of the insulation.
Preparing the walls of the house
At the preparatory stage, it is necessary to carry out all marking and measuring work. The surfaces of the structure must be strong, smooth, and non-flowing. To do this, you can additionally perform rough plastering of the walls, as well as treatment with special deep penetration primers. At the preparatory stage, the insulated surfaces are cleaned of dirt, cracks and crevices are sealed, and the existing exterior finish must be removed from the walls (if it is in poor condition).
Installation of profiles for siding
After completing the installation of polystyrene foam insulation, it is necessary to carry out complex and painstaking work on covering the walls of the house with siding and insulation.
Installing a siding profile does not require much skill, experience or tools, but you must carefully consider each step. If the financial side of the issue is important to you, then you can save some money by replacing the profiles with wooden beams measuring 20X40 and 20X50 mm. However, despite the financial savings, you must adequately understand that the service life of a wooden beam is much lower than the guaranteed service life of a galvanized metal profile.
Installation of profiles should begin from the corners of the building. On ready-made U-shaped hangers, profiles are installed in the corners. Using a building level, absolutely all profiles must be clearly aligned parallel to the vertical plane. After setting the profiles on the outer and inner corners, a nylon thread or cord is taken, which is stretched in four rows at the top of the profile and in two rows at the bottom of the profiles in order to use them as guidelines and to indicate the working plane. Then, in accordance with the tensioned thread, all the necessary materials are installed.
So, as you can see, modern installation work does not require you to have any specific knowledge in the construction business. The only thing you must be able to do is to be clearly aware of all your actions and follow fairly simple instructions for working with this or that material. Good luck to you in your construction endeavors and may your home and all the objects you have built serve you and your family for a long time.
Types of materials and their features
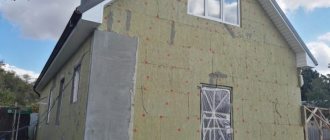
There is an opinion that only brick or panel houses need insulation. However, in wooden houses, despite all the advantages of the material, the standard thickness of logs is usually not enough to significantly save on heating. Four main types of materials can be used as insulation for the walls of a house outside under siding:
- Styrofoam;
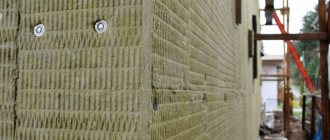
- mineral wool;
- ecowool;
- penoplex.
Each of these materials has its own advantages and disadvantages, as well as installation features.
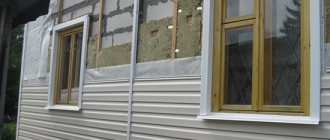
An example of installing insulation and siding on a wooden house
Foam plastic - easy to install and cheap insulation for house walls
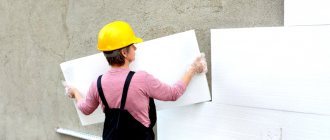
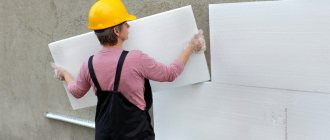
If you use foam plastic as insulation for the outside walls of a house, you can significantly save money. This material is both light and rigid, so it can simply be glued to the wall using construction adhesive. Another option for fastening foam panels is disc dowels.
Recommendations
One of the problems that one often encounters when installing siding is the insufficiently high rigidity of the supporting frame. It is clear that penoplex does not make it possible to use full-fledged fastening, and perforated tapes and long self-tapping screws do not provide rigid fixation of the sheathing and frame.
The problem can be solved by using plastic inserts, as in the photo.
The insert has four needle supports that easily penetrate the foam layer and are attached using a long self-tapping screw or pin
In this case, installation of the frame under the siding can be done directly on the holes in the plastic insert. As a result, the support is rigid enough to hold both insulation and decorative cladding.
