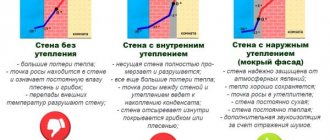
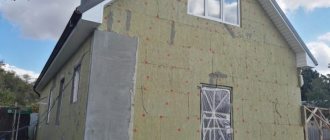
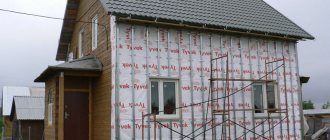
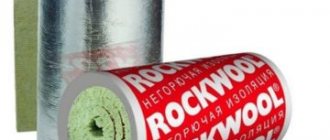
For a comfortable stay in the house and maintaining an optimal microclimate inside, it is necessary to insulate the facade of a residential building. There are several options for insulation used to provide thermal insulation for the external walls of a home. The most common of them is insulating the exterior of the house facade with mineral wool under the siding. Let's talk in more detail about the types of heat insulators, installation features depending on the type of walls of the house, and examine the technology of work step by step.
Peculiarities
Covering a house with siding allows you to solve several problems at once:
- protect the facade of the building from the negative effects of the environment, and therefore extend its integrity and durability;
- increase the thermal efficiency of the building through the installation of siding based on the principle of ventilated technology, as well as through thermal insulation of the facade;
- give the building aesthetic appeal, unify it or, on the contrary, distinguish it from others.
Siding consists of panels that are attached using a “dry” method, that is, they do not require the use of concrete mixtures, but are attached to dowels or nailed.
The panels are usually fastened to a frame, which is placed on top of the facade. Thanks to this, you don’t have to achieve a perfectly smooth wall surface and turn a blind eye to minor defects - they won’t be noticeable under the sheathing. Moreover, by adjusting the thickness of the sheathing and its distance from the wall, it is possible to insert insulation of the required thickness between the facade and the siding.
As you know, external insulation is more effective than internal insulation and does not take up the usable area of the room. By installing a heat insulator together with fastening the siding, it is possible to make this process even more convenient, efficient and less expensive
It is important that all the work can be done with your own hands, without being a professional builder
The ventilated cladding technology itself allows for some thermal efficiency, since an air gap is maintained between the siding and the facade, preventing heat loss. In the Russian climate, one thermal “cushion” 3-5 cm thick, of course, is not enough; installation of insulating material is necessary.
Materials and work
Sometimes the use of a certain technology is required due to the features of the design project of the building. At the same time, before starting insulation with siding, it is necessary to create a work plan. It is a kind of algorithm for performing work and determines the type and characteristics of the insulating material used.
It is possible to insulate the walls of a house using technology that involves the use of materials such as:
- Styrofoam;
- Expanded polystyrene;
- Mineral wool.
Sheathing with profile
The video and photos included in this article will tell you how to properly insulate a house and will illustrate the description of the basic rules for performing the work.
The timber is environmentally friendly, so it is very suitable for building a cottage. For such buildings, in most cases it is important to install siding with insulation yourself.
However, how to choose the most suitable thermal insulation material? To do this, you will need to carefully study the parameters of the possible options. They will be the determining factors in your choice.
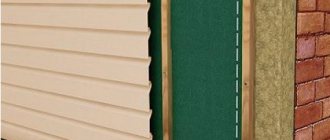
Insulation and cladding scheme
If siding with insulation is done correctly, then the risk of microscopic cold bridges to the facade of your cottage will be reduced to zero. But in such bridges moisture constantly accumulates, which causes the appearance of mold, which is dangerous for the wood.
But, even despite the type of insulation, the work must involve the implementation of cladding for the insulating material. As such cladding you can use:
- brick;
- block house;
- or siding.
It is also worth noting that the type of cladding material influences the characteristics of the process of cladding the façade of a building.
For example, insulating a wooden house with siding and plaster are completely different things. To ensure that the final result of the work carried out pleases you, this is worth taking into account.
Technology
Those who prefer to insulate a house with their own hands should first read the instructions and learn how to properly glue mineral wool to a wooden or brick wall or aerated concrete base.
First of all, you need to prepare the surface of the external walls. They must be cleaned of dirt and dust, and all irregularities must be eliminated. If there is old paint or plaster, it can be removed using a spatula or solvent.
Preparing and laying insulation
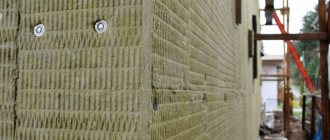
Let's start preparing the surface of the mineral wool. To do this, you can use special adhesive compositions, for example, glue such as Ceresit CT 180. This composition must be applied to prepared mineral wool slabs using a special spatula. The glue layer should be no more than 0.5 centimeters. In order for it to adhere better, one or two layers of primer must be applied to the mineral wool.
When the wool slabs are prepared, they need to be carefully glued to the facade. In those places where the wool joins the window, you need to make sure that the joint of the insulation does not border on the edge of the window opening. Otherwise, heat leakage may occur. You also need to make sure that the mineral wool tightly covers the space between the beams.
When the mineral wool is well glued, it is worth doing additional fixation. This is required in order to increase the safety of the entire structure, because the weight of a cotton block is twice that of foam blocks. Dowels can be used as additional fastening. However, additional work can be carried out only after a day, when the glue has completely dried.
For one block of mineral wool you will need to use 8 fasteners. To do this, you need to make holes in the wool blocks, the depth of which will be several centimeters greater than the length of the dowel itself.
Next, you need to start installing “patches” in the corners where the openings and walls meet. In this way, the entire façade structure is strengthened. Lightweight “patches” are made from pieces of reinforced mesh. At the very beginning, a layer of glue is applied to the desired places. After this, a reinforcing mesh is installed on these areas.
When all the “patches” are ready, you can begin installing the reinforcing mesh. To do this, you also need to apply an adhesive composition, on which the mesh is fixed. If insulation is done under siding, then only a layer of mineral wool will be sufficient - laying reinforcing mesh will not be required in this case.
Waterproofing
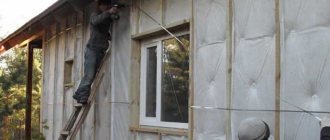
To protect the room from moisture penetration from the inside of the house, a layer of vapor barrier must be laid under the mineral wool. To do this, it is best to use a diffuse membrane that allows air to pass through perfectly. It should be mounted directly on the wall using a regular construction stapler.
It is also possible to attach individual membrane strips. To fix them, it is best to use brackets. All seams must be well insulated with adhesive tape.
To summarize, we can say that insulating the walls of a house with mineral wool will help cope with such a problem as heat loss.
For tips on insulating with mineral wool, see the following video.
What insulation materials are suitable for this?
Let's take a closer look at each of the suitable thermal insulation materials. Let's start with the cheapest, that is, glass wool.
Option one. Glass wool
A budget variety of mineral wool, so to speak. The material is quite dangerous, since when working with it, glass dust is released, which is extremely harmful to the respiratory system. When choosing this insulation, be guided by the fact that it will cost several times cheaper than its analogues (more on prices a little later).
Here are the main characteristics of glass wool:
- thermal conductivity index – from 0.029 to 0.041 W/m*K;
- the use of phenol-formaldehyde resin during the joining of fibers, due to which, in fact, toxic substances are released;
- the specific gravity indicator fluctuates between 11 and 25 kilograms per cubic meter;
- high danger to the human body (possible severe irritation of mucous membranes and skin);
- the vapor permeability indicator reaches 0.6 mg/m*h*Pa;
- the material is made from sand, limestone, broken glass, soda and borax;
- glass wool is a non-flammable material;
- high resistance to aggressive chemical environments;
- operating temperature – from minus 60 to plus 250 degrees;
- the fibers of the material do not absorb liquid at all;
- moisture absorption (if glass wool is briefly immersed in water) is approximately 0.8 kilograms per square meter.
From all that has been said above, we can conclude that glass wool would be an ideal insulation material if not for a number of harmful factors; more specifically, he:
- does not burn;
- resistant to high temperatures;
- moisture resistant;
- almost does not allow heat to pass through;
- not afraid of bacteria and fungi.
But health still comes first. That is why in a number of countries glass wool was banned from being used in civil construction. In short, in our case this material is not suitable at all.
Option two. Mineral wool
A common material, including as insulation for siding. It has all the advantages of the previous option, but it does not have its disadvantages. In addition, it is worth noting the long service life of mineral wool, reaching 70 years.
Over the years of operation, this insulation for the walls of a house outside under siding has shown itself only from the best side. You can easily install it yourself, but in the process you must strictly follow all the rules provided for by the installation technology.
In short, if you plan to use mineral wool to insulate walls under siding, you must take care to protect the material from getting wet. This can be achieved with the help of special membranes - moisture, wind and vapor protection (more on this a little later). The heat insulator in this case will be wrapped in a waterproof film. Manufacturers claim that such protection functions like a valve, since it only allows steam to pass out. Steam will not penetrate into the material from inside. What about the “breathing” of the walls, many will ask? The fact is that such “breathing” does not involve the movement of air through the walls; a ventilation system is used to ensure air exchange - even old log houses “breathed” only thanks to the stove draft, and not due to air penetration through the walls.
In short, mineral wool is a good option for thermal insulation of the outside walls of a house under siding. Go ahead.
Option three. Styrofoam
This material is characterized by a fairly low thermal conductivity (no more than 0.043 W/m*K), and therefore is rightfully considered one of the most effective modern thermal insulators. It is used in many areas, including for insulating the outside walls of a house under siding.
And it’s not surprising, because polystyrene foam has many advantages. So, it is quite easy to install, and it does not need waterproofing. It is also easy to work with polystyrene foam - it weighs little, is easy to cut, and does not emit any harmful dust.
Extruded foam plastic has a minimal thermal conductivity, but it:
- very durable;
- resistant to bacteria, fungi;
- not afraid of high humidity.
Its surface after installation will be protected by siding, and therefore the negative impact of the environment will be minimized. Therefore, extruded foam plastic is one of the best options for insulating the outside walls of a house under siding, especially since its modern varieties are safe both from a fire point of view and from an environmental point of view.
Manufacturers
It is better to buy cotton wool from trusted manufacturers. Among them are both well-known brands and mineral wool brands that are unfamiliar to the mass consumer.
Rockwool. (Denmark) produces insulation from basalt and gabbro fibers at production facilities located in several countries, including Russia. Features of insulating mats are:
- low thermal conductivity;
- good absorption of air noise;
- resistance to open flame (flammability class NG);
- long service life;
- environmental cleanliness.
Paroc. A manufacturer of basalt wool from Finland () offers consumers mats for residential construction and acoustic insulation of recording studios.
The insulation is characterized by a low thermal conductivity coefficient, fire resistance, and durability. It is almost impossible to find counterfeit products on sale - the company very carefully monitors the market for counterfeits. Unfortunately, for the average consumer the price of insulation is too high.
Isover. The leader in sales of mineral wool in Europe is a transnational company registered in France, which has its production facilities in Russia. The product has the best balance between price and quality.
TechnoNIKOL. The brand of thermal and waterproofing materials "TechnoNIKOL" belongs to Russian business, but is produced in many European countries (Lithuania, Belarus, Czech Republic, England). Among the huge product line, mineral wool insulation occupies a significant place. Modern equipment and careful quality control allowed the company to enter the TOP 5 largest suppliers of mineral wool to the construction market of Europe and the CIS countries.
IZOVOL. produces basalt insulation in Russia. The product has an affordable price and good quality. The line of insulation products includes mats produced separately for facades, roofs, floors, and foundations.
All quality characteristics meet the requirements of EU and Russian standards. A slight shedding of fibers during the installation process blurs the impression of quality. The manufacturer knows about the problem, but cannot fix it yet.
In addition to the listed brands, it is worth paying attention to the products of the brands “KNAUF” and “URSA”. It is very often bought for insulating timber houses.
From the middle price sector, experts note the insulation "Beltep" (Belarus). It has excellent rigidity, good vapor permeability, easy installation, and an affordable price.
Preparing the surface for installation of insulation
It is allowed not to carry out special preparation of the walls before installing the insulation, since this process is carried out with the installation of lathing, which in any case will hide all visible defects and imperfections of the walls.
The only thing that needs to be done before insulating the outside of the house under siding is to dismantle all objects that may interfere with the work. It is necessary to remove window frames, lamps, drainpipes, plants and branches.
The process of installing mineral wool on walls
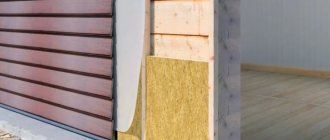
To install insulation on the walls of a wooden house, you can use either metal profiles or wooden sheathing. In the first case, the result will be a more expensive design, in the second - a simpler one.
Installation of mineral wool under siding using metal profiles includes several successive steps:
- A vapor barrier is installed on a wooden wall (a special film that provides additional protection from moisture)
- PPU (ordinary suspension) is installed on the wall surface and secured using fasteners (you can use dowels or self-tapping screws)
- Metal profiles are installed in the vertical direction, at intervals of half a meter.
- Mineral wool is attached to the hangers. The wool must be fixed in such a way that there are no gaps between the plates. The insulation must be fixed with dowels (4-5 pieces per 1 m2 are enough)
- A special membrane is installed on top of the mineral wool, its joints are glued using butyl tape. For reliability, you can secure the membrane with several dowels
- The entire structure is located on polyurethane foam. Metal profiles are installed on these hangers and screwed onto thin sheet metal with small self-tapping screws
- Mineral wool is pressed against the profiles. There is no need to compress it additionally - just use longer hangers
The installation of the profile frame is complete and you can begin cladding the house with siding.
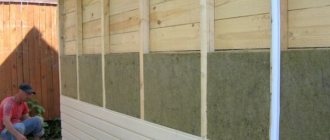
Insulation of the facade with mineral wool under siding using wooden sheathing is carried out as follows:
- A vapor barrier is fixed to the wall, the joints are glued with special glue or tape, after which the barrier is fixed to the walls using staples
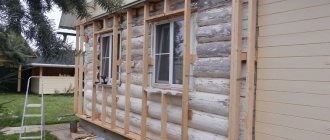
- Wooden blocks are installed along the width of the mineral wool slabs (on average, the step is 50-70 cm). Insulation is installed between the installed bars
- Using disc-shaped dowels, the cotton wool is fixed in wooden frames
- The entire structure is covered with a membrane and fixed with dowels or self-tapping screws, and the joints are taped with butyl acrylic tape
- To create a ventilated facade, a counter-latten is installed on the film. For secondary lathing, you can use thinner wooden blocks
The insulation of a wooden house under the siding is ready, all that remains is to install the latter.
Insulation of walls under siding is a very common type of thermal insulation. A variety of insulation for siding allows you to make the right choice.
You can use siding not only outside, but also inside. The interior decoration of a house made of timber with siding is partially covered here.
You can also use siding to decorate a garden frame house, the construction of which is described here. At the same time, no matter what type the house will be - for permanent residence or temporary.
Tips for installing insulation
During the installation of mineral wool, you can use small tricks that will optimize the process:
- It is advisable to impregnate all wooden parts with a solution that prevents rotting and damage to the wood. It is recommended to pre-coat the wooden walls of the house with the same solution.
- When installing wood sheathing, the installation should be in the same direction as the siding.
- Using a plumb line, it is recommended to determine the most protruding point of the facade surface and install the lowest beam at this point
- To apply markings, you must use a level and a vertical plumb line.
- You don’t have to waste time on pre-leveling the walls before installing insulation. With proper lathing, all possible irregularities will be hidden in any case.
Adhering to all the above rules, it will not be difficult for homeowners to correctly install mineral insulation under the siding of a wooden house.
Video description
Why it is important for vinyl siding to make smaller strut pitches, see the video below:
See also: Catalog of house projects using frame technology presented at the “Low-Rise Country” exhibition.
Frame around the window Source viteko.ucoz.ru
But there is one subtlety here. If the wall structure does not have windows and doors, then markings are applied from any corner to the opposite one with the step indicated above. If windows and doors are present, then markings are carried out from their edges. That is, frame posts must be present at the edges of the mounting openings. Therefore, in these places vertical lines are drawn along the walls. And then lines are laid from them to the right and left in increments of 0.4-1 m.
The rack profile is attached to the walls of a wooden house using direct hangers. The latter are installed along the marked lines in increments of 0.5-1 m. Wood screws are used for fastening.
Application area
It is not enough to know what materials are used for insulation and cladding of the facade; it is important to combine them correctly. First of all, when choosing, you should take into account the wall material and type of house, its load-bearing capacity
Houses on pile and column foundations are usually built on unstable soils, so heavy fiber cement and sometimes metal siding are unlikely to be used for cladding. The most acceptable option is vinyl or metal (not all houses) panels.
To cover a brick house on stable ground with sufficient load-bearing capacity, you can use all types of finishing; for a cinder block house, it is better to abandon fiber cement siding and increase the thickness of the insulation.
To decorate a country house that provides only seasonal living, there is no point in spending money on more expensive metal siding; vinyl siding will be quite sufficient.
For houses in the construction of which wood is used, that is, timber, panel, frame, it is undesirable to use polystyrene foam and polyurethane foam insulation. The wall under such heat insulators begins to get wet and rot, which is due to their low vapor permeability. The optimal choice for a log house or a timber house is mineral wool, always with a waterproofing system.
Insulation of brick houses from the outside
Whether you like it or not, you will have to heat a brick house. Experts unanimously recommend doing this at the construction stage, but people do not permanently live in buildings that they actually build. So, having lived through the cold winter, the problem has an advantage.
Currently, manufacturers offer a large number of thermal insulation materials on the market, each of which solves its own problem. Differing only in installation technology, labor costs and materials. You can choose any of the recommended thermal insulators.
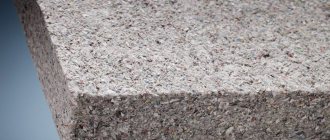
- Cellulose insulation.
- Basalt slabs.
- Styrofoam.
- Polyurethane foam.
- Mineral wool.
There are two technologies that can be used to insulate a brick house: frame and multilayer. In the first case, we place insulation between the frame posts. We can pre-make the frame from an aluminum profile or wood and install the facing material on it.
Main types of mineral wool
Stone wool is highly resistant to fire and does not deform for a long time.
Depending on the components of mineral wool, it can be divided into 3 main groups:
- The stone variety includes rocks with analogues of gabbro-basalt groups, due to which the material has low water absorption rates and, conversely, high resistance to fire. Consequently, stone wool is able to withstand the highest temperatures without deforming for a long time. Available in rolls.
- The slag type of mineral wool is produced using waste after melting non-ferrous or ferrous metals. It has good quality indicators, but they are slightly weaker than the previous type.
- In the production of glass wool, glass, limestone and other materials are used, and therefore this type can withstand high temperatures. Perhaps the only drawback is the fragility of the material, which allows small particles to get directly onto the skin.
Popular and inexpensive option
One of the most common ways to insulate an old log or new log house is thermal insulation with mineral wool and subsequent decorative and protective finishing with plastic or metal panels called siding. In Russia, many buildings are finished in this way, not only residential buildings, but also shops, garages, industrial or commercial buildings.
Material advantages
The main advantage of using mineral wool for exterior finishing is its price-quality ratio, as well as efficiency and service life ratios. These parameters allow you to rationally use money to achieve optimal results. In addition, the plates are easily used on almost any wooden surface with various deviations from a given vertical. The technology of such insulation has its advantages, allowing us to talk about its uniqueness and individuality:
- Easy installation;
- environmental friendliness;
- fire resistance (the material is not subject to combustion, in addition, it increases fire safety outside the house);
- the ability to perform work regardless of climatic conditions (with the exception of heavy precipitation, when working with mineral wool the material may get wet);
- both materials used (siding and mineral wool) have good vapor-permeable characteristics that do not interfere with the environmental friendliness of wooden walls. The fact is that the panel has special holes designed for ventilation of the structure.
useful in work
When choosing insulation, you should pay special attention to its density. This coefficient, related to thermal insulation intended for outdoor work, should be at least 20-30 kg/m3 for foam plastic and 50-70 kg/m3 for mineral wool
General description of thermal insulation
Construction stores offer a choice of three types of mineral wool, which is used for external insulation of wooden houses:
- In the form of slabs measuring 100x50 cm;
- Rectangular slabs measuring 60x120 cm;
- Wound in rolls (not recommended for use on facades, used for insulation of roofs and floors).
Any of these types can be used for work on the street side of the facade. Therefore, you will have to choose which mineral insulation is best suited for finishing your house. The only thing worth remembering is the requirements for material density. Rolled mineral wool is somewhat cheaper. This is due to the fact that its density is less than that made in the form of rectangular slabs. Therefore, it is better to use a stiffer material.
The need to use insulation
When choosing siding to decorate the facade of a house, you need to take care of insulating the walls outside. Even if the house is not planned for permanent residence, additional insulation will allow you to significantly save on heating costs. Siding, when installed correctly, not only provides protection for the walls of a building from weather conditions; the multi-layer arrangement of materials will retain heat inside the structure and in the room. The second advantage of using insulation on the outside is that you can attach several layers of slabs and their thickness will not matter, since the interior space will remain unchanged - the usable area of the rooms will be preserved. The maximum thickness of wall insulation on the outside is selected depending on the climatic region, the material of the building walls and the characteristics of its operation .
Choosing the type of insulation
The technology for fastening siding panels is combined with many types of modern insulation. For exterior work on wooden or brick walls, it is optimal to use mineral wool (mineral wool) with a density of 80 kg/m3 in slabs. Compared to rolled materials, the slabs have sufficient rigidity and hold their shape better - cold bridges do not form at the joints. In addition, insulation with mineral wool from the outside is effective due to the following characteristics:
provides good sound insulation and thermal insulation of the house, environmentally friendly (meets sanitary and hygienic requirements) and durable material, resistance to various chemical and natural pests (fungus, mold), ease of installation and transportation, non-flammability of the material (especially important for residential buildings).
It is important to know
When working with mineral wool, you must use eye and respiratory protection (goggles and a respirator/mask) to protect yourself from small particles, lint and dust.
Roof insulation
Mineral wool is not far behind in its relevance and convenience and in roof insulation. It is environmentally friendly, made of non-flammable material, soundproof. To prevent moisture from accumulating in it, an insulating film is included in the composition.
The main mistakes in roof insulation.
- The chosen size of the canvas is not correct; it is better to take a margin of 10-50 mm more than the measured one, so as not to allow cold to pass through the gaps.
- The terms chosen are not correct; it is advisable to discard materials whose shelf life is less than 10 years.
- Do not forget that you need to use a material of low rigidity to avoid cold bridges.
Stage five. Windproof layer
After installing the thermal insulation, it is highly desirable, and when using cotton insulation, it is simply necessary to cover our structure with a vapor-and-wind barrier layer. What is it for? As the name suggests, this protection should prevent moisture and steam from getting between the siding, insulation and the wall. If the mineral wool is wet or damp, consider that you have practically no thermal insulation. It also protects the building from being blown out by strong winds. Although there are skeptics who consider this protective layer optional, citing the fact that almost all moisture-proof materials are flammable
But, in my opinion, you should not pay attention to this, since this protection brings much more benefits
The materials used are polyethylene film, good old roofing felt or modern membrane materials such as isospan or technohaut. I won’t go into too much detail here because you can watch it all in the video. Let me just say that the most budget-friendly film is made of polyethylene, and, accordingly, membrane materials are much more expensive. Windproof material is laid along the wall in a vertical direction, with an overlap of about 10-15 cm. In some developed countries, the joints are glued, but in our country it is customary to use self-adhesive tape for sealing.
If the protective film and insulation were laid according to all the canons of construction art, then you will not be afraid of either Siberian frosts or the southern heat.
Some features of installing insulation on the walls of a wooden house
For a wooden house, an insulation system with a ventilated air gap is optimal.
In order to insulate the facade, a sheathing made of wooden blocks or galvanized profiles in the form of a frame is mounted on the walls. Their installation is described above. The thickness of the sheathing is selected based on the thickness of the insulation used. All wooden surfaces are treated with fire retardants and antiseptics. The walls must be covered with a waterproofing film or coated with waterproofing mastic.
Installing horizontal siding involves installing sheathing in a vertical direction, and installing vertical siding in a horizontal direction. The sheathing is installed in all corners of the house, window and door openings. Using a level, you need to adjust the flatness of the sheathing. Subsequent installation of siding depends entirely on this stage.
The structure is secured with screws and plastic dowels. For wooden houses, it is better to use galvanized nails 10 cm long. The thickness of the wool for insulating facades is selected based on the thermal characteristics, geographic region, location of the house and the material of its walls. With the correct calculation of all parameters, despite unfavorable climatic conditions, the house will always be warm and cozy.
After this, you can begin installing the siding. When installing it, there are many subtleties, depending on the type of this material. Quite a lot of time when decorating walls with siding is required for preparatory work on impregnating the walls with fire retardant compounds, leveling the walls and sheathing, and installing insulation.
Preparing the frame structure
Siding as a facing material with insulation is mounted on a prepared frame outside the house. This finishing option refers to the ventilated (curtain) facade system - air enters the space between the wall and the siding, which prevents condensation from accumulating inside the entire structure.
To ensure such internal space, as well as proper fastening of the insulation, it is necessary to frame (lathing) the facades of the house. Taking into account the size of the mineral wool slabs and the size of the siding panels, the method and material for installing the frame are selected.
The sheathing of the house is carried out:
- from metal profiles and guides,
- from wooden blocks.
In most cases, siding is attached horizontally (from bottom to top), so the main frame elements should be vertical posts. When mounted vertically, the main load will be on the horizontal axes. A cross frame - made of vertical and horizontal profiles - will be more labor-intensive and expensive, but reliable. The lattice system is initially stronger and more stable than single racks in one direction; it additionally ensures surface leveling (relevant for buildings with initially uneven walls).
After selecting the insulation and frame, you can proceed directly to installing the slabs on the exterior facades of the house.
Stage six. We install siding panels
We will look at the installation of panels using vinyl siding as an example. But we dare to assure you that the installation of the same metal panels is fundamentally no different. First of all, we make sure that all preparatory work is completed and there are no shortcomings or flaws
By the way, this is a very important note, since there are no ideal people and no ideal workers. Man is created in such a way that he is bound to leave something unfinished or make a mistake.
This, of course, is all lyrics and therefore let’s move on directly to the process itself.
Since buildings rarely have an even geometric shape, such as a square or rectangle, we will definitely have a need for additional elements that serve to complete the façade work. The main elements of which are drainage systems that prevent water from getting inside. Initial and final strips, the functionality of which can be understood from the name. These also include external and internal corners, used for connections at external and internal corners, respectively. To join the side connections and fix them, we need J-profiles. For direct connections, a connecting strip is used.
You need to start laying from a predetermined starting point, from where the installation of the first row of panels and fastening of various elements - window strips, corners and starting strips - will begin. The recommendations below will help you ensure that the facade will last a long time and keep the material intact.
- A certain distance of approximately 30 cm should be maintained between fasteners.
- The fastening material (nails, screws) should not be pressed against the siding until it stops, otherwise it may become deformed and fasten them exclusively in the center of the hole.
- Attach hardware strictly at right angles.
The vast majority of sheets are mounted horizontally, for this we first need to install the starting strip. We fasten it so as to cover the upper edge of the foundation. Its installation should be given special importance, since the beauty and neatness of the appearance of the house depends on it. It is necessary to set the strip strictly according to the level, otherwise there is a high chance of wasting time starting all over again. There are no special requirements for the aesthetics of the strip itself; it can be of any color and even assembled from pieces so that it will still be covered with a vinyl panel.
To strengthen the strip as evenly as possible, we determine the location of the siding and screw in the screws. We pull the rope through the screws and use an accurate level to check whether the line is exactly horizontal. Using a marker or chalk, we draw a line along the rope, and using this line, we finally install the strip.
- If there is a need to splice several strips, be sure to leave a gap of about 6 mm between them.
- Under no circumstances should you attach it to the very corner of the building; a special profile is designed for finishing corners.
- You should not put a strip under doors and windows in advance, because you can easily make a mistake with the distance.
The next step is to install the internal and external corner strips. There are some differences in fastening siding from different manufacturers, which are outlined in the included instructions, but they are generally the same. The corner panels are attached in the same way as the starting strip, with the exact location of the fasteners - the middle of the hole. Further installation is not particularly difficult. The only place where you will have to tinker is with window and door openings.
That's all, good luck in all your endeavors and have a warm winter!
What is siding
This is a material for external cladding of the walls of a house, the purpose of which is to protect the walls from natural loads (rain, snow, wind, etc.), plus decorate them. Basically, the word siding most often refers to vinyl siding. But the modern building materials market today offers several types of siding:
- vinyl from polyvinyl chloride;
- metal made of galvanized iron sheet up to 0.8 mm thick, painted or decorated to resemble various building materials;
- wooden, this is a type of lining;
- cement, decorated to look like stone;
- ceramic.
The last two are heavy materials, so they try not to use them for frame houses.
Siding differs in color and appearance Source eurodomik.ru
Installation of sheathing and siding
The question of how to install the sheathing should be given special attention, since the strength of the entire structure depends on this. It is preferable to install the slats in this order: if the siding is installed horizontally, then the slats are mounted vertically
In cases where it is necessary to install siding vertically, the sheathing is laid horizontally. Please note that the pitch between the slats is determined by the distance between the holes for fastening the siding. The slats must also be installed in corners, near openings, and so on.
Siding insulation scheme
It should be noted that the plane of the sheathing must be checked at all times with a building level, because the evenness of the siding installation depends on this. Wooden slats are mounted into walls using dowels or galvanized nails (weave). Please note that the sheathing is also treated with a primer if it is made of wood.
Siding is installed directly onto the sheathing elements using screws or nails. In this case, it is necessary to make a ventilation opening of several centimeters between the insulation and the facing material. Thanks to this, the walls will breathe. Siding is laid directly from bottom to top.
Ventilated facade technology
The ventilated façade is installed using aluminum brackets, which are secured to the walls with anchors. An aluminum profile is attached to them. After installation, a layer of insulation is installed on these elements. The panels here should fit one to the other as tightly as possible so that no gaps form. An important step is the installation of a protective film for waterproofing.
The insulation of the facade with stone wool is performed on even walls. The profile must be attached to a prepared base. The plane of each aluminum element must be checked with a building level
Maintaining horizontality is especially important here - the appearance of the final finish depends on it
The system assumes the presence of a layer of air. The advantage here is the ability to ventilate the walls and quickly dry the surface. The air space will prevent moisture accumulation and promote natural ventilation of the walls. Thanks to the advantages, the service life of insulation and other materials is significantly increased.
Finishing can be done using composite panels, siding, corrugated sheets and other materials. To ensure that the finishing material adheres normally to window frames and other elements, additional aluminum fasteners are used, of which there are a huge number on sale.
Selection of insulation materials
It is not easy to understand all types of insulation materials. A large range of products and varying prices will take inexperienced consumers by surprise. Insulation materials can be rolled or tile, expensive or cheap. The difference will be the density and thickness of each type. The choice lies in correctly identifying the right product. You need to be guided by the requirements for the quality of the material
You need to pay attention to:
- Thermal conductivity;
- Vapor barrier;
- Fire safety.
The thermal conductivity indicator should be minimal, otherwise the heat will easily escape and in winter the room will cool down in a few hours
In summer, it is important that the building does not heat up quickly, keeping it cool inside. Only properly selected, high-quality thermal insulation will allow you to maintain the optimal temperature in the room, regardless of the time of year.
Vapor barrier is also an important requirement for insulation materials. If the moisture content is high, fungus may appear under the siding in the room.
The insulation must be able to “breathe”, reliably protecting the structure from the cold, but without accumulating moisture. If water accumulates under the sheathing, the material - wood - begins to rot. In this case, the house will quickly collapse.
It is not recommended to insulate a building with flammable materials. Despite the fact that the insulation is located outside the building and has minimal contact with electrical wiring, the risk of fire still exists.
In summer, siding can become very hot from the sun's rays. Toxic elements contained in some insulation materials cause negative reactions in the body.
What are heat insulators, their types
The thermal insulation layer is planned in advance, based on: the thickness of the wall, the building materials used to make the house, and the climate in the region. In some cases, it is necessary to take into account the thickness of the insulation layer. For example, when installing a ventilated facade under narrow eaves, it is better to choose thermal insulation with a lower thermal conductivity coefficient in order to install a small layer of insulation.
Naturally, you need to take into account the financial side.
Most often, heat insulators are used for insulation under the siding of a brick house:
- mineral or stone wool;
- Styrofoam;
- extruded polystyrene foam;
- PPU;
- expanded polystyrene.
When choosing insulation for siding, pay attention to the basic requirements for the finishing material.
The process of fixing the insulation
All work is divided into several stages:
Preparing for work
For high-quality installation and minimal time spent on it, it is necessary to prepare working tools and accessories:
- tape measure, level, plumb line,
- drill, screwdriver, hammer drill (for brick walls),
- screwdrivers, hammer, stapler,
- hacksaw, metal scissors,
- protective equipment (glasses, gloves),
- fasteners, staples for staplers,
- ladder or stepladder (depending on the height of the house).
Frame installation
The initial stage of the insulation process is to clean the facades from various protruding parts in order to install frame profiles. The drainage system, eaves overhangs, window treatments and trims around the doors are dismantled. It is advisable to treat the surfaces of prepared wooden walls with special antifungal and fire retardant compounds; for brick walls, it is enough to eliminate cracks and small defects.
After priming the surfaces, a vapor barrier film is secured to the facades using a stapler or tape. It will protect the insulation from condensation and evaporation, and keep it dry, which will help maintain the high thermal conductivity properties of the material.
Then vertical lathing is performed to tightly place the insulation in increments of 50 - 60 cm (depending on the size of the slabs). The bars or profiles are attached using adjustable brackets. When using wooden blocks, it is also recommended to treat them with a protective compound. For rigidity and strength of the frame, it is advisable to fix several horizontal axes (3-4 per wall). The geometry of the frame lines is periodically checked with a level.
useful in work
The use of a metal frame structure when insulating a house with mineral wool is preferable, since it is not subject to rotting (unlike wood) and is generally more durable in use.
Useful Reminders
Regardless of the type of insulation, the final finishing layer is necessary to seal the previous layers and decorate the facade of the house.
The higher the vapor permeability of the heat-insulating layer, the less likely it is to be destroyed by condensation.
The main technical and everyday requirement for insulation is fire safety. But often the choice is made based on the cost of the material - for example, polystyrene foam is 3-5 times cheaper than mineral wool. In such cases, additional fire-fighting measures can be carried out in the form of using fire retardants or combining flammable and non-flammable insulation.
The building insulation cake must be well ventilated using a ventilated facade so that the humidity inside the insulating layers is minimal.
Additional insulation must be done immediately after realizing that not all is well with the insulation system of a frame house, and installing an additional layer on the outside is much more convenient and expedient.
