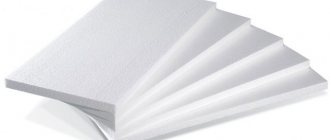
For the production of polystyrene concrete building blocks, foam granules in bulk form are used as coarse aggregate, as well as other types of polystyrene foam ground to a certain fraction.
Ingredients for cooking
To obtain polystyrene concrete blocks you need:
- Portland cement grade M400-500;
- washed river fine-grained quartz sand;
- clean water, preferably from the main water supply;
- foamed, unconnected polystyrene foam granules or large crumbs of ground polystyrene foam.
The initial components are mixed in a mixer and poured into molds (formwork) pre-lubricated from the inside.
For lubrication, an emulsion of diesel fuel (kerosene) and stearin (paraffin) in a ratio of 15: 1 is usually used.
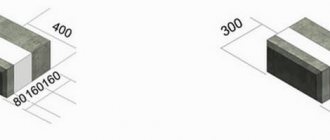
The mass, density and strength of the blocks depend on the number of polystyrene foam granules , in a ratio with cement from 3 to 8 of the volume of cement. The proportion of cement and sand is 1:3.
Plasticizing additives can be added to the liquid composition for polystyrene concrete during mixing in a proportion of 1-3% of the volume, increasing its workability, as well as frost resistance and water resistance (waterproofing agents).
Additional foam fixation
After the walls of the house have already been insulated, it is recommended to further strengthen the fixation of the material. For these purposes, a hammer drill and special fastening fittings are used - anchors with wide plastic caps, into which a metal pin is driven.
When choosing the sizes of fittings, you need to know that for high-quality fixation, it is recommended to recess the anchor 40 mm into the wall. If the thickness of the foam is 40 mm, the thickness of the adhesive layer is 10 mm, the length of the anchor should be 90 mm.
Step 1. It is advisable to secure the foam sheet with 4-5 anchors. For these purposes, holes are drilled in the insulation and the wall. The length and width of the drill should be equal to the dimensions of the fastening hardware.
Preparing foam plastic for mounting an umbrella dowel
Step 2. After drilling, plastic fittings are inserted into the holes. The anchor caps should be slightly recessed into the foam in order to subsequently hide them with a layer of plaster.
Fastening the dowel
Step 3. Metal pins are inserted inside the plastic anchors and driven in forcefully until they stop.
Step 4. In this way, all sheets of foam plastic glued to the walls are fixed.
Tools and equipment
Needed for work:
- shovel;
- hammer-pick;
- roulette;
- construction square;
- mason's trowel (trowel);
- spatulas of different widths;
- paint brushes or flange brushes for applying a release agent to the formwork;
- scales;
- measuring utensils - buckets and other containers of a given volume;
- electric concrete mixer of drum or auger type with a volume of 100 to 300 liters;
- electric winch or hoist for supplying concrete during pouring;
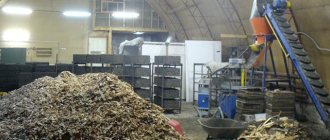
- steam generator for foaming polystyrene granules;
- mixer grinder for recycling foam waste;
- To better compact the mixture, sometimes a vibrating table is organized, for which the work area is covered with tin and a vibrating mace or vibrating lath is attached to it.
In the absence of vibration compaction, the finished product may turn out to be loose, containing undeveloped areas in the corners of forms or formworks.
More details about what equipment is needed to create polystyrene concrete blocks can be found in this material.
Forms and formwork
Forms or formwork for products are made of waterproof chipboards, plywood, sheet plastic or metal with stiffeners in individual (separately for each block) or cassette (for simultaneous production of several blocks) design.
To simplify forming, the formwork is made easily dismountable , using clamps, bolts, studs with nuts.
If necessary, the molds can have inventory inserts to form one or more cavities (voids), reducing the volumetric weight of the product. Inserts of a different configuration may be required for molding corner, additional products, butt edges with special cutouts for openings, which are called quarters.
Organization and placement of manual production
The production site, with communications connected to it - water supply and electrical networks, is located next to the construction site. The place of production and storage is protected from atmospheric influences by a light awning.
In order for the blocks to gain their design strength by the time of laying, work should begin as soon as the minimum daily temperature begins to exceed 5 °C .
What is polystyrene concrete made of?
Let me note once again that the composition is discussed in detail in GOST. Let's list the components we used ourselves. Criticism from the pros will be justified. But only criticism, not criticism. For polystyrene concrete we used:
- Non-additive cement DO-500. This is Portland cement. It didn’t take long to choose, since the warehouse stocks at the wholesale base were limited to two brands.
- Balloons They made it themselves from foam sheets measuring 1000x1000x100 mm. Sheets of foam plastic were left over after insulating the house. The diameter of the balls did not exceed 5 mm. We crushed the foam in the centrifuge of the washing machine, having previously installed a metal plate on the shaft. There were no torn balls. That is, the result was a very high-quality crushed material.
Crushing foam in a centrifuge
Crushed foam
Styrofoam balls
Pour foam into a bucket - Water was taken from a well in the yard. Note that PB requires cold water. This is especially important during the hot season.
- Synthetic fiber fiber . In concrete, it was distributed throughout the entire volume in small hairs. This makes the concrete stronger.
- Supplements . Here you need to know and understand the main thing. The cement itself will not stick to the balls. SDO required. Many people say that wood resin is an outdated method. But this method works.
SDO still forms small bubbles. That is, the cement foams. Therefore, PB resists moisture well during operation. But since we couldn’t get SDO, we made this supplement ourselves. To do this, you need to dissolve caustic soda in a small volume of water. Baking soda is sold at the hardware store as an all-purpose cleaner. This is caustic soda in which tree resin must be dissolved. You need to collect some pine resin and leave it in a soda solution for two days.
We also used calcium chloride and construction PVA. The first was to retain water in the working mixture, since the weather was hot. Evaporation of water prevents the cement from setting properly. However, calcium chloride is a hardening accelerator. This is also a plus. PVA added thickness and viscosity to the liquid cement. Concrete with PVA reaches behind the trowel.
Home making process
Let's take a closer look at how polystyrene concrete blocks are created.
Using improvised means
The easiest way to make polystyrene wall blocks is by hand. It may contain the following sequence of actions:
- Procurement and delivery of materials and ingredients, including foamed polystyrene granules.
Making forms (formworks) from boards or plywood.
If there are several formworks, you need to ensure that the blocks cast in it have similar dimensions, and you also need to ensure that the walls are parallel and perpendicular.- Making a comfortable desktop.
- Connecting a concrete mixer. Manual mixing of the solution using shovels is only suitable for the construction of secondary buildings - a garage, barn, chicken coop, bathhouse.
- Lubricating the formwork inside with paraffin-kerosene emulsion.
- Preparation of liquid polystyrene concrete mortar in the proportion of components required for a particular class of strength, density, frost resistance, water permeability and laying it in formwork.
- Compacting the solution (the easiest way to do this is by lifting the form above the work table at least 10-15 times and sharply lowering it onto its surface with a knock).
- Transferring the mold to a place of temporary storage for maintenance and initial strength gain.
- After a week, the mold can be disassembled and prepared for the next cycle of use, and the block can be transferred to a permanent warehouse for a 3-week development of design strength and subsequent use.
On special equipment
Typically, such equipment is purchased or leased . In this case, the labor of trained workers, as well as an invited technologist-consultant, is used, acting according to certain instructions and technological maps developed for this type of mechanism.
Glue
Most often, a special adhesive is used for polystyrene foam boards, which is a cement-based dry mixture.
If the wall surface is flat, the difference is no more than 5 mm, then you can apply a continuous layer of glue with a notched trowel.
If there are more irregularities, glue is applied around the perimeter in the form of a strip 3-4 cm wide.
Several beacons with a diameter of about 10 cm are made in the middle part of the slab. After pressing to the base, the glue should cover at least 40% of the plane of the sheet.
There is another option - polyurethane adhesive in aerosol packaging. It does not require additional preparation.
The balloon is inserted into the mounting gun, then a strip of glue is applied around the perimeter of the sheet, 2-4 cm from the edge. A zigzag stripe is applied inside the resulting rectangle. This glue allows you to install foam sheets much faster.
Work order
The text below describes the procedure for successfully insulating walls with foam plastic, both outside and inside. If you do not have an OP, we recommend hiring specialists. Approximate prices for wall insulation with foam plastic are given in the table.
Penoplex (extruded polystyrene) has a smooth surface. You can make it rough to ensure adhesion with glue in the following ways:
Ordinary polystyrene foam has a fairly rough surface and does not require preparation.
Installation of the base profile
A base profile is fixed along the bottom of the wall. It serves as the basis for the sheets of the first row, and also protects the insulation from rodents. Its size must correspond to the width of the insulation.
It is necessary to leave a distance of 2-5 mm between the profiles to compensate for the thermal expansion of the material.
Attaching foam to glue
The sheets are installed in the corners, aligned in the vertical and horizontal planes. Level and rule are used for alignment.
A cord is stretched along the upper edge of the sheets. It determines the position of the top edge of the insulation when filling the current row.
Once the sheet is in place, it must not be moved. If this is really necessary, the sheet should be removed, cleaned of glue and the entire gluing procedure must be performed again.
The sheet is applied to the wall with a slight offset from its final position.
Using a rule or a long trowel, it is pressed into the plane of adjacent slabs. Checked by level. The entire row is covered in this way.
At the corners, a serrated connection of sheets is made - sheets of adjacent rows are alternately wedged into the plane of the adjacent surface to the thickness of the insulation or a little further. After the corner is completely closed, the foam must be trimmed.
The vertical seams of adjacent rows must be at a distance of at least 20 cm from each other, that is, the seams must be bandaged.
There is a pause in work so that the glue sets securely. Usually this is three days.
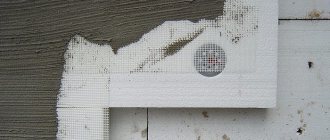
Fixing with dowels
The sheets are additionally fixed using umbrella dowels, usually 5 per sheet. Their length should ensure penetration into the wall by at least 5 cm. Recesses for fastening are drilled with a hammer drill.
The dowel is driven in with a rubber hammer or screwed in with a screwdriver.
The first dowel is driven into the center of the sheet, the rest - in the corners, in the seam. The cap must be flush with the foam, the permissible protrusion is no more than 1 mm.
Completing the gluing phase
The joints of the sheets are rubbed with glue.
If there are gaps wider than 5 mm, they are foamed with polyurethane foam or sealed with strips of polystyrene foam.
If unevenness is visible, they are leveled with a foam grater.
When laying two layers of insulation, the second one is attached with vertical and horizontal overlap of the seams of the first layer. The seams of the first layer do not need to be foamed.
Fastening the reinforcing mesh
A reinforcing fiberglass mesh is fixed on top of the foam using glue.
First, the corners of the house, as well as the outer corners of window and door slopes on the first floor, are strengthened with a perforated corner, plastic or aluminum. This is done to protect against accidental damage.
If there are no corners, you can glue a strip of reinforcing mesh extending 20 cm onto each side of the corner.
Then the rest of the wall is reinforced:
The mesh is cut into strips of equal length. A 2 mm layer of glue is applied to a section of the wall according to the size of the strip. The strips are glued horizontally. The mesh is embedded in the glue layer with a wide spatula. Another layer of glue is applied on top. The stripes should overlap by 10 centimeters. The next day the surface is sanded.
If necessary, it is leveled. After 3 days the walls will dry completely. They should be primed with a mixture of quartz sand. This ensures high adhesion for subsequent coating layers
Next, the outer layer of the facade is applied, which is a decorative and protective coating. This is usually structural plaster. But you can also paint it with facade paint.
If the walls are made of wood
Some experts express the opinion that wooden walls cannot be insulated from the outside with foam plastic using the bonded thermal insulation method, because the vapor permeability of this insulation is insufficient. Such insulation can lead to dampness and deterioration of the thermal insulation properties of the walls.
They propose to make a hinged ventilated facade.
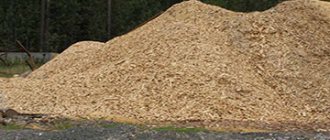
We draw your attention to the fact that sawdust and ecowool are excellent materials for insulating wooden houses.
Sawdust is inferior to ecowool as insulation, because it is not fire safe and rodents can grow in it.
However, ecowool also has disadvantages, which you can find out here.
If you don’t want to bother with insulation, build a warm Canadian house, the construction of which is described here. It is based on sip panels, which are known for already containing insulation in the form of foam plastic.
Insulation of walls from the inside with foam plastic
When using a material such as polystyrene foam to insulate the walls inside, it is necessary to take into account that there is a danger of not getting a good result. The dew point may move closer to the inner surface of the walls, then their freezing will increase.
It is necessary to make preliminary thermal calculations.
The technology of insulating walls with foam plastic on the inner surface has some features:
The entire surface of the sheet is covered with glue. This prevents the formation of air voids.
Moisture may condense in them. To level the walls, you cannot use ordinary cement mortar. Special moisture-proof mixtures are used for finishing bathrooms. Anchors are not used to avoid breaking the tightness of the layer. You can strengthen the fastening by installing between sheets of T-shaped profiles
As can be seen from the above, there are no particular difficulties in the technology of foam insulation. But the work must be done carefully. It is necessary that the insulation layer be strong and without cracks, resulting in a continuous and uniform thermal insulation shell.
Advantages and disadvantages
Positive qualities include:
- Manufacturing speed.
- Excellent physical characteristics and ability to resist all-season adverse weather conditions.
- Environmental friendliness of both initial components and finished products.
- The large size of the blocks reduces the time for laying walls.
- Reducing the volume of excavation work during construction, since masonry from light blocks significantly reduces the load on the foundation and allows you to narrow the width of its base.
- Frost resistance.
- Low water absorption.
- Excellent waterproofing and noise-proof properties.
To negative:
- The need for constant careful monitoring of compliance with geometric dimensions.
- Deterioration of the formwork, making replacement necessary (the cost of its depreciation and turnover).
- Obtaining in mixers, usually intended for domestic use, a homogeneous mass with a given strength for the finished product.
- Mandatory temporary care of finished blocks.
- Difficulties in the absence of a heated room with the work of making blocks during the cold season, accompanied by negative temperatures.
- The need to finish the front surface of the masonry - plaster, tiling with natural or artificial stone, cladding with metal or polymer stamped siding.
- The need for a nearby plastics plant that sells granules for polystyrene foam. Otherwise, the costs of delivering it from other regions may be prohibitively high.
Preparing house walls for insulation
The walls on which the insulation will be attached must be carefully prepared. All cracks and voids need to be repaired; damaged areas of the wall are best restored. If there are large differences - more than 5 cm, it is advisable to level the plane of the wall, otherwise it will be difficult to properly secure the insulating material.
Crack repair
It is not advisable to start work on a rainy day or install the material on wet walls. If the house renovation is major, it is recommended to install insulation after replacing windows and doors.
It is recommended to thoroughly prime clean walls before attaching foam plastic. Deep impregnation liquid can be applied with a roller or spray. The primer will protect the wall from corrosion and moisture, and improve the adhesion of the adhesive solution to the foam.
Preparing house walls for insulation
Before attaching the material to the wall, it is advisable to place beacons. Chop cords are stretched between the beacons. This will allow you to attach the foam with minimal deviations.
What is the cost?
This is one of the most important questions that usually worries the owner of a plot of land who wants to start manufacturing polystyrene concrete blocks for building his house.
When calculating and summing up unit prices for constituent materials and components, we obtain the cost of 1 m3 of about 4,300 rubles .
The volume of one block with standard dimensions is 0.016 m3. Having calculated the proportion for one block, we find that its cost will be about 65 rubles.
Installation of foam plastic on walls
After pre-processing the walls and installing the beacons, you can begin installing the foam.
Step 1. Diluting the glue. The dry mixture must be diluted with water. The consistency of the glue should be creamy, without lumps or other impurities. It is best to dilute the glue in portions.
Step 2. In order for the first row of polystyrene foam to be even, it is recommended to start attaching the insulation to the metal profile.
Using a tape measure and a level, you need to mark the line along which the first row of insulation will be attached. Then you need to drill a metal profile along this line to the wall. It additionally contributes to better fixation of the insulation to the wall.
We fasten the base profile
Step 3. Glue is evenly applied to the surface of the foam using a comb. If the wall surface is not too smooth, then you can apply more adhesive to the insulation to ensure maximum adhesion.
Scheme for applying glue under a sheet of insulation on a wall
Apply glue
Step 4. The first row of foam is laid out. It is recommended to glue the material to the wall from the bottom up. It is also recommended to apply glue between the insulation boards so that there are no gaps.
Installation of foam plastic on the facade
Step 5. The second row of foam is glued offset relative to the first row.
This will ensure better bonding of the material and minimization of gaps between the plates. Do not forget about applying glue to the joining ends of the plates for better sealing. If the gaps between the foam boards are too large, you can use polyurethane foam to seal them.
Step 6. At the corners of the house, the foam must be attached with such an allowance to completely cover the protruding areas.
Step 7. Before installing the next row, do not forget about setting up the beacons.
Step 8. All rows of insulation are glued in this way.
Use in winter
Work in winter is difficult, as problems are created due to low air temperatures. This factor adversely affects the structural composition of penoizol. Approximately 50% of the resin consists of water. For this reason, the viscosity of the material increases. Despite all these unfavorable aspects, penoizol can be poured under certain conditions. Its components must be stored in a warm room at a temperature of at least +15°C, for example in a garage.
The installation must also be placed in a warm place. You can install the cheapest tourist tent for this. The materials must be compactly rolled up, covered with a layer of plastic film, and then the fan heater installed. Before starting work, it is necessary to heat the solution to +40°C, and the resin to +20°C. For this, a regular boiler is used.
More information about do-it-yourself penozol:
If all these rules are followed, you can get penoizol that is no different from the material installed under normal conditions. It is unacceptable to keep it at a temperature below +15°C, as it does not dry well. The moisture it contains will freeze. It will fulfill its role as a heat insulator only with the onset of spring. Moisture that does not freeze in the spring will evaporate by itself. Dry foam will remain unchanged.
Comparison with polyurethane foam
The two materials are often compared in terms of financial benefits and technical performance. Safety of use comes first in importance. Manufacturers claim that penoizol is neutral and safe for humans and animals. But at the same time, in a number of states in Canada and America there is a law according to which the use of urea foam for construction is prohibited. It is considered a potential health hazard.
This situation is also observed in some European countries. This is explained by the release of formaldehyde during the polymerization of liquid foam. You can reduce the likelihood of adverse effects by using a vapor barrier on the inside of the wall.
As for polyurethane foam, there are no bans on it in any country in the world. It has all the necessary quality and safety certificates.
In terms of water absorption, polyurethane foam has minimal indicators, since its structure is porous and closed. It retains heat well and is equipped with protection against corrosion, mold and mildew. The appearance of condensation is excluded here. Despite the positive properties of penoizol, excess moisture can lead to its destruction. This can be avoided by installing moisture insulation.
Strong humidity can lead to the destruction of penoizol
In terms of strength and physical and mechanical properties, penoizol is also slightly inferior. It is resistant to mechanical stress, but in this indicator it is still ahead of polyurethane foam. In terms of price, urea foam is an order of magnitude cheaper than polyurethane foam.
Rules on how to make insulation with your own hands: installation installation
Production technology and equipment drawings can be obtained from the manufacturer’s websites. With such information, you can make the necessary installation yourself. You can choose a cheaper option from scrap materials.
Required materials for assembling the structure:
- Supply hose;
- Compressor;
- Cranes;
- Gas-liquid installation;
- Their plastic barrels have a volume of 300 liters.
The production of penoizol is based on foaming a solution with a catalyst and processing with resin. Using a pump, the components are launched into the installation and foamed under the action of compressed air. During assembly of the structure, special attention should be paid to the pump.
When choosing a pump, errors in the dosage of components and unstable operation of the engine depending on the system voltage are taken into account.
It is best to purchase vortex or plunger pumps. In this case, there will be no problems with dosage. But if large particles enter, the system will be inoperative.
Double foaming technology has shown the greatest efficiency. The result is a dry mass that holds its shape and does not spread. The compressor should be selected with a certain power. This takes into account the resin consumption, which should be no more than 25 kg. A high-quality product should be elastic and white in color.