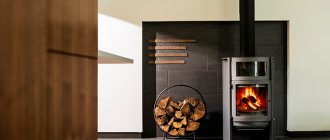
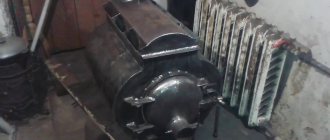
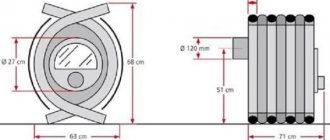
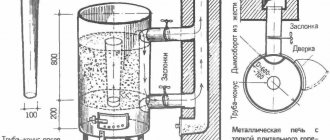
The wood stove is an ancient invention. In terms of economy, the first stoves, in the modern opinion, have some disadvantages - they burn a lot of fuel, the efficiency is low, you need to constantly monitor the stove and add firewood. But the goal of saving resources, including logs, has become very relevant at the present time, and this is one of the reasons for the emergence of new developments in stoves, in particular long-burning stoves.
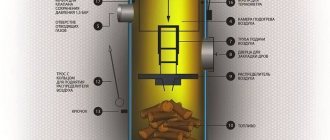
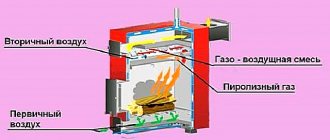
The design of these stoves is quite complex, and the approach to fuel combustion is unique. Firewood should not burn, but only slowly smolder in the absence of air. Oxygen, which supports combustion, is allowed into the combustion chamber in strictly dosed quantities; as a result, the combustion process proceeds according to the pyrolysis type. To prevent the fuel in the chamber from burning, but from smoldering, this chamber must “shrink” as the amount of fuel decreases.
The results of complication of the design give a positive effect, characteristic of all modern heating units:
- The burning time of wood increases, and as a result, the period between fuel refills also increases.
- Heat transfer and thermal efficiency increase
- Efficiency increases
Content
Despite all the popularity of natural gas in the modern world, there are still places where its use is still unavailable. In this situation, a person will be helped by a stove in a wooden house, which is heated with wood fuel or coal. You can purchase this fuel at any time of the year.
Classic stove design
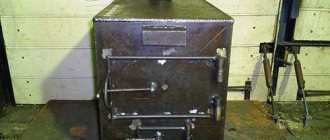
In appearance, the potbelly stove resembles an ordinary rectangle on legs. It is equipped with a door and a compartment for fuel, and an ash drawer for combustion waste. In addition, any potbelly stove is equipped with a branch pipe where an exhaust pipe with a length of 5 meters or more is installed. The length of the pipe directly affects the thrust and power of the device. The furnace body is made of steel or cast iron. We also recommend reading about the chimney for a potbelly stove in the garage on our portal.
Potbelly stoves are classified into two types:
- Metal devices.
- Brick buildings.
Brick models fit perfectly into a small country house and can heat several rooms at once. The stove heats the rooms evenly and allows you to retain heat for a long time. The only drawback of a brick potbelly stove is the long heating process. But the brick adds more functionality to the device; for example, during masonry, you can build a place for cooking. Craftsmen can arrange a recess for the oven.
Models of cast iron stoves are compact and easy to install, because they can be placed in any suitable place. The main thing is to fold the chimney correctly so that it can be easily moved thanks to the corrugated pipes.
Difficult climatic conditions are a factor that everyone living in the vast Russian territory has to take into account. With the onset of cold weather, houses, apartments, and industrial buildings are connected to centralized heating systems that supply heat and create comfortable conditions for us throughout the heating season.
Foundation structure
The foundation is a certain capital foundation required for fire safety, because When operating a high-quality, long-burning potbelly stove made by yourself, the steel material usually heats up quite strongly. It’s easy to make it yourself, because... the process is not complicated - you don’t even need to use drawings or make a special recess (after all, the weight of the cylinder is small). You just need to make the base only one brick thick and then go over the top with a layer of special mortar.
The weight of this device is not very large, even when lined with special brickwork, but installation on a weak base is still prohibited.
The main advantages of stove heating
Installing a stove is not only a simple process, but also quite inexpensive in terms of the cost of materials. Using firewood is the most environmentally friendly way to heat a space and will not harm your family. The installation of a stove can be combined with the installation of a fireplace, then there will be not only a standard type of heating, but also a stylish design element in the room.
Furnace maintenance is a simple and fairly cheap process. The main advantage is the ability to regulate the degree of combustion and the ability to retain heat using special dampers installed in the stove.
Categories
- Boilers by fuel type Gas boilers
- from bottled gas
from main gas
- on diesel fuel
on kerosene
- on brown and black coal
on wood
- ionic (electrode)
tenovy (classic)
- copper
steel
- double-circuit
column
- with natural draft
with forced draft
- floor
wall (mounted)
- with atmospheric burner
with fan (pressure) burner
- volatile
non-volatile
Pumps Heat pumps
- Firewood
- Tools (cleavers, saws, etc.) Chainsaws
Hydraulic splitters
- Bath stoves
Cooking ovens
Potbelly stove stove design
One of the biggest problems with furnaces of this type is the design itself. Conventionally, the model of a potbelly stove can be imagined as a hearth wrapped in metal and slightly raised above the floor level. Classic cast iron stoves have a firebox and a blower. The design does not provide a gate to regulate the air supply to the combustion chamber, so this is done by opening and closing the blower door. Such an operation is unsafe - when the ash pit is filled with ash, sparks often roll out, which causes a fire. So the “potbelly stove” fully lives up to its name and the appetite is exorbitant and a fire can break out at any minute.
The fuel combustion process also looks specific, which is the reason for the low efficiency of the potbelly stove. When wood burns, the metal shell of the stove body heats up and the heat spreads into the room through thermal radiation. The burning of wood usually occurs irrationally; when burning, the wood simply does not have time to reach the required temperature and therefore some of the combustible gases from the firebox simply go into the chimney. By the way, the pipe itself, like the furnace body, wastes precious heat irrationally - heating of the room occurs due to thermal radiation, and occurs only when the fire is burning in the firebox. As you can see, everything is quite simple - the fuel burns inefficiently in the firebox, while this type of heat energy release such as convection is used irrationally. So it turns out that any improvement immediately allows you to increase the efficiency of the potbelly stove, which means it will allow you to use fuel more efficiently.
Why modernize?
The potbelly stove is a very simple heating device, although today it is deeply modernized. Such a stove, which has become a favorite solution for heating small country houses, can have not only a single-chamber, but also a two-chamber design. A modernized potbelly stove can provide heat even to houses where residents live permanently.
The simplicity of design and manufacture makes it accessible to purchase and use. In addition, a significant advantage for the construction of such a structure is the absence of a foundation. But, despite so many positive properties, the potbelly stove also has significant disadvantages:
- Its efficiency is quite small, the simplicity of the design carries with it an inherent drawback - a huge part of the heat from the potbelly stove “flies into the chimney”.
- To work with such a stove, strict safety requirements must be observed, since falling combustion elements can damage nearby premises and even lead to a fire.
- To heat a room with a potbelly stove, it is necessary to consume a significant amount of fuel elements, which is due to the fact that this type of heating is used only for short-term operation.
But this is not a reason to be discouraged; over the years, our “Kulibins” have found several simple but effective ways to increase the efficiency of a potbelly stove. In this article we will look at the modernization of the stove design itself.
Water heating with wood
This more complexly organized system is a pyrolysis boiler. consisting of two sections. In the lower one, wood is burned, and in the upper one, the gas generated due to combustion circulates. Thanks to the scheme in which gas does not immediately enter the chimney. its efficiency increases, and longer burning requires less wood.
Around the boiler there are thick pipes through which water flows, heated from it. Keep in mind that only dry firewood is suitable for a boiler of this type, so you should always have a good supply of it at home.
There are also systems that use hot air instead of water for heating. It passes through the circuit and is transmitted into the airspace of the house. The cold air, falling down, again enters the boiler for further heating.
Increasing the number of pipe bends
Increasing the bends of the potbelly stove chimney
The tank at the outlet of washing machines will retain a certain amount of heat, but it will not be able to retain all the heat. A large amount of heat will continue to escape into the chimney.
Therefore, one of the improvements that provides additional heat retention is to increase the length of the outlet pipe. A long pipe running through the room, but with good exhaust, ensures the transfer of heat from its surface, which was previously lost.
Materials and tools
- several elbows that can be easily placed in the room after the potbelly stove,
- brackets for fastening pipe elbows,
- welding machine and metal processing tools.
Instructions
- First you need to mark the location of the pipe. It can pass with a large number of bends and zigzags, thereby ensuring maximum heat retention, without forgetting about the loss of exhaust draft.
- After marking the pipe laying location, it is necessary to install the pipe mounting brackets. Particular attention should be paid to the joints of pipe elbows and corners. Brackets must be made of heat-resistant materials.
- Lay the pipes to ensure a tight, hermetically sealed connection, and, if necessary, modify the elbows to ensure the pipe is laid along the marked route.
- Firmly secure the elbows in the brackets, check the working draft (burn newspaper in front of the pipe), check the tightness of the connections, connect the inlet elbow to the stove.
Modernization process
Potbelly stoves went through a long stage of development before the modern version of the stove turned out. A huge number of modifications are produced, from miniature decorative designs to heating units.
Summer cottage stoves serve as an addition to the existing heating system. There is also the possibility of connecting them to boilers, which will provide residents with hot water. Stove units for cooking are equipped with hobs and ovens. They become a worthy replacement for a kitchen stove. Compact miniature analogues are indispensable assistants on a trip.
Improvement methods
Modern models are highly efficient heating devices.
The appearance of the familiar potbelly stove has undergone minor changes. The main unit of the furnace, the firebox, was subject to modernization. The following changes have been made:
- window made of glass;
- a slow combustion process has been introduced;
- heat-resistant lining added;
- The gas re-burning system is turned on.
Washing machine tubs
Many have noticed that when the stove is burning, sheaves of sparks often fly out of the chimney. This means that the fuel did not burn out completely and left the working chamber, taking with it most of the thermal energy. So, one of the first ways to improve a potbelly stove is to create a working chamber where small coals will burn out and heat will be retained.
A common method of such an improvement is to install two washing machine tanks welded together, which will act as a kind of car muffler.
Materials and tools
To make this structure we will need:
- first of all, two whole tubs from old washing machines,
Washing machine tubs - welding machine,
- tool for working with metal.
Instructions
To properly attach 2 tanks from a washing machine welded together, you must follow a simple guide:
- First, you need to weld two washing machine tanks together so that after welding they form a single container resembling a large cylinder.
- After welding, clean the weld seams and bring the single tank to a marketable condition.
- The next step is to make one hole at opposite ends of the tank, the size matching the diameter of the furnace outlet pipes. Carefully clean out the holes made.
- Insert the outlet pipe elbow into these holes, but so that the pipes inside the tank are at different levels, as if overlapping each other.
- Seal one connection between the pipe and the tank and clean it. Make the second hole in such a way that it fits tightly around the pipe, which will be directly inserted into the potbelly stove. There is no need to weld the second hole, as it will later be useful for removing carbon deposits inside the tank.
Upgrade with washing machine tanks
This simple improvement will allow you to retain a large amount of heat, which previously simply flew away into the chimney.
Features of a potbelly stove - pros and cons
A good master can easily make a Bubafonya stove in one day, this is a significant plus. The maximum you have to buy is a cylinder and pipes from scrap metal. Other advantages of a potbelly stove:
- burning duration on 1 load is 6…10 hours;
- omnivory - waste wood, garbage, sawdust, freshly cut branches are placed in the firebox;
- ease of repair, any burnt part can be easily replaced.
On the left in the photo is the manufacture of a boiler jacket from a bent steel sheet, on the right is an assembled boiler
The disadvantages of Bubafoni are much more unpleasant:
- The stove is difficult to regulate. When working with high-quality dry wood, the damper helps you choose the optimal mode. If you burn with garbage and damp wood, the air duct must be opened completely.
- The potbelly stove's omnivorous nature is a double-edged sword. From burning low-quality fuel, the chimney becomes clogged with soot literally within a day.
- Without good draft, the stove will begin to smoke into the room. Hence the requirement for the height of the chimney - at least 4 m, counting from the grate, pipe turns 90° - no more than two.
- You can’t throw logs “on the go”, unless you pour a handful of sawdust through the air channel. This means we learn to dose the amount of fuel correctly.
- A potbelly stove made from a 200 liter iron barrel is very bulky and inconvenient to use. The piston is too large and heavy, the thin metal quickly burns out. Fortunately, the housing is easy to replace.
Why is “Bubafonya” dangerous: a well-heated firebox cannot be extinguished using a damper. Air seeps through the cracks, and the wood continues to smolder. The heater should not be left unattended or act radically - lift the lid and pour out a bucket of water. Is there a smoke screen in the room?
User manual
The most important condition for operation is good welding quality. Using chalk coating and kerosene, check for fistulas and defects. Be especially careful with the chimney seams. Load firewood into the combustion chamber, light the fire, close the door and regulate the process using the blower. To reduce the intensity of combustion, you need to screw on the blower; to put out the fire, just screw it on completely.
Heat emanating from metal at a temperature higher than that from brick or stone
To adjust the blower, always use a thick potholder, do it carefully and quickly. Clean the oven after it has cooled completely
If there are welding defects, operation is stopped and the defects are corrected. Carbon monoxide can cause death.
8f772c3fed439782b7a382d3001fa981.jpe e8afa33b49c7a84d043b39f36a44d322.jpe
According to some reviews, this stove can smoke when the firebox door is opened. This occurs due to decreased cravings. The defect can be eliminated if you increase the diameter of the chimney pipe to 150mm and reduce its length
Slow burning stoves are popular among fishermen and tourists. By replacing a thick sheet of metal with light and thin stainless steel chimney pipes, they successfully use the Loginov scheme for winter fishing and tourism
Welding is rarely used for such furnaces.
Kuznetsov boiler or stoves for heating greenhouses
Kuznetsov’s heating stoves are of particular interest for greenhouse premises. The brick miracle boiler has good efficiency, approximately 80%. 2 steel registers are built into the furnace body. The brick boiler body must be insulated with basalt fiber. A large number of dome models of stoves have a built-in modern technical solution that ensures afterburning of fuel, which constitutes flue gases.
Such equipment:
- Reliable;
- Durable;
- Effective.
To ensure afterburning, a secondary air supply is organized under the roof of the hood from above or in another place, depending on the modification of the stove. When using wood of the appropriate quality, such a stove will work as a pyrolysis heating structure. The thing is that the installation of stoves according to the Kuznetsov system is carried out using not 1 cap, but 2, which are connected to each other by a vertical channel.
Stoves for heating greenhouses are reliable and durableHigh-temperature combustion products go under the arch of 1 bell and give off heat to the walls. As a result, the gases are cooled and go down under their own weight and the pressure of the upward hot flow from the furnace. A water furnace can also provide watering in a winter greenhouse.
Grid with stones
Modernizing a potbelly stove with a mesh with stones is quite one of the most common improvements. Almost everyone had a bath and steamed in the steam room. There you saw a set of stones that warm the air in the steam room.
The principle of this modernization method is similar. It is necessary to line the potbelly stove with stones, which continue to retain heat for a long time. It is worth remembering that you should not use galvanized material for manufacturing, since when heated, toxic fumes are released into the air.
Materials and tools
For this event we will need:
- a set of good stones (you can use high-quality clay bricks), preferably of medium size, similar to those you came across in the steam room.
- dense metal net, you can use a chain-link net.
- if you plan to do it like an adult, then you will need fittings and a welding machine.
Instructions
Making this improvement is simple:
- It is necessary to make a frame of metal mesh (or reinforcement) near the stove, which will not block access to the technological openings of the potbelly stove.
Design example - After creating this frame, it is necessary to fill the cavities between the stove and the frame as tightly as possible with prepared stones.
You can also fill the cavities between the stones with clean clay, which will also help retain heat.
Precautionary measures
It is strictly forbidden to use flammable materials and metals with low melting points to create this improvement. Also, this structure should ensure free maintenance of the potbelly stove, not block access to the firebox, to the ash pan, and not interfere with the removal and replacement of outlet pipes.
How to make a stove for a greenhouse with your own hands?
Almost any stove for heating a greenhouse space consists of a fuel compartment, a second bottom (located above the specified compartment), an opening with a door and a blower. In addition, we must not forget about the organization of the chimney (it must have a metal valve and a lid). Wood chips, sawdust and small firewood are often used as fuel, so we suggest considering a homemade version of such a stove.
Preparatory work
To construct a long-burning furnace, in the simplest version, you will need the following tools and materials:
- a sealed barrel with a volume of 200 liters;
- a thick metal circle (with a diameter slightly smaller than a barrel);
- 4 corners or the same amount of channel, slightly shorter than the radius of the pancake;
- a piece of metal pipe for blowing with a diameter of 100 mm (5 cm longer than the barrel);
- a piece of metal pipe for a chimney with a diameter of 150 mm and a length of 5 m;
- welding machine;
- Bulgarian;
- sledgehammer;
- chisel;
- pliers;
- hammer.
When finished, a sawdust or small wood stove should look something like this:
The finished brick oven will look something like this:
Sequencing
A homemade long-burning stove is an economical option for a factory design, which often has a long working life. However, you can achieve the most positive results from its work only if you design it correctly.
Therefore, we propose to consider the sequence of actions for manufacturing the simplest, “barrel” heating system:
- Take a barrel prepared in advance, cut off the weld on its upper end and straighten the sharp ends with pliers. The result is a cylinder with a lid.
- Using a sledgehammer, bend the edges of the cylinder inward, and, on the contrary, leave the remaining side outside.
- Turn the lid over and put it on the prepared cylinder, just so that it sits tightly on it and does not slip off.
- Using a chisel, carefully cut a hole with a diameter of 102 mm in the center of the lid (later the blower pipe will be inserted into it, which should move freely up and down).
- In the upper part of the future firebox, mark a hole for the chimney and cut it out (a part of the chimney, no more than 30 cm long, will be welded to it).
- When the installation body is almost ready, you can work on the air supply device. To increase the rigidity of the previously obtained pancake, it is advisable to bend its edges, but if you use part of another barrel as a lid, then the existing plug hole will have to be welded.
- Weld corners or channels on the inside of the cover, and install a damper in the upper part of the pipe hole (it is better to fix it with a wing nut; by loosening or tightening it, you can adjust the amount of air supplied.
- Install a chimney made of a pipe with a diameter of at least 150 mm, otherwise the smoke from the firewood will not be completely discharged outside. To ensure good draft force, the length of the chimney must be at least 5 m.
- In addition to the already manufactured device, you can weld a ball valve, which is suitable for draining accumulated condensate from the inside of the installation.
- The ignition point should be at the bottom of the barrel, so cut a rectangular hole in it and make a drawer or tray to clear the stove of unburned wood. Above the door level, install a perforated partition with a hole in its central part (it should correspond to the lower end of the blower pipe).
Using the finished product is easy: insert a blower tube into the prepared hole, fill the barrel with sawdust and remove it so that the hole remains. Next, throw firewood into the lower firebox and set it on fire so that over time the fire spreads to the layer with sawdust.
Ways to increase efficiency
The designs and diagrams of finished furnaces do not provide for modes with variable efficiency. It all depends on proper operation, as well as the ability to independently upgrade the design. There are three simple ways to increase the efficiency of wood-burning stoves: installing a steel pipe in the ash pit, a metal rod in the chimney, or transferring heat from the tiles through the hood back into the room. Each of the methods for improving efficiency indicators is discussed below.
By the way, you can combine them with each other, then the efficiency of the stove will increase even more.
Installation of a steel pipe in the ash pit
If a wood stove is the only way to heat the room, then the air temperature in the room will continue to decrease for the first 40 minutes after ignition. Moreover, such a decrease will be more intense than after turning off the stove. The reason is the open vent, through which the rarefied warm air of the room is sucked into the smoke exhaust ducts.
As the stove heats up, air will flow through the view in the same quantity, but due to the sufficiently heated walls of the stove, heat transfer will begin to prevail. But is it possible to speed up this stage and thereby increase efficiency by 10-15%? You can - to do this, when laying it in the ash pit, install a steel pipe with a damper. As a result, when the view is opened, much less warm air is sucked in (it will be drawn not from the room, but from under the floor).
It is important to remember: the described method of increasing the efficiency of a wood-burning stove has a drawback - the chimney draws air from under the floor, so it will cool down quickly. Walking on a frozen floor is unpleasant
To fix this, you can attach a rubber extension with a diameter of 50 millimeters to the end of a steel pipe, then take it outside the wall of the house (then the ash pan will draw in street air).
Install a steel pipe into the chimney
A well-known fact: very hot air is exhausted through the chimney. Moreover, the longer the stove is heated, the less heat will be removed from the brickwork of the chimney and the hotter the evaporated smoke will be. Consequently, due to intensive operation of the furnace, the efficiency will decrease. People have come up with a trick that helps them use the heated air of the chimney to their advantage and prevent the efficiency from decreasing (such a modification is not found anywhere in finished projects).
The essence of modernizing a wood stove is as follows:
- Take a round metal pipe with a diameter of 20-30 cm.
- The pipe is inserted into the chimney elbow at a slight angle.
- If the stove is large and has several smoke exhaust pipe bends, you can insert 3-4 metal pipes.
- The thermal conductivity properties of the metal ensure that heat is removed from the chimney. This heat does not go outside, but returns back into the room.
As a result, due to such simple modifications, a stove with high efficiency is obtained (the efficiency will increase by 15-20%). Warming up the room will be 2 times faster, and fuel consumption, on the contrary, will be reduced.
The only difficulty: modification of the stove with a homemade and simple heat exchanger can only be carried out at the time of laying the chimney. If you need to improve the efficiency of an already installed stove, the chimney will have to be disassembled and then reassembled.
Additional heat extraction from the stove
The heat emitted from the cooking surface of the stove can be redirected back into the room, thereby increasing the rate at which the house warms up. This process is called recycling. As a result, fuel consumption will decrease and efficiency will increase.
This simple upgrade is done as follows:
- A stainless steel hood is made above the stove surface (not close to avoid overheating).
- A quickly heated pipe (cross section 8-10 centimeters) is connected to the hood. For example, the material for it can be galvanized steel.
- The metal base of the tubular outlet must be at least 1 meter long. Further, it is allowed to be fastened with PVC pipes.
- The pipe should be stretched under the ceiling and brought to the coldest part of the room. It is recommended to supplement the design with small fans (a device with a power of 13 watts is sufficient).
Hood on stove
There are no obvious disadvantages to the described method of increasing efficiency. The only inconvenience: when you turn off the stove, the installed tube will stop conducting heat and the indicators will return to their original values.
As an option: you can install filters (anti-grease and carbon) in the hood. Then the air from the stove will be cleared of the odors of food being cooked on the stove (you will get a simple version of an air conditioner, only without discharging warm air through the ventilation shaft outside the house).
How to choose a heater for a summer house
Previously, we found out that a convection cast iron oven is suitable for periodic heating and is not afraid of long downtimes
Like any potbelly stove, it is “omnivorous”, that is, it can burn wood of different species, sizes and humidity, which is very important for dacha owners. It remains to understand which stove from the offered range to choose based on operating conditions
The selection criteria are as follows:
- thermal power of the unit;
- its dimensions and purpose;
- additional functions.
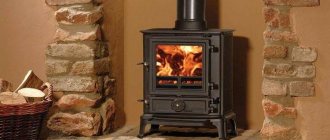
Power is an important characteristic indicated in the technical data sheet of any heater. It needs to be correlated with the size of the room where you plan to install the stove. For example, the technical characteristics of the Russian-made Bavaria PK 004 cast iron stove shown in the photo indicate a power of 12 kW and the cubic capacity of the room for which it is designed is 90 m3. This data should be relied upon when choosing a heat source.
Bavaria stoves PK 004 and PK 153 of the Russian brand Ecofireplace
Before choosing a stove for a country house made of cast iron, we suggest that you familiarize yourself with our recommendations in this regard:
- For a small house or a cabin located on a summer cottage, it is worth buying a small-sized, or better yet, collapsible model of the stove. Then it can be loaded and taken away in a car, so that the wood-burning heater is not stolen in your absence.
- If you need to heat 2-3 rooms, then it is better to take a stove with a water circuit and connect it to radiators installed in adjacent rooms. But you need to understand that this is due to increased consumption of firewood and constant monitoring of the operation of the heat generator.
- In a country house you can purchase and install a beautiful stove - a fireplace with wide panoramic glass.
- To cook and heat up food, look for a stove with a cast iron hob.
Modifications of “Bavaria” with a water heat exchanger (left) and with natural stone trim (right)
Among the many different cast iron stoves, you can also choose a unit with an oven, various additional drawers and original cladding made of natural stone.
Assembly
Having made the blanks, we proceed to welding and assembling the stove.
- We place the bottom element on a horizontal surface and place a side wall at its edge. We use a square to check the right angle between them, weld them onto spot clamps in increments of 10 cm. Make sure that we have a right angle, then weld the joint. We do the same with the second wall.
- We cut off two pieces of the corner: their length coincides with the size of the stove. We put marks from the inside on the walls where the grate will be located, and weld the corners along them (with the shelves down). We weld the joint between the corner and the wall on both sides.
- We give the structure rigidity and correspondence to the required geometry: we fix the back wall. Everything is simple here: we place it at the ends of the sidewalls and grab it from the inside without completely welding the joint; if suddenly something goes wrong, we will cut the tacks with a grinder and disconnect the part to adjust the design.
- We install a mirror and a partition that form the upper chamber. But before that, let’s weld the fastenings for them. We cut off 8 pieces of reinforcement 5 cm long and 8–10 cm in diameter. We make marks along the height of the channel (look at the drawing) and weld them as shown in the figure. Rigid fastening of the partitions is unacceptable: due to the high temperature in this part of the stove, they will eventually become unusable and require replacement.
- Let's start making the grate. We cut the fittings with a diameter of 8–10 cm into 25 strips (their length is 2 cm less than the width of the oven), this will ensure a power reserve, and the grate will fall into place freely. We cut out two strips of sheet steel (the width matches the width of the corner). We place them on the first and last pieces of reinforcement along the edges and secure them by welding. We perform similar actions with the remaining pieces of reinforcement. Turn the grill over and weld the joints on the reverse side.
- We make a hole in the cut-to-size lid and place a sleeve to connect the chimney. The easiest way to cut a hole is with a propane cutter, but if you don’t have one, you can burn along the contour using arc welding at high current. For the sleeve you need a piece of pipe with a diameter of 10 cm and a height of 20 cm. We weld it.
- Before attaching the cover, we weld the stuck joints on the back wall, since this will not be easy after installation. Now we can safely weld the lid to the sides and back wall.
- We put the finished grate in place.
- Installation of the front part. First, we cut out the top panel according to the dimensions from the drawing and drill 5 holes in a checkerboard pattern for the intake of secondary air (with a 5–6 mm drill). We attach the panel by welding at several points along the top and sides of the body; it should slightly cover the end of the mirror. Once we have checked the geometry and dimensions, we weld the joints.
- The next stage is the bottom panel covering the ash pan, with the blower door. First, we cut out the panel itself and the rectangular opening for the door. The height dimensions are indicated in the drawing; we measure the width according to the design of the future stove, since it may differ from those shown on paper. The best option is 1/2 of the oven width. The door is cut along the opening.
- In the door itself, we drill a hole for the bolted connection of the locking strap (this is a steel strip 2–3 cm wide and 10–12 cm long, with a curved end of 2–3 cm). The curtain is made from a piece of pipe and a steel plate. The door is placed with a tube on a rod welded to the body to the left of the opening. To lock on the right side of the body, a piece of corner or a curved strip is welded.
- The firebox door (the central part of the stove) and the curtains are made similarly to the bottom one, the only exception is that you don’t have to cut an opening for it in a single sheet: we will make it from strips 4–5 cm wide. They are attached by welding to the ends of the side walls, to the top and lower front panels.
- The oven is ready, we need to put it on its feet. A pipe with a diameter of 15–20 mm is suitable for the legs. We cut it into 4 pieces 20 cm long. To prevent the stove from pushing through the floor covering with its weight, we weld 5x5 cm sheet steel nickels to the tubes. You don’t have to do this if the potbelly stove will be in a garage or utility room, but with nickels it will become more stable. All that remains is to weld the legs to the bottom in the corners, retreating 3–5 cm from the edges (depending on the dimensions of the oven).
- To improve the appearance, the unit is coated with heat-resistant paint. The chimney should be made collapsible: with clamp connections for easy cleaning. The design of the chimney depends on the location of the stove in order to bring it outside.
When installing a stove in a garage, it is important to think in advance about additional safety measures for placing the stove next to the car and ways to retain heat while the stove is operating.
Solid fuel heating stove Professor Butakov Student
Modern solid fuel equipment is constantly evolving, improving its appearance, design and technological processes. Despite this, simple metal stoves remain quite popular among ordinary consumers. The Professor Butakov series of stoves, named after its designer, is one of the few examples of domestically produced equipment that has created full competition with foreign analogues, and in some respects, surpassed them.
For heating small areas up to 150 m#179, an excellent option would be to install a wood-burning stove, Professor Butakov Student, with a power of 9 kW. Despite the modest thermal power, the room is heated in the shortest possible time, no more than 2-3 hours from the moment of startup. The speed of heating is ensured by the special design of the air heat exchanger, which ensures uniform convection heating.
Furnace structure and operating principle
The heating stove Professor Butakov Student is equipped with a combustion chamber capable of burning wood and afterburning pyrolysis gas generated as a result of combustion of the main fuel. The use of this technology made it possible to obtain a significant increase in efficiency and increase it to 90%, which is an excellent indicator for stoves operating on conventional wood.
To obtain the maximum effect and the largest volume of pyrolysis gas, it is necessary to use natural, as dry wood as possible.
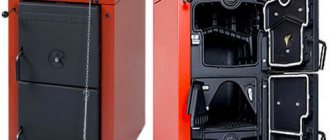
The heat exchanger of the heater is made of steel pipes surrounding the firebox. In essence, the fire tube heat exchanger is the body of the combustion chamber, absorbing the maximum heat generated as a result of wood combustion. The lower air intake ends of the pipes are located almost parallel to the floor, this allows cold air to be drawn in. Air entering the heat exchanger pipes quickly heats up, leaving through the upper free ends of the pipes, creating constant draft and convection flow.
To ensure long service life, the bottom of the firebox is equipped with a cast iron grate that is resistant to long-term thermal influences. Through the grate, residual combustion products in the form of ash, ash, and unburned fuel fractions enter the ash box, which allows the stove to be cleaned of debris directly during its operation.
The upper plane of the oven is a cooking surface that allows you to heat or cook food on it.
Some model differences
Currently, this heater model is available in three configurations:
- Heating stove Professor Butakov Student with a cast iron door and glass. Glass makes it possible to observe the living flame in the firebox.
Heating equipment with a blind damper. Butakov Student stoves with the possibility of a rear chimney connection. Compared to the classic design, where the chimney pipe is located on the upper plane, the rear connection increases the area of the cooking surface and ensures the connection of the stove to the chimney built into the wall.
Advantages and disadvantages
Despite a number of disadvantages inherent in such equipment, solid fuel heating stoves by Professor Butakov Student have a wide list of advantages.
Wood is a natural fuel that does not pollute the environment during processing.
The use of a fairly simple design and reliable materials, steel, cast iron, ensures long service life. Wood is the most economically advantageous fuel for many regions. Increased efficiency rates of at least 90%. Easy to use. Possibility of cyclic use only when necessary, unlike most heating devices that require constant operation at minimum power. Low cost.
Among the disadvantages of the equipment, Professor Butakov Student’s heating stove is not equipped with automation, therefore it is necessary to constantly monitor the presence of fuel in the firebox and, for safety reasons, it cannot be left unattended for a long time.
Installation
The entire line of heating equipment by Professor Butakov does not require lengthy preparatory work during the installation process. The stoves are installed and attached directly to the floor. One of the mandatory conditions is maintaining an air gap between the stove body and the nearest surface, especially important for wooden houses. The heaters can be equipped with any suitable chimney system with a height of at least 5 meters to ensure normal draft and, accordingly, a constant fuel combustion process.
Ensuring heat removal
It is possible to increase heat removal by creating devices that promote natural and forced convection. To ensure natural air circulation, screens are made with a guide device that allows you to create a powerful convection flow and distribute it throughout the room. The guide apparatus is made in the form of curved strips of metal, welded to the screen and directing warm air not only upwards, but also to the sides. The prepared device is attached to the oven.
The heat removal device can also be made from scraps of water supply and profile pipes. The distance from the floor to the bottom edge of the elements must be at least 15-20 cm. The pipes are welded to the stove body and covered with a screen on the sides to protect against accidental contact. A traditional potbelly stove heats the air around it by 0.5-1.0 m, and the use of such a design allows you to increase not only the radius, but also the rate of temperature rise in the room. When the body of the heating device is heated above 60 °C, a stable convection draft appears in the device, the power of which increases as the temperature of the furnace increases.
Heat removal can be increased by using fans to blow over the heat transfer surface. Both household and old car fans are used. Devices with variable rotation speeds have proven themselves especially well. They allow you to regulate the temperature and heating time of the room in various oven operating modes.
For more efficient blowing of the furnace elements, special casings are installed that allow cold air to be directed to the hottest areas of the heating device, while it can be taken from various places in the room. A potbelly stove with pipes welded into the firebox for heating air has proven itself well. A multi-speed car fan installed on a common discharge manifold allows you to effectively heat the room.
