When do you need to insulate?
Wood has low thermal conductivity, but the disadvantage of the material is its response to changes in humidity and temperature. The door block dries out, swells, warps and even cracks. There are three main reasons signaling the urgent need to insulate a wooden door in a country house:
- Formation of gaps between the frame and the ends of the opening walls . Initially, during installation work, all gaps are foamed. Foam is a good insulator, but over time it loses its properties. Destruction occurs faster on the street side if platbands are not installed. Foam deteriorates from exposure to the sun. Another cause of cracks is the misalignment of the bowl.
- Formation of gaps between the frame and the sash . The most common defect in a wooden entrance door occurs due to poor wood, poor-quality installation and long-term use. Often the owner himself becomes the culprit when he trims the swollen sash so that it closes better. After drying, the product decreases in size and a gap forms.
- Wear of insulation. Each thermal insulation material is selected taking into account operational requirements. If they were not initially followed, the incorrectly selected insulation loses its effectiveness. For example, mineral wool quickly cakes, and due to dampness it decreases in volume. Any old wooden door, as well as a thin leaf, needs to be insulated.
Things to consider
From the point of view of effective thermal insulation, the quality and price of the purchased door are not the main success factor. If there are violations associated with cold bridges, no amount of fabric replacement will help. Just as in the case of a wooden door, you need to completely solve the problem of blowing cold in the area between the frame and the leaf.
Please note that much of the success depends on good heat treatment of the through gaps. Pay attention to which side of the canvas you are installing the mineral wool on. If you place the filler outside, then all the condensation will evaporate outside, and not into the room. This way you will protect yourself from excessive humidity and dampness.
Through what channels does cold penetrate through the door?
The array tends to change its size and shape under the influence of moisture and temperature. The fibers absorb steam and drops of condensation. As a result, the interior space becomes larger. At negative temperatures, water turns into ice and increases in volume. The stresses caused by its deformation can not only change the direction of the fiber, but also damage it. As a result, voids appear through which air from the street enters the room.
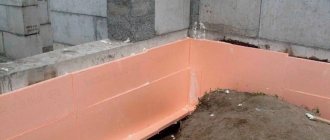
- Gaps between the frame and the walls of the opening - they are formed due to the fact that in old houses the parts gradually dry out. Connections are broken. With significant deformation, the channels are preserved even after swelling caused by oversaturation with moisture. The space filled with polyurethane foam is covered with platbands. If they are installed loosely, the porous structure of the polyurethane foam will begin to collapse, losing its insulating properties. To solve the problem, you need to disassemble the structure, change or repair parts if necessary, install it on polyurethane foam, cover it with vapor barrier tape and sealed platbands.
- The voids between the box and the canvas - they appear as a result of the boards drying out and changing their shape. The reason is long operation, low quality of the array and errors made during installation. Some breeds can last for several decades. Bog oak and exotic dark species have these properties. Spruce and pine, even after special treatment, quickly lose their shape. One of the reasons for the occurrence of voids is incorrect actions during operation. A swollen sash sometimes has to be trimmed so that it fits into the opening. After shrinking, it decreases in size, and the free space in place of the removed part becomes a source of drafts.
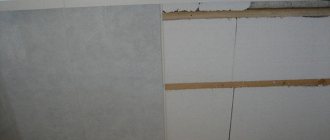
- The gaps between the boards from which the canvas is assembled become bridges of cold, even with good finishing. Before you insulate a wooden door in a private house, you need to get rid of them. The filling under the upholstery may not be of the required quality. In addition, the products have a limited service life. After the expiration date they need to be replaced with new ones.
Which insulation is better to choose?
To make an insulated wooden door with your own hands, you will need thermal insulation material, as well as material for the top decorative finish. The gaps are sealed with a sealant. When the question arises of how to insulate a wooden door in a private house, pay attention to the following materials:
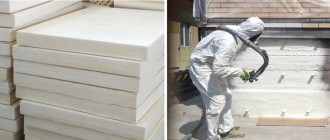
- polystyrene foam as internal insulation for wooden entrance doors. The slabs can be sheathed on the side of the room.
- Foam rubber is considered the most common insulation material, which is covered with artificial leather on top. Porous material allows you to create a volume effect. Foam rubber loses over time and crumbles into crumbs.
- Mineral wool does not burn, has good thermal insulation properties, but quickly cakes. When exposed to dampness, it accumulates moisture. Under the weight it slides off a vertical surface.
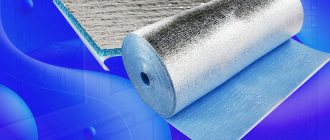
- Foamed polyethylene - isolon has a structure similar to foam rubber. The material has better thermal insulation properties and a longer service life. Isolon does not tolerate long-term exposure to direct sunlight.
- Polyurethane foam is applied by spraying, firmly adheres to the wood, and penetrates into all cracks. The disadvantage is the impossibility of performing work without special equipment.
- Expanded polystyrene resembles polystyrene foam, but has improved characteristics. The material has self-extinguishing properties when exposed to open fire.
When choosing insulation for the doors of a wooden house, it is important to consider the thickness of the material. Thick layers will weigh down the sash and create an obstacle to normal closing. Thin is useless. You need to find a middle ground between these two parameters.
Types of seals for door frames
In addition to thermal insulation, you will need a sealant to seal the cracks around the perimeter of the canvas. It is a tape that differs in thickness and material:
- The foam strip is fixed using an adhesive base. The seal wears out quickly during the season.
- The silicone strip is resistant to dampness and elastic. Over time, it begins to stick and tear into pieces.
- The rubber seal for wooden doors will last for many years. The tape is resistant to wear, dampness, and mechanical stress.
- Thermoplastic is the best in terms of wear resistance, but is difficult to install.
- The polyurethane strip is glued due to the adhesive base. The characteristics are not inferior to a rubber seal.
Thermal insulation cannot be done without decorative finishing. Usually the insulation is covered with artificial leather. Fixed with furniture nails with a wide decorative head. On the inside, the canvas is sheathed with laminated MDF panels. Genuine leather trim looks beautiful, but the material is very expensive.
New door trim
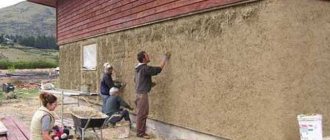
The next step will be upholstery of the prepared wooden doors . For this purpose, you can use soft materials such as leather substitute or dermantine. The upholstery fabric is cut with a margin of at least 10 cm in length and width. This is necessary for hemming the material, which should have some thickening around the entire perimeter of the door leaf.
Dermantin can be used as a finishing material
It is best to attach dermantine to special nails. They have a large decorative cap, which gives the trim a more attractive look. You can also run copper wire along the nails. If you pull it, you get an additional fastening for both insulation and exterior finishing.
An analogue of soft materials is MDF. This type of finishing is used for frame panels. In this case, each panel is attached to a clamp and nailed along the perimeter.
Insulation
Owners of wooden entrance doors often suffer from drafts and cold that enters the home through cracks. In addition, wood perfectly transmits sounds, which is also not always desirable. Additional insulation of the door will help, and you can do this with your own hands.
You will need
- leatherette or leatherette according to the dimensions of the door, taking into account 10-15 cm allowances on each edge,
- foam rubber,
— construction nails (50g),
- furniture nails with a wooden head (100-150g),
- decorative string
Instructions
- Remove the front door from its hinges and place it on a work surface (stools or table). Remove parts that will get in the way: handles, keys and other protruding parts.
2. Make a base for the rollers that will bridge the gap between the door frame and the door itself. If the door opens outward, cut out 3 strips of material for the rollers, approximately 14 cm wide. The length of one strip is equal to the height of the door, the remaining strips are equal to the width of the door. If the door opens inward, cut 4 strips 14 cm wide. Two strips are equal to the height of the door, two to the width of the door.
3. Attach the strips of material to the door with construction nails along the edges, leaving the side on which the hinges are attached. Leave 1.5 cm from the edge of the door. If the door opens inward, attach the strips to its four sides.
4. Take a strip of foam rubber 3 cm wide and wrap it in leatherette nailed at the bottom of the door. You should get a roller that needs to be secured with nails.
5. Make a door-sized canvas from the material, but do not forget about an allowance of 10 cm on each side. Place the canvas on the door, having previously inserted the foam rubber into the remaining, already nailed, strips of material. Foam rubber should also be placed under the main door leaf.
6. First nail down the partial edges of the canvas with construction nails, then the bottom one, which should fit onto the roller nailed below, and the top one. Secure the remaining rollers so that the main fabric goes inside the roller. Secure the canvas, but make sure that it does not warp anywhere. Lastly, fasten the side on which the loops are hung.
7. All that remains is to decorate the door: nail the furniture nails according to the pattern chosen in advance. Additionally, this will keep the foam from moving downwards. Stretch decorative string or fishing line between the nail heads. If you decide to abandon the pattern, you will just have to nail a few nails around the perimeter of the door. Cut out the holes for the lock, attach the handle and hang the door in place.
Metal
Metal ones are much easier to insulate. All work is carried out in the space between the doors. If there was standard insulation there, it should be removed. Select the required material and place it in special openings for insulation. The process is quite simple and does not require much effort.
How to insulate a metal door using polystyrene foam?
The question of how and with what to insulate Chinese doors is asked by almost everyone who has installed it. Basically, for the production of iron sheets, several sheets of metal are used, fastened together. To provide additional insulation, the cavity inside needs to be filled.
The size of the foam must correspond to the size of the openings
Note! To achieve good thermal insulation, before insulating a metal door, you should remember that the width of the foam must correspond to the size of the fasteners between the sheets of leaf.
Algorithm for insulation:
- Removing door parameters. Before insulating an iron door, you need to cut out a fiberboard sheet to cover the foam.
- Make holes for the door peephole and handle, having previously marked their location and dimensions on the canvas.
- Trying on a fiberboard frame (marks made must match).
- Cutting foam sheets with a sharp knife. The finished material should be attached to the inside of the door. This must be done by gluing it with silicone applied to the entire surface.
- Covering the insulation with a fiberboard sheet, which should subsequently be secured to the door using self-tapping screws.
To avoid frostbite and cold accumulation in the stiffener, you need to fill the void of this tube with polyurethane foam, having previously drilled a hole in it.
Advice from professionals
The following recommendations from experienced craftsmen will help you avoid common mistakes when insulating a wooden front door:
It is more effective to use heat-insulating material on both sides. You should choose consumable components from trusted manufacturers. The selected material must have high performance characteristics. The outer cladding must be resistant to precipitation. Each stage must be treated with full responsibility. In the video on how to insulate a door with leatherette with your own hands, you can get acquainted with some of the features of the work:
Tools and materials
When you have finally decided which filler to use to insulate the doors, it’s time to prepare all the necessary tools:
- hammer;
- decorative nails;
- measuring instruments (tape measure, ruler, pencil);
- wood saw;
- sharpened knife for cutting;
- stapler and staples;
- pliers or nail puller;
- sealing tapes.
The list is impressive, but all items are necessary. And for this case there is an English proverb - “Necessity is the mother of invention.”
It is best to choose a leather substitute for upholstery. This material has many advantages: moisture-resistant, tension-resistant and easy to clean. Plus, it's available in many hardware stores and chain stores, so your search won't take long!
Step-by-step instructions for insulation
A high-quality door leaf reliably protects the room from loss of warm air. We offer instructions on how to easily insulate a wooden entrance door with your own hands.
Required tools and materials
For the work you will need the following tools:
- screwdriver;
- roulette;
- mounting gun;
- stapler, staples;
- hammer;
- decorative and construction nails;
- scissors, pencil;
- router or grinder with cutter.
Materials you will need:
- insulation - better polystyrene foam, polystyrene;
- seal;
- upholstery material (leatherette).
Preparatory work
Before starting work, check the door for any existing cracks. To do this, you can use a lighter. Where there are cracks, the light will tremble from the draft. In such a place you need to put marks.
It is better to place the door leaf on the floor. Remove old upholstery. Remove the handles. Next, measure the height and width of the product.
From the outside, the canvas is measured from edge to edge. When measuring the inside, it is recommended to deviate from the edges by 2-3 cm.
Door upholstery with leatherette
The base of leatherette consists of cotton fabric. On top there is a nitrocellulose coating. Using this material you can transform any door leaf.
Main advantages:
- long service life - up to 15 years;
- moisture resistance;
- resistance to temperature fluctuations.
Leatherette is resistant to rotting processes. The structure resists the growth of bacteria. It is not subject to destruction when exposed to ultraviolet rays, does not fade under the sun, so it is excellent for decorating the front door.
To upholster the structure, you will need a piece of leatherette that exceeds the total area by 15 cm on all sides. Nail upholstery nails on top of pre-positioned foam. The excess is removed, from which rollers are subsequently formed. You can decorate the surface using wire and nails.
Insulation with foam plastic or polystyrene
These materials are the most successful because they retain heat well. Let's look at how to insulate a wooden door with polystyrene foam or polystyrene.
The prepared sheets are cut with a knife, based on the size of the area between the bars, which are laid on the corners. Gaps and joints are filled with polyurethane foam. When the foam hardens, it is cut with a knife to the height of the bars.
Seal installation
The installation procedure looks like this:
- determine the size of existing cracks;
- cut the seal;
- if the tape is self-adhesive, then it is attached along the borders of the door frame;
- silicone is mounted with a stapler.
In this case, it is worth paying attention to the thickness - if it is insufficient, cold air will pass through. Too much thickness prevents the sash from closing.
Preparatory work
To insulate the door leaf, you should go step by step, stage by stage. This approach allows you to achieve good results and eliminate errors. And first there is preparatory work to be done.
To ensure that nothing interferes with the work, you need to remove the door leaf. This is done using a mounting tool or a nail puller . It is enough to pry the canvas from below and it will rise from its hinges. If the rotary axis is slightly rusty, then it must be lubricated with machine oil. After this, with small forward movements you can move the hinge and remove the door leaf.
When the door is outside the frame, all existing elements must be removed from it. The hinges, handles, peephole and lock are carefully unscrewed and put aside. If the door is not made only of wood, then it is necessary to remove the sheet of inner lining to gain access to the interior of the door leaf.
Door insulation with rollers
To close the joint between the door jamb and the sash, thick leatherette rollers are used. They do it this way:
- After measuring, cut out 4 pieces 10 cm wide. The length will be equal to the parameters of the sash.
- Fasten the strip with a stapler or nails with the wrong side facing out.
- A roller is formed from insulation. Place into the prepared leatherette strip.
- Wrap it, secure it - you get a reliable sealed gap.
It is not difficult to insulate the door yourself. It is important to follow the recommendations. Then the room will be warm, cozy, quiet.
Advantages of thermal protection
Thermal insulation of a wooden door provides a range of benefits that must be carried out.
They consist of improving the indoor microclimate. Such work makes it possible to protect housing from extraneous noise. With their help you can change the design of the structure. Carrying out this work will make the door more reliable.