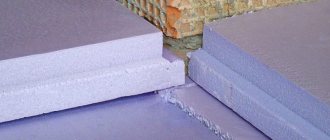
Penofol insulation is a modern, effective thermal insulation material that provides excellent reflective thermal, sound, and vapor insulation. It consists of foamed polyethylene and thin foil (20 microns). The thickness, structure and density of polyethylene varies depending on the modification. We will look into which Penofol to choose and which side to attach the insulation in in our article.
Important: Brand polyethylene foam can be used as the main and additional insulating material.
Operating temperature range - from -60°C to +100°C. The thermal reflection coefficient of this insulation is 95-97%, which indicates its phenomenal efficiency. Why Penofol can sometimes become covered with moisture, we wrote an article here. Now let's talk about the features of fastening polyethylene foam insulation.
What is penofol
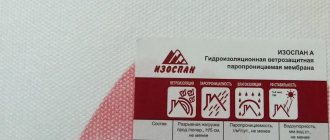
In fact, Penofol is the name of the manufacturer of polyethylene foam insulation covered with a foil layer. But today it has become a household word and is used in relation to various brands. Penofol is a multilayer reflective insulation made of polyethylene foam and aluminum foil. It was first used in the United States in astronautics, and then tried in the construction industry. Penofol has proven itself well and has become a common method of insulation. Such insulation is produced in the form of layers or in a roll version with different markings, depending on the areas and conditions of use.
Comparison table of the main properties of Penofol
| Characteristics | Units | Types of Penofol | ||
| type A | type B | type C | ||
| Applicable at temperatures | °C | from – 60 o C to +100 o C | ||
| Thermal reflection coefficient of the surface, not less | % | 95-97 | 95-97 | 95-97 |
| Thermal conductivity coefficient l, at 20° C, no more - in a dry state - in arb. operation A - in conventional terms. operation B | W/m °C | 0,037-0,049 0,037-0,049 0,038-0,051 | 0,038-0,051 0,038-0,051 0,039-0,052 | 0,038-0,051 0,038-0,051 0,039-0,052 |
| Water absorption by volume, no more | % | 0,7 | 0,6 | 0,35 |
| Specific gravity (at 4 mm thickness) | kg/m3 | 44 + / — 10 | 5 4 + / — 10 | 7 4 + / — 10 |
| Dynamic modulus of elasticity, Eq - under a load of 2 Kpa - under a load of 5 Kpa | MPa | 0,26 0,77 | 0,39 0,72 | 0,26 0,77 |
| Vapor permeability, not less | mg/m h Pa | 0,001 | 0,001 | 0,001 |
| Compressive strength, not less | MPa | 0,035 | 0,035 | 0,035 |
| Specific heat capacity, s o | J/kg°C | 1,95 | 1,95 | 1,95 |
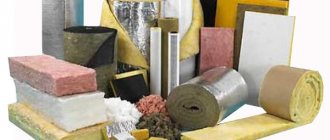
How to choose technical insulation?
Ask us +7 (499) 110-50-18
When choosing Penofol, the determining factors will be:
- Technical characteristics of one type or another;
- Thickness of thermal insulation material;
- Installation and operating conditions;
- Budget options.
When choosing the type of insulation and the thickness of Penofol, you should understand that a higher sheet of polyethylene foam and double-sided application of foil provide better insulation. But in the case of minimal heat loss, for example for interior spaces, a thinner, one-sided and, accordingly, less expensive material can often solve the problem.
You can read about other types of technical insulation by following the link.
Advantages and disadvantages
Foiled polyethylene foam is used almost everywhere: it can be installed on any surface, in interior and exterior work, insulate walls, ceilings, balconies and loggias, lay it in a roofing pie, thermally insulate chimneys and radiators, etc. The main advantages of penofol:
- Versatility of application;
- A light weight;
- Easy installation;
- Affordable price;
- Environmental friendliness;
- Practicality.
However, it has disadvantages and features:
- Flexibility and softness exclude the use of penofol directly for rough or fine finishing;
- In some cases, it cannot serve as a full-fledged insulation, requiring an additional layer, for example, polystyrene foam or mineral wool;
- Aluminum in the composition requires reliable insulation of any wires on the base;
- Cannot be used in rooms with high levels of heat and humidity (saunas, baths).
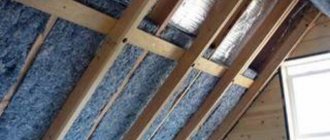
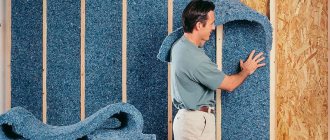
Installation inside the house
From the inside of a wooden house, insulation is used to insulate the following structures: walls, ceiling, floor, attic, basement or basement. Due to the non-penetration of moisture, it can be used in damp and dry rooms. A number of rules:
- The foil side of the penofol is placed in the direction where the heat should be reflected, that is, into the room.
- For better thermal insulation, a ventilated gap of 1.5-2 cm is left between the wall and the material. The same is done between the insulation and the external finish of the wall.
- To achieve complete sealing, the seams are taped with special foil construction tape.
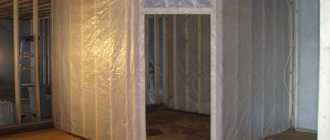
Wall insulation technology
Insulation of a wooden house from the inside with penofol is carried out according to the following scheme: wall, space of 1.2-2 cm from the sheathing, insulation, sheathing, external finishing, for example gypsum board or gypsum fiber board. The diagram and design are presented in more detail in the video and photo in this article.
The work is being carried out in stages:
- Bars 15-20 mm thick, pre-treated with an antiseptic, are attached to the wall. The pitch of the sheathing is any, but not more than 1 m.
- Penofol is attached to the sheathing. This is easier to do with a stapler or small nails. Laying is done end-to-end. They are glued with foil tape.
- A counter-latten made of timber of a smaller or the same cross-section is attached to the material. The bars are attached in the opposite direction to the first sheathing.
- Any panels (block house, imitation timber, lining) or sheet material (gypsum plasterboard or gypsum fiber board) are attached to the top of the sheathing.
- The walls are plastered and painted, or covered with wallpaper.
It’s easy to do thermal insulation with your own hands. The main thing is to follow all the steps. The video and photo materials in this article will help even a beginner to cope with the work.
How to attach foil polyethylene foam
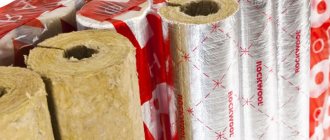
Reliable and high-quality installation will ensure the proper functioning and durability of the thermal insulation. To install insulation, special adhesives are most often used. Penofol is a fairly lightweight material that is easy to attach to almost any surface. For installation, you can use universal or special glue, which must withstand temperature changes. Some craftsmen allow fastening with liquid nails or polyurethane foam. In some cases, the rolled material can be additionally secured with construction staples. Class C penofol is produced on a self-adhesive base with waterproof glue. This type usually does not require additional installation tools.
Remember that the condition and preparation of the base for insulation is one of the most important factors for reliable fastening. So, the surface should be leveled as much as possible, get rid of bumps and irregularities, thoroughly clean and degrease. Make sure that the inside of the insulation is not dirty. It is recommended to additionally prime concrete, wooden and metal bases before installing penofol. Penofol layers are attached strictly end-to-end, and it is advisable to cover the assembly seams with aluminum adhesive tape.
Nuances
All joints between individual sheets of insulation must be carefully taped with construction tape. If you don’t have it on hand, you can go over all the seams with silicone sealant. In any case, joints should not be left untreated.
It is advisable to avoid joints at corner connections between the ceiling surface and the walls. Do not allow the foil side of the heat insulator to come into contact with power supply wires and cables. Aluminum conducts electricity well, therefore, all places where the heat insulator comes into contact with wires must be carefully insulated.
Penofol cannot be glued overlapping. Condensation may flow along its edge, which will appear if moist air gets on the inner surface of the material.
Ceiling insulation
Attaching penofol to the ceiling requires some additional means. Thus, laying a layer of insulation requires additional installation of wooden slats on top of the foam sheets, on which the finishing structure will be installed. After installing the insulation on the adhesive composition, it is additionally secured with wooden slats, onto which the subsequent layer of the ceiling structure is attached.
Penofol is a convenient, quick and affordable way to insulate a room and improve its energy-saving qualities, as well as reduce heat loss.
Self-selection criteria
What is better Penofol or Tepofol? Judging by this review, the performance properties of both insulation materials do not differ significantly, and the price of a 25-meter roll ranges from one and a half thousand to 1,800 rubles. The difference between Penofol and Tepofol is also the possibility of sealing Tepofol installation joints with hot air from a hair dryer.
By choosing one of the insulation materials, the Baustov company guarantees you that you will win in any case, since both insulation materials have equal effective heat saving and a long service life.
Call! We will calculate for FREE
8
Head of Sales Department
Zoning
Designers do not advise giving in to fashion trends and copying design ideas without taking into account dimensions, location and other nuances. Before planning and arranging furniture, every detail is thought through.
There are several simple rules that experts advise you to follow:
- Let the room have natural light. To do this, remove excess walls (except for load-bearing ones).
- If the rooms in the apartment are small (12 sq. m or 16 sq. m), the layout of the kitchen combined with the dining room will be the right solution.
- If the ventilation system is not designed correctly, the smell of food will spread throughout the apartment.
Do-it-yourself floor insulation in a private house under a screed. Instructions for use
Preparing the base
Before insulation, it is necessary to prepare the subfloors throughout the house. There are the following types of subfloors for screeding in a private house:
- priming;
- reinforced concrete slab.
To prepare the soil foundation for insulation, it is first necessary to carefully level and compact the surface of the earth. Then lay a 30 cm thick layer of inert materials: gravel or crushed stone. Next is a sand cushion 10 cm high.
Elimination of unevenness on a cement base by grinding
As for the preparation of the concrete base of the floor, it is enough to ensure the evenness of the surface by cutting off the convex parts with a grinder, wiping out cracks and holes with putty or mortar. The next step is to remove construction debris, dust and coat the surface with two layers of primer.
Floor insulation technology
Laying damper tape around the perimeter
- The joints between walls and floors are insulated with sealant or cement mortar.
- A damper tape is glued around the perimeter of the room to compensate for the thermal expansion of the screed during operation.
- Before insulating floors, it is necessary to install communications. Grooves are cut out in the insulation for the laid pipes and wires, and the heat-insulating material is tried on in place. The insulation should fit tightly to the damper tape, to each other and to the base of the floor without gaps.
- It is advisable to lay the insulation in a checkerboard pattern. This will help avoid temperature corridors. The thermal insulation material is attached to the base of the floor.
- Installation of waterproofing material over the insulation is carried out with an overlap. The sheets are fastened together with tape or construction tape.
Screed device
Laying reinforced screed on foam plastic
- When insulating the floor with polystyrene foam and penoplex, a reinforcing mesh is laid on top of the waterproofing, the mesh size of which is 10 cm. The mesh is laid with overlapping sheets, which are connected with wire. Reinforcement of mineral wool insulation can be done using a fiberglass mesh. It will also ensure the strength of the surface.
- Placing beacons from aluminum corners will ensure even pouring of the cement screed. The slats act as formwork.
- The screed mortar is prepared from a purchased mixture or by mixing sand, cement and water yourself in a ratio of 3:1:1.2. Cement and sand are mixed, a depression is formed, and water is poured into it. Gradually, the water is filled with the dry mixture, thereby mixing the components until a homogeneous mass is formed. To reduce dust, the surface of the mixture is moistened with water. The use of polymer binders will give the solution plastic properties. The technology for mixing the solution from a purchased mixture is specified in the manufacturer's instructions.
- A cement-sand mortar is applied and distributed evenly over all floor surfaces. The mixture is smoothed using a rule that relies on the beacons, ensuring the evenness and smoothness of the base. Having leveled the first strip of screed, you need to move on to the next part of the floor and so on until the end of the room. Gradually the solution will be laid over the entire prepared surface.
- The hardening period for the screed to gain strength characteristics is 14–28 days. To avoid cracks when the solution dries, you need to periodically moisten the surface.
- Now the concrete base in a private house is ready for laying any floor covering: ceramic tiles, laminate with underlay, linoleum and more.