Warm floors are one of the most popular heating methods today, used both independently and together with other systems. The laying technology has been studied and refined, but is used mainly on the first floors due to the large weight of the cement screed traditionally used for pouring the highway. In order to fearlessly lay heated floors on wooden floors, without fear that the base will “play,” the Finns came up with an original technology. And FORUMHOUSE users adapted it to their needs and capabilities. Our craftsmen willingly tell everyone how to lay heated water floors in a private house over wooden joists.
We make Finnish heated floors using wooden joists with our own hands. What happened to the floor after 5 years?
All my life I dreamed of a kitchen made of wood and I made it. An expensive top-class tongue and groove board was laid on the floor, covered with a tinting compound and three layers of varnish.
After the first heating season, my dream collapsed - cracks appeared in the floor and the boards began to creak. I got tired of it all and decided to redo the floor. By that time, I had become a fan of heated floors, so I started looking for a solution on how to make a heated floor using wooden joists, and I found it from the Finns. Let's get started!
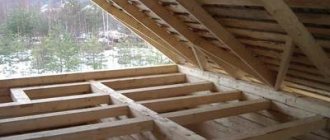
The object of reconstruction is a room of 18 sq. meters (kitchen). We will make a warm floor in it. Scroll through the gallery -> There are powerful wooden joists under the board, so I didn’t want to pour screed in this room at all. Moreover, the room was recently renovated. The object of reconstruction is a room of 18 sq. meters (kitchen). We will make a warm floor in it. Scroll through the gallery ->
Step 1 - Lay the underlayment
To begin with, I screwed all the boards to the joists with self-tapping screws to secure the base (floor board).
As a substrate for the heated floor, I used a special material - penotherm based on foamed polypropylene. It is good because its reflective layer does not corrode when it comes into contact with a cement-sand screed. The seams were taped with metallic tape.
Ecowool thermal insulation
This material basically contains waste paper and other paper waste. To preserve it from fire, rodents and insects, it is treated with special compounds.
This cotton wool is a loose material and the higher its density, the lower its thermal conductivity.
Ecowool thermal insulation
In addition to high thermal conductivity parameters, it, of course, after treatment with special compounds, firmly resists strong heat and open flame. This material contains boron. When heated strongly, it provokes the appearance of water contained in the material, that is, self-extinguishing occurs.
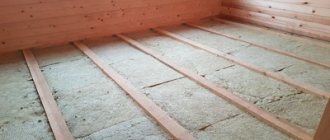
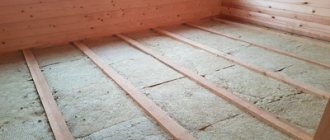
It can be poured dry; this is the method used for thermal insulation of the floor. It is simply poured between the joists (see Figure 4.)
Among all the properties inherent in insulation, this one has several disadvantages: after a certain period of time, it can cake and become denser. In addition, it absorbs moisture well and begins to rot. Of course, this happens if it is not protected from moisture.
Warm floors over wooden floors: Finnish technology, adapted by FORUMHOUSE craftsmen
Warm floors are one of the most popular heating methods today, used both independently and together with other systems. The laying technology has been studied and refined, but is used mainly on the first floors due to the large weight of the cement screed traditionally used for pouring the highway. In order to fearlessly lay heated floors on wooden floors, without fear that the base will “play,” the Finns came up with an original technology. And FORUMHOUSE users adapted it to their needs and capabilities. Our craftsmen willingly tell everyone how to lay heated water floors in a private house over wooden joists.
Dry screed: lightweight heated floors
Dry screed is a technology by which a heated floor is laid on joists without pouring cement mortar. In a conventional system, the screed functions not only as a retainer, but also as a conductor - thanks to its high thermal conductivity, it effectively transfers heat upward. But due to its heavy weight, it cannot be used on joists. According to Finnish technology, in a dry screed this function is performed by plasterboard sheets in three layers - as a base, between pipe loops, as the completion of a “pie”. This allows for a lighter design. The voids between the pipes and sheets are covered with tile adhesive, and the top layer is attached to it.
The design is lightweight, the load on the floors is within normal limits, and even in the event of a leak, the main can be repaired.
DIY water floors in a wooden house.
Variations on a theme
In our country, based on Finnish technology, which facilitates the design and allows one to abandon monolithic casting, its variations have appeared - the principle remains, but the materials have been increased:
- Gypsum fiber sheets (GVL) - compared to plasterboard, they are denser, more resistant to bending and deformation, and contain cellulose fibers and other additives that increase their technical characteristics. For wet rooms, a moisture-resistant variety (GVLV) is used;
Тishin FORUMHOUSE Member
In such a floor, instead of plasterboard, it is better to use gypsum fiber sheets (GVL). I myself am now considering a dry screed for implementation in my home, I will only replace the bottom layer with OSB. I will assemble the middle part from two layers of gypsum fiber board.
- Chipboard, OSB, plywood - in terms of heat transfer, this design is worse, since wood and its derivatives act as an insulator. Ready-made sets of heated floors on a dry screed made of chipboard sheets, with grooves selected for hinges, are sold, but not everyone can handle their cost.
boatmaster FORUMHOUSE Member
Logs, with a pitch of 60 cm, plus insulation - 35 cm, OSB base, then a 20 mm pipe, plus a 5 mm clip, it turns out 25 mm, three layers of GVLV between the pipes 12x3 = 26 mm.
- Cement particle board (CSP);
- EPPS - pipes are laid directly into the insulation, and the voids are covered with glue. To increase the heat transfer of the elements, foil or similar material is used;
The thickness of the sheets for the middle layer with the main is selected based on the diameter of the pipe, so that after filling with glue, a flat surface is obtained, and the final layer does not put pressure on the pipe. As an option, two sheets are glued together if the thickness of one is not enough.
Forum users are actively organizing their underfloor heating systems on wooden floors.
Serg177 Member FORUMHOUSE
If something happens to the pipe (today, tomorrow or in 25 years), you won’t have to break the screed. I will buy 50 sheets of plywood, 18 mm thick, for 200 m², cut it into strips, 16 mm pipe in between, and cover 200 sheets of ten sheets with laminate on top.
One of the options for making a dry screed with your own hands is laying pipes in special aluminum plates with grooves. They fit the pipes tightly and increase heat transfer. The disadvantage of this configuration is the high cost of these metal gaskets; their use increases the cost of the entire system.
Vladimir Tallin Member of FORUMHOUSE
There are not enough special aluminum sheets that are placed under the pipe and remove heat to the top. I have them, they “hug” the pipe, the size is about 30 cm per meter, there is a groove for the pipe with rare spikes to hold the pipe.
Sheets on a gypsum base are one of the most popular, as an optimal material in all respects.
- Reasonably priced;
- Easily cut into segments;
- Eco-friendly (does not contain synthetic binders like wood-filled boards) and suitable for home use;
- Non-flammable;
System installation
The construction of a water floor using logs based on Finnish technology requires a standard installation algorithm, regardless of the materials used in the work, be it gypsum plasterboard, gypsum fiber board (V) or other slabs.
evraz FORUMHOUSE Member
Similar technologies, where pipes or heating cables are sealed with a solution in the grooves of gypsum plasterboard and covered with a top layer of gypsum plasterboard, are painted by many manufacturers of underfloor heating systems.
Water-heated floor on joists in a wooden house.
On FORUMHOUSE you can read detailed instructions for installing a subfloor yourself.
Insulation
The system should transfer heat upward, and not pass it into the ceiling, which will lead to increased heating of the medium and a decrease in efficiency. A vapor barrier is laid between the joists, a layer of insulation (mineral wool, EPS) is placed on top, covered with a layer of vapor barrier. Insulation will protect both the wood and the insulation from condensation, provided that it is not just plastic film. Under a regular film, condensation will form in even larger quantities.
Base
When installing the system, the optimal distance between the logs should be observed - 60 cm; in this case, there is no need to create additional sheathing to distribute the load, and the sheets form a monolithic structure. The sheets are attached to the joists with self-tapping screws.
Highway
The size and diameter of the pipe depends on the area of the room, heat loss, and the power of the equipment used to heat the coolant. The most popular range is 16-20 mm in diameter. The pipe pitch is also individual in each specific case, but on average it is 100 mm, more often at the edges. The pipe is secured with special metal or plastic brackets or self-made clamps.
Warm water floors, wooden floors.
Laying
The space between the contours of the pipes is filled with segments cut from sheets; there should be grooves around the pipes for filling with glue. The optimal groove size is 3 pipe diameters, this is enough for maximum heat removal. The segments are screwed with self-tapping screws, in increments of 10–15 cm; the length of the fasteners should be sufficient for fixation in the joists.
Filling
To fill the grooves, tile adhesive is most often used; a cement-sand mixture can be used, but when mixing, it is necessary to use plasticizers. To increase adhesion and ensure that the finishing layer of the “pie” is more firmly connected to the intermediate layer, it is recommended that after filling the seams with pipes, go over the entire surface with the adhesive mixture “to tear off”. This is advice from a user under the nickname Vitaon, he professionally installs such systems and shared his trick with the forum members.
Vitaon FORUMHOUSE Member
Before the finishing layer, the surface consists of alternating strips of dry plasterboard and ditches filled with adhesive. Immediately before gluing, it is necessary to cover the entire surface with putty, a wide spatula and a thin layer of glue - you will get a homogeneous base. Apply glue on top under the final layer. With this method, adhesion increases many times over.
Finish floor
A water floor over wooden joists allows you to use almost any decorative covering in a private home; only cheap linoleum is a contraindication - it will have a noticeable “smell” when constantly heated. The best option is ceramic tiles or laminate flooring. In the case of laminate, there is no backing underneath it due to its thermal insulation properties.
Conclusion
Warm floors with dry screed using Finnish technology are a basic option that can be tailored to specific conditions and needs. All the subtleties and nuances are in the topic of heated plasterboard floors. In the article about heating a private home, the most economical heating method is selected. And in the video about engineered heating equipment - expert advice on choosing.
Methods for installing underfloor heating
Since in houses made of wooden beams the floors of the first floor or the ceiling above the basement are often concrete, the traditional method of installing floor water systems cannot be completely discarded. Moreover, you should not try to build a heated floor over wooden joists on such bases; this will lead to unnecessary costs, and the result may not meet your expectations. It is better to install a heating system under the screed on rough concrete floors, and only then lay the wood flooring.
The situation is completely different when the house has wooden floors. You should not use a screed with a heating circuit on them, and here’s why:
For reference. Sometimes wooden houses are often built from insufficiently dried profiled timber, which is why at first changes occur in the thickness of the structure, leading to cracks in the material. In such conditions, the screed will certainly suffer.
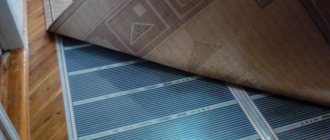
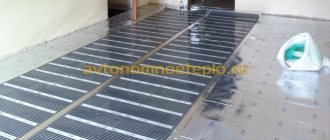
The use of various electric floor heating systems cannot be ruled out, of which the most acceptable option is the use of infrared heated floors for heating a wooden house. A thin polymer film with heating elements applied to it is laid directly under the floor covering; no screed is required, which greatly simplifies installation work. However, in this case, the choice of energy resources for heating a home is limited to electricity, while the coolant of water heated floors can be heated from a gas, solid fuel or diesel boiler.
Some homeowners, paying tribute to tradition, build brick stoves in wooden houses, integrating a heating circuit for water into them. In this situation, there is simply no alternative to underfloor heating circuits with coolant.
Finnish heated floor without tubes and electric mats: how to make heating for a harsh winter
"Down-to-earth" Finnish technologies
Many private houses or country houses in Russia stand on a fairly high foundation. Basements are set up under houses as a kind of warehouse for very necessary, but temporarily unclaimed things. They lie there for years, ventilated by all the winds. If the mice don’t chew or the neighbor’s cats don’t get dirty...
It seems to look aesthetically pleasing - the house is elevated, the windows are high, this is also a plus: at least minimal protection from inquisitive neighbors. But there are more disadvantages to such a “high altitude,” especially if the house is inhabited in winter. Then you will have to take special care of the warmth of the floor, because the ventilated “pan” will constantly supply portions of cold air.
The Finns, our closest neighbors, place their houses as close to the ground as possible. This becomes an additional heat saving factor. And there is less wind from above, and they don’t sneak under the house at all. Because, as a rule, the foundation is insulated and completely filled with concrete!
If we are not ready to take such a radical step, it is worth using the same Finnish, but older technology for floor insulation. It operated until the 60s of the last century in the construction industry of the neighboring country. But quite capable.
Let's use the old proven method
So what does the Finnish experience offer? There are friends who have already tried this technology in their homes and claim that they forgot not only about “indoor felt boots,” but also about other indoor shoes. They also walk light in severe frosts, because the floor is really warm without artificial heating.
I doubted it, but I just went and tried it myself. I’m convinced that it works, I go barefoot at home in severe frosts! The main thing: you don’t have to pay through the nose for electric heating! Of course, the construction of an insulated floor will also require costs, but they are not commensurate with those needed with other technologies.
So, I’m telling you what kind of “layer cake” we make using our neighbors’ technology. The bottommost layer will be plywood. We install logs above, their thickness is about 20 cm. Between the logs we put the actual insulation, two 10-centimeter layers. The third “floor” is a block, its thickness: 5 cm. Thermal insulation is laid between the bars. The top layer is plywood or subfloor with laminated chipboard sheets laid on top of it.
We use stone wool as insulation. The main thing: the Finns do not use rolled soft insulation, but high-density stone wool, with values from 90 to 110 kg/m3. It is not subject to winds, it is not blown at all. It is easier to install. And rodents, in the full sense of the word, are too tough.
Thank you all, friends, who were interested, be sure to LIKE and don’t forget to SUBSCRIBE. May ZEN be with you.
Floor insulation with penofol
Penofol looks like a layer cake. Foamed polyethylene is covered with pure aluminum foil. Available for sale in large rolls. The penofol sheet has a thickness of three to ten millimeters. It retains heat perfectly, provides high-quality sound insulation, and is safe for the environment of the home.
Foil penofol is an easy-to-work material
The effectiveness of penofol is based on the reflection of thermal radiation . This is how heat is retained indoors. This is due to high quality aluminum foil. Here its properties are close to those of precious metals.
I distinguish between penofol with two and with one layer of foil. In addition, there is self-adhesive penofol.
Penofol is susceptible to moisture. However, it is not capable of absorbing moisture on its own.
Penofol does not support combustion
The disadvantages of the material include low rigidity, which can create additional difficulties when working with it.
Attaching penofol may also require additional effort. Punch-out fasteners cannot be used, because this will lead to deterioration of properties. All that remains is special glue, which will also have to be purchased.
To work with vertical and inclined surfaces, it is advisable to take self-adhesive penofol .
Recommended for use as additional insulation. Serves no more than 5 years .
Insulated Finnish foundation: do it yourself
Along with the popular USP (Insulated Swedish Plate) foundation on FORUMHOUSE, another type of energy-efficient foundation is of interest to users. This is UFF, an insulated Finnish foundation, which is an insulated strip foundation with floors on the ground. This is exactly what we will talk about in today’s material.
Comparison of USP and insulated Finnish foundation
First of all, those developers who want to build UFF are those who think about how to level out a number of shortcomings (both imaginary and real) inherent in UFF. This is a low base. This largely reflects the Russian mentality and the fear that the low slab and the house standing on it will be covered with snow in winter. As the extensive practice of using USP by users of our portal shows, this characteristic of the foundation does not particularly affect the ease of its use.
The second indicator is the high cost of installing a USP in areas with large elevation differences. The large volume of preparatory excavation work is taking its toll. And the third factor is the high price of USP, or rather, the need to immediately pay a large amount for a whole range of works associated with the construction of this type of foundation.
USHP is a real system consisting of the foundation body itself, drainage, insulated blind area and all the necessary utilities: heated floors, installations for electrical cables and water supply pipes, sewage system. And the surface of the slab is already ready for laying the finishing coating.
In addition to all of the above, USP requires a high level of construction work culture from contractors, which is not always possible in our conditions. Hence: for many private developers, UVF is more understandable, less complicated to implement, and also allows you to stretch out the work over time.
In the end, UFF may turn out to be more expensive than USP; the possibility of “installment payment” for the entire cycle of work, as well as the usual high base or the possibility of laying a foundation on an uneven area, outweigh.
In its classic form, the UFF is a prefabricated strip foundation made up of 3-4 rows of KBB (hollow or solid expanded clay concrete blocks) (200x200x400 mm). The section of the tape is 600 - 800 (height) x 200 (width) mm. Each row of blocks is reinforced with two steel bars in “tens”.
Finnish slab, foundation. An important detail: the KBB tape is erected on a monolithic, reinforced concrete “heel”, measuring 600 (width) x 200 (thickness) mm.
The foundation is insulated from the inside with extruded polystyrene foam, after which the perimeter is filled with sand, the sand is compacted, and all necessary utilities are laid. Then a concrete screed with pipes and, as an option, a heated floor is poured.
Those. classic and well-known to the user of our portal floors are installed on the ground. Also, UFF, to reduce the cost and speed up construction, can be erected without the use of classical wooden formwork.
This is done like this: a trench is dug (in fact, only the fertile layer is removed), crushed stone is compacted into it, a plastic film is lined, the outer edges of which are placed on the KBB.
The blocks act as sides for pouring a concrete base, and also act as removable formwork. After the “heel” is poured and the concrete hardens, the blocks are removed and used for laying the tape.
How this was done is clearly demonstrated by the following photographs taken from the topic “Finnish Feng Shui near St. Petersburg” by portal user with the nickname Tim1313.
Complete solution
By definition, a foundation is a structure that transfers loads from a building to the ground. However, the Finnish foundation is always a comprehensive solution including:
- excavation;
- water supply and electricity supply to the house;
- reserve mortgages for communications;
- sewer line to the treatment plant;
- drainage system;
- storm drainage;
- protective grounding circuit;
- reinforced concrete load-bearing tape;
- plinth ready for finishing;
- waterproofing of load-bearing structures;
- protection of soil from freezing;
- radon protection system;
- floor insulation;
- house heating system - water heated floor;
- distribution of water supply pipes with hot water recirculation;
- routing of sewerage pipes with installation of drains;
- air intake line from the street for burning the fireplace;
- reinforced floor screed.
Warm floors using the Finnish method, which does not require electromats or pipes
You can unsubscribe at any time.
Let's start with the fact that for more than seven decades in a row, floors in almost all cases in Finnish residential buildings have been made not on joists, but on the ground with an insulated strip. Until 1962, the old Finnish system was used, the effectiveness of which cannot be argued today.
In Russia, as a rule, insulation is done in the traditional way. There is wind protection along the bottom of the joists, in the gaps they put roll-type insulation - 150-200, a vapor barrier or foil (reflector) on it, then a subfloor and a finishing floor on it. But in harsh climatic conditions this will not save.
In Finland they did everything a little differently. There, plywood was first laid, a 50-mm block was laid on top of it, between which thermal insulation was laid using the cross method. Next came logs 200 millimeters thick. Between them, 100 millimeters of insulation was laid in two layers. There was plywood again on top.
As a result, the floors were insulated by 250 millimeters using stone wool. This was a critically acceptable indicator. The developers' recommendations indicated an indicator of 300 millimeters. The significant difference between our and Finnish methods lies in the type of insulation. If in Russia it is a rolled material with a density of 12-25 kg/m3, then in Finland they mainly use slabs. To actually make the floor as warm as possible, it is important to choose the right stone wool. Its density should be 90-110 kg/m3. This type of wool is not blown through and is quite easy to install.
Perhaps someone will say that it is expensive. But if you look at the expense as an investment in the future and savings on gas bills, then it’s worth it.
Preparing the base
To install a heating structure along joists, you will first need to prepare a base on which the layers of the heated floor “pie” will be laid in a certain sequence.
Preparation consists of the following steps:
Stage one. The base of the subfloor is leveled. If there are defects in the form of cracks and chips, they are eliminated. The surface should not have a large slope.
Stage two. After the base is prepared, a layer of waterproofing is placed on it. Today, the market offers a large selection of materials that provide reliable protection against moisture penetration. For waterproofing under heated floors, polyethylene film is suitable. The sheets are laid overlapping, and the joints are sealed with tape.
Laying the waterproofing layer
Stage three. At this stage, the installation of wooden logs is carried out.
Stage four. Thermal insulation material is laid between the laid joists.
Installation of heat insulator
Stage four. The heating system is installed using one of the methods below.
Feet will not freeze on the Finnish heated floor, made without pipes and electricity
It is possible to make a warm floor without pipes and electricity using the Finnish insulation method. The material and installation method do not allow cold to enter the house. The thickness of the insulation and its type play a major role in making it comfortable to walk on the floor in the house. Expensive material will pay for itself in the savings from not wasted gas or electricity.
How does Finnish floor insulation work?
Insulating the house is the main factor in providing warmth in winter, and you won’t have to worry about it escaping to the street. In addition to the windows and roof, the weak link remains the floor, which can be cold and radiate a similar temperature into the room. A beautiful floor does not mean that it will be warm without additional heating. And this, in turn, costs the material, and then pays for the energy or gas used.
The floor can be made warm without pipes and electricity using the Finnish method. It is based on the fact that it should not be cold without additional heating. Therefore, it is intended to be mounted taking into account that it will not be cooled from below.
In Finland they stopped making floors using joists a long time ago; they are laid on the ground using insulation. When there is no space left where the wind can blow, then the floor does not cool down and is not blown through. But the quality of the insulation also determines how pleasant the floor will be for your feet.
How to make a Finnish floor without pipes and electricity
You can understand the difference in the quality of the floor if you know how it was done before and how it can be done in a modified version.
How it's done traditionally:
- wind protection is installed;
- logs are laid;
- Roll-type insulation 150-200 mm is placed between the lags;
- vapor barrier or foil on top;
- for vapor barrier subfloor;
- completes the finished floor.
With this arrangement, the floor can allow cold to pass through in harsh winter conditions.
How to make a Finnish floor without pipes and electricity:
- lay plywood on the ground;
- thermal insulation;
- top beam 500 mm;
- between the beams there is 200 mm insulation in a cross pattern so that the joints do not coincide;
- vapor barrier;
- ventilation beam 200 mm;
- insulation between the beams 100 mm in 2 layers;
- plywood;
- main floor
The main secret of a warm floor is the use not of roll insulation, but of stone wool with a density of 90-110 kg/m3.
The advantage of such insulation is that with high density, it does not allow cold air to penetrate from below. In addition, mice do not like it; on the contrary, they live quietly in rolled insulation with a density of 12-25 kg/m3. Good stone wool in the form of slabs is expensive, but it will pay off the costs that would have been spent on paying for gas or electricity.
Advantages
What are the advantages of polystyrene foam mats for water heating?
- Thanks to the manufacturing material, the mats significantly lighten the design of water heating, which weighs a lot in the presence of a concrete screed, the weight of pipes and water in them, and dynamic load during operation.
- A significant advantage is the simplicity and speed of installation of the structure as a whole, the thoughtful placement of markings on both sides of the mat, and the successful design of latches and locks.
- The system of latches and locks allows you to create a continuous coating that does not require additional gluing with tape or laying adhesive tape at the joints of the slabs.
- Thanks to the material with minimal thermal conductivity, optimal heat distribution is created into the heated surface.
Technical characteristics of extruded polystyrene foam boards When installed correctly, Knauf guarantees 100 years of operation of such a floor. Among the disadvantages, one can note the relatively high cost of heated floors, but the quality and duration of operation fully compensate for this disadvantage.
When designing, it is important to take into account all the gaps that should be left between the laid pipes, and then attach the chipboard strips taking into account these gaps.
Just like in Finnish houses: heated floors without pipes or electrics
Despite the summer outside, it’s time to think about insulating your home for the winter. A heated floor system provides excellent assistance in this regard. However, it is not necessary to install electrical circuit breakers and pipes, which requires significant time and physical resources. You can use simple Finnish technology, which has been in use for several decades, and it does not lose its relevance.
Floor insulation in Finland differs from domestic technology
In Russia, the traditional way of creating a heated floor system involves installing logs. Rolled insulation 150-200 mm, wind protection, vapor barrier, foil are laid on top of them. This technology is considered effective, but in reality it does not always give the desired result. In the conditions of harsh Russian winters, a multi-layer structure consisting of a subfloor, moisture insulation, insulation, vapor barrier and joists may not help at all.
Therefore, in Finland for almost seventy years they have not used logs, but laid them on the ground with insulated strips. In Russia, they abandoned the Finnish system back in 1962, and it was in vain. As of the 20s of the twenty-first century, it does not lose its relevance, despite the emergence of innovative materials and the constant improvement of construction techniques.
Installation technology
The Finnish slab foundation technology includes the following stages of construction:
- preparatory work
- installation of sand cushion
- installation of a waterproofing layer
- mortgage device. Utilities are being installed
- pouring the slab
- creating a layer of insulation
- installation of a slab with a heated floor system and the necessary communications.
First, the height difference between points on the surface where the house will stand is calculated. To do this you need to use a level. This will help create an accurate house construction project and level the site relative to the selected point. Next, the foundation is marked. The top layer of soil is removed from the site (as a rule, it can be useful for creating a garden, since this layer is most often fertile). If the soil is homogeneous, then the settlement of the structure will be uniform and without distortions. One of the difficult types of soil to work with is rocky soil.
You can mark the territory using pegs and fishing line. Pegs must be driven in around the perimeter of the construction site. A fishing line is stretched between the pegs. To create a Finnish slab foundation, you need to dig a pit. The depth will depend on the basic characteristics of the soil, including the level of freezing and the groundwater level. However, the Finnish stove does not require a deep pit.
The pit is covered with geotextiles, which have a density of 350. The geotextiles are covered with crushed stone. The main water pipes and special pipes through which the electrical cables will run are installed. The design of these communications must be clear and carefully planned, since it will not be possible to change the location later.

