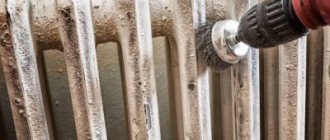
The service life of cast iron heating radiators is so long that residents take their work for granted, so if a leak or fistula appears in the wall of the device, they do not know what to do. It is especially unpleasant if the breakdown occurred in the midst of cold weather, but even in the off-season you cannot leave heating elements unattended. As a rule, preventive maintenance carried out by heating network workers can reveal the presence of contamination or leaks in the device.
In this case, there are simple ways to eliminate a leak in a cast iron heating battery.
Construction of cast iron radiators
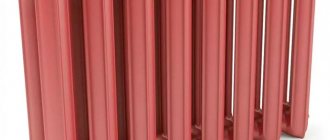
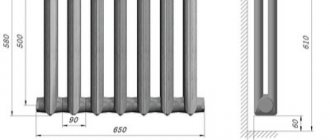
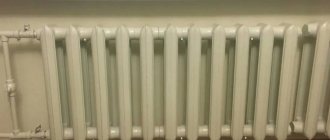
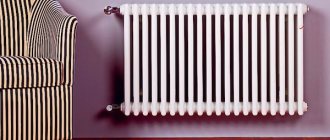
This type of heating device consists of sections. Models of the old type, even today, are produced in the form of “accordions”, while the new generation has a flat outer panel, which provides better heating of its entire area.
When operating, these devices use two types of heat transfer:
- Radiation, or as professionals call it, radiation accounts for up to 25-30% of heat. It not only heats the air, but is transferred to nearby objects, providing better heating of the room.
- Convection produced by the heating battery ensures constant movement of air masses around the room and accounts for about 75% of the heat transfer.
The structure of the cast iron battery, despite all the external changes, remained the same. It consists of sections equipped with:
- plugs;
- locking devices;
- traffic jams;
- shank and thermostat;
- locknuts;
- nipples and gaskets.
No matter how strong cast iron is, even it has its limits. As a rule, the service life of cast iron radiators is 25-30 years, and with proper care and optimal operating conditions they can operate without interruption for 50 to 100 years.
The same cannot be said for the parts that hold the sections together, such as spacers. With frequent water hammer, they can “sway” or crack over time. In this case, a leak appears between the sections of the cast iron battery, which, if not eliminated in time, can cause a serious accident and a threat to human health and life.
To avoid this, you need to check the condition of cast iron radiators after the end of the heating season. In this case, you can detect completely different problems in the heating system.
What to do in case of a breakthrough: step-by-step instructions
If your battery is leaking, you won’t be able to fix the leak on your own, but you can minimize the consequences and prevent serious damage. The sequence of your actions should be like this:
- Remove children and pets from the room; if hot water is spurting out, you need to throw something thick, such as a blanket, over the radiator to prevent thermal burns.
- Turn off the power to the apartment or at least turn off electrical appliances that are located near the battery.
- Turn off the water. If there are no shut-off valves in the apartment, then you can shut off the coolant supply at the main pipeline at the entrance to the basement, but this method is used in exceptional cases, because the entire house will be left without heat.
- Call an emergency plumbing team.
- Take possible measures to eliminate (reduce) the leak.
How and what can you fix with your own hands?
If the leak is small, you can try to fix it yourself. For this you will need:
- Find the exact location of the leak. Use dry toilet paper (napkins or newspaper) for this. By looking at the wet spots, you will understand where the water is flowing from the pipe.
- If a leak has formed in a cast iron battery, it is eliminated with a self-tapping bolt, which is screwed into the resulting hole.
- If you have the necessary materials, you can make a plaster-cement bandage. Strips of a regular bandage are moistened in cement or gypsum mortar and applied to the leak site.
- If a leak has formed at the threaded connection between the pipe and the radiator, you can use a salt dressing. Strips of bandage soaked in water are rolled in salt and applied to the leak site. Salt dissolves in water and cokes the point of damage. A cement bandage is applied on top.
It is important to understand that all these measures are temporary; if even a small leak in the system occurs, over time this can lead to an emergency and serious damage. Therefore, it is better to replace such a device
Where to go in other cases?
If a serious leak occurs, you need to call the management (maintenance) company. It is her responsibilities that include eliminating leaks and organizing repair work.
Drawing up an application
After eliminating the malfunction, a report is drawn up, which records the amount of damage. If heating radiators need to be replaced, residents must file an application addressed to the management company (who should repair and replace heating radiators in apartments?). The application is drawn up in any form, but it must contain the following information:
- name of the management company and details of its director;
- the applicant’s personal data and specific address;
- text demanding replacement of radiators and indicating the cause of their damage;
- signature and date of submission.
We do not recommend completing the documents yourself. Save time - contact our lawyers by phone:
The application must be registered as a written appeal, in which case it must be considered within 3 deadlines and a written response must be given, in accordance with paragraph 34 of Government Decree No. 416.
The most common problems and their symptoms
Although cast iron perfectly tolerates the imperfections of the central heating coolant, and the radiators made from it have wide enough channels so that debris does not accumulate in them, problems can arise even with them. And this despite the fact that there is no wear to this metal. The following factors may be to blame for a cast iron battery bursting or a fistula appearing in its walls:
- Everyone knows the heavy weight of radiators made of this metal. If during installation of the structure, insufficiently strong brackets were used, or there were not enough of them, over time it may sag under its own weight and tilt. Even a slight deviation of just a couple of millimeters will reduce the efficiency of the device, and if the distortion is not corrected, then after a few years corrosion will appear in the place where the coolant is missing. At first it will look like a small brown spot, which will grow with each heating season until a fistula forms in its place.
- The reputation of “long-living” is characteristic of both old and new models of cast iron radiators, but provided that they are installed in the contour of an apartment building no higher than six floors. If the heating network is reliable and does not suffer from strong water hammer, then they can be installed in nine-story buildings. Otherwise, under strong water pressure, the cast iron battery may leak at the joints of the sections. In the event that a cast iron battery leaks during the heating season, you need to know in advance how to repair it. Today there are a lot of sealants that will help the device “hold out” until warm days.
- The internal structure of domestic batteries is such that the cast iron from which they are made has roughness that is completely absent in imported analogues. That is why a lot of debris is deposited on the walls over time, which fills the water in the heating network. Suspensions, particles of rust and metals, all settle and make the wide channel so narrow that it is no longer able to easily pass coolant under high pressure. In this case, the structure may burst anywhere, and then you will have to urgently decide how to eliminate the leak in the cast iron battery.
- Nipple gaskets and threads are the weak “link” of heating devices . If cast iron does not have a statute of limitations, then the same cannot be said about the parts that make up the battery. In order not to lead the situation to the point where repair of the cast iron battery is required, the connections must be checked after each heating season and the gaskets on them must be periodically changed.
As practice shows, most often it becomes known that something is wrong with the heating system when repair of cast iron radiators is already required. To find out about a problem in advance, you need to listen for “help signals” that indicate the presence of defects.
How to quickly fix a leak
Since operating a vehicle with a current radiator is not possible, the problem must be urgently resolved. As a rule, small cracks in the radiator housing, which can only be detected when the engine is running, can be eliminated independently and quite easily by using appropriate sealing compounds.
If the leak is more severe and is detected even when the car is turned off, this may indicate a violation of the integrity of the radiator due to a breakdown or intense corrosion processes occurring inside. They often start when the driver has chosen the wrong antifreeze/antifreeze. Then the cracks are large in size, and the situation cannot be corrected with sealant - either the radiator will need to be replaced, or it will be dismantled and then soldered. How to work with sealant is shown in the video: Before starting repair work, you should make sure that it is the radiator that is leaking, and not the pipes. If a leak is detected visually and its size is small, the best way to solve the problem is to use a special sealant. It is capable of high-quality sealing of small cracks, is distinguished by its high efficiency and ease of independent use. This composition is especially convenient on the road, because when the cooling radiator leaks, and there is no specialized service or just a populated area nearby, further movement may be impossible.
However, its purchase will not help much in case of sudden repairs. Welding can be handled by a specialized specialist who has at least three years of relevant experience.
Welding is relevant when repairing cast iron radiators, as a way to ensure a permanent connection. But the difficulty of its use lies in the fact that this metal is difficult to weld. You can find a way out of this situation - use the so-called cold welding. As for other materials used in heating systems, more modern types of connections are used for them.
The first signs of trouble
There are a number of factors that indicate that something is wrong with the heating circuit or batteries. These include:
- Feeling of coolness in the room. In this case, it is worth asking your neighbors how warm it is in their apartment. If everything is in order, then you can start looking for problems in yourself. The reason may be simple contamination of the channels, misalignment of the device, or the presence of fistulas. In the first case, it is enough to wash the batteries, in the second, fasten or change the brackets and check the correct installation with a building level, and in the third, provide assistance to the “sick” radiator.
- If an incomprehensible coating appears on the battery, visible to the naked eye, then the reason for this is worn out gaskets. You will have to turn off the system, remove the batteries and install new ones, for example, from paronite.
- The leak is immediately noticeable. If it is small, then you can get by with a clamp or cold welding, otherwise you will have to completely change the device.
It should be remembered that even small defects can develop into a big problem if they are not eliminated in time. Don't rely on temporary clamps and patches. Only heating network specialists can determine the reliability and tightness of the heating circuit and its elements.
Eliminating a leak at the connection between the radiator pipe and the main pipe
Leaks at the joints of the pipe and radiator pipe are caused by:
- improper installation when connecting the battery. The connection is made either by welding or threading. In both cases, the slightest carelessness during assembly, for example, non-compliance with welding conditions or misalignment of the pipes being connected, when their ends are pulled together with force to align, different pipe diameters will manifest themselves already in the first months of operation;
- mechanical bending loads in the joint area. They arise as a result of a simple everyday situation, when one of the residents uses the battery as a support, wanting, for example, to straighten a curtain on a curtain rod. Even if a hundred-kilogram owner stood on the radiator, there would still be a distortion and a break at the junction of the two pipes.
To stop the leak, you can use a car clamp or use a rubber band and a piece of soft wire. The rubber from a bicycle inner tube will cope with the task of temporarily stopping the leak. You need to prepare strips 4-5 cm wide and up to 35 cm long. Secure the rubber strip wrapped around the damage with wire. Automotive clamps are good because they are inexpensive and allow the possibility of securely and evenly fastening them to a damaged joint, without the risk of overdoing it when tightening, as is the case with wire.
Elimination of fistula
For any breakdown there are a number of reasons accompanying it. A fistula on heating system pipes or on a radiator is no exception. If a small brown spot appears on the elements of the heating network, you should not think that it is paint coming off. In fact, this is the beginning of an often irreversible process, but knowing how to repair a fistula in a cast iron battery, you can stop the destruction and extend its service life. Causes of corrosion:
- Taking into account the frequent increases in the cost of utilities, some craftsmen are cunning and, in order to save energy, connect a neutral cable to the heating circuit. The currents that begin their “journey” through the pipes through the coolant are what cause the formation of corrosion. You can identify a dishonest neighbor if there are several fistulas and they appear with a certain regularity. Calling the appropriate service to identify the intruder and repairing cast iron batteries yourself will help save the situation.
- Too much acidity of water can harm even corrosion-tolerant cast iron.
- The batteries have expired or deposits on the battery walls have damaged the metal. In this case, even a small fistula or crack under the influence of water pressure can cause the battery to burst and a stream of hot water to flow from it.
Any of the options requires urgent intervention. If the cast iron battery leaks only slightly, then you can do without disconnecting the circuit and dismantling it. A clamp can save the situation. If the water only drips, then a one-sided clamp will do, but if it runs in a thin string, then it is better not to risk it and use a double-sided clamp.
In the event that the coolant ruptures the place where the fistula was located, the question immediately arises whether it is possible to weld a cast iron battery . As a rule, cold welding becomes an emergency solution, but even if it has restored the tightness, it is necessary to call specialists from the heating network to check the condition of the heating system.
The main reasons why pipes leak
The main cause of leakage is oxidation. Corrosion mainly occurs on the outside of the pipe. This is explained by the fact that the material is constantly influenced by unfavorable external conditions - temperature changes, air and water. All this contributes to the appearance of rust on the material. When such a problem occurs, a leak forms. It is typical for steel and cast iron devices.
The cause of leaking plastic pipes is the use of material for the heating system that is not intended for this purpose. In order to save money, pipes for cold water supply are installed. This is the main mistake. When hot coolant is supplied, they are deformed or mechanical defects appear on the material, which leads to a leak. This problem also occurs on pipes intended for the heating system. The reason is poor quality material.
Leaks also appear due to poor installation of the heating system. Poorly performed welding of butt seams leads to this problem.
Another reason for a leak is wear and tear on the heating system. If the operational period of the material has expired, defects appear on it.
Mechanical damage causes leakage. This applies to plastic materials.
Methods for repairing cast iron radiators
There are several methods that allow batteries to last not only until the end of the heating season, but also for a couple of years. These include:
- If there is a leak at the junction of sections, it can be quickly eliminated using a bandage and epoxy glue. The material is impregnated with glue and wound around the leak. After it sets, you can paint this place to match the battery, but the main thing to remember is that such an “operation” is considered temporary, and it is better to buy and install a new section after the cold weather ends.
- If a fistula or crack is detected, a clamp will be required. You can buy it at a building materials store, or you can make it yourself from rubber or tin.
- Cold welding for cast iron batteries is the best way to quickly eliminate a defect. This is a special sealant that looks like children's plasticine. It must be thoroughly kneaded and applied to the damaged area. The product sets quickly, is resistant to temperature changes and is quite suitable for quick and temporary repair of a cast iron battery.
Knowing how to weld a cast iron battery using a welding machine with an inverter circuit, you can save the device from leaks for quite a long time.
conclusions
There are several ways to eliminate emergency leakage of heating radiators:
- using a self-tapping bolt;
- using a cement-plaster cast;
- using a rubber pad with wire or a clamp;
- using fabric impregnated with waterproof and heat-resistant glue;
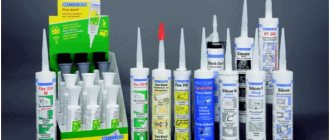
- using a special sealant;
- using welding.
All of these methods of eliminating leaks are temporary measures that make it possible to have time to purchase new heating devices and plan their replacement.
The leak is repaired using a regular bandage or strip of fabric and epoxy glue. The bandage is impregnated with glue and tightly wrapped around the leak site. After the glue has dried, the repaired area is painted the same color as the battery. This “ambulance” ensures tightness for 1-2 years.
How to seal a heating radiator Miraculously, a problem with an aluminum heating radiator arose when frosts set in throughout Russia. Moreover, the radiator leaked late at night. I woke up several times at night because the heating radiator was making noise. I also thought that this was not without reason and was very similar to depressurization. Alas, I was not mistaken - in the morning there was a decent puddle under the radiator on the laminate floor. Initially I thought that the problems were related to the faucet, but then I discovered swollen paint on the side surface of the radiator from under which water was oozing. I was able to determine the location of the leak by the swollen paint. Having removed the swollen paint with a flat screwdriver, I saw the cause of the leak - two small holes. Two holes in the left sections of the radiator. Most likely, the microscopic hole appeared a long time ago, since just a year ago, a noise similar to a clicking emanated from this battery. I kept blaming Mayevsky's damaged faucet, but even after replacing the faucet, the noise did not stop.
What to glue with?
After searching for information on the Internet, I decided to buy cold welding. There was no choice, so I took what was in the store - “Almaz Universal Cold Welding Adhesive.” Almaz Cold Welding Adhesive Previously, I had the opportunity to use this glue to repair a leak in a steel heating pipe under pressure of about 2 atmospheres. It was not possible to completely eliminate the leak, since it was not possible to drain the water from the system and properly degrease the surface of the pipe at the place where the glue was applied.
Equipment:
- Plastic tube packaging;
- Glue wrapped in film;
- Instruction insert.
What does Almaz universal glue:
- Parts made of ferrous metals;
- Parts made of non-ferrous metals;
- Plastics;
- Glass;
- Ceramics;
- Tree;
- Marble;
- Concrete;
- Granite;
- Plexiglas.
Be sure to look at the manufacturing date on the back of the insert - the glue has a shelf life of two years. The shelf life of cold welding does not exceed two years. The adhesive is two-component - before mixing, the components are inert to each other. The adhesive is two-component. Visually it looks like a brown core and a white shell
Instructions for using Almaz welding adhesive:
Clean off dirt, degrease and sand the parts at the joints. Cut off the amount of compound required for repair, thoroughly mix its components with each other with wet hands (use gloves) until a working mass of a uniform color is obtained. The composition should warm up in your hands and become plastic and sticky. Immediately apply the composition to the surfaces to be glued, if necessary, fix them for 15-20 minutes with a clamp or tourniquet. Curing time is 1 hour, after which the composition can be processed, drilled, threaded, painted. Final strength is achieved after 24 hours, after which it can be subjected to structural loads. Wrap the remaining adhesive with film, secure with an elastic band and pack in a tube for reuse.
Gluing process
Before gluing the radiator, I turned off the taps on it and waited until water stopped flowing from the leak. The heating radiators are equipped with bronze half-turn taps with an American nut. Thanks to this, you can close the taps and dismantle the radiator without draining the water from the system. If necessary, you can always loosen the American nut to quickly drain the water. For these purposes, it is convenient to keep a plumbing wrench on hand. When the gluing process began, the surface near the damaged area was dry. In principle, Almaz cold welding can be glued to a wet surface, but I prefer a dry one. Alcohol applied to a cotton pad was used as a degreaser. The adhesive area was degreased with alcohol applied to a cotton pad. After cutting off the glue and mixing the components, I got a ball with a diameter of about 15 mm. The composition is ready for use. Cold welding was first applied by hand and then pressed tightly to the radiator using the tip of a screwdriver. It doesn’t look very neat, but the glue is applied between the fins of the radiator, where it is still not visible
To improve the quality and speed up gluing, the composition applied to the radiator was heated using a household hair dryer for 5-10 minutes.
Heating with a hairdryer allows you to get better bonding and speeds up the hardening process of the composition. In principle, after 10 minutes, the glue has hardened considerably. However, he decided not to rush and opened the taps only after an hour. The leak has now been eliminated.
Sequence of work
Depending on how serious the breakdown is, the steps to fix it depend. So, if the leak is small, then you can do without disconnecting the battery from the circuit, and for repairs you will need:
- Place a container under the breakdown site in case of a breakthrough or an oilcloth with rags to collect water.
- The area of the rupture or crack must be cleaned down to the base using a cable or sandpaper. It is necessary not only to remove a layer of paint, but to expose the metal itself.
- Degrease the prepared area with some solvent.
- If special glue or epoxy resin is used to repair the damage, then strips of thick fabric or bandages will be required. Apply the product to them and wrap several layers around the tear site.
- If cold welding is used, fabric is not needed.
- A clamp is put on and screwed onto the area captured by the sealant, but it is important to ensure that its clamps are on the opposite side of the leak. For example, a crack has formed on the inside of the radiator, which means the clamps will be on the outside, and vice versa.
- If the breakdown is serious and hot water is gushing out of the battery, then you need to call an emergency team, and not try to stop the leak yourself without the necessary tools.
Even the highest quality repairs do not guarantee long service life of the device. Restored cast iron radiators will still have to be replaced, and the sooner this is done, the safer it will be in the apartment.
The pipe is leaking - what to do at the first stage
In the event of a fistula appearing on the central heating riser, from where water is gushing out, we offer the optimal plan of action:
Organize the coolant drain into a bucket or basin by quickly wrapping the pipe with any rag. This way you will preserve the flooring, personal belongings and furniture, and prevent flooding
Proceed with caution - in winter the temperature of the network water reaches 90 ° C.
Spend 2-3 minutes calling the dispatcher of the heating supply organization. Report the accident, call the plumbers. While the repairmen are getting there, try to close the riser yourself
Too hot a coolant will still not allow you to close the fistula under pressure. Taps should be found in the basement heating point located under the entrance. Observe where the riser penetrates the ceiling and close the nearest valve. As a last resort, turn off the main house tap during repairs.
In the current reality, craftsmen often have to wait 2-3 days (reasons: holidays, weekends, accidents at other facilities). It is impossible to leave residents without heat for a long time, so in case of delay, make an improvised clamp from scrap materials:
- Find a rubber glove, a bicycle tube, or a ready-made medical tourniquet. The second component of success is soft steel wire with a diameter of 2-4 mm.
- From a glove (bike inner tube), cut a strip 4-5 cm wide, as shown in the photo.
- Applying the end of the strip to the pipe 1 cm below the fistula, wind it with tension. The goal is to tightly seal the hole with several layers of rubber.
- Hold the “bandage” with your hand and secure it with wire. It is better to wind the latter tightly, turn to turn, helping with pliers. Now the common valve in the basement can be opened.
Also use the procedure described above when a cast-iron central heating radiator is leaking heavily and there are no shut-off valves. Typically, radiators leak at the joints between sections, and a temporary clamp should be applied there.
When a leak forms from under the nut, the connection must be repacked
If a trickle of water is observed at the place of the threaded connection of iron pipes, you need to unscrew the fixing nut from the coupling with a gas wrench. Wrap the exposed thread with a braid of fresh flax (clockwise) and tighten the nut again. The plumber will show the considered sealing options in the video:
Watch this video on YouTube
In a private home, eliminating a leak is greatly simplified - just shut off the required valve or quickly empty a section of the heating network. It is not necessary to wind the rubber; it is better to repair the hole using a more reliable method. When the leak in the apartment is temporarily fixed, you don’t have to wait for locksmiths - choose the right time and finally seal the hole using any of the methods presented below.
Elimination of leaks at joints
Very often, the coolant begins to leak where some elements are joined - for example, a pipe and a radiator are connected. There can be quite a few reasons for this. Most often, the problem is the wear of the material with which the threads were sealed during installation.
If the coolant does not gush out like a fountain, but only drips slightly, and for some reason you do not have the opportunity to stop the heating system to carry out a full repair, then you can try the following method. Drip a small amount of alcohol onto the tow that is wrapped around the joint. Then apply BF glue there.
When interacting with alcohol, it will become liquid and can flow into the connecting element, and then harden there. But the disadvantage of this method is its low reliability. In addition, someday later you will have to take a very long and painful time to disassemble such a glued joint.
Therefore, it is still advisable to ensure that you have the opportunity to undergo normal repairs. It consists of disassembling a leaking threaded connection and then reassembling it, making it better. Naturally, this procedure can only be carried out after stopping the supply of coolant to the segment of the system being repaired.
- Carefully unscrew the nut. This must be done slowly so as not to damage the thread.
- Once the thread surface is free, remove all sealants that were used during installation. As a rule, this is tow or FUM tape. Don't forget to clean the sealant as well. You can go through the sandpaper a couple of times, bringing the cleanliness of the thread to perfection. Finally, it is advisable to degrease the surface using acetone or the like.
- Next, do everything in reverse order. Screw on a new FUM tape, wrap flax tow on top, lubricate the whole thing with a high-quality sealant and assemble the connection. Tightening the nut must be done no less carefully than unscrewing it. This is especially true for old radiators, where the elements are already on their last legs.
If a leak occurs at the junction of radiator sections, the problem is usually deformation or wear of the sealing gasket. Ideally, this element should be replaced with a new one. To do this, the battery needs to be disassembled into sections - step-by-step instructions for carrying out this work are on our website. To disassemble you will need a special plumbing wrench and quite a lot of patience, but it is quite possible to complete all the steps.
After disconnecting the sections from each other, clean the joints from all contaminants - of course, initially remove all old sealing materials. Then install new gaskets. It is better to choose non-rubber and non-silicone ones, since they do not withstand high temperatures very well and, as a result, do not last very long. The best option is paronite, which will perform its functions perfectly for many years.
After installing the new gaskets, reassemble the radiator and connect it to the system. If during disassembly you find that the problem is not in the seal, but in damage to the section itself, then the best option would be to replace it.
Instead of regular epoxy, you can use special products called cold welding. Working with them is done in much the same way. Some compositions can be used even on wet surfaces, that is, if it is not possible to stop the flow of coolant.
Cold welding can be liquid or solid. In the first case, the work is carried out according to the same principle as with conventional epoxy glue. In the second case, the product is kneaded and then used as putty. When using it, be sure to wear gloves, since the composition is chemically active and can adversely affect the skin.
Regardless of what product you use to seal the leak between the sections, remember that this solution is temporary. After the end of the heating season, you will still need to take this issue more seriously, disassemble the connection and fix the problem. Good luck!

