Living in a country house and having external water supply and sewerage communications, pipes are laid below the freezing point.
In most of our country, this mark is at a level of no more than 2.5 m.
What to do if you cannot lay a pipe with water to such a depth? Let's say your site has rocky soil or groundwater is too close to the surface?
Or an extended piece of water supply runs in the unheated basement of the house, where there is a risk of freezing. You can, of course, use special pipes, but it will cost you a pretty penny.
Therefore, it is much more profitable to warm the pipe with an inexpensive heating cable.
Types of cable and how it works
The most common types of heating cables are:
- resistive
- self-regulating
How do they differ from each other and which one is better for plumbing? Resistive ones can be single-core or two-core.
The operating principle of this brand is very simple. Inside the cable there is a core made of a special alloy with high resistance.
When current passes, the core heats up. You can purchase ready-to-install kits or order the required footage.
Which is better, single-core or double-core option? With a single-core cable, it is necessary to make a loop and pull the cable twice from the beginning to the end of the pipe in order to supply 220V voltage to its ends.
With a two-core one everything is much simpler. You measure the required distance, at the beginning of the cable line you apply phase to one core, zero to the other, and at the end you simply short-circuit them together, installing an end coupling.
This type of heating will require temperature sensors and a thermostat, similar to what is used in heated floors.
Mistake #1
You cannot use a resistive cable without a regulator!
Otherwise, it can simply melt and burn the pipe.
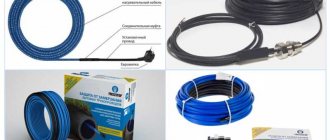
Types of heating wire with characteristics
Heating cable for water supply.
Heating wires convert electrical energy into heat due to high internal resistance. These are flexible products that can be laid on surfaces of any configuration. The wire has at least 2 layers of reliable insulation that protects from harmful external influences. The design may include a foil screen or copper braid that prevents short circuits and neutralizes the magnetic field.
There are 2 types of heating wires produced - resistive and self-regulating. The action of the former is based on the ability of metals to heat up when electricity passes through them. In self-regulating designs, heat is generated by a special matrix, and the conductors remain cold.
The main characteristic of all heating cables is the electrical power they consume per 1 linear meter. m. To place a heating product inside the pipeline, 10 W/m is enough. Outdoor installation requires an increase in power density of 20 W/m and more.
When choosing a heating wire, other characteristics are taken into account, including:
- Maximum permissible line length including branches. The parameters are directly influenced by the thickness, resistivity of the conductor, and the number of cores. If the permissible length is exceeded, the entire heating system may fail.
- Limit operating temperature - characterizes the ability of the product to maintain it for a long time. 3 lines are produced, each of which is designed for operation in appropriate conditions.
- Maximum permissible temperature when switched off.
Heating cables are available in round and flat sections. The latter are more suitable for outdoor placement. Sold complete with a wire for connecting to the working part. To save energy consumption, a temperature sensor with automatic control is used. Self-regulating options are used with a compact thermostat, which is installed on the supply wiring.
Self-regulating cable - operating principle
Self-regulating, there is no closed loop or loop.
Mistake #2
There is no need to short the cores together at the end of the cable!
Between them, along the entire length, there is a cunning polymer, which, when cooled to a certain temperature, forms different conductivity bridges.
That is, at the cooling point, the loop of two wires closes on its own, current begins to flow between them and the cable heats up. In this case, you will have different temperatures along the entire length of the cable.
The hottest point will be in the coldest place. But at no point will the temperature exceed 85C. The nominal heating is 65 degrees.
This cable is completely fireproof. Even if it is overlapped on itself, it will still not burn.
Mistake #3
However, make no mistake, when the weather is warm enough outside, it does not completely turn off on its own.
He simply reduces his consumption several times. There is no such option for its consumption to be zero when switched on.
Self-regs from different manufacturers differ in the quality of the so-called matrix. This is the same miracle polymer that transmits electricity through itself.
The vast majority of specialists use self-regulating types of cable to heat pipes. This is explained by their simpler operation and simplified installation.
You don't have to buy and connect a thermostat.
All you have to do is plug it into a power outlet, and it will immediately start working as it should.
With or without thermostat?
If you want to pay a pittance for heating the water supply, it is better to install a thermostat. Even if you are planning to install a self-regulating heating cable. Basically, the characteristics are as follows: switches on at +3°C, switches off at +13°C.
If your water is supplied from a well, it will never have a temperature of +13°C. It turns out that the heating will work all the time, even in spring and summer. In the summer, of course, the cable can be turned off, but in the spring and autumn this cannot be done due to the possibility of sudden frost. With wells it is somewhat simpler, but not much - in summer the water there can have a temperature slightly above the shutdown threshold. But this is in the summer, and during the hottest period. And in general, why do you need to heat, say, the water that goes into the drain tank? And you will still heat the one that goes to the kitchen or shower with boilers or instantaneous water heaters.
In any case, it turns out that a thermostat is needed. On it you set the shutdown temperature to around +5°C. The costs of heating the pipeline fall significantly. At the same time, the service life of heating cables increases significantly - they have a certain service life of working hours. The less they work, the longer they will serve you.
Heating cable for water supply - connection diagram to the thermostat
When installing a water heating system with a thermostat, you will also need to install a temperature sensor. There is a difficulty here. It must be placed on the pipe so that it is not affected by the temperature from the heaters. That is, it does not need to be thermally insulated from the pipe, but it is necessary from the cables.
It is advisable to install the thermostat itself indoors. It is connected to the house electrical panel through a circuit breaker and, preferably, an RCD. The power consumption of the heating cable is small, so the rating of the machine can be about 6A, the rating of the RCD, choose the nearest larger one, otherwise the leakage is preferably 30 mA.
Connect the heating cable for the water supply to the corresponding connectors on the thermostat housing. If there are several branches, they are paralleled. A temperature sensor is connected to adjacent contacts. Each thermostat has markings that make it clear what needs to be connected and where. If there is no marking, it is better to buy another one: the performance of this copy is very doubtful.
Food and non-food - 3 differences
Self-regulating cables are divided into food-grade cables, which can be laid directly into the pipe, and non-food-grade cables, which can be laid on top.
How do they differ from each other structurally? Firstly, the size.
Food grades, with fairly similar characteristics, have a smaller cross-section so as not to occupy useful space inside the water supply. Compare, the most common dimensions for external ones are 7*14mm, 7*15mm, and for internal ones – 5*7mm.
Mistake #4
You can't go wrong with the size, and such a cable can actually reduce water pressure.
At the same time, do not forget about the end coupling, which has a cross-section 1.5-2 times larger than the wire itself.
The second difference is the mandatory presence of a screen. External ones may not have it.
And thirdly, and most importantly, the external insulation material.
Here, for example, is a food option.
On the outside we have:
- fluoropolymer shell
This shell is chemically inert to aggressive environments and does not decompose inside the water supply.
Next come:
- armored, protective screen or braid
Mistake #5
Without such a grounding screen, the cable inside the pipe cannot be used.
- insulation layer
- two copper strands with a polymer between them
For the non-food model, the shell consists of ultraviolet-resistant polyolefin.
Self-regulating - pros and cons
The operating principle of a self-regulating cable differs from resistive cables.
This is inherent in the design itself, which consists of the following elements:
- 2 copper cores in a thermoplastic matrix;
- 2 layers of internal insulation;
- copper braid;
- external insulation.
The features of the device result in advantages, including:
- Universal application. Used to heat pipelines from the inside and outside, as well as tanks and roofs.
- Economical energy consumption. Self-regulation is designed so that in the area with the minimum temperature the heating is greatest, warm sections consume less current.
- Convenient installation. The wire can be cut according to special markings and extended without fear of loss of functionality. Not afraid of overlaps.
- There are no overheating or cold spots. Length does not affect heat transfer.
The only drawback is the high cost - the cheapest self-heating cable is 2 times more expensive than a resistive cable. But it has a long service life - up to 10 years.
Operating principle of a self-regulating cable
Thermal regulation is carried out by a polymer matrix including carbon. Under its influence, conductive bonds of varying strengths arise depending on the temperature. When the product is connected, a current passes through the conductors and carbon contacts, which heats the matrix. As the temperature increases, the distance between its graphite components increases, which leads to an increase in resistance. The current drops and cooling occurs. In this way, continuous thermoregulation of the heating cable is carried out.
Which cable to choose?
The primary purpose of the heating cable is to prevent the water in the pipe from freezing. And this can only be achieved with sufficient power.
Which one should you choose in your case? In domestic conditions, a water pipe with a maximum diameter of 32 mm is usually heated.
For such a pipe, a cable with a power of 16 W/m is sufficient. For larger pipes from 50 to 110mm, choose a power of 24W/m.
If you are extreme and do not insulate the pipe at all, then such a water supply system will have to be wrapped with a cable of at least 32 W/m.
If the required power is not available, you will need to wind two cables at once.
Installation of an external heating cord, recommendations
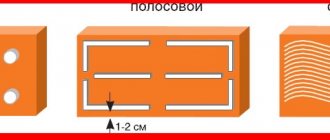
When installing the wire, two methods are used: linear arrangement along the pipe or tangential wrapping.
Adhesive tape or synthetic cable bandage is used as fastening. The distance between the fastening points should not exceed 200 millimeters.
Often, to increase the efficiency of heat transfer, the pipe is initially wrapped in aluminum foil (this can significantly increase the heating area), to which the heating cable is directly attached. This method is recommended for installation on plastic products, which have low thermal conductivity compared to metal ones.
When laying the heating element, you should avoid creating kinks and make turns at an acute angle to avoid accidental damage to the electrically conductive wires and damage to the insulating layer. The final stage will be the installation of thermal insulation material.
The pipe is frozen - the reason
All heating cables operate normally only if the voltage corresponds to the nominal values specified in the product data sheet. If you have problems with the voltage at home, and it rarely rises above 180-190V, then do not be surprised that the selected power may not be enough, and one day the pipe will freeze.
Why does the cable itself sometimes die? Self-regulators are afraid of frequent switching on and off. They usually have a finite number of such switchings.
They also fail due to improper connection to the 220V power cable. Poor quality end seal and moisture getting into the shell are another reason.
To seal the food cable into the pipe, seals are used. When choosing them, pay attention to the shape of the cable. They are round or flat.
They use their own seal for a specific brand. If you choose the wrong one, you will get a leak.
Installation methods
The heating cable for water supply is laid outside or inside the pipe. For each method there are special types of wires - some only for external installation, others for internal installation. The installation method must be specified in the technical specifications.
Inside the pipe
To install a heating element inside a water pipe, it must meet several requirements:
- the shell should not emit harmful substances;
- the degree of electrical protection must be at least IP68;
- sealed end coupling.
To be able to thread the wire inside, a tee is placed at the end of the pipeline, into one of the branches of which the wire is inserted through the gland (included in the kit).
An example of installing a heating cable inside a pipe through a gland
Please note that the coupling - the transition point between the heating cable and the electrical cable - must be located outside the pipe and gland. It is not intended for wet environments.
A tee for installing a heating cable inside a pipe can have different outlet angles - 180°, 90°, 120°. With this installation method, the wire is not fixed in any way. It is simply tucked inside.
Types of tees for installing a heating cable inside a water supply system
Outdoor installation
The heating cable for the water supply must be secured to the outer surface of the pipe so that it fits tightly over the entire area. Before installation on metal pipes, they are cleaned of dust, dirt, rust, welding marks, etc. There should not be any elements left on the surface that could damage the conductor. A rein is placed on clean metal and fixed every 30 cm (usually possible, less often not) using metallized adhesive tape or plastic clamps.
If there are one or two threads stretching along, then they are mounted from below - in the coldest zone, laid parallel, at some distance from each other. When laying three or more wires, they are positioned so that most of them are at the bottom, but the distance between the heating cables is maintained (this is especially important for resistive modifications).
Methods for attaching a heating cable to a pipe
There is a second installation method - a spiral. The wire must be laid carefully - they do not like sharp or repeated bends. There are two ways. The first is to unwind the coupling, gradually winding the freed cable onto the pipe. The second is to secure it with slack (bottom picture in the photo), which is then wound and secured with metallized adhesive tape.
If a plastic water pipe is to be heated, then metallized tape is first glued under the wire. It improves thermal conductivity, increasing heating efficiency. Another nuance of installing a heating cable on a water supply system: tees, valves and other similar devices require more heat. When laying, make several loops on each fitting. Just watch out for the minimum bend radius.
Fittings and taps need to be warmed up better
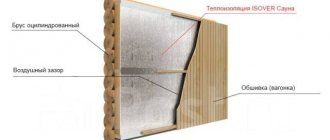
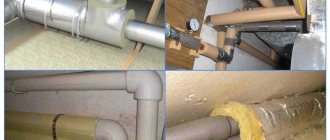
How to insulate
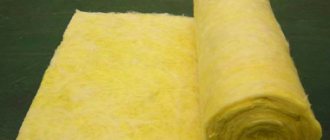
It is definitely not advisable to use mineral wool of any origin to insulate a heated pipeline. She is afraid of getting wet - when wet, she loses her thermal insulation properties. Having frozen wet, after the temperature rises, it simply crumbles into dust. It is very difficult to ensure the absence of moisture around the pipeline, so it is better not to use this insulation.
Insulation materials that compress under the influence of gravity are not very good. Having shrunk, they also lose their thermal insulation properties. If your pipeline is laid in a specially constructed sewer system, nothing can put pressure on it, you can also use foam rubber. But if you are simply burying the pipe, you need rigid thermal insulation. There is another option - put a rigid pipe, for example, a plastic sewer pipe, on top of the crushable insulation (for example, closed-cell polyethylene foam).
An example of insulating a water pipe with a heating cable
Another material is polystyrene foam, molded into fragments of pipes of different diameters. This type of insulation is often called shell insulation. It has good thermal insulation characteristics, is not afraid of water, and can withstand some loads (depending on density).
What power is required for a heating cable for a water supply system?
The required power depends on the region in which you live, on how the pipeline is laid, on the diameter of the pipes, whether it is insulated or not, and even on how exactly you lay the heating - inside the pipe or on top of it. In principle, each manufacturer has tables that determine cable consumption per meter of pipe. These tables are compiled for each power, so there is no point in posting any of them here.
From experience, we can say that with average pipeline insulation (expanded polystyrene shell 30 mm thick) in central Russia, a power of 10 W/m is sufficient to heat one meter of pipe from the inside, and at least 17 W/m must be taken from the outside. The further north you live, the more power (or thicker insulation) you need.
How to lay a heating cable outside a pipe
For external installation you will need:
- the cable itself
- aluminum tape
It should be tape with a good metallic coating. Cheap lavsan film with a metallized coating will not work.
- nylon zip ties
- thermal insulation
To ensure that the heat is distributed evenly along the entire length, wrap the insulated area with foil tape.
Mistake #6
In this case, there is no need to wrap the entire pipe.
Let's say you have a pipe of one hundred square meters or more. Glue one strip of tape along it and that’s it. It is not necessary to use the material over the entire surface.
Mistake #7
There is no need to wrap steel and copper pipes with tape at all.
This equally applies to metal corrugated ones. Only the top layer will be enough for them.
Next you need to secure the cable.
Mistake #8
Most often this is done with the same aluminum tape.
However, this risks the fact that the wire eventually “bulges out” and begins to move away from the wall, which reduces heat transfer significantly.
To prevent this from happening, use nylon ties. The distance between the ties is 15-20cm.
The cable itself can be laid either in an even strip or in rings around it. The first option is considered more rational for sewerage and small-diameter pipes.
In this case, the overlapped spiral gasket will cost you a pretty penny. But often this is the only way to properly warm a large cross-section pipe in severe frosts.
Mistake #9
When laying the cable in a straight line, it should be placed not at the top or side, but at the bottom of the pipe.
The warmer the water, the lower its density, which means it will rise upward as it heats up. If installed incorrectly, the bottom of the pipe may be cold, and this can lead to freezing, especially in sewer systems.
In them, water flows below. In addition, such pipes are never full.
Another layer of foil tape is glued over the cable.
After that, thermal insulation in the form of foamed polyethylene is put on this entire “pie” (pipe-duct tape-cable-tie-tape).
Its use is mandatory. It keeps all the heat inside and reduces energy consumption.
The thermal insulation seam is sealed with reinforcing tape.
Otherwise, maximum tightness cannot be achieved. If you have a ready-made kit with a plug at the end of the cable, then, in principle, the entire installation is complete. Plug the cable into the outlet and forget what freezing pipes are like once and for all.
Stages of installation of a heating system
Let's consider the arrangement of a pipeline heating system from the inside using the example of water supply. For such a pipe, it is best to take a self-regulating wire in a food-grade casing.
Stage #1 - purchasing the necessary materials
When purchasing a cable, we immediately determine the required footage, which is equal to the length of the pipe that needs heating. Along with the cable, it is better to purchase the consumables necessary for installation: a set of couplings, a gland and a section of wire with a Euro plug.
Image gallery
Photo from
Heating wire with metal braid
Set for connecting and insulating wires
Pass-through system for cable entry into the pipeline
Power cable with Euro plug
Additionally, a tee may be useful if it is not located in the intended installation location, and a 10 mA RCD. A tee is needed to correctly enter the cable. The latter should not be allowed through a pipe that bends at a right angle. Therefore, it is better to first install a tee at the site of the intended entrance and then enter through it.
The self-regulating cable requires power to operate. Therefore, a separate line is allocated for it. And, despite the presence of double insulation on the heating wire, it is necessary to include an RCD and a circuit breaker in the connection diagram, protecting this line in case of accidental damage to the shell.
Stage #2 - preparing the cable for installation
It must be remembered that self-regulating cable systems die not only from frequent cable connections and disconnections. No less evil is incorrect splicing with the power cable and poor-quality termination, which can lead to a short circuit.
It is necessary to properly insulate using good consumables. There are bad couplings when the manufacturer did not provide enough glue. Another reason lies in the hands of the master, especially if he has no experience and connected everything incorrectly.
To prepare the heating wire for insertion into the pipeline, you need:
- perform end sealing;
- put the pass-through kit on the cable;
- splice the supply wire with a plug with a self-regulating section.
Let's take a closer look at how to properly insulate the end of a wire.
Image gallery
Photo from
The braid strands are cut flush with the insulating sheath
Shortening one side of the matrix
Using pliers to end crimp the heated heat shrink tubing
Complete insulation of the end of the heating cable with a large heat shrink tube
If each step of the end seal is carried out carefully, the tightness of this assembly will be ensured. True, provided that you use a reliable adhesive coupling kit from a trusted manufacturer.
Now we have to splice the power cable with the heating cable in order to provide the latter with the power it needs to operate.
It is necessary to prepare in advance a power cable, at the end of which there is a Euro plug, cutting the wires to make a connection with the heating wire. It is important to free each of them from the shell and strip the insulation
But at this stage it will be more convenient to put on the oil seal or it is also called a penetration or a passage kit. Each part should be put on strictly following the instructions supplied by the manufacturer.
Having placed the penetration on the wire, you can begin splicing with the power cable. If you purchased a ready-made kit in which a piece of cable with a plug at the end is already connected, then you do not need this step.
Image gallery
Photo from
The top insulating sheath was removed from the end of the cable
Removing protective shells from the semiconductor matrix
Current-carrying conductors are freed from the matrix
Heat-shrinkable tubes are placed on the heating and power cables
The heating and supply wires are connected using a crimp sleeve
Insulating wire connections with heat shrink tubing
Splicing the cable braid with the grounding conductor of the supply wire
General connection node insulation
After waiting for the heat shrink sleeves supplied to insulate the connection to cool, you can proceed to the next step.
Stage #3 - placing the system inside the pipe
When the preparation of the heating system is completed, it can be introduced into the pipeline.
To do this, you must adhere to the following rules:
- lead the cable only through a tee;
- avoid areas with straight and sharp corners;
- Do not jerk sharply or use force.
Entry begins by pushing the insulated end through the tee into the water pipe. After pushing the entire length of the heating cable into the pipe, you need to ensure tightness at the entry point.
Scheme of introducing the system into a pipe using a penetration - a bushing kit/gland. This kit consists of one bushing with external and internal threads, one bushing with only external threads, two brass washers and one rubber or silicone seal with a hole in the center
At this stage of cable installation, the penetration is useful to ensure the tightness of the system. You need to carefully tighten all the fasteners, screwing the clamping sleeve first with your hands, and then tightening the connection with a wrench.
The rubber seal inside the oil seal will flatten, thereby ensuring a tight seal.
Before sealing the entrance, you should make sure that the penetration does not touch the coupling - the area where the power cable is spliced with the heating cable must be removed from the sleeve with external thread by 5-10 cm
Before placing the heating system, you need to make sure that the cable will not pass through the shut-off valves, which is strictly prohibited.
Stage #4 - connection to the power supply system
Having completed the installation work, all that remains is to connect to the electrical network. It is advisable to use a separate line for this.
Here it would be a good idea to take care of safety and equip this line with a 10 mA RCD. This solution will protect against current leakage if the wire is accidentally damaged. The RCD will simply de-energize the line, preventing damage to the home owner and all family members.
The connection process is extremely simple - you need to plug the Euro plug located at the end of the power wire, which we connected to the heating wire, into the socket. Moreover, there is no need to monitor the temperature and periodically turn off the heating system - thanks to the self-regulating matrix, this process will take place automatically.
The heating cable is activated if the temperature of the liquid in the pipe drops to +5 °C. And it will work, heating the water supply until the water temperature reaches +15 °C
This completes the connection. But in order for the system to last a long time, it must be operated correctly. It is highly undesirable to unplug the cable from the outlet unless necessary - these actions will significantly shorten its “life”. The self-regulating matrix will fail before it has time to work for the allotted time.
In order to save money, it is better to provide additional heating of the pipeline, especially if a section of the pipe runs along the surface. It is advisable to additionally insulate it from the outside by wearing a special casing made of heat-insulating material.
There are many options for insulation for external pipes - here you can choose the one that is most preferable for yourself. Yes, and installation can be done on your own. With a self-regulating wire power of 10, 16, 24 W per linear meter, the heating filament of the cable from the GWS line can have a length of up to 100 m.
But in practice, they often use a system up to 20 m long. What manufacturers have noticed is that they offer ready-made heating systems, both resistive and cable with a self-regulating matrix, 5, 10, 20 m long.
Pipe mounting with valve
What if you have a more complex case? For example, are there fasteners and valves on the water supply section?
There are certain nuances here. First, prepare the pipe itself by gluing the tape.
At the fastening points, the clamps will have to be temporarily removed.
In this case, the wire itself must pass through the lower attachment point of the clamp.
What to do with the tap?
Mistake #10
If the cable is pulled here in a straight line or even in a spiral, then if it is necessary to replace the valve, it will no longer be possible to do this without cutting the cable.
Therefore, a reserve must be made in the form of a loop.
After this, simply fold this loop around the valve and tighten it with a tie.
Thermal insulation is stretched over everything.
Types of fixation
KSO is usually fixed to the pipe in several ways:
- Fiberglass tape, with adhesive surface.
- Aluminum strip.
In addition, it is possible to install plastic clamps. But certain conditions must be met. The permissible heating temperature of the clamp must be higher than the heating temperature of the cable and pipeline. It is necessary to maintain a distance of about 300 mm and secure tightly.
Device and types
Let's look at the design and types of heating cables.
In appearance, the heating cable is no different from a regular one, only instead of a conductor, it has a resistive element - that is, one with high electrical resistance - an element.
When connected to electricity, it heats up, just like a heating element in an electric kettle or a coil in an electric stove.
The main characteristic of such a cable is the specific thermal power, that is, per 1 m of length (unit of measurement - W/m). Other characteristics are mainly related to the quality of the outer shell: resistance to abrasion, impact and chemicals, moisture resistance and dielectric strength.
Heating cables come in the following types:
- unregulated;
- self-regulating;
- inductive.
Unregulated (fixed resistance)
This is the cheapest option, which today is often called obsolete.
The resistive element of such a cable is one or more cores made of nichrome, steel, copper or a special alloy.
All this is placed in a shielding shell (copper mesh or aluminum foil) and then in protective insulation made of PVC or modified polyolefin.
Often, a second layer of insulation is placed under the shielding shell - made of fluoropolymer or the same polyolefin.
The multi-core version is preferable because it does not generate as powerful electromagnetic radiation as the single-core version. In addition, a cable with several cores is connected to the mains only on one side (type A), while for a single-core heater both ends have to be connected to the mains (type E). In view of this circumstance, they usually try to make the trajectory of a single-core cable closed.
The resistance of this type of cable cannot be adjusted, so it always operates at full power. If heat dissipation in any area is insufficient, the resistive element may overheat and melt. Sensitivity to overheating must be taken into account during installation and operation; moreover, it requires more accurate calculations when selecting power.
Unregulated cables (often simply called resistive) are divided into two types:
- Linear: this is the most common option, consisting of one or more cores. This cable cannot be cut; it is used only in its entirety.
- Zonal: have a more complex structure. Inside there are two ordinary (non-resistive) conductors, between which insulation is laid with holes made through every meter. The conductors are wrapped in a spiral of high-resistance wire (resistive element), which is connected to them through holes in the insulation. Thus, it turns out that the resistive element consists of several fragments powered in a parallel circuit. This allows you to cut the heating cable anywhere.
In industry, mineral insulated heating cables are used. They have a flexible, corrosion-resistant metal shell (ALLOY 825), which makes them very durable and allows the heater to be used in very high temperature environments. Between the outer shell and the resistive element there is a protective insulation of magnesium oxide. Typically, such cables are made very powerful and are used to solve specific problems.
If you decide to organize your own water supply from PP pipes, then you cannot do without a soldering iron. Soldering iron for polypropylene pipes: how to choose the right model? Read on.
Read about tools for installing metal-plastic pipes here.
And here https://aquacomm.ru/cancliz/zagorodnyie-doma/avtonomnaya/stoki/uklon-kanalizacionnoj-truby.html information on methods for measuring the slope of sewer pipes. What should the slope be and what are the consequences of deviation from the norm.
Variable resistance (self-regulating)
Discoveries in the field of materials science have made it possible to create a new generation of heating cables. Inside it there are two conductive wires connected to each other by a matrix or threads made of a special polymer with semiconductor properties. It is this that is the resistive element.
The peculiarity of this polymer is that its resistance depends on temperature, and if it turns out to be too high, the matrix will simply stop passing current and the cable will turn off. And not all of it, but only that part of it where there was a danger of overheating.
Self-regulating heating cable for pipes
The rest of the line will operate normally. Thus, the self-regulating cable is absolutely reliable, because even under the most unfavorable circumstances it simply cannot physically burn out.
Another advantage of such a heater is its efficiency. If a conventional unregulated cable, regardless of temperature, always consumes the maximum amount of electrical energy, then a self-regulating cable in warm weather will reduce its consumption to a minimum.
This type of cable can be cut into fragments.
Inductive
A cable of this type is a highly elongated flexible electric coil with a ferromagnetic core.
When current is passed through the winding, the latter generates an alternating magnetic flux in the core, leading to the formation of eddy currents.
As a result, the core begins to heat up. The conductive winding also heats up, releasing approximately 20% of the total thermal energy.
Using the principle of inductance, the water pipe itself can be turned into a heating cable, if, of course, it is made of steel or other metal alloy. The pipe is wrapped with wire, which is connected to a source of high-frequency alternating current. As in a ferromagnetic core, eddy currents will arise in it, leading to heating.
For full operation of the heating system, in addition to the cable, a temperature sensor is required, which will turn it on as soon as the temperature drops to a certain point specified by the user.
Connecting the cable to power
To connect to the power supply, it is worth identifying an additional line equipped with a grounding system, which will protect all residents from electric shocks. To connect the cable to power, you need to insert into the socket the Euro plug that is equipped with the end of the power cable. The cable operation is monitored by a triple matrix, which will turn off the system if necessary.
Attention! The cable operates at water temperatures up to five degrees above zero; if the water warms up to fifteen degrees, the cable will turn off.
The service life of the system is shortened if the cable is constantly plugged in and out of the socket, thus causing the matrix to malfunction. To save energy consumption, it is worth providing external thermal insulation of the water supply using special materials. For a self-regulating cable with a linear meter power of 10, 16 or 24 W, the length of the heating filament inside the wire can reach one hundred meters. As a rule, cables no longer than twenty meters are installed. The most common sizes are five, ten and twenty meters.
Areas of use
Heating cables are used for various needs:
- in construction - for heating the concrete solution;
- in industry - for the purpose of heating tanks with diesel fuel and chemical liquids;
- in everyday life - to prevent icing of roofs, stairs, paths.
It is possible to install it inside greenhouses - this way you can maintain a constant positive soil temperature. Pipelines are also often wrapped with heating wires, especially those parts that run outdoors - a little heating reduces heat loss.
In addition to cables, it is recommended to use insulation using mineral wool and other materials. In this case, the heating efficiency will be much higher. And the cost of paying for electricity is lower.
Connecting to the network is an alternative method
We took this cable:
The heating conductor (3) and the conductors (1 and 2), through which current flows, cannot be short-circuited
- This is what the end looks like.
- Cleaned it up.
- Using this terminal block I connected it to the wire.
- Thermal gun.
- Heat-shrink tubing.
- End of insulated cable.
The opposite side must be insulated. It is prohibited to bridge the conductors. And we must ensure that they do not bridge in any environment. You can buy a special plug for this. They cost around 300 rubles apiece. But you can do everything yourself using improvised means, such as heat-shrink tubing and a heat gun.
The plug is made as follows. We put on the heat shrink tube. We warm it up with a hairdryer. Afterwards we fill the entire structure with a heat gun.
The same procedure can be done with the terminal block to which the cable power is connected. You can also wrap everything with electrical tape just in case. If operating conditions are harsh.
Installing a cable inside a water pipe
How to correctly insert the cable into the pipe:
- Enter the wire using a tee. If possible, avoid sharp, right corners of pipes. Do not jerk the cable sharply or insert it with force.
- They begin work with the tee, when the cable insertion is completed, they seal the hole through which the insertion was made.
- To ensure the tightness of the installation, a penetration is used. The fasteners are tightened tightly by tightening the clamping sleeve first by hand, then tightened with a wrench.
- The rubber seal installed in the oil seal will compress and provide a tight connection. Reference! Before the final stage of sealing the inlet, you need to make sure that the coupling for the connection and the penetration do not touch.
- The connection point between the heating cable and the supply is removed from the bushing, which has an external thread of up to 10 centimeters.
Experts strictly prohibit installing cables through locking devices.
How the electrical cable works
The self-regulating cable is an electric heater in the form of a tape.
A cross-section of the heating cable consists of:
- metal heating conductor.
- conductors insulated with insulating PVC.
- internal insulation is made using fluoroplastic.
- screens made of copper mesh in which the conductors are located.
- The insulation on the outside consists of thermal insulation PVC material.
The insulating material resists the effects of water, is resistant to elevated temperatures, and is not affected by the harmful environment of wastewater. The materials have Sanpin approval for use in food water supply systems, so cables are allowed to be laid in cold water systems.
Reference! The cable has automatic control over the temperature level outside the pipe, therefore it is called self-regulating; it changes the heating level depending on the temperature regime.
The heating cable operates without human control. The system will automatically stop working if the ambient temperature exceeds the set values. Self-regulation protects the system from overheating, saving electricity consumption.
The advantages of a heating cable include:
Reliable and safe operation.- Simplicity of installation and operation.
- Energy savings due to automatic temperature control.
The main disadvantage is the cable's volatility. Some sections of the water supply must be equipped with additional sockets.
Results: how to choose the right one
To ensure efficient and economical heating of an object, you need to take into account its dimensions, the conditions under which the cable will operate, the power of the wire, and the operating temperature. The quality of the insulation should also be taken into account. For outdoor installation, be sure to use a cord with durable braiding. And in order to prevent interference with electrical appliances near residential premises, the cable must be equipped with a screen, which will also allow the system to be grounded.
All heating wires sold in the country must undergo mandatory certification.