Owners of personal plots use sheds not only for storing tools and equipment, but also for keeping animals. In the latter case, a capital insulated building is erected. Then, even in the most severe frost, there will be a stable above-zero temperature inside.
If there is already a barn, but it is too cold, additional insulation of the building is carried out. Detailed step-by-step instructions for thermal insulation of such outbuildings are given in this article.
How to insulate a shed for almost nothing - a description of the simplest way to carry out the work
In this article I will tell you how to insulate a shed from boards with minimal cost. This technique has been used for hundreds of years and has proven its effectiveness even in harsh regions. I am sure that this option is available to anyone, and to implement it, you need a minimum set of materials and devices, which is important, because no one wants to spend significant money on a shed.
In the photo: a barn for animals and poultry must be insulated
Waterproofing concrete screed
Before pouring cement, it is advisable to take care of waterproofing. For these purposes, use polymer materials or resin solution. Apply these substances to a bed of crushed stone and gravel, and then dry thoroughly. If desired, you can mix the polymer with liquid concrete and fill the floor. Experts call the method penetrating waterproofing. Such solutions will make it possible to protect the shed from the penetration of groundwater.
Workflow Description
I will tell you about one technology that has been in use for a couple of hundred years and has undergone only minor changes over that time. The work process will always be the same, but the set of materials used may differ. You must choose the solution that best suits your specific situation.
Materials and devices used
To begin with, I will talk about the insulation options that can be used; there are several solutions that have been tested in practice:
| Straw | A natural material that is great for budget projects. This option will cost you almost nothing, the only thing you should take care of in advance is the delivery of straw, it is best to purchase it in the form of rolls or bales, so it takes up less space and is much easier to transport |
| Wood sawdust | Another inexpensive solution; you can purchase this material at any sawmill. Again, you need to resolve the delivery issue, especially if you need significant volumes of products. It is very important that the sawdust is dry, since if you lay it in wet form, then over time the process of rotting will begin |
| Loose penoizol | A very interesting material that resembles ordinary polystyrene foam, but unlike it, it is produced not in sheets, but in the form of granules. Of course, you won’t be able to find this option for next to nothing, but its cost is not that high – about 5-6 thousand per cubic meter. The main advantage of penoizol is its high thermal insulation performance; it is much more effective than straw and sawdust. |
| Foam glass | I have also used this option several times for bulk insulation of wooden buildings, and I like it for its simplicity and high performance. The material is not afraid of moisture, is not damaged by mold and is able to effectively protect structures from the cold; the price per cubic meter is about 5,000 rubles |
| Expanded clay | I’ll say right away that I consider this option to be optimal and recommend using it for bulk insulation of sheds and outbuildings. The thermal insulation properties of expanded clay are known to everyone, it is not afraid of water and fire and has a very attractive price - a cubic meter will cost you only one and a half thousand rubles |
Another option is to use a mixture of sawdust and expanded clay. As you know, sawdust is afraid of moisture and tends to absorb it, which reduces the thermal insulation properties of the material, but if you add 20-30% expanded clay to it, it will draw in excess moisture, which has a positive effect on both the quality of insulation and the durability of the structure.
Foam glass is well suited for sheds due to its unpretentiousness
In addition to the main insulation, you will need additional materials:
Powdered fluffed lime is used for work.
If you don’t have any board, then buy the cheapest unedged board with a thickness of 20-25 mm
Wall insulation
Now let’s figure out how to insulate a shed with your own hands, the process is extremely simple, there is no need for accuracy and precision, the reliability of the structure and its integrity come to the fore; the fewer cracks and voids, the better the end result.
This is exactly the effect you need to achieve - make a double partition on the walls
The instructions for carrying out the work are as follows:
These walls look great
Insulation is poured into the resulting cavity; consider all the options that deserve attention:
Before pouring into the cavity, be sure to add lime and mix the mass
After two weeks you need to add more sawdust, as they tend to cake over time.
Insulating a barn with straw is a good solution; it has good thermal insulation characteristics
Granular polystyrene - very light and very warm material
Floor insulation
This part of the structure also requires special attention, especially if the structure will contain animals. There are two methods that differ in their technology and costs. Let's look at each of them in more detail and start with a clay floor; in this case, work is performed in this way:
This floor will be very warm
The disadvantage of this option is that your barn will always be dirty. If you are thinking about how to insulate a barn for animals so that the floor is warm, durable and easy to clean, then the second insulation option is more suitable for you:
Beacons allow you to quickly fill a flat floor
Ceiling insulation
Almost all sheds are made with a gable roof, since hay stored for the winter is often stored in the attic. If you also have hay lying around, then this is very good, because it insulates the roof well and allows you not to worry about heat loss through the ceiling in winter. But if your attic is empty, then you must insulate it; the main options are as follows:
Sawdust is the most budget-friendly solution
Expanded clay is an excellent solution for the ceiling
If you have a pitched roof without an attic, you will have to insulate the building from the inside . It is best to use extruded polystyrene foam for these purposes, which is cut so that it fits between the beams, after which it is glued to polyurethane foam, and the joints are also sealed with it for the best effect.
Single-pitch construction is more difficult to insulate
Additional work
I have more than once encountered a situation where a person has done a good job of insulating the walls, floor and ceiling, but at the same time there is a cracked door with cracks hanging on the barn, and there is single glass on the window. Naturally, under such conditions it is impossible to achieve heat in the barn. To avoid this, use a few simple tips.
A blanket cushion around the perimeter covers the joint and improves thermal insulation
Polystyrene foam is cut according to the configuration of the cavities and glued to the mounting foam
As for the window, it is better to build a structure with double glazing; glue the glass with silicone, and then you will get an air chamber inside, which will protect from the cold several times better than ordinary glass. All joints in the opening are filled with foam or other insulation, and a casing is nailed to the outside of the crack.
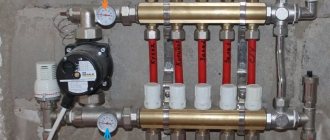
Heating system installation
Most modern poultry farmers prefer electric heaters as the safest and most affordable. You can install them yourself without any special skills. They can heat a room of any size.
Infrared lamp
Infrared lamps (IR lamps) are highly efficient, converting energy into heat. They do not pollute the air in the chicken coop; after switching on, they quickly warm up the area they are aimed at.
The disadvantages of lamps include their high cost and short operating period.
For additional heating of a thoroughly insulated chicken coop with an area of 30 square meters. m and a ceiling height of 200–240 cm, it is enough to install 2 IR lamps, each with a power of 250 W. Lamps are suspended from the ceiling, placing them in those areas of the house where maximum heat is required (for example, above nests, perches or a cage with chickens).
IR lamps should be equipped with a thermostat or dimmer (power regulator) in order to avoid overheating of the room.
Important! When installing an IR lamp, you must remember that it itself gets very hot. It is hung from the wooden ceiling not close, but at a distance of 30–50 cm
Or they protect the attachment point with asbestos plate. It is better to take ceramic lamp sockets.
Heater
An IR heater is mounted like an IR lamp (Cozy Warmth, Good Warmth). Its heating area is larger than that of a lamp. It is more reliably protected from overheating. Only ceiling models should be installed in the poultry house so that chickens do not have the opportunity to come into contact with the unit. The cost of an IR heater starts from 2700 rubles.
A popular way to heat a chicken coop is to install a household fan heater or heat gun inside. Not the most economical option, spending up to 1 kW of electricity per hour, but suitable for quickly warming up a room. The fan built into the heater quickly moves air around the room, mixing cold and warm layers. The fan heater has the ability to dry the air.
The unit is installed on the floor or attached to the wall so as to prevent birds from accessing the heater. It is necessary to regularly clean it from dust and feathers, which often accumulate inside the unit.
The need to insulate a shed
Any poultry farmer knows: poultry lays eggs only at positive temperatures. The optimal winter maintenance regime is considered to be +12 +15 o C. Large dairy animals: cows and goats maintain productivity up to +5 + 7 o C, but milk yield drops significantly, since the animal spends most of its energy on its own heating. This means that when severe frosts occur in a drafty, cracked plank barn, the bird may simply freeze, and large animals run the risk of getting sick.
Insulating your barn early will help keep your animals and poultry healthy and productive, and therefore economically viable, all year round. In addition, a well-insulated building saves not only heat in winter, but also coolness in summer, helping animals endure periods of summer heat.
General points
For a chicken or turkey to lay eggs well, it must be healthy.
That is why it is so important to pay enough attention and effort to building a high-quality, strong and warm poultry shed. Most novice farmers do not dare to have livestock due to the lack of suitable premises for their maintenance, believing that they cannot afford to build from scratch. However, if you carefully study the issue, which is what we will do in this article, it will become clear that building a good-quality chicken coop is not only not difficult, but also not so expensive
However, if you carefully study the issue, which is what we will do in this article, it will become clear that building a high-quality chicken coop is not only not difficult, but also not so expensive.
Choosing a location for a bird shed
First of all, you need to choose the right place for construction. In this case, it is necessary to start not only from considerations of the square footage of the future barn. Keep in mind that poultry waste products emit a rather strong unpleasant odor, so if the barn is located on the leeward side, the odors will constantly be directed towards the residential building. It is best to place sheds for animals and poultry at a sufficient distance from residential buildings next to a toilet or cesspool.
The dimensions of the object being built are directly affected by the free area of the site. The best place to build a shed is on a small hill, then in the cold it will not need to be heated additionally, and in the warm season it will warm up faster. In addition to the space for the barn, it is necessary to allocate an area for walking poultry - this is a prerequisite for the comfortable and healthy well-being of pets. Its area should exceed the area of the barn itself by 2-3 times.
You can build a chicken coop using existing plans developed by professional builders and experienced farmers, or you can take one of them as a basis and create your own unique poultry shed design, ideal specifically for your site. At the end of the article you will find several examples of chicken coop designs.
Bird shed dimensions
Poultry is quite unpretentious in keeping, but this does not mean that it does not need care and attention at all. Remember, the more comfortable your chickens and turkeys live, the better they will lay eggs. In this part of the article you will learn how to arrange a poultry barn according to all the rules.
The chicken coop must be durable, warm and safe. This is a kind of smaller copy of a residential building, the residents of which should feel safe and comfortable in it. It must have ventilation and lighting. It is not at all necessary to conduct electricity there - you can install several windows for natural light.
Birds are social animals, but they still require personal space. Otherwise, strong individuals will begin to dominate the weak, peck at them and fight. To avoid this, it is better to think in advance about how many chickens will permanently live in the barn and, based on this, calculate the area of the room. No more than 4 chickens or 3 turkeys can be placed per 1 m².
Inside the barn you need to install nests, perches, feeders and drinkers. It is best to place the perch as far as possible from the front door, since the bird will rest there, and therefore it is better not to disturb it again. In this case, the perches should be slightly inclined, but just enough so that the chickens can move freely along them. Usually, to make a perch, wooden beams with a diameter of up to 5 cm are used, the upper part of which is rounded so that it is convenient for the bird to clasp the pole with its paws. The beams are installed parallel and in several tiers, maintaining a distance of at least 25 cm (up to 40 cm), between the floor and the lower beam there should be 40-50 cm. Experienced farmers advise making a perch in 4 tiers, attaching the beams to the walls using hinges.
As for the equipment of nests where birds will hatch eggs, you can use wooden boxes (for vegetables and fruits) or baskets to make them. Use hay or straw as soft, warm bedding, which is periodically replaced with fresh one. One nest can accommodate 3-5 laying hens.
At the bottom of the barn door you need to make a closable hole (miniature hole) approximately 30 cm high. It is necessary for the birds to freely exit to the walking area.
So, based on the above information, you can calculate the exact dimensions of the future chicken coop and walking area. A barn for 10-20 chickens will occupy an area of 2x3 m, and the walking area should be several times larger.
Options and materials for thermal insulation
How to insulate a shed with your own hands? First of all, you need to choose technology and material. The following materials have traditionally been used for thermal insulation of outbuildings:
Nowadays, more modern materials are increasingly used to insulate sheds. They are more expensive, but have several times higher performance. Among them are:
In addition, progressive sprayed materials such as polyurethane foam and ecowool are becoming more common. The high cost of equipment makes it unlikely that they will be purchased specifically for a shed. However, if they carry out thermal insulation of the main house, and the equipment has already been delivered to the site, then it is quite possible to use the remaining materials for outbuildings. Sprayed materials have no seams and create a perfectly smooth continuous layer of thermal insulation. They do not cake, do not crumble and are characterized by consistently high thermal insulation properties and durability.
Operating experience
The end result was a completely functional building. Things are safely hidden inside, the area is fenced, and an alabai runs inside the fence, scaring away uninvited guests. So I'm calm about the wheels and tools.
Most of the winter the barn is really “warm”. To ensure that even in severe frosts the temperature does not drop below 0C, you can install an additional electric convector for 2-3 days.
Electricity savings are achieved through the function of switching off the convector based on temperature. Until November, with such insulation, I do not turn on this convector at all.
Anatoly Dyatlov, 2015.
More on this topic on our website:
- What is better to use for building a 2-story house - foam block or gas block? To understand the question: “foam block or gas block, which is better,” you need to understand what properties these building materials have. What are their disadvantages and advantages compared to...
- A person who owns a plot of land (it doesn’t matter whether it is a dacha plot or for private housing construction), as usual, is interested in building a bathhouse. A bathhouse is a place to relax, where…
- The frame method of building a bathhouse is the simplest and most affordable option for anyone who decides to start construction. Each of them will be able to erect such a structure on their own site...
- Owners of wooden houses know firsthand how important it is to timely and well insulate their home. Cold floors are the main problem in most private homes...
DIY barn insulation technology
How to insulate a shed? The technological process is not complicated. It does not require highly qualified workers or the use of expensive equipment. To carry out the work, general construction skills are quite enough; the owner of the barn can do it with his own hands. He will be required to be careful and strictly follow technological recommendations and safety regulations.
Materials and accessories
To insulate a shed using mineral wool or penoplex you will need:
You should also equip a workplace for cutting material indoors or under a canopy. It should be spacious and level and well lit.
Wall insulation
The method of insulating walls depends on the selected material. If you decide to work with bulk insulation, such as sawdust or expanded clay, you will need to build a second wall connected to the main one with wooden vertical logs at a distance of 10-15 cm from the main wall of the barn. The boards of the second wall are laid horizontally, nailing them starting from the bottom. Every half meter of height you need to stop, fill in the insulation flush with the top board and tamp it down.
If sheet material, mineral wool or penoplex is selected, proceed as follows:
Now you can attach the internal cladding from thin boards, plywood, OSB or moisture-resistant gypsum board.
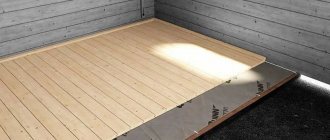
Floor insulation
A budget method for floor insulation is as follows:
The top of this floor is sprinkled with sawdust or straw, which is changed periodically. For goats and sheep, it is recommended to make beds 20-30 cm high from the floor level; the animals willingly spend the night on them and do not freeze.
Straw with clay - a way to insulate the floor in a barn
A serious method of floor insulation involves removing soil to a depth of 30-40 cm, filling it with expanded clay, and making a clay or cement screed. Wooden floors are used less frequently in animal housing buildings. They are insulated using polystyrene foam or penoplex. Mineral wool is not used because it will inevitably get wet from urine and water spilled from drinking bowls.
Ceiling insulation
Up to half of all heat loss passes through the ceiling.
To properly insulate the ceiling, you need to proceed as follows:
If there is no rough ceiling in the barn, sheets of foam insulation are attached directly to the roof sheathing using disc dowels and adhesive.
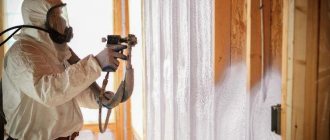
Spraying polyurethane foam onto the roof from the inside is very effective.
We insulate the doors
If the door is an uneven opening in the wall, somehow closed with a cracked shield made of slabs on rope loops, there is no point in insulating such a “door”.
You will need to install a normal door frame, seal the gap between it and the doorway with foam, and hang a solid wood door.
Windows are also insulated in the same way. To preserve heat, old windows are covered with polyethylene, pressing it against the wall with a glazing bead.
Nests
In the process of arranging a bird’s home, it is extremely important to make nests and fix them on the wall. During this work, it is necessary to adhere to certain recommendations:
the number of nests directly depends on how many laying hens will be housed in the house
There should be at least one such structure for every five laying hens; The nest should be about 30 cm wide, 40 cm deep, and 35 cm high; it is allowed to combine nests along one line, but they must be fixed exclusively in the dark part of the room at a height of only 0.5 m; It is extremely important that the entrance to the nest is wide (at least 25 cm in width and height). It should be raised from the bottom of the nest by at least 5 cm
Thanks to such a small threshold, the eggs will not roll out onto the floor; You need to fix a shelf next to the nest, from which it will be convenient for the birds to take off; The slope of the roof on the nest should be about 45 degrees. Thanks to this special design, laying hens will not be able to sit on it, and accordingly the nest will not be contaminated with bird excrement; Be sure to put hay or straw in the nest.
In order to attract laying hens to the nest, it is recommended to place a dummy egg in it. Experienced poultry farmers have noted that in the presence of this simple element, birds begin to lay eggs much more willingly.
It often happens that chickens begin to shit in the nests and stay overnight in them. To avoid this, they should not be placed on the floor, but rather placed on the farthest wall. Closer to nightfall, the nests can also be covered, since chickens do not lay eggs at night.
You also need to make sure that the birds have containers in the barn for drinking, eating and taking ash and sand baths. There are many variations of such designs that can be made with your own hands without much effort. For those poultry farmers who were able to build a barn on their own, manufacturing these necessary elements will clearly no longer be a problem. Having equipped the bird's home with everything necessary, it will be possible to immediately move birds into it.
Internal additional work
In order to maintain a favorable microclimate in the insulated utility room, you will need to take care of air circulation. Animals produce a lot of moisture during their life, and humid air is a breeding ground for the development of mold and mildew. To organize air exchange, you will have to install one or two exhaust devices with a check valve into the wall at the top of the room, which prevents cold air from entering the room. Supply ventilation, as a rule, is provided by remaining leaks, a gap under the door and its periodic opening.
If possible, an insulated shed should be equipped with a vestibule with an internal door. It is convenient to store food and pet care items out of their reach. The vestibule allows you to save up to 30% of heat.
Source
What exactly needs to be insulated in the cellar to prevent freezing?
Let us consider in detail the basics of insulation of all enclosing structures of the cellar: ceiling, walls, floor.
Ceiling insulation
Ceiling insulation plays a big role in the formation of optimal temperature and humidity, because when cold air enters the room, it threatens the formation of condensation on the ceiling and walls. So, how to insulate the ceiling in the cellar with your own hands.
- Surface inspection. It is necessary to inspect the ceiling covering for cracks in the seams between the concrete slabs. After which you need to cover them with putty with antiseptic additives. Regarding the dowels for attaching thermal insulation, they must also be thermally insulated.
- A vapor barrier membrane is attached to the putty surface to the ceiling. It is necessary to ensure that during each subsequent operation moisture is normally removed from the cellar without forming condensation on the ceiling and walls. The membrane does not prevent the infiltration of moist air to the outside, and prevents the penetration of moisture from the outside. The material is a regular polymer film, but with special perforation.
The photo clearly shows the membrane for ceiling insulation and aluminum hangers
To construct a vapor barrier for the ceiling, you should use penofol, the main composition of which is foamed polyethylene, protected by aluminum foil. Its peculiarity is that it serves as an excellent heat insulator, and aluminum acts as a screen that reflects thermal energy into the room.
- Installation of hangers for sheathing. It is necessary to select a material that will be more tolerant of a damp room; this material includes a galvanized profile. It must be secured to special hangers. You can also use wooden blocks as hangers, but this will add additional hassle. The bars must be treated with an antiseptic and other hydrophobic compounds. Fastening will be carried out using screws and dowels.
It is important to know! When working with hangers, it is necessary to set a distance corresponding to the width of the foam. Otherwise, gaps will remain.
- Installation of thermal insulation boards. You can use any heat-insulating materials, but mostly foam sheets are used. You should not use glass wool; it tends to get wet, after which it ceases to perform heat-insulating functions. The foam sheets must be fastened so that the gaps between them are minimal. To completely eliminate the entry of cold, fill the cracks with polyurethane foam.
installing thermal insulation on the ceiling
The joints between the foam sheets are taped
How to insulate a floor
Floor insulation follows a similar pattern, with the exception of several technologies. The bottom layer will be roofing felt or any other waterproofing material. The bars for the construction of the support logs should be chosen more durable, as they will experience a greater load. The top layer will be plywood or boards.
This floor insulation technology is quite easy to install and not so expensive in price, but wood has a big disadvantage: it quickly becomes unusable in moisture conditions. Therefore, it is better to use extruded polystyrene. The properties of the material are very similar to polystyrene foam.
An effective solution for floor insulation would be to use an expanded clay base.
The base of the floor is expanded clay (insulation), then light reinforcement mesh and concrete screed
How to insulate a shed from the outside step by step
External insulation is the first stage of arranging a capital building for winter housing of animals (Figure 1).
Note: In such a barn you can keep any domestic animals and birds, from chickens and quails to rabbits and goats.
Insulation of the shed from the outside is carried out as follows:
It often happens that after the external insulation is completed, the barn becomes warm enough that no internal work is required. But, if the temperature in the room has not reached the required levels, the barn is additionally insulated inside.
Why you need to observe the temperature regime
The plumage and fat of chickens allows them to survive in low temperatures. However, if the thermometer shows 0 °C or less, then they stop laying eggs. And in severe frosts, birds may not survive at all. The optimal temperature in the chicken coop in winter is 7-10 °C. Better 12-15 °C. It is in such conditions that chickens will maintain their egg production even in winter.
But for them to lay eggs constantly, maintaining the temperature is not enough. In winter, lighting needs to be created in their “house”, as in the spring. To do this, you will need to place 60 W light bulbs around the entire perimeter of the barn. They will not only provide the necessary light, but will also additionally heat the chicken coop.
If light bulbs alone are not enough to create the optimal temperature, additional heating of the shed will be required. To monitor the internal temperature, you need to place a thermometer in the building, but only closer to the ceiling, because chickens can peck at it. It is better to use a remote meter that is placed outside, but its measuring tip is located inside the shed.
Insulation inside
It is advisable to carry out internal work on insulating the shed in advance, in the summer. Otherwise, you will have to come up with a place to temporarily house the animals while repairs are being carried out in the barn.
Like external insulation, internal insulation is carried out in several stages. Each of them has its own characteristics, so it is worth considering them in more detail.
Walls and floor
It is better to start interior work from the floor. It is through it that a lot of cold air penetrates inside (Figure 2).
Note: Under no circumstances should you skip floor insulation, especially if the building is planned to be used for keeping animals.
A budget option for floor insulation is as follows:
The disadvantage of such an adobe floor is that debris and dirt accumulate on it, so you will have to clean up after the animals more often.
But there is another insulation option:
After completing the floor work, they move on to insulating the walls. This process is simple, but requires care and attention, since even small cracks can cause drafts (Figure 3).
Note: If external insulation was previously carried out, thermal insulation of internal walls will be easier and faster.
Step-by-step instructions for insulating walls:
If desired, the surface of the frame is further processed. To make it easier to maintain the barn in the future, the walls are plastered and then whitewashed with lime.
Ceiling
Most barns have a gable roof. The attic is usually used to store hay or other feed. Dry grass is an excellent heat insulator, but to additionally retain heat, you will have to insulate the ceiling inside the room (Figure 4).
Note: From the attic side, insulation can be carried out according to the same principle as working with the floor. That is, the surface is leveled, covered with expanded clay and a screed is made.
In sheds with a pitched roof, insulation is carried out inside. To do this, a metal or wooden frame is stuffed over the entire surface of the ceiling, insulation (mineral wool or polystyrene foam) is placed inside, and then the frame is sewn up with sheets of plasterboard or wooden boards.
Figure 4. Thermal insulation of the ceiling is carried out from the attic side
Finishing is carried out in the same way as for walls.
Thermal insulation of doors
Even in a well-insulated building there will be drafts if you do not take care of insulating the doors (Figure 5).
Note: Often the door is made of boards, between which there are large gaps. This is unacceptable for a winter barn, because it is through the door that cold air will penetrate inside.
To prevent drafts from coming through the door, do the following:
From the inside, the cracks in the door are closed by nailing boards or sheets of thin plywood onto them.
Application of shingles
Shingles are excellent not only for insulating outbuildings, but also residential premises. Moreover, it does not require any financial costs, you only need clay, slats and patience.
Insulating a shed with shingles occurs as follows.
Preparatory activities
First of all, you need to nail the slats diagonally, first in one direction, then in the opposite direction (goat willow branches can be used as slats).
Then you need to prepare the solution. To do this, the clay is soaked in water until a creamy mass is obtained and a little sawdust is added to it. The solution should stand for 20-30 minutes so that the wood shavings swell and the clay adheres better.
Now you can start insulating. You should start applying the mixture from below in a small layer of 4-7 cm. More is not necessary, as this can lead to the appearance of severe cracks on the surface. The solution just needs to be poured onto the shingles, and then leveled with a regular construction spatula. You can add more clay to the corners, making them slightly rounded.
Next, the walls should be completely dry. This may take several days. Cracks may form on the plastered surface. Don't be afraid of them. They should be covered with a solution of clay and sand (1:2). It is recommended to seal all cracks near the ceiling and floor with the same solution.
After the clay plaster has completely dried, it must be treated with slaked lime. This will give the walls an aesthetic appearance and prevent various rodents and insects from entering them.
Selection of materials
The modern building materials market provides a huge selection of insulation materials. But industrially produced products can be easily replaced with cheap organic materials that can be found in any household (Figure 6).
The most commonly used organic insulation materials are straw and sawdust. These materials must be dry. Otherwise, they will begin to rot and all work will have to be done again.
Note: For additional protection of such insulation from moisture and rodents, it is mixed with lime and only after that is poured onto the floor or the frame is filled.
The most popular industrial insulation materials are:
If you plan to keep birds or animals in the barn, it is better to give preference to polyurethane foam. It does not allow cold to pass through, is resistant to moisture, and the material itself does not contain toxic substances that can harm the health of livestock. The only drawback is the high cost of the material.
The first method is cladding with boards.
The outside of the barn can be covered with boards according to the principle of brickwork, closing the gap between two boards with a third. The walls are covered with slate in the same way as when covering the roof. In addition, the shed can be sheathed with boards from below. Sheets of slate are placed higher, and then timber is stuffed.
During the work process, insulation is poured between the walls, which needs to be compacted with something. Pine needles, fallen leaves, and sawdust can be used as insulation. These materials are mixed with lime in a combination of one to twenty-five. This avoids problems such as rodents between the walls. The ceiling also needs to be hemmed, and the same composition must be poured on top. Boards are placed above the rafters and covered with roofing felt in several layers, which must be nailed down with wooden slats at a distance of half a meter. The lower part of the barn can be lined with slate on both sides, which will protect the room from rodents and predatory animals.
The bottom of the barn is insulated by filling the floor with soil, 10 cm below the main floor, and then laying and compacting the clay mortar.
The door is made of boards knocked down diagonally, with a layer of roofing felt placed between them so as not to let out heat.
Additional thermal insulation
Even if the shed is well insulated, it can still be cool inside. To fix the problem, additional work is carried out.
If a draft comes from the door, it can be additionally upholstered with an old blanket or pieces of foam plastic from the inside. It is advisable to insert double glass into the windows and place them on silicone. A platband is nailed onto the cracks from the outside, and the joints in the openings are filled with polyurethane foam.
You will find more useful information about insulating a shed with your own hands in the video.
Source
Waterproofing a wooden floor
Before you begin installing the plank floor, you should take care of waterproofing. Use coarse crushed stone mixed with sand as a protective cushion. Compact the layer thoroughly. Cover with plastic wrap. Re-place the sand and gravel mixture. Cover the backing with another layer of polyethylene. Connect the edges of the film with tape or other adhesive tape. Consider the groundwater level. The closer the moisture penetrates to the soil base of the future floor, the more massive the waterproofing pad should be.
Let's sum it up
In this material we looked at the main methods of insulating a shed. Which one to choose - cheap but labor-intensive, or more expensive and durable - in the end it’s up to you to decide. If the structure is made of poor material, then, of course, it is better to use the economical option.
Material from Anatoly Dyatlov from the Sverdlovsk region, who built a frame shed with insulation and heating for storing seasonal items.
In order to store various seasonal items, I decided to build an insulated shed. Since all the buildings on my site are frame - a house, a bathhouse, a garage - I also decided to make the barn based on a wooden frame.
The material for the frame, of course, must be chosen based on which one is more accessible in your region. In the Urals, the most accessible material is wood. Lumber costs an average of 5,000-6,000 rubles per cubic meter with delivery to the site and unloading.
Calculation of chicken coop parameters
You can very easily calculate the size of the chicken coop using a simple formula: one square meter for four chickens. In addition, you need to think about the foundation for the bird’s future home.
The most important thing for the foundation of a chicken coop is strength. As a rule, the foundation is made of ordinary concrete. There are several reasons for this:
- Preventing boards from rotting. If they are isolated from the destructive effects of wet soil, then the building itself will be much stronger and more durable.
- Preventing Undermining. It's no secret that foxes and other wild animals, and often domestic dogs, are not averse to eating chicken. Once they hit the concrete base, they won't be able to dig a hole into the coop and cause you any damage.
If you don't want to make a concrete foundation, then just carefully line the entire bottom of the coop with iron sheets.
Dimensions
Selection of materials and design of outbuildings are interconnected things. Most finished blocks, as well as wooden structures, have dimensions of 100x100 or 50x100 mm. Based on this, you can easily estimate the final need for materials. But we must not forget about leaving door and window openings and structural gaps. Exact dimensions are selected according to needs.
Simple equipment for a garden or cottage is usually stored in structures measuring 150x150 cm. But when it is necessary to create special shelves for storage, the length of the building increases to 200-250 cm. But gardening equipment and other bulky tools require increasing it to 300 cm. Simple tools include rakes and hoes, shovels, and hoes. Even in such a lightweight building, you can install hooks or stands for hanging plumbing and carpentry tools.
Pigsty area
If you decide to design a pigsty yourself, first decide on the total area. It is calculated taking into account the standard per pig and the number of individuals intended for breeding.
Drawing of a typical pigsty
- For a boar you need 6 sq. m., if it is in an individual section, and 4 sq.m. for each individual if group keeping is planned (no more than 5 animals). You need to feed in a feeder, divided by partitions into sections of 45 cm per person.
- For each sow (with suckling piglets or at the last stage of motility) individual pens are required, at least 5 square meters. m area.
- Inseminated sows are kept in groups, but not more than 12 animals in one section. The area is allocated at the rate of 1.5 square meters. m. for one head.
- To sort pigs by age and live weight, it is better to take into account the nesting principle: place offspring in families from one sow. There should not be more than 25 heads in one section. Please keep in mind that:
- for a piglet of 10-30 kg, an area of 0.3 sq.m. is needed;
- for 30-50 kg - 0.4 sq. m. on the head;
- for 50-85 - 0.55 sq.m.;
- for 85-110 - 0.65 sq.m.;
- for heads weighing over 110 kg - 1 sq. m. on the head.