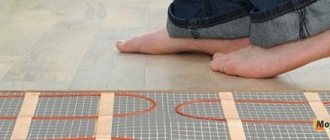
One of the alternative sources of heating a house or apartment is an electric underfloor heating system. Due to ease of installation and ease of use, cable flooring is rightfully one of the most popular among consumers.
Before considering how to make an electric heated floor, we suggest that you familiarize yourself with the advantages and disadvantages that this system contains.
Electric heated floor - advantages and disadvantages
Pros:
- the ability to be used both as the main and as an additional source of heating for housing;
- uniform heating of the entire area of the room;
- unlimited installation locations. Availability for installation in both living rooms and offices;
- compatibility with most floor coverings (laminated boards, ceramic tiles, linoleum);
- the ability to adjust the temperature regime - both throughout the apartment and separately in each room. The system on/off time is also set at the discretion of the users;
- no need to install additional equipment (as, for example, in the case of a water heated floor);
- relatively simple installation technology;
- aesthetics. The system is installed under the finished floor, this eliminates any restrictions when designing the available space;
- long service life.
Minuses:
- significant cost of using the system. This type of heating can hardly be called economical;
- danger of electric shock. Which puts forward special requirements for the calculation and installation of the heating element in all rooms, and in particular in the bathroom;
- the presence of an electromagnetic field created by the heating element (cable);
- The use of natural wooden flooring is excluded (laying under parquet or floorboards is not possible), because under the influence of temperature changes, the wood will dry out, as a result, cracks and creaks of the floor will appear;
- reducing the height of the room by installing a subfloor with a heating system;
- additional requirements for the power of existing electrical wiring.
Professionals and users who have installed electric heated floors themselves note that compliance with installation requirements and competent design make it possible to eliminate most of the listed disadvantages.
What affects energy consumption with cable floor heating
Factors affecting the energy consumption of an electric heated floor system
- climatic zone in which the house is built (private or multi-apartment);
- volume of the room (area);
- type of floor (type of floor covering);
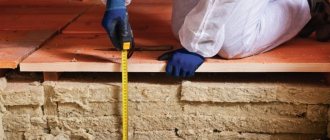
- level of thermal insulation of the room (degree of fatigue);
- the state of the warm circuit (windows, doors) and the level of heat loss through them;
- purpose of the premises (living room, industrial facility);
- purpose and period of operation. Is the electric floor used as a primary or secondary heating system? Constantly or periodically;
- the degree of heat perception by people living in the room.
According to reviews from those who already use electric heated floors - when using the system as the main heat source - its power is 170-200 W/sq.m., as an additional one - 100-150 W/sq.m.
Material calculation
You can use ready-made tables from the manufacturer of the cable heated floor, and according to the calculation of the heat loss of each room, the required wire laying step and its total length per room are selected.
For film (infrared) systems, the calculations are even simpler: you need to select the number of elements that will cover the required area.
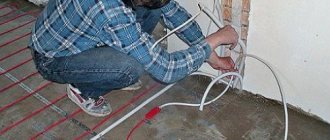
The calculations also include a wire for connecting the regulator and heated floor from the meter and from the regulator directly to the system elements.
Important: It is prohibited to use a direct connection to an outlet for electric heated floors.
According to the calculations and the obtained power of all heated floors, it is necessary to check the general electrical input for the ability to withstand such a load. If the input is insufficient, then replace it and install suitable circuit breakers.
Installation of electric heated floors - errors
Here are a few typical mistakes that, as evidenced by reviews from home craftsmen, are very common:
- buying extra material. The error is due to the fact that in the calculations the user is guided by the total area of the room, and not by the area that will serve as the basis for the heated floor. The calculations do not take into account the area occupied by furniture and heavy household appliances (refrigerator, washing machine);
- The cable used in the heating mat must not be cut. You need to choose a laying pattern in order to use the mat completely. It is better to leave part of the floor surface uncovered;
- You cannot turn on the floor heating system until the screed is completely dry, because this can lead to uneven drying of the layer and the appearance of cracks and voids.
- The cable must not be laid on an unprepared surface. It is better to treat the surface of the subfloor with a primer to eliminate dust, which can cause air pockets to form around the cable and cause it to overheat;
- the temperature sensor is placed in a corrugation, so it can be dismantled and repaired if it fails;
- Resistance measurement is an important stage of pre-operation testing of an electric floor; it should not be ignored. In case of significant deviations, you need to make a decision to correct the situation on your own or involve professionals;
- The cable laying diagram will be useful when moving furniture and performing repair or maintenance work. The easiest way is to photograph the installed floor before pouring the screed.
Electric heated floors are easy to use, reliable (if you choose good components and install them correctly) and will last a long time.
Types and design, as well as features of heating elements
A single-core wire or a two-core cable is most often used as an electric floor heating element. The first option is notable for its low cost, but the increased background EMR imposes restrictions on its use in residential premises. The heating cable has two cores, one of which plays the role of a regular conductor, and the second - a heating element. This design can significantly reduce electromagnetic radiation, but increases the cost of the product.
Design of heating wire (A) and Teplolux heating cable (B)
More detailed information about the above heating elements can be found on the pages of our website.
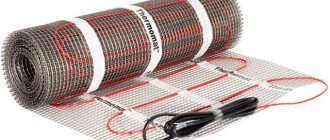
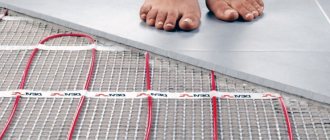
Installation can be greatly simplified if you use a heating mat . This design is nothing more than an ordinary thermal cable laid with a certain step width on a reinforcing mesh. As a rule, the width of the mats is about 0.45-0.5 m, and the length can vary from 0.5 to 12.0 m (accordingly, the maximum heating area for one segment is limited). There is no standard for mat sizes, so they may vary slightly from one manufacturer to another. The electromat, like the thermal cable, is a solid structure, the footage of which cannot be changed arbitrarily.
Heating mat Devi
Rod structures are considered a subtype of electric mats. They use special carbon rods with the addition of copper and silver as heating elements. Heating elements are connected in parallel with a certain step. The main advantage of this design is self-regulation. That is, if the temperature on any rod has increased due to poor heat transfer (for example, furniture has been placed), then the heat release is reduced. Thanks to this property, you can lay the mat over the entire area of the room.
Rod electric mat Energy Mat
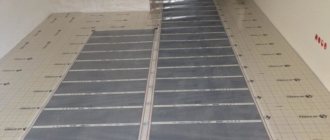
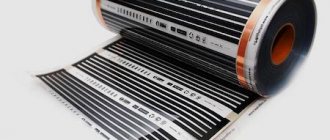
Infrared film . This heating element became widely available relatively recently, literally at the beginning of the century. The term “infrared” used in the name is a marketing ploy aimed at distinguishing this product from a number of other heating elements. As you know from a school physics course, infrared emitters are also called thermal, therefore, any heating device can be classified in this category. The design of the film infrared heating element for a heated floor is shown in the figure below.
Heat Plus film heater device
Designations:
- A – coating made of film based on polyethylene terephthalate; this material is a good heat conductor.
- B – copper bus.
- C – silver tire.
- D – carbon strip coating.
- E – thermal insulation based on polyester.
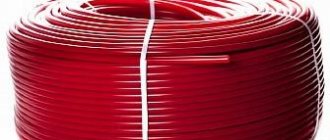
Which pipes to choose
Currently, manufacturers offer a large number of pipes that are suitable for laying warm water floors.
They are made from a variety of materials:
- Stainless steel corrugation. This type of pipe can be spliced with confidence. In this case, they use fittings that are among the most durable and reliable. The material bends easily while maintaining position.
- Copper. Copper pipes cost quite a lot. In addition, during the pouring process you will have to take care to protect the base from alkaline influence.
- Polypropylene. This type of pipe is not used for heated floors. This is due to the fact that the material is too strong to bend, so it is simply impossible to organize a 20-centimeter hose without soldering. This is unacceptable.
- Polyethylene. Pipes are made from cross-linked polypropylene. The material has two classifications: PEX-a and PEX-d. Only the first group is suitable for heated floors, since the second shrinks over time.
- Metal-plastic. Metal-plastic pipes do not cost too much, and besides, there are no problems with their installation.
Step-by-step installation of a single-core thermomat
If you are planning to install a heated floor with your own hands and have chosen a single-core thermomat as the base electrical system, then it is worth keeping in mind that it is installed in strict accordance with a technological cycle that has a very specific sequence:
- First of all, you will need to draw up an installation plan or installation plan, as experts say. And you shouldn’t listen to those who call this operation unnecessary.
- Then the distribution/installation boxes are installed, and (according to the pre-installation plan drawn up) the tubes for the temperature sensor are installed.
- It will also be necessary to provide high-quality warm floor screed. And you can use:
- a rigid thermal insulation board 2-3 cm thick;
- Styrofoam;
- hard plugs;
- or polystyrene foam.
- The resistance of the electric mat is checked, and then its cutting is done. The fiberglass mesh will need to be cut to suit the features of the existing layout. This is very easy to do, because the material has neither a face nor a backside, the only important thing is not to interrupt the cable. Therefore, when laying a heated floor using thermomats, they rarely use sharp or cutting tools (except for the moment when they cut the mat itself with extreme caution), they try to work in shoes with soft soles and carefully ensure that they do not step on the cables or interrupt them with construction materials. garbage.
- The mat is placed on a completely finished screed, which at this stage is the working surface. Fiberglass mesh, equipped with a thin cable system, is laid out on the floor so that the distance from the walls is at least 10, or even 15 cm. You will have to retreat from the batteries by 15-20 cm.
- And you need to spread the thermomat in such a way that both of its cold ends lead to the power supply.
- As mentioned above, electromatte heated floors work with a thermostat. And it’s better (to save energy) if such a regulator is equipped with a special “floor sensor” that shows its current temperature, but also in a number of models automatically turns off the heating when the readings exceed the designated control point on the temperature scale.
- The floor sensor is placed in a corrugation, which is then located in a canvas specially grooved for it and between the cable branches. After all, it reacts exclusively to temperature changes in this situation.
- The end of the corrugation must be plugged so that not a drop of solution or, for example, glue gets on the floor sensor.
- Next, the cold ends (pre-shortened to the required size) and the floor sensor are connected to the thermostatic device.
- A qualified tiler can begin laying the tiles immediately (after checking the resistance of the mat again). But if we are talking about an amateur who has decided to equip a heated floor on his own (and in general, if you adhere exactly to the letter of the technology), then it is first recommended to fill the laid cable mats with tile adhesive. This is done in order to avoid damage to the heated floors when laying the tiled flooring. However, no glue is used, but only special adhesives based on epoxy resin that can withstand high temperatures. When heated, such adhesives become elastic and do not crack at all.
- The glue used to fill thin-cable single-core thermomats is diluted to a “sour cream” consistency, and then thickly applied with a spatula directly over the laid fiberglass mesh equipped with a cable pattern. So that there are no voids left and no air gaps. But the thickness of such an adhesive coating should not exceed 2.5-5 mm.
- Then you will need to wait until the adhesive layer dries completely.
- And only then start actually laying the tiles on the floor.
Thermomats with a single-core cable have a number of advantages over the same two-core cables. They:
- cheaper;
- thinner;
- have greater linear power, and therefore a higher heating rate.
But for mats with a two-core cable that do not have a second cold end, there is no need to necessarily lead it to the first. This means that there are no special requirements for cutting and laying such mats.
The advantages of mats with a two-core cable are described in the video review:
Surface preparation. Features of base insulation
If necessary, the old screed layer is completely dismantled to the base. The entire surface is cleaned.
Next, a layer of waterproofing is laid, extending onto the wall by about 10 cm. A damper tape is attached to the wall along the entire perimeter of the floor. It will compensate for the thermal expansion of the floor when heated. As a result, you can trim off the excess waterproofing and damper tape.
To prevent thermal energy from escaping downwards, it is necessary to insulate the base of the floor. Depending on the location of the room and the type of surface, as well as the target orientation of the heating system, the appropriate insulation is selected:
- If the heated floor is an addition to the main heating system, then it is enough to use foamed polyethylene with a reflective foil coating as a substrate for the heated floor (penofol).
- For apartments with heated rooms on the floor below, sheets of expanded polystyrene or extruded polystyrene foam with a thickness of 20 to 50 mm or other durable insulation of suitable thickness are suitable.
- If a heated floor is installed on a previously unheated loggia or veranda, then a more substantial layer of insulation is formed, up to 100 mm of expanded polystyrene or a similar layer of mineral wool.
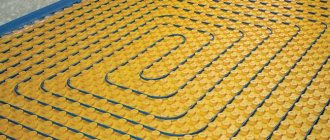
A reinforcing mesh is laid on top of the insulation. You can do without it, since the screed layer will be thin and it is enough to add plasticizer and microfiber to the solution. (Read about how to form a semi-dry screed reinforced with synthetic fibers here).
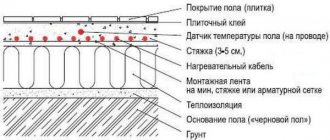
Sectional view of cable electric heated floor screed