Design characteristics
Owners of personal plots and rural residents still build Russian adobe stoves with their own hands. The heating device can be placed not only outside, but also inside a living space. In addition, such a stove is often used as a boiler for a bath, and if you need to decorate the garden, it can be made in a decorative style with hand-made drawings. The main advantage of the design is low cost, and other advantages include the following parameters:
- Small size.
- Environmentally friendly - the stove is made from natural building materials that do not harm the environment. In addition, harmless raw materials are used for the firebox (firewood, peat, straw, and so on).
- Low cost - the structure can be made from materials that do not necessarily need to be purchased in a store. Clay and sand are the main elements for making a stove. The main thing is to mix the solution correctly.
- Fast construction and ease of operation. However, before making an adobe stove, you must carefully study the instructions.
- Practicality - the design can be used not only as heating equipment, but also for cooking, drying clothes and as a sauna boiler. In addition, this is an original decorative element that can be used to decorate the garden.
But there is also a drawback: to build a furnace you need a lot of clay. To get the right solution, you need to know how to mix it. That is why the manufacturing of the structure begins with this technological process.
Excursion into history
The Russian clay stove has been known to mankind since ancient times. Previously, in villages they built just such stoves, which were also called “black” stoves because they did not have a chimney. Even houses with such stoves had their own unique name - “smoking” huts. This name was explained by the fact that the smoke did not escape through the chimney to freedom, but first entered the room, and only then gradually ventilated through a small window under the ceiling, which was created specifically for these purposes. Needless to say, there was a lot of smoke, and the window greatly undermined the thermal insulation of the room in the cold winter? But with all this, the smoke did not spoil the ceiling, did not pollute it with soot. And all because people managed to achieve absolutely complete combustion of firewood, so all the soot settled only around the “top”. How did they do it? The whole point is to heat the house with hardwood logs. They had to be placed in the oven so that there was free access to fresh air, and a few aspen logs were placed on top. (See also: Clay for stoves)
Later, the Russian adobe stove acquired a chimney (a wooden pipe that originated from the ceiling) and there was less smoke, but the risk of burning, on the contrary, was reduced. The dimensions of such a device (a stove with a chimney) were not small; it could occupy a good quarter of the entire room, but modern adobe stoves are much more compact.
The closest “sister” of such a Russian stove was the Pompeii clay stove, but, unlike the more patriotic version, it always had a pipe and was made of brick, and it was better to use refractory brick inside. Needless to say that such a stove, then and now, is an expensive pleasure?
Solution: general information
To create a Russian adobe stove, you will have to mix the solution by hand. All that is required to complete this process is to strictly follow the instructions, with the help of which you can obtain the desired consistency. If this condition is violated, the fat content of the clay will not correspond to the characteristics necessary to create the structure. The only thing that is known for sure is that there is no ideal proportion, so you will have to experiment a little.
To prepare a clay solution you will need the following components:
- sand;
- clay;
- water.
The finished solution should be durable and with minimal shrinkage. As a rule, the more sand you add, the higher the degree of shrinkage of the clay composition and the lower the durability of the finished kiln. Therefore, it is necessary to correctly combine all the components to obtain the optimal mixture.
Experts recommend first making a small test solution for building an adobe oven. If the resulting mixture produces a reliable temporary structure, then construction of the full-size equipment can begin.
However, you need to know: to reduce shrinkage, you need to add as little water as possible.
Clay based
One of the cheapest and most accessible types of connecting stove mixtures. Clay mortar for laying stoves is characterized by increased fat content, which determines the degree of plasticity, heat resistance and strength of the finished material.
Natural clay oven mortar can be:
- Fat – characterized by plasticity, strength, but the rapid appearance of cracks after drying;
- Normal - quite plastic and resistant to cracking, gives a small percentage of shrinkage after drying. Able to withstand high temperatures up to 110 degrees;
- Skinny - non-plastic and short-lived, susceptible to rapid delamination and crumbling.
A refractory clay mortar is prepared using three components: clay, sand and water. This composition is resistant to cracking and drying out and ensures reliable installation of a brick stove.
To build a stove, it is recommended to use fatty and normal compositions, which have increased strength, ductility and resistance to delamination.
The quality of the clay determines the amount of sand needed to mix the solution. Clay and purified water with a low content of impurities are used for work. To lay 100 bricks, on average, up to 20 liters of clean water are used.
To prepare the solution, fine-grained quarry or river sand without additional impurities is used. Before use, it must be sifted through a fine-mesh sieve. If it contains gravel impurities, then it is recommended to use a sieve with a mesh size of up to 10 mm. For fine-grained material, a sieve with 2 mm cells is suitable.
Before adding other components, it is recommended to test the clay base for plasticity. How to do such a check? To do this, a small board should be lowered into the resulting mixture for laying the stove and its thickness should be determined. It should be moderately thick and viscous. If there is excess liquid, then it is worth adding a little binder, stirring periodically and testing the mixture for plasticity.
The optimal thickness of the connecting material is 2 mm, which indicates the correct proportions of all components. The finished masonry mass is viscous and not very dense.
The appropriate density of the mortar for masonry depends on the ratio of the main components in it - clay and sand, respectively:
- Fat mass – 1:2;
- Normal weight – 1:1;
- Lean mass – 2:1.
Methods for preparing clay composition
How to prepare high-quality clay-based connecting mass? There are several proven methods.
Method No. 1
The required volume of clay is soaked for 24 hours, water is added to obtain a thick mass. The resulting material is carefully filtered, then sand is added to it and mixed again
It is important to avoid the formation of clay puddles, which can be eliminated with a small portion of the binder component
Method No. 2
Fireclay sand and clay are combined in a container in equal proportions, purified water is added (1/4 of the volume of clay). All components are thoroughly mixed until a homogeneous mass is obtained.
Method No. 3
The composition is mixed on the basis of loam. This recipe involves preparing 10 different solutions, from which the best one is selected.
For the first: 10 volumes of loam, 1 volume of sand and 1 volume of cement, etc. Descending volume of loam. Ten resulting bases are placed in different containers and left to dry for 5-6 days. At the end of the allotted time, the highest quality composition of the solution with a minimum degree of shrinkage and resistance to cracking is determined.
The initial stage is preparing the solution
Builders recommend using components in a 2:1 ratio to create the mixture, where the first indicator is the content of fine-grained sand, and the second is clay. Before preparing the solution, you need to know exactly how much composition is needed to make the stove. As a rule, for laying a medium-sized structure you need approximately 3.5 m3 of clay-sand mixture.
The solution must be prepared in a special wooden container, lined with tin, in which the clay must be soaked for two days. After this time, sand must be added to the solution. The resulting mixture will have to be stirred with your feet until you get a thick mixture without lumps of clay. Large fragments can be chopped using a shovel or hoe. If, as a result, large clots remain in the solution, they will have to be pulled out and broken by hand.
To prepare the solution, add an amount of water equal to ¼ of the volume of clay. The main thing is to use high-quality liquid. This can be river or rain water. The result should be a plastic mixture from which the adobe oven will be built.
If you liked the article, please share it
Previously on the topic:
Share
Checking the quality of the solution by drying
This method is a good option for determining the readiness of the mixture. To check the fat content of the solution using the drying method, you need to perform several simple steps:
- Mix the clay with water until thick, and then soften any lumps with your hands, if any. Next, you need to roll a small ball from the resulting mixture and place it between two flat boards.
- Squeeze the lump slowly until cracks appear.
To determine the fat content, it is necessary to take into account the degree of compression of the ball and the shape of its breaks. A normal solution is one in which a round lump begins to crack when squeezed to 1⁄3 of its original diameter.
The sequence of building a house using clay pot technology
For an eco-house made of chocks, it is most convenient to construct a strip foundation.
It can be not only rectangular, but also round, because such houses are distinguished by their unusualness. They are often made in round or oval shape, which eliminates the need to build supporting structures at the corners due to their absence. The round shape is ideal because it is the most stable and provides the best grip for the entire structure. There are no special requirements for the construction of the foundation. It is only necessary to make a layer of horizontal coating waterproofing along its upper surface. When building a rectangular or square house, you will need to construct a supporting frame for lashing in the corners. To do this, install beams of logs or timber in the corners, selecting longitudinal spikes in them on the sides located in relation to each other at 90 degrees. The space between the load-bearing posts is filled with walls.
A wall between two load-bearing posts.
To do this, a layer of mortar is applied to the foundation, and lumps are placed on it at a short distance from each other. Then all the distances between the firewood are filled with a new portion of the solution. This layer is made just above the chocks and a second layer of blanks is placed. The operation is repeated until the wall is completely ready. You need to ensure that the edges of the chocks protrude 1 - 2 cm beyond the edges of the clay. When laying walls, you must not forget to install window and door openings.
Laying round walls layer by layer.
When the walls are completely erected, they must be covered with a temporary lightweight roof made of tarpaulin or durable film. At the same time, good ventilation of the walls themselves must be maintained. They will dry completely only after six months. For this reason, it is better to start construction in the spring, at the beginning of May. In regions with cold climates, it is best to place the edges of the logs on the mortar, and create a layer of sawdust or straw between them.
Clay oven: foundation construction technology
After preparing the solution, you need to begin building a strong foundation. To organize it, it is necessary to perform the following simple technological work:
- Dig a pit, the depth of which should be at least 25 cm, and its width should be 10 cm larger than the base.
- Fill the resulting recess with clay mortar.
- Lay a layer of stones.
- Fill the pit again with the mixture.
This is a simple technique for making a secure base.
Installation of formwork
To make it, the masonry must be raised approximately 20 cm from the ground surface. The top layer is laid out with a thick clay mortar, after which a waterproofing material (for example, roofing felt or plastic film) must be laid on it.
The final stage of this process is to attach 25 cm thick planed boards on top, which must be laid crosswise. It is necessary to build several such layers.
Preparatory work: collection and delivery of material
Straw was also needed for construction. But after reading a number of articles and literature, it was possible to make it from pine needles. The author cut spruce branches, it just has long needles, and he also placed these branches in the greenhouse. The branches were drying for almost a month, it seemed like it was hot in the greenhouse, but the needles didn’t even turn yellow at all, but retained a wonderful fresh green tint. Still, the author did not wait until the needles were completely dry, and plucked them from the branches; it was difficult, since the needles had not reached dryness. While the branches were drying, the stove stand was poured. A trench 2 bayonets deep was also dug, right down to the clay.
The dimensions of the trench for the stove turned out to be 120x120 cm, and the width of the trench was bayonet wide.
For the formwork I used old interior doors and boards were placed on top of the doors - the resulting structure was 90 cm high. After that it was filled with concrete. A week later, having already placed hemp prepared to size under the boards with iron, the slab was poured, an ordinary slab (without expanded clay).
Furnace assembly
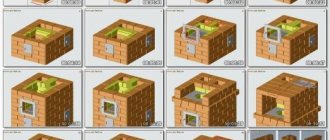
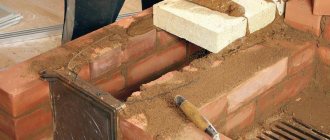
The main part of the device can begin to be erected when the base and formwork are completely strengthened. First, you need to lay stones on the foundation, which must be bound with clay mortar. The recommended height of this structural part of the oven is about 20 cm. An important point: the upper 5 cm should be made only of the mixture.
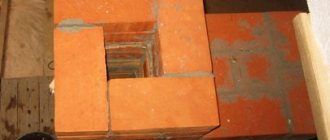
The next step is to install on the pole the outer part of the formwork from boards knocked down into a strong box, the dimensions of which should be 60 x 120 x 140 cm. After this, you need to build the inner side, leaving a hole measuring 20 x 20 cm. This will be needed later for burning out formwork. When this work is completed, you need to wedge the outer boards with stakes so that the structure does not deform during use.
The space between the sticks must be filled with clay mortar, but before this you need to protect the hole from the mixture. To obtain a dense layer, it must be compacted thoroughly. It is better to strengthen the corners with reinforcement, which must be placed 10 cm above the internal formwork. The diameter of the metal rods must be at least 10 mm.
The prepared structure should harden in a week. This time is enough to result in a strong adobe oven. However, after three days it is necessary to remove the outer part of the formwork, and then cut out the mouth of the structure with the following dimensions:
- height - 32 cm;
- width - 38 cm.
Then you need to remove the protective board through the resulting hole, which should be made in the shape of an arch.
Method two. We make a stove without having a metal casing at hand
The manufacturing process in this case is not much different from that described above, but there are definitely some nuances here. Let's start with the fact that the working volume of the design below will be about 13 liters. The spiral, as mentioned above, can warm up to a thousand degrees in just 1.5 hours, while the temperature of the outer walls of the device will not exceed 100 degrees. The algorithm of actions should be as follows.
Step 1. First, using a 4x2 centimeter profile pipe (with a square cross-section), we build a stand for the device. After this, we paint the finished stand with enamel.
Step 2. We attach a sheet of galvanized steel on top of the stand (its thickness should be approximately 0.1 centimeters), using “metal” self-tapping screws.
Step 3. We make the walls from fireclay bricks and a special fireplace composition (everything is the same as in the previous version). After the solution hardens, we make grooves for the spiral.
Step 4. We assemble the bottom from brick separately, and use the same mortar for fastening. Before continuing work, wait until the structure is completely dry. Do not forget to wet each brick immediately before laying.
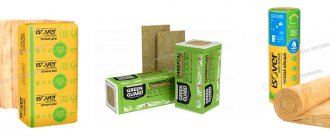
Step 5. We lay a thermal insulation layer on top of the metal base (we can use the same basalt wool for this). In order to maximize compaction of this layer, it must be moistened before fixing the brick bottom.
Step 6. We continue the traditional laying of the stove, but we try to ensure that all voids and seams are carefully filled.
Step 7. We traditionally make the lid for the chamber from fireclay bricks, but at the same time we fasten them together with a metal tie.
Step 8. Place the spiral in the prepared grooves and insulate the structure from the outside with thermal insulation material. Next, we cover everything with sheets of galvanized steel, which are cut according to the dimensions of the resulting chamber.
As you can see, this requires knowledge not only in the furnace business, but also in the field of electricity. You can see another possible manufacturing method in the video below.
The final stage is drying and finishing the structure
If the previous work was done correctly, then at the end it is necessary to give the stove a completed look. The structure should be erected only in warm weather, since it will take a long time to dry if the temperature outside is low. In summer, this process will take a week, but this time directly depends on the quality of the solution and the amount of water added.
However, there are some tricks that can be used to reduce the drying time of the structure. To do this, you need to light a low fire in the oven for 30 minutes, but no more. This procedure must be done several times a day. In addition, the craftsmen claim: the longer the structure dries, the better quality it will be. If you need to speed up this process, you can light a fire, but it is better to wait until the stove device hardens on its own.
Do not forget that you need to make additional elements: a blade and a damper. These accessories can be made from wood. The function of the valve is to close the mouth. It is recommended to make the board for the shovel 25 mm thick.
To make an adobe stove more beautiful with your own hands, you need to whitewash it. For these purposes, you can use ordinary materials, for example, chalk or lime. In addition, patterns are sometimes painted on the surface of the structure using watercolors.
Basalt with cladding
This option is practically no different from the previous one, however, if you don’t know how to decorate the wall behind the stove in the steam room in such a way as to preserve the beauty of the room while creating safe conditions, then this option is undoubtedly for you.
Protect the walls using heat-resistant decorative materials laid on thermal insulation. The finishing around the stove in the bathhouse can be done with the following materials:
- Clinker tiles are made from baked clay. It is characterized by high strength, heat resistance and durability. One of the advantages of this option is also the rich color palette, which includes not only black and white tones, but also blue or green colors;
- Terracotta tiles are also made from clay, but they are inferior to the previous option in terms of density and the number of possible colors;
- Soapstone is a good cladding option for a bathhouse, made from rocks of green and grayish shades. Has good heat resistance and strength;
- Tiles are ordinary ceramic tiles, characterized by good heat resistance and a pattern on their surface;
- Porcelain tiles are heat-resistant tiles that imitate natural stone or wood.
The tile will not dissipate heat, protecting the walls from fire, so it cannot be mounted directly on the wall. We recommend using the following design:
- Wall;
- Clearance for ventilation;
- Fireproof material;
- Tiles (the distance from the tile to the stove must be at least 15 cm).
Such a “pie” will create reliable protection for walls from heat, preserving the beauty of the room.
One of the following options can be used as a fireproof material:
- Fireproof drywall - made from the same materials as regular drywall, but using fiberglass;
- Minerite slabs for baths are absolutely not exposed to moisture and heat.
- Glass-magnesium sheet - plates made of fiberglass and magnesium binder. Excellent resistance to heat, moisture and noise.
This option will perfectly protect your bathhouse from the possibility of fire, and will also insulate the room, preserving its aesthetic component.
Basalt facing slabs look aesthetically pleasing and provide good fire protection. In addition, this material gives off heat for a long time after heating. You can use this material to cover both a brick screen and the wall itself on top of insulating sheets.
Fire safety cannot be treated negligently - the consequences of carelessness can be tragic. The modern building materials market allows you to choose an option according to your means and taste, while providing reliable protection against fire.
Operating rules
The formwork inside the furnace must be set on fire. If this is not done, then there is no way to extract it. Such actions must be carried out carefully, since due to careless handling the structure may crack or even collapse. If defective areas still appear, you can repair the adobe stove. As a rule, to do this, the cracks need to be opened and simply covered with mortar. If all the steps described are done correctly, then you can safely light the fire.
Initially, the structure needs to be heated for about 2 hours. Dry firewood can be used as raw material. The stove should be cleaned of burnt firebrands using a poker. Afterwards, you need to close the device tightly and wait 20 minutes. During this time, the temperature inside the structure stabilizes, so you can put food in it, which will warm up evenly on all sides.
How to make a clay stove in 5 steps
You may be wondering: “What can you do in such an oven?” Good question!
These ovens are perfect for baking pizza, bread, cookies, cakes, potatoes, rice, beans, and even stews!
Is this enough for you to start building your own stove?
Here's a step-by-step guide on how to do it:
Step 1: Creating a sand-clay mixture (adobe). When kneading, the main thing is to choose fatty clay that is easy to mold in your hands and to make the correct proportion of sand and clay.
How to determine it? Very simple. You should have balls like these in your hands. Step 2: Make a base with insulation. Glass jars or bottles provide reliable thermal insulation. And fireclay brick will be the basis for creating a dome furnace. Step 3: Create a sand oven. More precisely, this is not the stove itself, but only its layout. Reminds me of the principle of how papier-mâché is made. Cover it tightly with newspaper and moisten it. Step 4: Creating a thermal layer. The main purpose of the thermal layer is to retain heat inside the oven. After the first dome is ready, all the sand is carefully removed from it. Next, adding a little straw to the mix, we make an arch under the door. Step 5:. Insulation layer. The purpose of this layer is to retain heat in the thermal layer. It is much thicker and sawdust is added to it. Finally, the finishing! Coat the stove with clay to give the stove a smooth surface and add sculptural decorative details. Well, the clay stove is ready. You can put firewood and light it.
