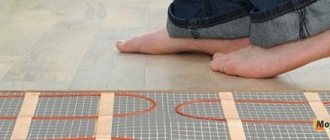
Modern homes are increasingly equipped with heated floors. After all, the availability of this heating method increases while maintaining high efficiency. Despite the simplicity of the design of heated floors, they can be called the most optimal option for heating a house or for additional heating.
Connecting a heated floor to electricity
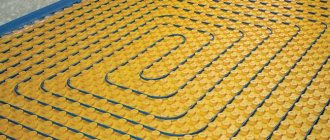
Heated floors can be of two main types by design: water and electric. Let's look at how an electric heated floor works and is connected.
The principle of operation of warm electric floors is simple: they convert electrical energy into thermal energy due to the resistance of the conductors. At the same time, the screed or tile warms up. It is these materials that are able to evenly distribute heat over the entire area and release it into the environment.
Serial connection of a rod heated floor
Heated floors powered by electricity have a fairly simple design and consist of the following main parts:
- heating element (depending on the type, it may be a cable or a mat);
- temperature sensor;
- thermostat.
The structure of a floor heated with electric cables
Many people think that laying a heated floor and connecting it to electricity is difficult. In fact, in its essence, this type of heated floor resembles ordinary wiring, which is laid in layers of screed or under tiles. For full operation, a regular outlet with 220 V alternating current is sufficient.
The connection diagram itself does not cause any difficulties - it does not even require special knowledge. But be sure to remember when working that this is an electric current, which, if handled incorrectly, can greatly harm a person, even leading to death. To prevent this from happening, you must strictly follow a number of rules when choosing and connecting.
Selection of heated floor power
Calculation of heated floors
The most important indicator that you need to focus on when choosing heated floors is their power. This criterion depends on the following points:
- floor area that needs to be heated;
- type of heating required (additional or main);
- type of room where heating will be carried out (balcony, living room, office, warehouse).
The type of connection to the network and the presence of additional elements depend on the power.
Calculation of underfloor heating power
When calculating a heated floor, you need to take only the usable area where a person is most often located. So, if this is a kitchen, then you don’t have to calculate the area under the furniture and refrigerator. When making calculations, it is imperative to determine in advance the location of all heating elements, since it will be impossible to change their positions in the future.
If you decide to use underfloor heating as the main heating, then the area allocated for it should be at least 70% of the entire room.
Safety requirements for operation
Before using electric floors, read the manufacturer's instructions included in the kit.
Basic safety requirements that apply to all types of electric floors:
- Do not shorten the heating element;
- It is necessary to take only a screed solution or tile adhesive intended for warm polos;
- Opening heat-shrinkable sleeves at the junction of the heating and installation parts of the floor is prohibited;
- Do not lay carpet on heating sections or place furniture without legs.
Specific power of heated floors and its calculation
Advantages of Uriel thermostats
Warm floors can be used both as the main source of heat in the house and as heating. For the first type, the calculation is approximately 150-170 W per 1 sq.m. Heating is calculated based on values of 110-130 W per 1 sq.m.
This indicator may vary slightly depending on the type of heated room. For example, rooms where people are constantly present must have very warm floors, and for this reason the calculated power consumption increases. If this is a kitchen or bathroom, then you can not overestimate the values here, since residents spend little time in them.
Electricity consumption of underfloor heating can be controlled
Additionally, when calculating, it is recommended to take into account the number of storeys. If the floor of an apartment on the first floor is insulated, then the power needs to be increased by 10-15%. In all higher rooms the values can not be increased.
electric heated floor
System Features
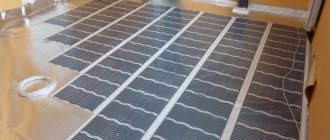
This type of underfloor heating (IR) is a film combined with carbon paste, which heats the floor and room using infrared radiation. And this type quickly gained popularity due to its advantages, including:
- Easy to install.
- Possibility of arrangement under any covering.
- Durability.
- Safety for humans.
- Fire safety.
And this is not all the advantages of the system. And among the disadvantages, I usually highlight only the relatively high cost, as well as minor harm from radiation (in case of incorrect selection).
Also, when purchasing, you should consider some nuances:
- Infrared film does not fit in areas where furniture or decorative elements are placed.
- The layout of the film and electrical wiring is outlined in advance.
- It is also taken into account that the location where the temperature sensor is supposed to be located should be free of drafts and other factors that locally change the temperature.
Types of electric heated floors and thermostats
Now there are two types of electric heated floors:
- cable or sectional;
- mats, infrared film systems.
Cable heated floor
Each of these types has its own characteristics and is used in specific cases. So, if a warm floor is installed in a concrete screed, then it is better to use a cable type. Mats or film heating elements are best suited under the tiles.
Naturally, the main part of a warm floor is the heating element itself. But it works fully thanks to the thermostat, which is the heart of the system.
A thermostat for a heated floor is a device that, without human intervention, automatically regulates and maintains the optimal air temperature
It allows you to maintain the desired surface temperature. Buying a thermostat is not a problem: it can be either mechanical, with manual setting and temperature control, or fully automatic, with measurement of surface temperature, room air and selection of the most optimal parameters.
Thermostat for heated floors Electrolux ETT-16 Thermotronic Touch
What type of flooring is best to choose for a city apartment?
When choosing a heated floor model for an apartment, you need to take into account the advantages of each system and the design features of the room. You need to decide whether it will be the main heating or additional heating.
The water design is environmentally friendly and economical to operate. Heat transfer is carried out by radiation, so excess positive ions are not formed - there is no electromagnetic field.
But installing it in an apartment has its own difficulties:
- Obtaining permission to install a system in a multi-storey building. After all, installing water heating in an apartment building is dangerous due to the possibility of leakage and flooding of neighbors below, and can also lead to a decrease in pressure in the general system of the house. In addition, this will significantly increase the load on the floors.
- A mixing unit is required, and this is not always possible to do in an apartment.
- During the repair of the general house system, slag will fall into the hydrofloor.
- When carrying out annual pressure tests, the pressure in the system will exceed 6 Bar, and the TP equipment (manifold with flow meters) has a maximum pressure of 6 Bar.
- The temperature of the liquid in the heating system can reach up to 100 degrees, which will negatively affect the equipment.
When choosing an electrical system (see the device, types and installation diagrams), all the previously listed problems are absent: no permit required, no risk of leaks. In addition, such structures are less labor-intensive, and the cost of their construction is lower than water ones. But during operation, electricity bills increase.
Cable-type electric floors filled with screed have less weight, thereby not placing a large load on the floors of the house. Infrared film is ideal for an apartment. It is easy and quick to lay, and it does not take up much usable space.
To summarize, we can say that for an apartment, purchasing and installing an electric floor is a cheaper option, but during operation, a water floor is less expensive.
But with its installation in an apartment building, as mentioned above, there are a number of problems.
Connecting the thermostat to the system
Installation diagrams for film heated floors
Before connecting a heated floor, regardless of its type, you need to decide on the location of the thermostat. This device is used to maintain a stable set temperature indoors. In addition, the thermostat directly connects the heated floor to the network.
It is better to install the thermostat close to existing electrical wiring.
The thermostat is installed at a height of at least 1.5 meters from the floor and in places where it will be completely protected from high temperatures. This will allow you to take measurements as accurately as possible and set the desired floor heating.
Before connecting the thermostat, you first need to decide which method will be used to do this: power from the panel or use of an outlet. It’s worth noting right away that these two methods involve the additional inclusion of a circuit breaker in the circuit, which will trip in the event of a breakdown, overheating or short circuit. Its maximum shutdown power is selected depending on the type of heated floor.
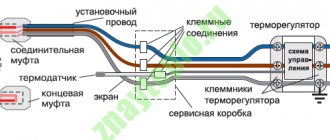
In most cases, the connection diagram is indicated on the thermostat, which greatly simplifies installation without the help of electricians. If there is no diagram, then the following wires need to be connected to the following terminals:
- 1 terminal – network phase;
- Terminal 2 – network zero;
- 3, 4 terminals – heating element cores;
- Terminal 5 – timer;
- 6, 7 terminals – floor temperature sensor.
This distribution is standard, but it is worth understanding that different manufacturers may create circuits that require different connections. It all depends on the design and additional capabilities of the system.
We prepare a place for installing a thermostat: we supply power to it (hidden or open, as desired)
Before connecting, you need to cut a small ditch in the wall. It will house two plastic tubes. In the future, the wires of the heating element will be passed into one, and the temperature sensor will be located in the second. Upon completion of these activities, you can begin installing and connecting the entire underfloor heating system.
Surface preparation
First step. We dismantle the old floor covering and screed. When laying a film heated floor, the old screed, if it is in good condition, does not need to be dismantled. If you install a cable system, you will have to get rid of the tie. Thoroughly clean the surface from dust and dirt.
Dismantling the floor screed
Second step. We lay a layer of waterproofing material. Traditionally, polyethylene film is used, but you can choose other insulation if you wish. It is important that the moisture-proof material extends approximately 100-120 mm onto the walls.
Floor waterproofing
Third step. We attach a damper tape to the wall along the perimeter of the base. Thanks to it, it will be possible to compensate for the thermal expansion of the system during heating. We carefully trim off the excess waterproofing and damper tape.
Film and damper tape
Fourth step. We lay a thermal insulation layer. Thanks to it, loss of thermal energy through the base will be eliminated. Choose insulation taking into account the location of the room, the type of base and the intended purpose of the heating system.
Floor insulation with polystyrene foam
If you plan to use the system as an addition to the main heating, thermal insulation can be done using polyethylene foam equipped with a reflective foil layer. Additionally, the material will take on the function of a substrate for a heated floor.
Foamed polyethylene in a heated floor system
If there is a heated room on the lower floor, it is best to install thermal insulation using expanded polystyrene sheets. The thickness of the material is 2-5 cm. Another insulator with a similar thickness will do.
When installing a heating system in a previously unheated room, for example, on a veranda or balcony, the thermal insulation layer must be more thorough. For example, 10 cm insulation with polystyrene foam or mineral wool of similar thickness is suitable.
Insulating the loggia floor with mineral wool
Fifth step. We lay a reinforcing mesh on the insulation. If desired, you can add microfiber and plasticizer to the screed solution. This improvement in the composition will make it possible to do without additional reinforcement.
A reinforcing mesh is laid on top of the insulation and beacons are installed for pouring the screed
Connecting a cable-type floor heating system
Connection diagram for cable heated floor
To connect a cable heated floor, you need to level the surface. Next, attach a damper tape along the wall and then lay thermal insulation. The cable can also be installed on an old surface, without a lining. The only condition for this is the presence of a heated room below. Before laying the cable, you need to stretch all the wires to connect to the thermostat.
Next, you can lay the heating element, having previously placed a regular mounting tape on the floor. This is done to keep the cable in the desired position and not move. The cable can be laid in any shape, the main thing is that it does not intersect with itself. The most effective and convenient installation method is the so-called “snake” - the cables are sold in rolls, already laid in the form of a coil on a mesh.
Connection diagrams for single-core and double-core cables for heated floors
Having distributed the cable evenly, you can secure it. It is important that the edges do not reach about 10 cm from the location of the furniture or walls. Next, you need to install a temperature sensor, which is hidden in the tube mentioned earlier. Its location should be at a distance of 40-50 cm from the edge of the heating element coil.
This completes the installation of the cable and sensor. Using a tester, you need to check the resistance of the heating element. It must correspond to the passport data. Next, you need to fill everything with screed and wait until it hardens. You cannot immediately turn on the heated floor to dry it, as cracks will appear and the strength indicator will significantly decrease. All that remains is to simply connect all the wires to the thermostat and check the functionality of the system.
thermostat for heated floors
Installation of thermomat
Installation of Thermo Thermomat
The process of installing heating mats with your own hands is much simpler than cables, since the wire is fixed to the sheet:
- Draw a diagram of the location of the mat on paper; we must remember that they are not placed under heavy furniture.
- The power of the heating device and the amount of material required are calculated - this is done by analogy with cable floors, taking into account the usable area.
- A place on the wall for the temperature sensor is determined, a recess is made for it, as well as grooves from this area to the sensor.
- The base is prepared - it is leveled and cleared of debris. Then it is covered with a primer - this will improve the adhesion of the floor to the solution.
- The sensor is installed - placed in a corrugated pipe and placed at a distance of at least 50 cm from the wall. It should be placed between the floor turns.
- Mats are laid - they are laid directly on the subfloor to avoid overheating; additional insulation is not necessary. The product is equipped with adhesive tape, so no fasteners are required. Mats should not overlap each other. If you need to trim the fabric, you need to be careful not to damage the electrical wire.
- The connection is made and the system is checked - the resistance of the cable in the mats is checked with a multimeter. The thermostat is installed, the floor and sensor wires are connected to it, after which it is connected to the power supply. A test run of the system is performed.
- The mats are poured with tile adhesive - a layer of 8 - 10 mm, and time is given for it to dry. The grooves are also sealed with this composition.
It is possible to lay mats in concrete or dry screed; this process is the same as when installing a heating cable (described above).
- The finishing coating is laid - when filling the mat with glue, it is often tiles.
Turn on the electrical system only after the glue has completely dried.
Thermal mats can be laid on an old base, similar to a heating cable.
Connecting heated floors in mats
To figure out how to connect heated floors in mats, you don’t need to have a lot of knowledge and experience. The basic principle is approximately the same as that of the cable type. It is only worth noting some differences.
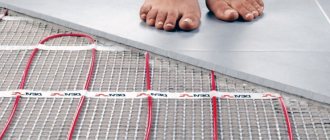
A thermal mat is a heat-resistant film onto which a heating element is attached. Since the pitch and shape of the installation are set during production, you will only need to calculate the heated area and power consumption.
Electric floor in mats
When installing such heating, you need to lay out the mats on the surface according to the calculated area. Next, everything is filled with a thin concrete screed or glue is applied for laying tiles. A very important point is the lack of thermal insulation. This can lead to system overheating and failure.
If the cold leads are not long enough for connection, just use a piece of mat. The coupling must be located inside the screed itself.
Common Mistakes
How to install electric floors correctly with your own hands - this question often arises for beginners who want to do this heating at home.
The main mistake is installing floors under large furniture. Underneath, the surface is not cooled, which leads to overheating and then failure of the system.
You cannot bend the cable either, as this will disrupt the functioning of the device. When laying cable mats, cutting the wire is unacceptable, so you should correctly calculate the size of the heated area.
A common mistake when constructing electric floors is inappropriate control of the insulation resistance during installation. The indicator should not exceed that specified by the manufacturer by more than 10%.
When using a film heated floor, it may stop heating if the film is damaged. Its current-carrying parts must be properly insulated, otherwise electric current will leak and the system will eventually shut down.
If we talk about the temperature sensor, then you should not pour it into the screed. In case of breakdown, replacement will be difficult. It is placed in a corrugated pipe.
Connecting a film-type heated floor to the electrical circuit
Film-type warm floors are a relatively new invention. It is made of special heating film. Even the most experienced builders may have problems connecting this system. In order to do this without problems, you must definitely understand the film heated floor system itself.
Sequence of work when laying electric heated floors
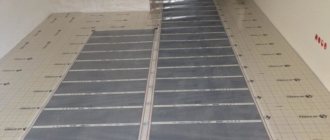
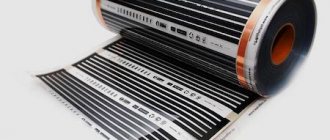
The film heated floor system consists of special carbon and bimetallic heating elements, which are sealed in a special heat-resistant material. Copper contacts are located along the edges of the film. With their help, the device connects to the network.
The actual connection is made by soldering wires to the terminals and leading them to the thermostat. A special feature of the installation is the use of a substrate that has a foil surface. This solution allows heat to be reflected from the lower surface and completely directed to heating the floor.
The temperature sensor is installed, as a rule, in a special recess under the film itself, but options for its location on the surface are not excluded. This type can also be cut according to special marks applied by the manufacturer. They are located at a distance of up to 30 cm from each other. When the installation is completed, the sheets can be connected in parallel.
The main difference between a film heated floor is that it fits under any surface. The only exception is its installation under the carpet, since there is a high probability of damage to the integrity of the film.
The decision to install heated floors in the house has always been justified. It is convenient, practical and quite economical. And if there are children in the house, a warm floor will allow parents not to worry about them freezing and getting sick.
Video - Connecting a heated floor to electricity
Film floor installation
Infrared heated floor - Installation, laying and connection of film flooring.
As mentioned above, installing a warm electric film floor is simple. But you need to start, as when installing any heated floor, with the film location diagram (do not lay it under furniture). The film is placed at a distance of at least 10 cm from the furniture.
Then the power of the floor is determined. When laying laminate as a finishing coating, the power should not exceed 150 W, if there are tiles - up to 200 W. Afterwards, the quantity of the product is calculated - with film this is easy, it should cover the entire required surface, a maximum length of 8 meters.
The process of constructing an electric heated film floor is similar to cable systems, the only difference is in the arrangement of the heating element.
Preparatory work
You should start by preparing the area for the thermostat. It is installed in an accessible place on the wall. A recess is made for it, in which the junction box is placed.
Then the subfloor is prepared - leveled and cleaned.
A polyethylene film is laid down - it is necessary for protection from moisture. Foil insulation (no more than 5 cm thick) is laid on top of it, with the metallized side up, this will help avoid heat loss. The sheets are glued together with tape.
The location of the film is marked on the insulation, and a recess is made for the sensor. The temperature sensor should be placed under the second section of the infrared floor - this will allow more accurate reception of information about surface heating.
Film editing
Floor strips are laid according to the prepared diagram. To reduce the length of the wire, the film is placed with its end sides to the wall where the thermostat will be, the distance from the wall is 15 cm, the copper contacts should be located down.
Laying the sheets overlapping is not allowed; they must be positioned end to end. If necessary, the film can be cut, but only along specially designed lines; the maximum length is 8 meters. The product is fixed with tape to the heat-insulating material.
Connecting the system
The film is connected to the power supply using terminals. To do this, the insulation is removed from the edge of the wire, it is inserted into a clamp, one contact of which is inserted inside the film, and the second is installed on a copper busbar. All contacts are fixed with pliers and insulated with bitumen tape; the places where the film is cut must also be insulated.
After this, a temperature sensor is installed, it is attached to the bitumen insulation to the black silicon strip at the bottom of the film, and the wire is pulled to the thermostat along a recess in the substrate.
The thermostat is installed. The sex cables from the sensor are connected to it. Then the power supply wire is connected. To check the functionality of the system, you need to turn it on at full power for a few minutes.
Laying the finishing coating
Before laying the finishing product, the structure is covered with thick polyethylene - this will protect it from moisture.
Laminate flooring can be laid directly on plastic film. If you are going to lay carpet or linoleum, then sheets of plywood are placed on top of the waterproofing.
How to properly install tiles on a warm film floor - this can be done in two ways:
- A painting mesh is placed on the polyethylene to improve adhesion. A thin layer (1 cm) of self-leveling compound or screed is poured.
- The waterproofing is sheathed with GVL, the sheets are fixed with self-tapping screws. It is important not to damage the film. The tiles are mounted using underfloor heating adhesive.
Electric film floors can be installed on old flooring.
To do this, it is cleaned, a heat-reflecting product is placed on top, on which the film is laid.
The nuances of choosing a heated floor in accordance with the characteristics of the heating cable
- The above connection diagram for a two-core cable, or rather the absence of the need to return its second end to the thermostat, greatly facilitates installation in rooms with a complex configuration. It is important that the entire installation takes no more than four to five hours.
- From the point of view of harm to the human body, both sex models are considered harmless. However, there are some subtleties here: the electromagnetic field created by a two-core cable is less than the permissible standard by a factor of 300, and a single-core cable by a factor of 60. Therefore, for rooms such as a kitchen or living room, where, as a rule, people stay for a long time, more often two-core floors are used. A single-core one would be more appropriate, for example, in a bathroom, on a balcony or in any other room where a person usually stays for a short time.
But what should you choose - single-core or double-core underfloor heating? It all depends on the specific thermal capacity and room parameters. For large areas it is best to install cables with 2 cores. Systems with low energy consumption can be equipped with a single-core heated floor.
© 2022 prestigpol.ru
Direct connection diagram
You have a boiler, after which all safety fittings + a circulation pump are installed. In some wall-mounted boiler versions, the pump is initially built into its body.
For floor-standing units you will have to install it separately. From this boiler, the water is first directed to the distribution manifold, and then disperses through the loops. After which, having completed the passage, it returns through the return line to the heat generator.
Specification of materials and equipment using the example of Valtec
With this scheme, the boiler is directly adjusted to the desired temperature of the TPs themselves. You don't have any additional radiators or radiators here.
What are the main features worth paying attention to here? Firstly, with such a direct connection, it is advisable to install a condensing boiler.
In such schemes, operation at relatively low temperatures is quite optimal for the condenser. In this mode it will achieve its highest efficiency.
If you use a regular gas boiler, you will soon say goodbye to your heat exchanger.
The second nuance concerns solid fuel boilers. When you have it installed, for direct connection to heated floors, you will also need a buffer tank.
It is needed to limit the temperature. It is very difficult to directly regulate the temperature with solid fuel boilers.
Laying the heating mat mesh
It is necessary to begin the installation of the grid from the point where the cable exits to the thermostat box. Unroll the roll and lay it out on the surface. In this case, it is necessary to bypass the areas previously marked with marker tape.
During installation, you can walk on the heated floor (via wires) if you have shoes with soft soles. Some even press the mesh to the base of the screed in this way, but you shouldn’t overdo it.
When unwinding the roll, it is advisable to hide the end section of the cable inside so that during installation it does not twist or touch foreign objects.
In the place where it is necessary to rotate the heating element, a section is cut.
However, do not try to cut the heating cable itself.
It is enough to free it from the net. Glue the tail that turns out when turning to the floor with aluminum tape. In addition to fastening, it also helps distribute heat over this area of the surface.
If you have a sectional resistive mat, where there are independent sections connected from the power cable running along the edges, then when turning, you can cut one of the outer wires.
But not the heating element! Don't even think about cutting it.
After installation, it is necessary to connect these cut strands. To do this, you will need a copper installation wire PuGV with a cross-section of 1.5 mm2.
Measure the required length and trim the ends. After which, you thread heat shrink through them. The PuGV core and the outermost supply core of the mat are connected to each other using a pressed GSI sleeve.
Select the sleeve according to the cross-section of the wires.
Next, move the heat shrink to the crimping area and heat it, reliably insulating this area.
After which, do the same with the second end.
In this way, single-core power wires on mats are connected to independent sections.
How to connect
If you have not worked with plumbing before, then you should not take on such work - there are too many serious consequences if you make mistakes. Moreover, heated floors can be made from different materials, which require special tools to work with. If you are confident in your abilities, then you can act according to the instructions that we will now provide. We will connect the circuit already built into the screed to a two-pipe heating system. For this we need:
- A regular tap that we will install for supply. It will, if necessary, disconnect the heated floor from the system.
Radiator tap "male-male" - We will install an RTL valve on the return line, the operating principle of which we described earlier. It will be equipped with a thermal head that measures the temperature of the water in the circuit. Do not confuse it with a radiator head, which measures the heating of the air in the room.
RTL valve for return
Table 1. Connecting heated floors.
| Steps, photo | Description |
| We turn off the heating taps to stop the circulation of coolant in the system. After it has cooled, if it was hot, cut the pipes with special scissors. There are different ones for each type of pipe. In our example, the master works with reinforced polypropylene - all connections are made by hot soldering. The pipes are cut into tees, from which two outlets are made upward. As you can see, from the return pipe the master laid a multi-joint elbow to carefully bypass the upper pipe, and on the supply he limited himself to a tee with a thread for the tap. |
| Before soldering the bend from the elbow, he made a vertical level marking, along which he screwed a clip-retainer for the plastic pipe |
| Step 3 - solder the tap | Next, the bend is attached to the elbow using a soldering iron, as shown in the photo above. After that, it is fixed in the clip, and you get a precisely drawn thread into which we will screw the tap. |
| We install both taps, tightening all connections securely. We use only sanitary flax as a sealant. There can be no talk of any fum tape. Advice! On the RTL tap there is a mark indicating the direction of movement of the coolant in the form of an arrow - be sure to check this point during installation. |
| Step 5 - underfloor heating outlets | PEX leads with internal thread for return and external thread for supply are mounted on the terminals of the plastic pipes of the heated floor circuit so that they can be connected to the taps. These conclusions are made at the same level as the conclusions on the heating pipes. |
| Step 6 - Connector | Next, we screw the connecting corrugated stainless steel hose (inlet) onto the nuts - we connected the return line. We proceed in the same way with the coolant supply tap. |
| We screw the thermal head to the RTL tap. In our example, the master uses equipment from the Austrian company Herz, which can regulate the temperature within 25-60 degrees Celsius. |
Prices for heating cable and components
Heating cable and accessories
This concludes our article. Do it right, do it wisely, and the result will always please you.


