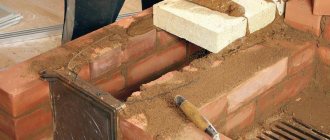
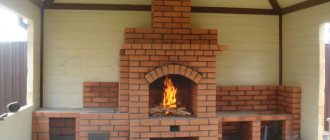
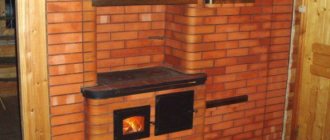
Laying a furnace is an expensive and labor-intensive process. These circumstances reinforce the already high importance of proper operation of the device. Certain rules for caring for a stove or fireplace come into force immediately after completion of construction work. Many people wonder how long it will take to use the constructed structure?
Their doubts are not without foundation; a newly built oven contains a lot of moisture, which is absorbed from the mortar into the bricks, and if it seems to us that the mortar has already hardened, then this is only an external appearance, since removing moisture from the volume of materials takes a long time.
To describe the full picture of the seriousness of the situation, we note that the remaining moisture in the form of liquid is contained in the smallest pores of the material. When lighting a new stove without following all the recommendations, the water in the pores will begin to evaporate, the steam pressure will increase sharply and it will lead to destruction of the structure of the substance. As a result, many cracks will appear throughout the entire volume of the firebox. It is simply pointless to fight with such a large number of them. Therefore, the answer to the question of when it is possible to light a newly built stove does not come down only to indicating a certain period.
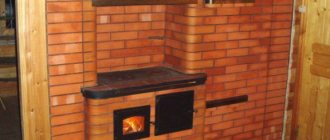
Ready-to-use structure
When can you light the stove after laying?
There are two main stages in the oven drying process:
- Natural drying of the stove after laying for 5 - 7 days. At this time, heating it with wood is strictly prohibited, since the main removal of moisture from the structure occurs
- Drying by heating lasts from 7 to 14 days, depending on the intensity and number of ignitions of the oven.
In total, the entire process from laying the last brick to complete drying and full use of the stove takes about 2 - 3 weeks.
The entire drying process takes about 2-3 weeks (depending on weather conditions)
General rules for carrying out work
Before directly plastering the stove onto the work surface, the following work must be completed.
- The plaster must be stirred to achieve a homogeneous mass and the consistency of thick sour cream.
- It is important to remove all contaminants from the working surface of the stove (dust, remnants of the previous plaster that were used when laying the stove).
- To improve the “grip of the mortar,” you need to clear the masonry seams to a depth of about fifty millimeters.
- Before application, it is important to heat the oven a little in order to achieve 20–25 degrees of heat;
- On warm walls, the plaster will lie more evenly, and an excellent level of quality will be achieved.
After all the preparatory procedures, you need to proceed to the main part:
- Additional surface cleaning.
- Treatment of cracks.
- Surface primer.
- Installation of reinforcing mesh.
- Plastering the stove
Why is it prohibited to heat an undried stove?
A large amount of moisture contained in the structure, when heated, can lead to deformation of the masonry, up to the loss of individual elements, as well as cracking of bricks and cement mixture. This will negate all the efforts of the stove maker; the stove will need to be rebuilt in a new way.
Possible cracks
Even after repairing the furnace, if it is not heated and dried properly, carbon monoxide may enter the living space. The culprit will again be moisture, which, with intense evaporation, forms microscopic channels and cracks through which dangerous carbon monoxide and smoke will enter the home.
Rules for stacking firewood
In order to prevent unforeseen situations when the operation of the structure is not efficient enough or, conversely, the heating occurs too intensely, it is necessary to follow the recommendations for laying the material. In order for the stove to provide heat, it is worth placing the firewood on the grate as follows:
- Wood with a 25% moisture content is lined with a layer of no more than 25 cm.
- Hard coal - recommended thickness 15 cm.
- Peat products with 30% humidity are not recommended to be placed in layers greater than 25-30 cm.
How can I speed up the drying process?
It is better not to force the natural drying process; the stove should release maximum moisture naturally.
But, there are some tricks that increase the evaporation of water from the structure:
- It is recommended to use a fan heater, directing the air flow into the combustion chamber.
- It is possible to use a powerful incandescent lamp of 200 - 250 watts; it is also placed in the firebox, after which it turns on and slowly heats the air inside all compartments of the furnace.
To intensify drying by heating, the stove is ignited 3-4 times a day, adding a small amount of quick-burning firewood.
It is important that the exhaust dampers are half open and the access of fresh air to the combustion area is closed. After the wood has completely burned out, close the dampers and open the stove door. You can completely dry the stove after laying it after 5–7 days of such procedures.
Useful tips
Drying the stove is accompanied by ignition of the fuel. You will have to deal with this process every time, so prepare in advance for the specific features of your design. It is known that two identically built stoves can melt differently.
Before you force dry the device, you need to make sure that there is draft in the chimney. To do this, a tourniquet is made from newspaper and set on fire. The flame should deflect towards the pipe. With this maneuver we also achieve heating of the air in the pipe, so use this method every time you light the stove.
There are certain restrictions on how to dry the stove, for example, in bad weather it is better to abandon this idea. The total time for one cycle should be about 3 hours. By drying, you have not protected the device from mechanical damage.
Cracks in the masonry can also form if the structure is not treated carefully enough. The firewood must be stacked carefully to avoid hitting the walls of the firebox. Remember safety at any stage of using the oven.
Signs that you can light the stove
The main indicator that the oven is completely dry is the absence of condensed moisture on the oven doors and the main valve 3 to 4 hours after all dampers and oven doors are completely closed.
There is another Siberian way to find out if the stove is completely dry:
- To do this, you need to open all the windows in the room, as well as all the doors and dampers in the oven.
- Afterwards, place a bucket of water near the stove.
- As soon as it completely evaporates, the oven is ready for full operation.
And the last way to finally make sure that the brick structure is completely dry is to test the kindling upon completion of forced drying.
After such kindling and burning of the wood, you should close all the dampers and monitor the condition of the seams. If no serious cracks have formed on them within 3 to 5 hours, then the oven is completely ready for full use.
Fuel types
In general, the Russian stove belongs to the category of solid fuel. Several types of resources can be used to kindle them:
- coal. The most effective is stone, but it is rarely used for private houses,
- peat. It burns well, but leaves behind a lot of ash and is not particularly efficient,
- pellets. Granules made from wood waste by hot pressing,
- eurowood. Essentially the same as pellets, but made in the form of bars.
All these types of fuel are environmentally friendly, they are convenient to use and are not too expensive. But the championship in the ranking is held by another resource, which from time immemorial has been used to maintain a fire in the hearth - wood.
Logs are the optimal type of fuel for a Russian stove. They burn for quite a long time, giving off a large amount of heat. From an environmental point of view, there are no questions about them; firewood is absolutely harmless to the environment. This fuel is available almost everywhere and comes at a low price.
Of course, there are also disadvantages. For example, firewood has a fairly high level of humidity and produces a lot of smoke when burning. In addition, they take up a lot of space, so you have to allocate a separate area or room for storing supplies.
However, these disadvantages do not make firewood less popular. If you choose the right logs, you will get excellent, highly efficient fuel. There are several main selection criteria:
- humidity. Firewood for lighting the stove must be absolutely dry. If you purchase them somewhere, then pay attention to this point. If you harvest it yourself, then know that after cutting, the logs must lie for at least a year, only then will they dry to the required level. During drying, they need to be fully protected from possible getting wet. To do this, the woodpile is placed in a covered shed or under an outdoor shed. If you put wet logs in the firebox, they will, of course, still burn. But at the same time, the moisture contained in them will turn into steam, which will first cool the walls of the chimney and then settle on them in the form of condensation. As a result, under constant exposure to water, the stove will begin to collapse. Therefore, special attention must be paid to the dryness of the logs.
- density. One of the important qualities of firewood is the duration of combustion. The speed of this process depends on the density of the wood. The higher this indicator, the longer the fuel will burn. Accordingly, it will release much more heat than a log belonging to loose wood. The optimal wood for kindling is birch, oak, aspen and linden. They are the hardest. Moreover, each variety has individual beneficial qualities. For example, birch burns evenly and does not throw sparks, and also has the highest heat transfer of all the listed species. If you need to rid the chimney of soot, then alder firewood will help. Aspen burns quickly, leaving no coals behind. It is best to use oak that is approximately halfway through its life cycle. When burning, linden firewood releases many useful substances into the air; the optimal direction for its use is to kindle a sauna stove. Coniferous trees also have the same properties.
- size. In order for the logs to burn evenly, while providing high-quality heating of the oven walls, their thickness should be from 8 to 10 cm.
How to properly fire a new brick oven?
The first fire of a new brick stove begins with checking the presence of draft; to do this, just bring a lit match to the chimney, all dampers must be open.
Then follows:
- Make sure there is no condensation on the doors and internal bricks;
- Make sure there are no serious cracks in the dried mortar; thread-like fractures are allowed;
- Place the wood in the firebox to 2/3 of its volume. Ignite the stove using paper and wood chips; the use of gasoline and other flammable liquids is strictly prohibited;
- After the wood has completely burned, wait 15–20 minutes and close the exhaust damper.
Control check
After the droplets of condensation have disappeared, you need to carry out quality control of the dried oven. For this purpose, firewood is laid that will be used every day. The total mass of burnt firewood will be 20 kg. It is advisable to adjust the draft so that combustion efficiency is maximum.
Over the course of several hours, the masonry in the firebox area is inspected very carefully. Ideally, no cracks should occur. But in some situations, the appearance of small cracks is considered normal. Small formations that look like cobwebs do not need to be sealed. The oven is ready for use.
The preparation went well
Security measures
Brick stoves require careful care and mandatory compliance with safety regulations when working with them. It is imperative to remember that carbon monoxide is a dangerous and invisible killer, therefore, increased attention should be paid to the issues of ventilation and sealing of cement joints when using such devices.
Do not immediately close the chimney damper to avoid carbon monoxide poisoning. Before lighting, be sure to check the presence of draft and regularly clean the chimney from soot, and the ash chamber from wood combustion products.
How much firewood will you need?
It is difficult to calculate exactly how much firewood will be needed for the heating season. This is due to a huge number of factors influencing the calculation of this indicator. The first thing to consider is the nature of the area, the average number of days of the heating season. If in the southern regions the indicator is the same, then in the north it will take more time to heat up. The total amount of firewood also depends on the material. Different types of wood have their own calorific value, so the indicator affects the final volume of firewood. What is also important is the area of the heated room. All indicators are taken into account in the calculations, so the total amount of firewood is calculated individually.
Forced
The temperature throughout the entire volume of material can only be increased by burning fuel. But this must be done according to a strictly defined algorithm in order to avoid breaks in the solution structure. Before drying the stove after laying, you need to stock up on dry hardwood firewood. The logs must be even and no more than 4 cm in width.
The algorithm by which the first fire will take place is presented in just a few points.
- The blower door is opened slightly so that its maximum gap is 1 cm.
- The valve in the chimney, which blocks the flow, must be open ½. We can’t open it all the way, since we need to get heat. With the valve fully open, we will burn wood “in vain.”
- The channels through which secondary air circulates are not used. All relevant doors are closed.
After complete combustion of the firewood, close the main valve, leaving a gap of 1 cm. The ash door does not need to be touched, and the secondary supply doors also need to be opened slightly. In this position, the oven dries until the next day. Subsequent stages follow an identical scenario. The only difference is in the mass of fuel burned. At the first start, you can heat the stove with two kilograms of wood; with each subsequent session, the weight increases by 1 kg.
Which glue to choose for cladding
The variety of mixtures that are recommended for such a case confuses anyone. And the range of prices is completely confusing.
Those who make a decision for the first time take what they hear, without going into details. Professionals usually settle on one mixture that has a stable result.
If you try to understand the mixtures for stoves and discard the advertising on the packaging, then grouping them according to certain characteristics, you can see a certain pattern.
Mixtures that present themselves primarily as heat-resistant have adhesion to the base from 0.5 MPa to 0.9 MPa:
- 0.5 MPa. “Budmeister GLUE-16”, “PLITONIT SUPERFIREPLACE THERMOGLUE”, “PALADIUM PalaTermo – 601”.
- 8-0.9 MPa. “Scanmix Teplo”, “Glue SBS 17”, “REDBAG119”, “POLYPLAST PP-018”, “Terracotta”.
Litokol does not have an adhesive mixture specifically designed for lining stoves and fireplaces. There is simply class C2 adhesive, with a high content of polymer additives, which can be used on surfaces with a maximum heating temperature of 90 degrees (SUPERFLEX K77) and 80 degrees (Ceresit SM 17). Their adhesion strength to the base is more than 1.0 MPa.
1.0-1.3 MPa. “Anserglob VSH-35”, “Ceresit SM 17”, “Hercules GM-215” “SUPERFLEX K77”, “LITOPLUS K55”.
If we continue our study and sort the mixtures by cost, we will not see a proportional relationship between price and adhesion strength (MPa) and maximum heating temperature. The suspicious discrepancy between the indicators of the glue “Glue SBS 17” immediately catches the eye.
It is clear that price is a relative indicator. It partly depends on where they are being transported, from where and by whom.
But still, a pattern is visible. The bulk of new (unknown) mixtures have a price of 4-6 $. Well-known manufacturers raise the cost three to four times, with technical characteristics that do not have such an excess.
It is interesting that some relatively new mixtures with a high price have appeared on the market
Perhaps consistently high performance has attracted attention, and manufacturers are no longer afraid of losing the market
In addition to the price, such characteristics of the glue as the maximum surface heating temperature are of interest. To be guided by it, you need to know to what temperature the surface of the stoves heats up?
This can only be determined with a thermal imager and in a specific area. The temperature depends on the thickness of the walls and the design of the hearth - the presence of a second circuit, the pattern of gas movement.
If we take the average heating rates of a double-circuit structure, then different areas will have approximately the following temperature:
The heating temperature of various parts of the furnace.
Technology of facing stoves and fireplaces with ceramic tiles.
Before lining, the stove must warm up to operating temperatures, undergo drying, movement and cool to room temperature. The cladding technology itself is no different from the generally accepted rules for laying tiles and stones on complex substrates:
- Primer a brick surface without fanaticism - the glue should penetrate into the structure of the brick and not cling to the film of the primer. Abundant priming is possible on the seams, which will strengthen the clay mortar. The surface of the bricks must be cleaned of the clay mortar on which the structure was laid.
- Fastening the metal mesh with knitting wire placed in the seams at the time of construction of the fireplace.
- Leveling the surface along the grid with glue, using the rule.
- Additional leveling the next day with dried glue using an aluminum wedge.
- Primer.
- Laying tiles with class C 2 adhesive....
- Filling the seams with elastic grout.
Most errors occur at the stage “How to level the surface of the oven and with what?”
For this stage, the general rule of any finishing process is valid: “Each subsequent layer in strength should be no stronger than the previous one.” That is, the glue used to lay the cladding must also be used to level the surface.
It is possible to understand what characteristics a particular glue actually has only after using the stove for several years. And the more such stoves there are, the more reliable the conclusion will be. Therefore, it is better to seek such information from masters who have been doing this for a long time.
>
