From the author: hello, friends! A well-functioning heating system guarantees uninterrupted heat supply during the cold season. Radiators are replaced in the summer, when the heating season has ended. The reason for this may be an old leaky element or a complex repair that includes lining the section of the wall behind the heating device. Apartment owners are interested in how to remove the heating radiator in an apartment without flooding and causing damage to neighbors.
In what cases are batteries removed?
More often than others, it is necessary to dismantle a cast iron heating radiator that has already served its purpose. But sometimes you have to decide how to remove a bimetallic radiator. Modern heating devices are the easiest to dismantle.
Work to dismantle the heating radiator may be necessary under the following circumstances:
- When cast iron batteries leak between sections. At the same time, the distance from the eyeliner is small, there are many sections. With a regular radiator wrench, it may be impossible to reach the nipples that are located on the side of the blind plugs. Therefore, you have to remove the device from the eyeliner side. To do emergency dismantling, you need to know in advance how to properly remove the heating battery.
- If leaks form in the drainage areas on the supply to the battery. To change the connection (no matter thread or welding), the device must be dismantled.
- Sometimes it becomes necessary to replace the radiator with another device, with more favorable power characteristics or a more modern design.
- Radiators must be removed for preventive maintenance to remove scale inside. Sometimes this is done by annealing. After this procedure, replacement of the intersection gaskets is required.
- When renovating an apartment for gluing or painting the wall behind the radiator, it must be removed. It is not recommended to glue wallpaper near radiators during the heating season; they will not stick, so you need to take care of this in advance.
- There are other cases: for example, it was decided to convert a one-pipe system to a two-pipe one. Radiators must be removed carefully to be reused. Aluminum appliances require special care.
Before installing a modern radiator, you need to figure out how to remove the old heating battery. Cast iron radiators, although durable, are difficult to remove, if only because they are very heavy. To figure out how to remove a cast iron radiator, you need to understand the connection methods.
Temporarily removing the battery
When renovating an apartment, the owners decide what to do with the radiators. They are replaced with new ones or removed for a while.
Important! To avoid damaging the floor covering, place old rags made from fabrics that absorb moisture well under the radiator being removed.
Follow the correct sequence of actions.
- In the upper right corner there is a tap for regulating the flow of water into the battery and its heating temperature. It is twisted by hand, without using tools.
- There is a shut-off valve in the lower left corner. It regulates the intensity of water outflow and balances its movement in all batteries of the apartment. It is closed with a hex key.
- In the left corner on the right there is a Mayevsky tap. It is necessary to remove air from the heating system.
Important! When turning off the shut-off valve, remember the number of full turns of the key that you made. When installing the radiator in place, you need to turn the key the same number of times in the opposite direction.
To remove the battery, you need to unscrew the nut of the foot connection and separate it from the tap. To do this, use a gas sliding and ring wrench. One holds the American fitting, and the other unscrews the nut.
After disconnecting the valves, the battery is carefully removed from the brackets. Due to the fact that the radiator is heavy, it is advisable that two people perform this work. Don't forget to wrap the unscrewed parts in paper or cellophane so as not to stain them with paint or clog them with construction dust. Place the battery itself in a remote corner to avoid scratching it.
New types of heating elements do not need to be disconnected from the general system. They have special jumpers along which warm water moves while the battery is turned off
Different methods of dismantling
Methods for dismantling heating radiators primarily depend on what kind of fasteners are used and how they are located relative to the radiator.
The options may be the following:
- fitting connection;
- with the help of drives.
Fittings and connections are also different.
Typically, batteries made of Soviet-style cast iron were fastened with a bunch of clamps and locknuts. Modern radiators are mounted using American ones. The American is a collapsible fitting with a union nut.
The connections relative to the battery may be positioned differently. The connection can be one-way or two-way. Why is this so important to find out before unscrewing the radiator? If the installation is carried out using pipes, then one of the passage plugs on the radiator will have a left-hand thread.
Sometimes in high-rise buildings built at the end of the last century there are convectors that are connected to the supply pipes by a weld.
In conclusion, we draw conclusions
Now it’s probably easier for you to decide which radiator to choose for your apartment - after all, out of the four options considered, there are only two left. As it turned out, neither steel nor aluminum radiators will withstand the test of either aggressive domestic coolant or pressure drops. So, what remains are bimetallic and cast iron appliances. What exactly to buy, look at your budget, as well as the characteristics of specific models. However, here you can give a couple of tips.
- In old houses (for example, “Khrushchev” buildings) it is quite possible to install cast iron products. If you live in a high-rise building, where the pressure of the heating system is higher, then it is still better to take bimetallic radiators.
- If the predecessors of your future new batteries are made of cast iron, then you can choose either of two options. Both bimetal and cast iron are suitable. If you are going to replace batteries made of another metal, then change them only to bimetallic ones.
Turning off the heating and draining water from the heating radiator
The first step when dismantling a radiator is to turn off the heating system and drain the coolant. And it doesn’t matter whether the problem is being solved, how to remove a cast iron battery or an aluminum one: the algorithm of actions is the same.
With individual heating everything is simple. The heating unit is turned off and water is drained from the system. This is done in different ways, the method depends on what type of boiler it is and what opportunities are available for draining the coolant.
But most often you need to understand how to remove an old cast-iron battery clogged with scale in an apartment. With central heating, the easiest way is to shut off the coolant using shut-off valves. But it is better to find out how to turn off the battery in your particular home from the appropriate authority.
After this, you can start working with connections. Be sure to place a container to drain water from the radiator. This method is suitable when a jumper is installed between the supply and return pipes. If not, the coolant circulation will stop throughout the entire riser. This means that the neighbors’ radiators will become cold.
⚖️ Judicial practice
An interesting case was when one of the owners, having received permission from the city administration, dismantled the batteries in her apartment. Instead of the removed ones, the owner installed electric radiators. Naturally, the heating risers running through her apartment remained.
However, the heat supply organization considered that the decision of the city administration was illegal. Therefore, she filed a lawsuit to cancel the dismantling permit. As arguments, the heating supply organization presented to the court the allegations we had previously considered. Namely:
- The owner had to obtain permission from other owners, since the heating system is a common one. However, there are no minutes of the meeting where other owners give permission for the reconstruction.
- The owner had to coordinate the installation of electric radiators with the energy supply organization and energy supervision. This, by the way, is not without meaning, since the risers of the MKD power supply system are designed for a very specific electrical power of each apartment. Therefore, the additional load in the form of several electric radiators can negatively affect the internal power supply networks of the apartment building.
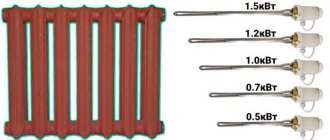
For example, the design power of a standard Soviet “Khrushchev” is on average 2-4 kW. And one electric radiator can have a power of 1.2 kW. If there are 3-4 such radiators, the total electric heating power can reach up to 5 kW. And this is actually an additional burden both for the whole apartment and for the apartment building. And this is not counting the power already allocated to the apartment for lighting and other consumers.
- The owner is heated by central heating due to risers passing through the apartment and heat transfer from adjacent rooms. But since he does not pay the heat supply organization for this thermal energy, the latter incurs losses in the form of lost income. In the absence of reconstruction of apartment heating, the heating networks would not have suffered these losses.
However, the courts, from the first instance to the Supreme Court, rejected the claim, recognizing the permission issued by the administration to reconstruct the heating system as legal.
The courts, in particular, drew attention to the fact that in accordance with Part 2 of Article 26 of the Housing Code, in order to obtain permission to renovate (redevelop) an apartment, a protocol of the general meeting of owners of an apartment building is not required . At the same time, the courts classified the apartment batteries as the private property of the apartment owner.
Further, the courts drew attention to the fact that permission from the administration was given because the owner of the apartment provided a reconstruction project, completed in accordance with the requirements of the law . And the stated requirements for coordination of the project with energy supervision and heat supply organizations do not apply to the installation of heating devices in residential premises.
The courts also noted that the heating networks were unable to prove the heat consumption of the renovated apartment from heating risers, inter-apartment partitions or ceilings . And since the apartment building has a common building heat meter that takes into account all the heat consumed, the heat supply organization receives payment for all the heat supplied to the house.
There was also no information that due to the reconstruction of heating in other apartments it became cold, and that the dismantling of radiators does not allow heating networks to provide high-quality heat supply to other rooms.
Thus, the installation of electric radiators instead of conventional batteries by the owner was recognized as legal, since all the necessary conditions were met.
Different schemes
There are fundamentally different coolant bottling schemes. With the top filling method, the supply is taken to the attic of the house. With this system, the risers will be independent and are disconnected in the basement and attic. For bottom filling, the supply and return distribution pipes are located in the basement technical floor. You will have to disconnect the supply and return risers.
The type of wiring is determined as follows: when in the basement along the perimeter of the building there are two horizontally located pipes, covered with heat-insulating material, pouring the lower circuit. If there is only one pipe - the top one.
You need to find the riser that goes to the apartment, while you can navigate by the flights of stairs between the entrance and the landing of the 1st floor, and in the attic - by the windows.
Dismantling of bimetallic and aluminum sectional products
To disconnect the radiator from the system and remove it from its mounting location, you must do the following:
- Stop water circulation and relieve pressure.
- If the heating battery is hot, you need to wait until it cools down and then disconnect it from the system. To do this, you need to unscrew the connecting couplings at the inlet and outlet.
- Move the coupling away from the radiator along the pipe and remove the device from the brackets.
- Drain the remaining water and place the product in the disassembly area, face up.
- Pull out and rinse the filter immediately to prevent dirt from drying on it.
Dismantling of bimetallic and aluminum sectional products
At the next stage, the radiator is disassembled into separate sections. To avoid damage during operation, you need to figure out which way to turn the nipple nut. This element is a ring-shaped nut with an external thread and grooves inside on both sides. In this case, one nut has both right and left threads. If you unscrew it, the adjacent sections of the battery will evenly move apart, and when twisted, they will tighten.
Manufacturers usually make marks on the face of plugs and sleeves that indicate thread directions. O denotes right-hand thread, “S” denotes left-hand thread. To accurately determine the direction of movement, it is recommended to take a loose nipple nut and try to attach it to the threads in the radiator. Having decided which way it twists, it will become clear where to turn the key to separate the sections.
Important! If you turn the nipple nut in the wrong direction, you can easily break the threads on it and on the heating battery.
Having decided on the direction of the thread, insert the nipple wrench into the radiator and slide it towards the desired nut. The notches on the tool will help you do this. When it is in the grooves, insert the lever into the hole on the other side. It will take force to move the nut out of place. Call an assistant to fix the radiator in one place.
Repair of bimetallic radiators
When the nut has moved half a turn, go to the other side to unscrew the second one and do the same. After making sure that both nuts rotate without applying much physical force, gradually unscrew one side or the other, moving 5-7 mm.
Gasket between radiator sections
After disconnection, take away the metal spacers that were between the sections. If they are in good condition, then they can be installed back during reassembly; if in bad condition, then use them as a sample for purchasing new ones. Silicone gaskets must be changed.
Top filling type
If the building has an overhead filling method, proceed as follows:
- shut off the valve located in the attic (do not unscrew the plugs);
- shut off the shut-off valves in the technical floor;
- then you need to unscrew the plug a couple of turns and wait until the pressure of the coolant stream drops; now you can completely unscrew the plug.
Any water remaining in the pipe will flow out when the radiator is disconnected.
Photos in the interior of the rooms
Kitchen
The kitchen is the ideal room in which all ways to hide batteries will become practical and convenient. If the room is small, then you can hide the radiator with the help of a beautiful tabletop or make a folding table, which will fold out when convenient.
Factories of metal-plastic structures offer a large selection of beautiful large-sized window sills that imitate stone, wood and other materials. A modern window sill does not break under weight, is not afraid of external factors, is easy to care for, wipe clean, is not afraid of scratches, and so on. You can hide any type of battery in this way, including cast iron.
In the photo, wooden boxes are used to disguise the radiators.
Living room
If the radiator is in a niche, then a wide window sill will help create a work area.
You can place souvenirs, vases or potted flowers on the constructed wooden box. You can also cover unsightly radiators in the living room with thick curtains.
The photo shows a modern living room. In order to hide the radiators, a wooden structure was installed, which also serves as a place for rest, storage and decoration.
Bedroom and children's room
In the interior of a bedroom and children's room, batteries can be used as another place to relax, a tabletop for decorative elements or a workplace.
Bathroom
You can hide the pipes in the bathroom using a louvered door, plastic grilles or a cabinet with opening doors.
We hide heating radiators using wooden, glass or plastic screens.
In the photo, the radiators in the bathroom are hidden using a wooden box.
Hallway
For radiators in hallways, glass screens or wooden boxes are suitable. In a small room, covering the battery is only necessary from a practicality point of view. This could be a locker for storing shoes, or the battery will become a small coffee table where keys and other necessary items will be stored.
Bottom filling method
If the building has a bottom filling method, proceed as follows:
- block the riser of their apartment and two neighboring ones;
- unscrew the plug a couple of turns;
- alternately open the valves on adjacent risers to find out which one is connected to the apartment where the radiator needs to be disconnected;
- completely open the unnecessary valve;
- the riser, which is in a pair, is blocked;
- turn out the plugs on the apartment riser and the riser connected to it.
There are simpler options, when there is no plug, and it is replaced by a regular “dump”.
What the law says
Issues of maintenance and repair, reconstruction and redevelopment of residential premises in an apartment building are regulated by the norms of the Housing Code (LC RF).
Relocating a battery is essentially a refurbishment of a living space that requires changes to the technical documentation.
Guided by the provisions of Art. 26 of the Housing Code of the Russian Federation, before you begin redevelopment of the heating system, changing the location of the radiators, you must obtain permission from local authorities.
How to remove the radiator if it is installed on American models
If the radiator is connected to the heating system using an American connection, then disconnecting it will not be difficult:
- unscrew the nuts using an adjustable, open-end or pipe wrench (the thread on the American one is right-handed);
- Next you need to pull the line slightly away from the radiator cap and remove the device from the brackets.
Dismantling should not be difficult; the battery can be removed within a few minutes. But it may happen that additional force is required to disconnect the metal connections if the connection is diagonal. To make this easier, you need to slightly tilt the battery on the brackets.
Tools
Each type of work necessarily requires the presence of certain tools, thanks to which it is easy to perform certain actions. Of course, in order to remove a heating radiator, you need to have not only special tools, but also components that will allow you to further install new radiators. Full purchase of all necessary parts allows you to carry out the planned work without loss of time and in the most economical way. It goes without saying that the subsequent purchase of materials in case of shortage requires additional time and freezes the work begun. (See also: Which is the best heating radiator to choose)
Be sure to acquire the following materials:
Lever pipe wrench.
In addition, it would not hurt to have a Mayevsky tap, without which no plumbing work can be done. It is imperative to have plugs that are suitable in size for the junction of batteries and radiators, as well as for installing additional taps. In addition to the plugs, it is recommended to immediately stock up on gaskets.
If, in addition to dismantling, you plan to replace batteries and pipes, then you need to stock up on new sections of pipes; it won’t hurt to buy Rifar bimetallic heating batteries, or some other analogues. In this case, you will need American cranes or simpler options. A polypropylene tap is very useful; with its help it will be easy to ensure that the heating is working when the radiator is removed. The PPR limit switch will be necessary for carrying out work in the neighbors’ area. If communication with them is unsuccessful, you will also need a clerk.
What to do if the batteries are on the way out
The step-by-step steps for removing radiators on squeegees are as follows:
- Using a pipe wrench (numbers 1 or 2), you need to unscrew the locknuts to the end of the thread of the bends (right-hand thread). If paint residues or corrosive deposits interfere, the leash needs to be warmed up. This can be done easily using a hair dryer, a blowtorch, or another convenient method.
- Remove the residual compressed winding from the thread with a screwdriver or an ordinary knife. As a rule, red lead or plumbing flax.
- Now you need to “roll up” the radiator plugs. If the connection is one-sided, the two plugs have a right-hand threaded connection. With the diagonal connection method, one of them is left, the letter “l” will indicate the thread progress.
You need to be prepared for the moment when the remaining coolant flows from the radiator.
Advice. For that. To unscrew the cast iron plug, use pipe wrenches No. 3 or No. 4. To make the work easier, you can heat the collector of the first section. Even a small increase in diameter due to thermal expansion will cause the thread to move. Attention, it is the section that needs to be heated, not the plug itself!
Radiator installation
Assembly is carried out in the following order:
- All parts of the battery are assembled together : plugs, gaskets, plugs, shut-off valves. When assembling, you must pay attention to the direction of the connecting thread - right or left. The right-hand thread is twisted clockwise and is usually applied from the right side of the device, and the left-hand thread is counterclockwise and is applied from the left. All connections are laid with thermal paste or tow to prevent leakage.
- If necessary, a Mayevsky tap and a thermostat are attached to the radiator.
- Markings are applied to the wall for installing fastening elements for the heating radiator. The marks must be placed in such a way that the battery is positioned strictly horizontally.
- According to the applied markings, fastening fittings are installed.
- The heating battery is hung on the fastener. The device should sit tightly on the fastener, without the slightest swing or movement.
- Using a level, you can check whether the radiator is positioned horizontally.
Non-standard situations
An unpleasant situation can happen when, when dismantling cast iron batteries, the bottom of the plug breaks off and the thread remains inside.
Proceed as follows:
- the collector is heated;
- put a chisel to the part in the direction of unscrewing it and try to turn it with a hammer;
- As soon as the edge of the thread is stuck out, it is turned out with pliers.
It is often necessary to remove old rusty batteries in which the threaded connection is corroded or even perforated.
In this situation, you need to do the following:
- “arm yourself” with a coupling made of brass or cast iron of the required diameter;
- cut off the thread from the liner, but leave the first five turns;
- drive the thread with a die;
- wrap the threads with plumbing linen soaked in paint (organic solvent), which dries quickly;
- screw on the prepared coupling;
- Now the wound thread is screwed into the coupling, and the problem is solved.
Method of fastening heating elements
- on bends, when pipes are connected from two parts - a pipe with an extended thread and a lock nut. The heating system can be disassembled, the radiators removed and washed or replaced;
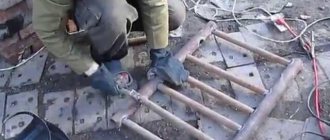
- welding of joints was used when installing convector-type radiators in the form of a tubular coil. All issues are resolved with the help of an angle grinder. The pipe is simply cut and the battery is dismantled;
- fitting system, which includes quick-dismount fittings with union-type nuts. These mounts are used when installing the latest batteries. With their help, it is easy to disassemble pipe connections and remove the radiator.
What to do when the battery is welded?
Convectors were usually attached using a weld seam. To dismantle them, it is advisable to arm yourself with a grinder with a disc for cutting steel. You can, as a last resort, take a hacksaw for metal, but the work will be much harder. The liner is simply cut. The main and very important condition for this is that this must be done strictly at a right angle.
To install a new battery, you will need to make a new thread. This is not difficult as it seems at first glance, but, of course, cutting off the battery is much faster.
Step-by-step instructions on how to make a new thread:
- Using a grinder or a regular file, remove a gentle chamfer at the end of the pipe;
- To facilitate the process, lubricant is applied to the place where the pipe will be cut (the one used for a sewing machine is suitable);
- The die is carefully put forward with the holder;
- Now you need to clamp the liner with a pipe wrench. This must be done, otherwise, when cutting, you can tear the riser away from the batteries, which are attached to it using American wires (in the next apartment). The consequences, of course, will be disastrous.
- Next, the thread is cut. Don't forget to hold the eyeliner or riser. The main thing is not to rush, do everything carefully, and don’t over-exert yourself. Usually it is enough to make five turns.
Preparatory work
It is advisable to carry out any work as quickly as possible, and this is only possible with proper preparation.
In case of replacing the battery in advance:
- agree on the date of work with the craftsmen and the management company;
- buy radiators that are suitable in design;
- prepare tools and consumables: bends, fittings, taps, thermostats, working tools.
It is important to select the right components for the upcoming operating conditions.
Selection of radiators
A typical heating system for a private home is designed for a maximum pressure of 3 atm and rarely more.
Adjustable spring safety valve. Most often used in individual heating systems.
If it is exceeded, the safety valve will operate (the inscription 3 bar is visible on the lid). Based on this, almost any commercially available radiator is suitable for individual systems.
For apartment buildings up to 6-7 floors, you can choose steel, bimetallic or cast iron radiators. Aluminum products are not suitable even for 5-story buildings - the coolant in centralized networks is not suitable for such devices. In houses above 9 floors where the pressure in the system is much higher, you cannot use aluminum, cast iron and some types of steel convectors; it is better to choose bimetallic radiators.
Center distance of heating radiators.
The center-to-center distance is taken into account when using a diagonal connection diagram; in this case, there is no need to adjust existing pipes.
The most effective is a diagonal connection.
An example of a diagonal connection of a heating radiator.
In the wiring of apartment buildings, the center distance is usually 300, 350 or 500 mm. Based on this, radiators are purchased.
In any other case, pay attention to the dimensions of the old and new radiators so that it is possible to bring the pipes to the right places.
How to actually choose the cheapest heating radiators on the market
How to choose steel heating radiators Design, selection criteria and best models
Necessary tools and consumables
The set of devices for carrying out the work depends on the connection method, the type of old and new convectors.
You may need:
| lever wrench, for unscrewing/tightening large nuts, as well as for holding a steel pipe if you need to cut a new thread | |
| an angle grinder (grinder) for cutting pipes from a battery that could not be removed by unscrewing the nuts | |
| ratcheting die with a die of the required diameter for cutting threads on steel pipes | |
| gas welding machine, if it is necessary to weld corners and bends of metal pipes | |
| hammer drill for mounting brackets | |
| laser or bubble level | |
| tape measure, pencil | |
| flat container for collecting coolant |
For installation purchase:
- plumbing flax (recommended) or sealing tape (FUM) and plumbing paste (optional);
- gaskets of the required size.
Required installation products depending on the type of radiator:
1. American – (quick-release threaded connection). 2. Shut-off valve (automatic thermostat) 3. Radiator valve (manual adjustment).
Important! Conventional ball valves cannot be used to regulate the flow of coolant. They are designed to operate only in the fully open or closed position.
Results
Dismantling heating radiators is not such a difficult process if you know the theory of how to do it correctly. In any case, scheduled work must be performed outside the heating season. Touching the heating system in the middle of winter is a necessary necessity.
To ensure that the performance of the heating system does not suffer, all necessary preventive measures must be taken in a timely manner. Therefore, it is better to take care of new radiators or clean old ones before the heating season begins. This applies to any work related to heating, both in private households and in apartments.
When you need it
Owners are required to monitor the condition of the heating system in their apartment. If a breakthrough occurs, not only this room will suffer, but also the neighbors below. In the event of flooding, they have the right to demand compensation for repair work in their home. Replacing radiators is necessary if:
- they flowed from age and rust,
- do not generate enough heat
- the temperature differs in different parts of the battery,
- the wall behind the heating element needs to be repaired,
- they do not fit into the new interior of the room.
To prevent an emergency from occurring, it is necessary to periodically carry out preventive inspections of the heating system, especially in old houses where cast iron batteries are installed. Timely measures will make it possible to extend their operation at least until the end of the heating season.
Alternative options for insulating a loggia
A battery on a balcony is a dangerous undertaking that will require a lot of effort and time. And this idea may end unsuccessfully. Thanks to modern technologies, it is possible to insulate a loggia using alternative methods.
In terms of heating quality, they are in no way inferior to the classics, and some even surpass them:
- The heater is an outdated, but reliable and economical method. The time for outdated air cannons and similar devices is over. Now heaters are made using infrared film. This significantly reduces energy consumption. Read more in the article “balcony heating”.
- Warm floor. An excellent replacement for the general heating system not only on the balcony, but throughout the entire apartment. Does not take up space, heats the entire area evenly. You can adjust the temperature yourself. Installation is not complicated, it does not consume much electricity, and the overall cost will be lower than paying for central heating. Disadvantage: installation will cost more than a radiator. But you can do the installation work yourself and reduce the cost.
Read in detail in the article “Warm floor on the loggia“.
And if you combine two alternative methods, the loggia will maintain a comfortable temperature even on the coldest days.
The owner can use the property at his own discretion. However, the constitutional rights of citizens living nearby must be respected. Moving a radiator to a balcony is a dangerous undertaking and permission for it is not easy to obtain. New buildings have an advantage; Soviet-built houses rarely receive the necessary confirmation. It is better to entrust the installation to professionals so as not to damage the overall communications system.
Main reasons for relocating batteries
- The room does not maintain the temperature required for comfortable living.
- The owners decided to carry out renovations, and the battery does not look good in the interior.
- The wall on which the battery was located was demolished.
- In the event that a loggia is connected to a room, creating a space that requires heating.
- All heating devices will be replaced with newer models.
- Existing batteries will be replaced with a different type of radiator.
Package of documents required for approval
First of all, you need to prepare a project specifying the types of equipment and installation locations.
The technical report must indicate the location of heating devices.
Important to note:
- for a thermal engineering calculation proving that heat losses will not increase as a result of the redevelopment;
- to maintain access to heating risers.
A written appeal is submitted in the prescribed form through the MFC or during a personal visit, attaching:
- the original or a notarized copy of the document confirming ownership of the apartment - purchase and sale agreement, exchange, donation, will;
- compliant refurbishment project;
- registration certificate for the apartment;
- written consent to the relocation of all adult family members living with the applicant at the specified address.
After completing the installation of the battery at a new location, a commission is invited to sign an acceptance certificate, which serves as the basis for making changes to the technical passport.
Responsibility for unauthorized transfer of battery
Since any changes to utilities without appropriate permission are a violation of the law, unauthorized transfer of the battery is fraught with:
- administrative punishment in the form of a fine of 2-2.5 thousand rubles (clause 2 of article 7.21 of the Code of Administrative Offenses of the Russian Federation);
- forced by a court decision to restore the premises to their previous condition, which will require additional material costs.
