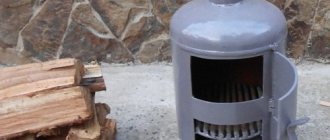
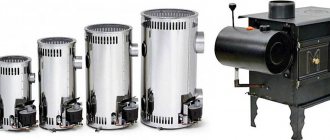
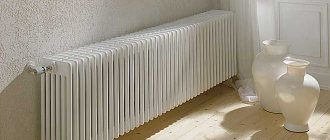
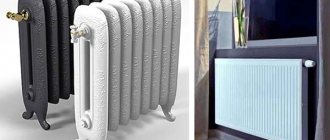
When standard designs for heating rooms do not meet the requirements, a heating radiator is made. Its dimensions and heat dissipation exceed those of a conventional battery. Mainly used in utility rooms, garages, where design requirements are low. They can also be installed in apartments or private houses, paying special attention to appearance.
Making your own devices for heating a room is profitable from a financial point of view. If the owner has a welding machine and knows how to use it, the costs often result in purchasing electrodes and paying for electricity. For homemade batteries, pipes and sheet iron that have already been used are suitable. Many people have them on their farm, and if not, you can buy them inexpensively at a scrap metal collection point.
Method for creating a battery from pipes
We offer detailed instructions for making a battery from pipes with your own hands, which will help you avoid mistakes in operation.
So, first of all, a long and thick pipe is cut into three equal sections. To make it smooth, you need to apply markings to the pipe in advance.
On each segment, with an indentation of 5 cm from the ends, two holes with a cross section of 2.5 cm are cut, located at 180° to each other. In this case, you need to use a welding machine. At the end of the work, scale should be cleaned from the pipes.
6 round plugs with a diameter of 10 cm are cut out of a sheet of steel, and the end parts of the pipes are closed with them using welding.
A thinner tube is cut into two parts with a grinder and welded to the previously made holes of 2.5 mm in diameter on the large pipe.
Next, pieces of reinforcement 10 cm long are welded to these thin tubes to make the entire structure of the homemade heating radiator made from pipes more durable.
At the last stage, the bends are welded to the input and return circuits. At this point, the assembly work can be considered complete.
To check the reliability and tightness of a home-made heating radiator made from pipes, you need to shut off one outlet and then pour water into the structure. This way, you can check whether the radiator is leaking, and if so, where exactly. If imperfections are found in the structure, you need to drain the water and re-weld all the seams where leaks were found.
It is worth noting that installing heating pipes without radiators will cost significantly less than purchasing industrial batteries.
Homemade heating registers
By increasing the heat exchange area and the volumetric component of the coolant, of course, it is easier to achieve the desired temperature in the room.
Therefore, quite a lot of property owners, taking advantage of the lack of control over heat extraction at each specific point, increase heat removal by manufacturing radiators of non-standard designs. In fact, this is prohibited, as it is seen as an irrational approach to energy consumption. In practice, they think less about resources than about their own well-being. The following article will introduce you to options for economical garage heating, the contents of which we recommend that you familiarize yourself with. However, closer to the point.
A heating register made by yourself and installed in one of the utility rooms. This is a four-pipe circuit solution with coolant inlet and outlet on one side
Making a heating register with your own hands is a relatively simple task, especially if you have welding skills and have a welding machine at hand. All that remains is to purchase the required quantity of pipes of suitable diameter and sheet metal.
This is interesting: Large diameter pipes: product characteristics
Some nuances
Before you begin to implement a plan for arranging heating from metal pipes without radiators, it is worth considering some subtleties. First of all, you should take care of the procurement of materials and select its configuration. It shouldn't be difficult to get the material. It is best to purchase large-section steel pipes.
You can additionally save on materials if you look for pipes of the required size and diameter at a scrap metal collection point - you will definitely find something suitable there.
As for the main characteristics of materials, the most important of them is heat transfer. Based on this parameter, the power of the heating device is determined. For further calculations, we will use data typical for standard cast iron radiators.
The power of the heating device can be calculated taking into account the following factors:
- radiator weight;
- mass of coolant in the battery;
- surface area of the heating device;
- thermal conductivity of the material.
Comparing the parameters of cast iron and steel, we can conclude that they are not much different.
However, one of the main differences between factory radiators is that industrial products have a larger heating surface area. However, this difference is compensated for by the slightly greater heat transfer of steel compared to cast iron.
How to calculate heat transfer?
The required amount of material can be calculated based on the temperature parameters that need to be obtained in the room. At the household level, this step is usually skipped - they make heating registers with their own hands “by eye” according to the principle “the more, the better.”
But it is better to make simple calculations of heat transfer, for which you do not need to be a mathematician. All you need is:
- Calculate the area of the room.
- Learn about the heat transfer properties of steel.
- Select the optimal pipe diameter.
The area of a room is calculated by multiplying its length by its width (S = L*W). However, for more accurate calculations, it is recommended to calculate the volumetric parameter by adding the height (H) value to the calculations.
So, the final calculation formula takes the form:
V = L*W*H
For example, you need to calculate V of a room where the length is 5 m, width is 3 m, height is 2.15 m. The volume of the room is obtained: V = 5*3*2.15 = 30.25 m3. Based on this basic value, further calculations should be made to determine the amount of heat, the size and number of heating registers to make with your own hands.
Self-welded heating registers are blocks consisting of six steel pipes with a diameter of over 100 mm. Such batteries, made without proper calculations, can overheat the room being served.
First of all, the required amount of heat per calculated volume of the room is calculated to achieve the required internal temperature (W):
Qп.т = V * k (Tin – Tout),
where V is the volume of the room; k – heat transfer coefficient of the building walls; Tin – temperature inside; Tout – outside temperature.
The amount of heat generated by one register can be calculated using the formula:
Qр = q * L * (1-n),
where: q – heat flow from each horizontal and vertical pipe of the register (approximately 20-30 W/m); L – length of vertical and horizontal pipes of the register (m); n – coefficient of unaccounted heat flows (for metal pipes – 0.1).
The category of unaccounted heat loss also includes the hood in the garage. If the mechanical type is installed, the coefficient n must be increased to at least 0.2.
The number of registers, accordingly, is determined by the formula:
Nр = Qп.т. / Qр
Such a calculation method will most likely be assessed by design specialists as a simplified and crude form. However, this approach still seems to be a more rational action than calculating and making registers with your own hands by eye, without any calculations.
Real calculation example
To demonstrate how to calculate the size of a homemade radiator, here's an example. For the calculation, we will take an industrial cast iron radiator with 10 sections. The volume of each section is 1.5 liters of water with a power of 160 W. If we compare such a battery with a homemade radiator, it turns out that its volume should be at least 14.5 liters of water.
To assemble heating from pipes without batteries, a standard steel pipe with a cross-section of 10 cm and a wall thickness of 3.5 mm is usually used. Then its internal diameter will be 9.5 cm, and its cross-sectional area will be almost 71 cm.
If we divide the total required volume of liquid by the cross-sectional area, we obtain an approximate value of the length of the pipe, which will allow us to obtain the required thermal power. In our example, it will be 2 m 5 cm. Therefore, to assemble one radiator, you will need a steel pipe of exactly this length.
Autonomous heaters
What to do if there is no central heating or gas in the garage, and the frequency of your visits to the premises does not allow organizing a scheme with a solid fuel boiler?
In this case, it would be quite logical to use electricity for heating.
Oil radiator
The simplest homemade oil radiator is a welded register already familiar to us with several modifications.
- There are no welds for connecting to the connections.
- The register, as a rule, is made portable, which implies the presence of legs.
- Jumpers between sections are present on both sides. Their diameter is made slightly larger than when assembling a register for water heating. The instruction is due to the fact that natural convection implies a minimum hydraulic pressure, and if so, the hydraulic resistance should also be minimal.
- A heating element or several parallel connected heating elements are installed at the end of the lower section.
- Oil acts as a coolant. Ideally, a transformer one, but even testing will do.
- The register is equipped with a small open expansion tank. As an option, the oil is not added a little to the top of the register, and the weld on its upper section is equipped with an automatic air vent.
Homemade oil radiator.
Warning: installing a safety valve instead of an air vent is a bad idea. When triggered, it can douse the owner of the room with oil at a temperature of 60 - 90 degrees, which obviously will not benefit his well-being and mood.
Heater from a car radiator
Another interesting solution is a homemade garage heater made from a radiator.
Heater from an old radiator.
The diagram is indicated by numbers:
- Radiator.
- Expansion tank.
- Forced air fan.
- A casing that protects the fan blades.
- Water pump.
- Oil supply pipe.
- Actuator.
- Fan drive belt.
- Electric motor.
- Frame stand.
- Drain tap.
- Block of heating elements.
- Blinds for adjusting the direction of air flow.
A few tips for assembling this product:
- Partially clogged radiator tubes are not a problem. They will miss the oil.
- Optimal motor characteristics are 300 - 500 watts at 1500 rpm.
- To heat the oil, heating elements with a total power of up to 3 kW are used. It is better to provide stepwise power adjustment by switching them on separately.
Use a block of three 1 kW heating elements with each of them switched on independently.
- Due to the small diameter of the radiator tubes, it is not worth using mining in this design. Transformer oil or antifreeze A-40 is suitable.
- The heater will operate most efficiently at an oil temperature of about 80C. The temperature is regulated by selecting the power of heating elements and fan speed.
Radiator installation
To install heating radiators from metal pipes with your own hands, it is important to have some practical skills and a certain amount of basic training. In addition, it is worth taking care in advance of having a full set of tools that may be needed during the work process, so as not to be distracted and not make mistakes.
Tools required for work:
- adjustable wrench;
- wrenches for installation;
- drill with drills;
- level, tape measure and a simple pencil.
Having prepared your workplace and equipment, you can begin installing homemade radiators. Naturally, if you plan to replace old appliances with new ones, then the failed heating batteries should first be dismantled.
In short, the technology for installing radiators will look like this:
- First of all, you need to decide on the location of future radiators and make markings for installing fasteners under them.
- After the brackets are secured, you can hang homemade batteries on them.
- At the next stage, a home-made heating system for a private house with pipes without radiators will be equipped with shut-off elements - plugs and taps.
- Then a head with a tap is installed, which will be required to activate the entire system.
- At the final stage, newly installed heating devices from pipes are connected to the general heating system.
To avoid mistakes, we will provide more detailed instructions on how to make heating from metal pipes.
So, before starting work on installing heating pipes around the perimeter of the house, all areas where heating devices will be located must be prepared - plastered, painted or lined with some material. Once the batteries are installed, this will no longer be possible.
If there are old radiators in the heating system, all devices installed behind the heating boiler must be dismantled.
It is worth noting that when installing a heating system without pipe radiators, technological clearances must be observed. There should be at least 3 cm from the wall to the surface of the heating device, and at least 10 cm between the pipe and the floor.
To avoid mistakes during the installation of batteries, it is advisable to first draw up a detailed plan in which you indicate the places where they will be located. Then the diagram will be before your eyes, and you will see what needs to be installed and when.
At the next stage, couplings must be installed on the incoming and outgoing flows. Then, to remove air pockets from the pipes as a result of starting the central heating lines, you need to install a Mayevsky tap on a homemade radiator.
The next step is to prepare the thermal head. It is necessary to install a special tap and valve under it. Please note that the valve should be located at the inlet to the radiator, and the tap should be on the return circuit. During operation, all connection points must be sealed with sealant or FUM tape so that leaks do not occur during operation of the batteries.
After completing the preparatory activities, you can proceed directly to the installation of the heating system without radiators.
In cases where the heating system will contain several heating batteries at once, you will need a water level to operate. He will help mount the system in such a way as to achieve the correct pressure in the line.
Now you can fill the heating system in a private house without radiators with water. To do this, you need to open the taps to remove air pockets. Then water is poured into the circuit using an expansion tank or supply pipe. Please note that when pouring water into the pipe, a low power pump will be required.
Principle of operation
The heating process occurs due to convection, which is why such structures are called built-in convectors. The principle of operation is as follows: cold air flows down through the grille, and then heats up and rises back. There is a special subtype of such radiators with fans, where convection heating occurs naturally. They are more efficient because they warm up the air in the room where they are located much faster. This occurs due to the movement of both warm and cold air.
The heating grates themselves can be metal or wood. They can be painted with paints of different shades. This is done so that the heating device fits organically into the interior of any room. For the safety of users, the grilles do not get very hot. Their temperature does not exceed thirty degrees, so there is no possibility of getting burned.
The operation of the built-in radiator is based on air circulation. It should be installed close to windows or glass doors. The radiators have a relief valve, which is connected immediately after installing the radiator. It helps remove air from the system and also significantly increases its efficiency. The regulators located in it set the required temperature in the room.
What errors may occur during the installation process
Very often, during the installation of heating devices from pipes, workers make technical errors, which can subsequently affect the performance of the system. Here are the most common ones.
If the radiator was installed lower than 7 cm from the floor covering, this can significantly complicate cleaning underneath and will also lead to disruption of heat exchange in the room. But in cases where the radiator hangs further than 15 cm from the floor, significant temperature changes will be felt - your feet will be cold.
In addition, installing batteries close to the wall can also affect the quality of heat transfer, since the level of heat loss will increase. Installing additional screens or decorative grilles in front of pipe radiators will also reduce their heat transfer.
Replacing old radiators
If you decide that old heating devices need to be replaced, then dismantling and updating them should be done in the summer. Since the heating system is turned off at this time of year and is not filled with coolant, removing and installing homemade or industrial radiators will not be difficult.
Replacing old equipment may be necessary in cases where they are too worn out and do not provide enough heat, or residents want to reduce or increase the number of sections in the radiators. If installation work is carried out, the surface of the walls behind the radiators can also be updated.
But remember that all work on the wall surface - plastering, painting or cladding - is carried out before installing the radiator.
Features of piping in a 1- and 2-pipe system
Single pipe system:
- The pipes that are connected to the inlet and outlet fittings are always connected to the same vertical riser or horizontal pipe located around the perimeter of a one-story house. If a vertical pipe is created to supply coolant, then one end of it is inserted into the upper fitting of the battery, and the other into the lower one.
- Always install a bypass. It is a tube that connects two pipes that go to the battery inlet and outlet. During normal operation of the radiator, a bypass is not needed. However, in case of repair of the heating device and shut-off valves, the coolant flows through the bypass, that is, the system operates without stopping.
Features of two-pipe systems:
- In this case, the piping is done in such a way that the two battery fittings are connected to different pipes. A pipe that supplies heated liquid is connected to one, and a pipe that removes cooled coolant is connected to the other.
- They provide for the use of a larger number of tees and connecting elements necessary to bypass one pipe to another. The latter are in demand because two pipes often intersect.
- There is no need to install a bypass.
Date: September 25, 2022
Factory heating devices
It is worth noting that industrial enterprises also produce heating batteries from pipes. As a rule, this is equipment that includes two collectors - upper and lower. They are connected to each other by vertical tubes installed in two or three rows. At the same time, these devices do not have fins, which would increase the heat-releasing surface area, as in standard cast-iron radiators. Heat exchangers on such batteries are made of pipes with a cross-section of 2.5 cm, and collectors with a diameter of 5 cm.
The maximum pressure level that such batteries can withstand is 12 atmospheres. They are resistant to corrosion because the inner surface of the pipe is galvanized. The wall thickness of steel pipes is 1.5 mm.
The layout of the radiator in relation to the collectors can be:
- with parallel heat exchanger;
- with a perpendicular heat exchanger.
Considering the technical features of heating radiators made from pipes, they can be successfully used both in public institutions and residential urban buildings. The products have an attractive appearance and fit harmoniously into any environment. Moreover, the absence of sharp corners on tubular radiators makes it possible to install them in kindergartens and primary schools, as well as hospitals and clinics.
Another positive point is that cleaning such a radiator from dust will not be difficult, since there are no fins on it.
We hope that this material will be useful to you and will help you avoid mistakes when making and installing a homemade radiator from pipes.
Device design
You can use a pipe of this length, laid under the window, and consider it a radiator. But it is better to divide it into two halves and install them on top of each other. The design becomes compact with the same heat transfer characteristics.
Homemade radiators with a three-tier design will require large costs and time to manufacture. Therefore, installing pipes in two rows at this length is the best option.
