mark_kr
9464 0 0
mark_kr July 25, 2016Specialization: professional in the field of construction and repair (full cycle of finishing work, both internal and external, from sewerage to electrical and finishing work), installation of window structures. Hobbies: see the column “SPECIALIZATION AND SKILLS”
To make such a device, you do not need either expensive materials or complex devices: a pipe, a welding machine and a head!
Anyone with at least minimal welding skills can make a stove from a pipe with their own hands. There are dozens of designs for such furnaces, ranging from the simplest to complex multi-circuit models, so you can almost always choose an option that suits your needs.
I will talk about how the simplest models are made: having mastered the technique of assembling them, a beginner can try to “swing” at more advanced products.
General information about homemade stoves
To save money, heating devices are often made independently from scrap materials and scrap metal. Such structures are characterized by ease of maintenance and operation. As stated in the regulations, the car must be stored at a temperature not lower than +5 degrees. A drop in temperature makes it difficult to start the car. Severe frosts can also cause antifreeze to freeze, which usually leads to damage to the cylinder block or its head.
In such a situation, the car owner has to turn on the engine in advance to warm up. However, the life of the motor is not eternal, and sooner or later this leads to premature wear of parts and components. The transmission also needs to be warmed up, for which a blowtorch or fire is used. A more practical solution to the issue is to maintain a comfortable temperature inside the garage, for which you can use a factory-made or homemade wood-burning stove.
An effective garage heater should be:
- Compact.
- Versatile in terms of fuel consumption.
- Able to warm up quickly.
- Have good heat capacity, which is reflected in maintaining the temperature for a long time after the end of combustion.
- Possess a simple and compact design.
- Cheap.
- Have a reliable chimney and exhaust hood.
- Fireproof. The device is usually installed as far as possible from flammable materials.
Since the area of the garage or utility room has limited parameters, it is very important to take care of safe smoke removal.
Why a wood stove?
If we exclude gas and electricity, the first - due to the complexity of installing a separate pipeline, the second - as an expensive energy source for heating, there are not many types of fuel left for a country stove. Coal has a high heat capacity and produces long-lasting and persistent heat . But its cost in regions that are far from coal mining areas negates its advantages. Wood pellets and briquetted fuel have now become popular. The calorific value of these materials is higher than that of firewood, but they are also more difficult to obtain and the price is higher.
At the same time, firewood is a renewable material that grows in abundance throughout most of Russia. In forested regions it is the cheapest type of fuel . A wood-burning stove is also convenient because, if necessary, it can burn not only quality firewood, but also wood waste - old boards and wood products that are not covered with varnish and paint. Although this is not the main source of fuel, such recycling can still be beneficial.
Firewood continues to be the most affordable fuel
Varieties
Garage stoves are classified according to the type of fuel used.
Based on this feature, the devices are divided into four groups:
- Gas . They are distinguished by their affordable cost and high heating speed. Due to the risk of explosion, such devices must be operated with great care. Since main gas is rarely supplied to garages, it is replaced with liquefied fuel in cylinders.
- Solid fuel (potbelly stoves) . A very popular method of heating various technical rooms, for which any solid fuel is suitable.
- Electrical . They are famous for their compact dimensions, high safety and environmental friendliness (in this case, a chimney is not required). The disadvantage of electric heaters is the high cost of energy consumed.
- Liquid fuel . The energy carrier for such stoves is used motor oil. This heating option is considered the most inexpensive. Homemade camping stoves are also popular. A DIY camp stove that you make will serve no worse than a factory stove.
Do-it-yourself gas stove for the garage
Anyone with the appropriate skills can assemble a gas heater with their own hands. To begin, prepare the necessary materials and tools: - Iron sheets 0.8 mm - Iron mesh (chain-link will do). — An old iron sieve. — Gas burner with safety valve. — Gas cylinder. — Metal fittings.
Let's start by preparing a sieve to fit the dimensions of the future stove. Place the sieve on a sheet of iron. We outline it with a nail or marker. We mark the sidewalls along the edges of the sheet. The length of the rectangle should be such as to encircle the sieve and the future bottom of the stove. Using metal scissors, cut out the marked contours. At the back, we will place the burner. We make markings, then drill and attach the burner. Next, we connect all the parts together. A chain-link mesh will be attached to the plates on top of the sieve.
We attach the legs to the body using rivets. Screw the hose to the burner valve. We release gas from the cylinder. It is necessary to take into account some nuances. If you have main gas nearby, then you will spend some time coordinating everything with the gas service. You will need to make a project, install ventilation in the utility unit if there is none, make the necessary foundation for the building from non-combustible materials. You will be forced to maintain the dimensions from the stove to the nearest combustible structures.
There should be 1.5 meters to the floor of flammable material. The nearest wooden wall should be more than 70 cm. The ceiling should be at least 1 meter. If you have a wall-mounted boiler, then you can only mount it on a solid wall. According to fire safety rules, there should be no clutter in the passages. If there is oil on the floor, then a cement slab or iron sheet should be placed on the floor. When operating such a stove, it is important to consider the following points: - Check that the ventilation in the room is working properly. — After each use, you must close the gas supply valve. — The cylinder must have a reducer that will protect against backlash.
Tools and materials
Having decided on the fuel and the design of the furnace, they move on to procuring the necessary tools and materials.
To make your own garage heater you will need:
- Sheet metal, scrap metal (used gas cylinders work well).
- Metal barrel, pipes, angle, channel.
- Fireproof brick.
- Welding machine.
- Pliers, hammer, etc.
Each of the above designs can be made on your own using the following instructions.
Types of stove heaters
There are a lot of stoves for summer cottages into which you can load firewood. But based on the material from which the stove is made, they are divided into two types.
Table 1. Efficiency of different types of furnaces.
| Type of oven | Efficiency |
| Dutch oven | 45 — 55 % |
| "Swede" | 50 — 60 % |
| Iron potbelly stove | 60 — 70 % |
| Long burning stove | 80 — 90 % |
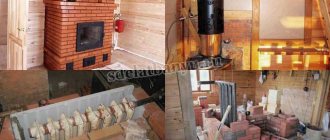
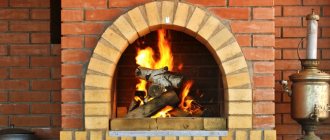
Brick ovens
Such structures are built from refractory brick - red, which is not afraid of temperature and does not crack from heating. Hollow bricks are used to lighten the load on the foundation. The furnace can have a different shape and configuration, not only its dimensions depend on this, but also the efficiency and degree of fuel combustion. The well-known Russian stove is also made of brick, and then coated and whitewashed. But it is not suitable for a modern dacha: it is too large and heavy, difficult to build, and in addition, it must be constantly heated. After complete cooling, it will heat the room only after a few hours.
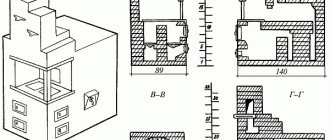
More compact options with quick heating are much better suited for a country house: “Dutch” and “Swedish” . Both of these stoves do not require rough construction; heat is emitted by walls with a chimney duct running inside them. The heat transfer of the furnace, the degree of fuel combustion and other factors depend on the number of elbows and bends in the channel. can build such stoves with his own hands if you follow the instructions.
You can lay out a brick oven according to your design
Metal furnaces
The material for these products is cast iron or steel . Cast iron structures are good because they have thicker walls with a porous structure. Once heated, they cool down more slowly , continuing to give off heat. Steel ones have their own advantage - they weigh less , since the steel is stronger, and the walls of the furnace are made thinner. Such a stove, having gone out, quickly cools down, but also heats up in a matter of minutes - just right for a small house.
Market Review
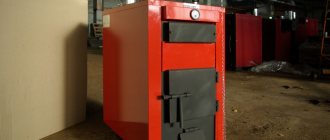
Steel stoves include a potbelly stove - the simplest cylindrical stove with one door and a chimney made of a simple pipe. If you have the materials, you can do it yourself using a home inverter welding machine. At dachas they also install more complex structures - “Buleryan” , Butakova . Their configuration allows the stove to operate as a convector, pumping air through flame-heated pipelines. Such systems are characterized by a very high warm-up rate .
The main advantage of metal stoves is that they are ready- made; you just need to pick them up and buy them. On the other hand, the price may be higher than when laying a brick oven yourself.
The iron stove is ready for use
Video - Review of heating stoves for summer cottages
Find out how to install a fireplace stove for a long-burning cottage, and also check out the rating in a special article on our portal.
Prices for the range of solid fuel boilers
Solid fuel boilers
Brick
This wood-burning garage stove is solid and reliable. Brick is a suitable material due to its ability to retain and transfer heat well. However, it must be taken into account that a brick stove is a static structure, and the process of its construction does not occur very quickly. Standard parameters are 2x2.5 refractory or fireclay bricks. The solution consists of sand, fireclay and fireclay powder.
To construct the combustion chamber, you must use exclusively fireclay material. Most often it is positioned at the level of the second, third, fourth rows of masonry. The total height is usually 9 bricks. To remove combustion products, a brick chimney with a stainless insert is installed. Most often, the chimney of garage stoves is vented through the roof. Less often, an outlet in the wall located at a certain height is used for this.
Construction of a stove for a summer residence and its features
The main elements of any brick stove for a summer residence are:
- Foundation. For any stove it is necessary to build a separate foundation, not connected to the main foundation of the house.
The foundation is built separately
- Furnace body. Consists of a combustion chamber and a chimney. If the stove design requires additional elements, then it may include a hob, oven, and water heating tank.
- Combustion chamber. The dimensions of the firebox depend on the area of the room and the required power. If the stove is planned to be heated with wood, then the height of the firebox must be at least 40 cm. The thickness of the firebox must be at least 1/2 of a brick. The firebox can be made of fireclay (heat-resistant) bricks or purchased in ready-made cast iron.
- Ash pit (ash chamber). This element of the furnace is designed to collect products during fuel combustion. Oxygen is also taken in through the ash pan, which is necessary for the combustion process.
Ash pan
The ash pan is located below the combustion chamber and is always equipped with a metal door through which cleaning takes place. A grate is laid between the ash pan and the combustion chamber. Typically, the ash chamber is 3 bricks high.
- Chimney. The main element of the furnace through which combustion products are removed. The chimney can be made of brick or made of steel pipes. This does not affect functionality or efficiency in any way. The chimney is discharged from the stove either directly through the roof or through the wall to the street. When constructing a chimney, you must avoid multiple branches and horizontal sections, as this negatively affects draft and can reduce the efficiency of heating the room.
Potbelly stove
Making an iron stove in the garage usually does not pose any particular difficulties. To do this, thick metal sheets are used, connected via an inverter. In addition, to construct the structure you will need a metal corner, a pipe and a barrel. Metal sheets work well for making a square or rectangular oven. It is easier to make a cylindrical potbelly stove from a pipe or an old gas cylinder.
Only thick sheets should be used - at least 5 mm. The pipe must have a diameter of 300 mm. The best place to remove the chimney pipe is the roof. To exit through the rear wall, you will need to maintain a slope of at least 30 degrees. The chimney is made of a metal pipe with a diameter of 120 mm. At the bottom, such a pipe should have a thickness of 2–3 mm: walls that are too thin will quickly burn out.
An ash pan is placed under the firebox to dump ash, welded from a thick sheet of metal with slots. Its dimensions are influenced by the size of the stove and the type of fuel used. If coal and fine solid fuel will act in this capacity, the slots are made 10–12 mm. When using firewood, the gaps are increased to 40 mm.
As an ash pan, you can use a small steel box installed under the partition. Ash will accumulate there, which needs to be thrown out from time to time. It is recommended to make the ash pan from a steel sheet 3 mm thick. To increase the efficiency of the potbelly stove, thick steel plates (from 5 mm) are welded onto its side walls. In this case, the area of interaction between air and the heated surface expands.
Using insulation: pros and cons
Economy-class garages are almost never insulated on the outside for a very simple reason - it is too expensive for a room that is not constantly used. Yes, this is not always possible, for example, in garage cooperatives, buildings are placed very close to each other, the gap does not allow installation of insulation.
To insulate a garage, you can use materials such as fiberboard, which extinguish when caught on fire. The use of plastic in such a room is unacceptable
But the internal thermal insulation of a garage can also be problematic. When installing insulation material directly on metal walls, a so-called dew point occurs at the point of their contact, i.e. place where condensation accumulates. Almost always, when in contact with moisture, insulation becomes unusable quite quickly.
And for the structure itself, such a situation can be disastrous. Insulation can be installed in a metal garage, but it is better to install a suitable material at some distance from the wall, about 20-50 mm.
You should retreat 50-70 mm from the floor. It is best to use washers as a profile to avoid creating closed contours under the coating.
With this installation option, condensation will also appear, but thanks to air circulation under the insulation layer, the moisture will gradually evaporate without causing any noticeable harm to the structure.
However, for a garage that is constantly heated, this option is not suitable, since the indoor humidity will be excessively high most of the time. This will put both the health of people and the condition of the vehicle at risk.
When insulating a metal structure, it is necessary to leave a ventilation gap between it and the insulating material for regular drainage of condensate
As a material for such “ventilated” insulation, it is recommended to use slabs, for example, fiberboard, chipboard, that is, wood materials that self-extinguish when ignited. Recommended thickness is about 5 mm.
Flat ondulin or its analogues are perfect. These materials have the ability to reflect infrared radiation, which provides effective heating.
But plastic, even with attenuation properties, is strictly not recommended to be placed in the garage. When ignited, such materials emit toxic fumes, which can cause poisoning to people who escaped the fire. It is also prohibited to use slabs containing asbestos as insulation.
When insulating a cold brick garage, it is recommended to first plaster the walls with vermiculite to protect them from moisture. The walls of a metal garage should be painted in two layers, having previously primed the base.
The walls of an insulated garage must be treated with a water-repellent compound to protect the building from the destructive effects of condensation
Stove in progress
These small garage stoves are the most convenient from an economical point of view. As you know, firewood and coal are not always available in the garage, which cannot be said about used engine oil and fuel oil: motorists have plenty of such goods. Devices of this type consist of two sections: the first is designed to burn oil, and the second burns a mixture of gas and air.
A do-it-yourself garage stove drawing includes the following components:
- Fuel tank.
- Afterburner chamber.
- Temperature section.
- Chimney.
The burning fuel produces vapors that enter the next section to be mixed with air. This allows for another combustion reaction at high temperature. You can make your own liquid fuel stove from sheet metal. The lower part is often a ready-made box with welded legs. It must be equipped with a hole with a flap for fuel supply.
The damper allows you to regulate the air flow. The upper part of the chamber has a cylindrical shape. For connection to the tank, a pipe with a cross-section of 10 mm is used: secondary air is pumped through it. The chimney can only be located on top. Various oils, kerosene, diesel fuel and fuel oil are used as fuel for the furnace during mining.
Fire safety rules for garage heating
When installing garage heating, it is strongly recommended to study fire safety rules. There are 6 main points for mandatory execution:
- Each type of stove (without exceptions) must be installed and operated in accordance with fire safety regulations.
- The garage must have good ventilation.
- The room should be equipped with a fire corner containing: a fire extinguisher, a piece of tarpaulin (3 * 3 meters) and several buckets of sand.
- The vehicle's fuel system must be in full working order.
- All fuels and lubricants must be kept outside the garage. Preferably outdoors, in a specially equipped metal cabinet.
- Refueling a vehicle with fuels and lubricants must be done outside.
Advice for those who do not have the desire or ability to heat the garage. You can purchase a two-burner electric household stove (with a total power of 2-2.5 kW) and place the device under the car engine an hour and a half before departure. Even in cold weather of -30 ᵒC, a car located outside will start much easier. The car should be started 20 minutes before the trip to allow the interior to warm up.
Long burning
A long-burning wood stove for a garage is convenient because the wood here does not burn, but smolders. This allows you to increase the frequency of fuel loading to 20 hours. To maintain this mode, you will need a dense loading of the fuel compartment and the presence of a control valve. As a result, the stove's draft will be moderate and stable: this will ensure slow burning of the wood with a constant release of heat.
A homemade wood-burning garage stove is made from a 200-liter metal barrel. Its upper part is cut off, creating a channel for a chimney with a diameter of 100 mm. A second hole with a diameter of 100 mm is cut for the air pipe. After this, a special weight is made for free movement inside the barrel. A metal circle reinforced with channel cuttings is suitable for this. Next, the stove body is equipped with a series of slots, after which a piece of 100 mm pipe is welded to it.
The load is placed inside the body, closing the lid on top. The air pipe is welded inside the cut hole. You will also need a couple of hatches for loading firewood and cleaning out ash. It is advisable to install the finished structure on a brick, concrete or cement platform.
Important aspects of keeping your garage warm
Providing a traditional heating system in a garage is not easy, and it is also quite expensive, but maintaining optimal air temperature in such a building is still necessary. After all, it is even better to store transport at a temperature of at least +5 degrees, but some work needs to be done at a temperature of at least +18.
Long-burning garage stove
For the most part, car owners, as well as motorcyclists, prefer to use small, economical stoves to heat their garages, which are highly efficient and can warm up the room well.
It is also important that the stove not only saves the family budget, but is also safe and provides quick heating of the garage. It would be good if various wastes could also serve as fuel – for example, waste oil or wood waste
This will also make the furnace a less unprofitable structure.
Potbelly stove round
Features of the functioning of the furnace
Heat loss in a garage is always high - it is rare that a building of this type is properly insulated with good thermal insulation materials
It is also important to understand that heating a small room often requires much more thermal energy than warming a house. To heat a two-story house, you will need a device with a power of about 10 kW, but a design with a capacity of 2.5 kW can heat a standard-sized garage
If you want to ensure that the temperature in the garage is always about 16 degrees, then you need to install a 2 kW unit. Sometimes, in order to save heat, motorists try to heat not the entire garage, but only the place where they directly work.
A garage oven is an important piece of equipment that will create optimal conditions even in the cold season
The best homemade stove for the garage
Useful tips
It is worth following the following advice from professionals when making your own garage oven:
- To increase the thermal properties of the stove, you can cut off the top part just below the seam. This will increase the air chamber, but this can reduce the size of the firebox;
- electric models are the most convenient to use. They are fireproof, but are many times more expensive than, for example, wood-burning options;
- It is better to entrust the installation of gas models to professionals;
- It is recommended to install droppers in rooms with good ventilation. This model does not smoke, but leaves an unpleasant odor that cannot be removed with the help of improvised means;
- the walls near the potbelly stove can be sheathed with metal sheets. They will heat up and provide additional heat.
To learn how to make a stove for a garage yourself, see the following video.
Installing a potbelly stove in its original location
We have assembled the potbelly stove, now let's start installing it. The foundation is prepared for this. The stove cannot be installed on earthen floors - it will gradually push through them. It is necessary to pour a concrete screed on which the stove itself will stand. If you have ready-made concrete floors, there will be one less problem in the installation procedure. In the case of installing a potbelly stove on wooden floors, it is necessary to lay a sheet of metal 1-2 mm thick on them. The same sheet should be placed in front of the firebox - this will prevent fire if coals accidentally fall out.
It is recommended to install a protective jacket made of brick. It will prevent burns and ensure uniform heat transfer.
To install the potbelly stove in the garage as correctly as possible, use the following recommendation - step back 50-60 cm from the nearest walls. This way you will avoid overheating them and reduce heat losses. The recommendation is valid for brick, concrete and wooden walls. In the case of wood, it becomes mandatory (the distance to the wooden wall should be 1 meter; it is recommended that they be lined with brick or covered with asbestos). You can also line the walls with metal to reflect heat. The distance to vehicles is at least 1.5 meters (preferably 2 meters).
Heating a garage with a potbelly stove will be more efficient if it is located not at the garage door, but against the opposite wall
We pay special attention to the vent - make sure that there is an opening in the garage for outside air to enter. Otherwise, the oxygen level in the room will be too low. Do not forget to move canisters with machine oil, gasoline and other flammable liquids away from the place where the stove is installed.
We also move away everything that can burn - rags, plastic, wood, etc.
Do not forget to move canisters with machine oil, gasoline and other flammable liquids away from the place where the potbelly stove is installed. We also move away everything that can burn - rags, plastic, wood, etc.


