The oven is completely insulated from hot gases and soot. Can be used both at the beginning of the furnace firing and at the end of the combustion process. And the temperature inside it can be regulated using valves that meter the flow of hot gases into the space surrounding the oven. Thanks to this, it is easier to cook in it, and dishes can be more varied than when cooking dishes directly inside the firebox, as is done in tandoors or the same Russian oven.
What is this article about?
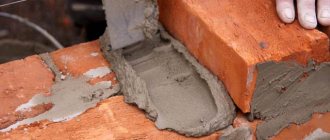
What mortar to use for masonry
The reliability and durability of the finished stove directly depends on the quality of the masonry mortar.
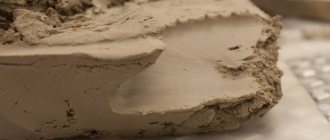
The masonry will be carried out using a sand-clay based mortar. There is nothing complicated in preparing the solution. Take clay, fill it with water and soak it. Sift the mixture through a sieve and then stir into “clay milk.” Finally, add some water to obtain a sufficiently viscous and plastic solution.
Remember, the reliability and strength of the stove directly depends on the correct preparation of the masonry mortar. If you do everything right, the stove will effectively heat your home for many years. Violate the technology or decide to save a lot on materials - the thermal unit is unlikely to be able to fully reveal its potential and stand for any length of time.
Mortar used for laying the stove
Building a foundation for a furnace: universal instructions
Regardless of the stove model, it needs a reliable and durable base. This foundation is suitable for both the Swede and the two-bell model.
The sequence of arranging the support is as follows.
First step
We dig a pit about half a meter deep.
Foundation pit
Second step
We compact the bottom of the hole and fill it with a 15-20 cm layer of sand. Pour water over the sand and compact it thoroughly.
Third step
We install the formwork.
Fourth step
We lay the reinforcement frame.
Fifth step
We prepare a solution from part cement, five parts crushed stone, three parts sifted river sand and water. Fill approximately half of the free horizontal space of the pit with this solution. Let the fill dry.
Sixth step
We prepare a solution from part cement and three parts sand. Fill the remaining space of the pit with the mixture. Carefully level the upper part of the fill using a rule.
Poured foundation for laying a brick stove
Seventh step
3-4 weeks after pouring, cover the frozen foundation with a layer of roofing material.
Foundation waterproofing
The working process of a Russian stove
Despite serious competition and a solid history, the design is still in demand among country property owners. Based on how the Russian stove is structured from the inside, it will be possible to focus on the dimensions from the outside and accordingly plan a place for it and lay the foundation.
Before you put together a Russian stove, you need to understand its operating principle - the design is a periodic heating device, that is, when burning wood, it accumulates heat, then releases it for almost a day. The structure can warm or languish like this for almost a day, which makes it possible to cook baked milk in it, steam porridges and soups, without controlling the process.
Before making a Russian stove, you should build a separate foundation that is not connected to the tape, since the structure is usually heavy
This is especially important when the house “dances” on heaving soil during freezing and thawing. In this case, the stove will move along its own amplitude along with its foundation, without destroying the finish or affecting the walls and openings
Cross-section of a Russian stove during heating and simmeringSource 2proraba.com
Work principles:
- the entire structure stands on a brick or concrete slab;
- firewood for kindling is stored in the stove, where it dries very well and, when ignited, lights up instantly;
- the top of the sub-peck is made with a hemispherical arch, like a trough;
- sand, clay, broken brick - any heat-intensive material is poured onto it, and the front part of the firebox (cooking chamber) is laid on top of it under the stoves; it is placed without clay mortar.
If you ignore the topping, then you can forget about real hearth bread and pies. By the way, they are baked on cabbage leaves.
Next comes an injection with an overtube and a highlight in the form of a tapering nozzle. On the sides of the fold near the walls there are ash pits - recesses for smoldering coals (for the next kindling) and ash. Sometimes they are raked into a fringe - a part of a cast iron or stone slab (pole) protruding from the face (brow) of the stove.
To reduce costs and cleanliness in the room, there is no need to make an ash pan and ash pan. Previously, they were raked into a nook of the mouth, then the coals of birch, maple, elm, oak and aspen retained their heat for only a day.
Cooking in a cast iron pot over coalsSource yandex.net
Most likely, this is where the belief came from that the Russian stove is quite picky when it comes to fuel. But this is not so - it works on any solid fuel, including:
- brushwood;
- dung;
- dead wood;
- sawdust
- straw;
- peat briquettes.
Thanks to this configuration, the combustion chamber acts as an economizer, where the following happens: the smoke circulation heats the air, which enters the firebox without removing oxygen from it and without interfering with combustion - mixing of heat flows should not occur. In essence, a combustion chamber is an energy recuperator (heat exchanger).
Before building a Russian stove, you should check the dimensions in advance - this is important so that the structure does not smoke, does not cool down quickly and does not use a lot of firewood. For the same purpose, perfectly smooth haila vaults are made.
Moreover, they cannot be plastered, so the bricks are chipped from the inside and polished until glossy - then there will be no swirls in the slit.
Smoke from the stove goes into the chimneySource stroyfora.ru
What is a Swedish stove and where is it used?
The design has many advantages. The operating principle allows you to install such a stove in any room, especially small ones. It gradually warms up the house and keeps it warm for a long time. But this is only possible with proper installation and operation. Anyone can do it. Without some knowledge, the process will be difficult, but if you follow the order and instructions, it is possible to complete it.
Operating principle and design of the Swedish oven
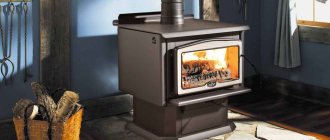
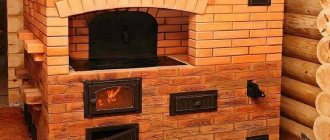
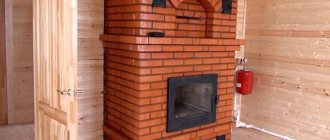
A Swedish stove, with a built-in oven and hob, is an economical option for heating a private home. The design has many advantages. The oven is located on the side. The principle of its operation is that the first heat warms up the massive brick well. This part conducts heat poorly.
The combustion part, in the form of a cap, performs one of the main functions - it burns the fuel. The fire does not apply to the metal part of the oven. This is not necessary, because it heats up due to the intense heat. If you open the doors, the room will quickly feel warmer. While preparing breakfast, you can warm up the house well.
This stove is suitable for private and country houses. If the design is supplemented with a sun lounger, you can ensure healthy and restful sleep in the winter.
Upper niche
Compact and at the same time roomy part of the oven. Heats up at first and second heat. You can safely dry wet clothes. This is how the heat supply technology is thought out. Convenient to dry clothes. In winter and autumn it gets wet from rain and snow. The function is safe if fire safety regulations are taken into account.
Niche above the stove
Old samples of the stove had a wooden lid that covered the niche to preserve heat for a long time. This was convenient, because in the morning the room was warm, even from the evening kindling. This advantage allows you to save time in the morning. Especially if you don’t have enough time to fire it.
Smoke exhaust
During the development process, the masters decided to abandon the highlight. It was located between the chimney and the firebox. This construction method turned out to be complex and expensive. Therefore, they build a stove with their own hands without a heel. Instead, they make a crossflow under the oven. When the house is heated, it is necessary to close the view. Otherwise, the stove will cool down very quickly.
The structure is heated with a second heat, when massive parts of the fuel begin to burn out. In the standard scheme, vertical channels are installed. In this case, the device does not heat the room well. But there is no accumulation of soot, which allows the use of any type of firebox.
Initially, horizontal channels were installed. They were made in the houses of rich people. This saved time. Kindling did not require much effort. The lower part heated up well and quickly. But soot removal was carried out frequently. Now this process complicates operation. It is inconvenient to use, given the hustle and bustle of everyday life.
Much also depends on the type of firewood used for heating. It is recommended to choose firewood with a low resin content. For example, aspen or acacia. Pine tree species and birch are not suitable. It is these substances during the combustion process that contribute to the accumulation of soot and contamination of the chimney.
Additional items
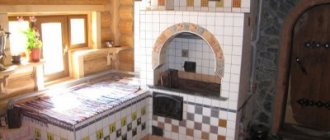
The back of such a stove is an ideal place to create a stove bench or fireplace. In place of the sun lounger, you can create a Swedish bed. Long-lasting heating will allow you to sleep well in winter. They also additionally create drawers for linen, which is always dry and warm.
Similar designs or what we compare with
The classic “Dutch” is intended exclusively for heating the house. Its main advantages are its compactness and relatively low price.
But since the Dutch oven does not have a frying surface, people do not favor these stoves. In addition, the efficiency of the Dutch is about a third lower than that of the Swedes.
This model is considered an improved version of the Swede. With the same dimensions, it is more practical. On the left is a diagram of a Muscovite:
- Ash pit or “blower”;
- Soot cleaning hatch;
- Grate;
- Firebox;
- Hob;
- Closing doors under the hob (installed upon request);
- Ventilation ducts;
- Cleaning hatch;
- Water heating tank;
- Oven;
- “Winter” valve;
- “Summer” valve;
- Cleaning hatch;
- Central valve.
It is good in operation even for a small house, up to 50 m2 is perfect, but for an amateur it is almost impossible to fold a Muscovite with his own hands.
To some extent, this model can be called a lightweight version of the classic Russian stove, because a stove bench is not just a brick extension, but a plane with full-fledged gentle heating.
This Swedish stove is convenient to use, but the design has several serious disadvantages:
- Large mass;
- A stove with a stove bench requires a lot of space;
- For an amateur, the order is quite complicated.
Swedish stove with fireplace.
A very convenient option with high efficiency. Typically this design is built between the living room and kitchen.
Everything about this stove is good, but, as in the two previous options, putting it together yourself is quite problematic.
This heating and cooking stove can claim to be a classic option more than others.
With standard dimensions of 1020x770x2010 mm, it can produce up to 3600 kcal/hour, for example, for a Dutch oven a maximum of 2600 kcal/hour.
It is the stove K.Ya. Buslaeva and models close to her are best suited for amateurs.
Content
In the 8th-13th centuries, several types of stoves were common in East Slavic and Finno-Ugric [3] territories [4]. In Northern Rus', stone stoves predominated, built dry from stones without a fastening mortar. In Staraya Ladoga, the bases of stone ovens reached 1.5 m in diameter [5]. Clay ovens built on a stone foundation are also known in Izborsk - a hollow clay dome about 1 m high was built on a stone platform about 1 × 1 m in size [6]. Ovens made of stone and clay are known. They were most common on the Upper Don, in Poochie and in the Middle Dnieper region. The bases of such ovens reached 1.5×2 m. Clay ovens were more widespread in the Upper and Middle Dnieper regions. Their dimensions reached 1.5 m in diameter and up to 1.2 m in height [7].
During this period, the huts did not have devices for removing smoke, and it came out through the doors and small windows in the walls (heating “in black”, smoking hut). At the turn of the 15th and 16th centuries, a device for removing smoke appeared. Initially it was a wooden box. With the advent of refractory brick, stoves acquired pipes, and by the beginning of the 18th century they themselves gradually acquired the appearance that is now known as the “Russian stove.”
Operating the device
After the structure is laid out, it is dried. In summer it will take 2 weeks. If the masonry was carried out in the autumn-winter period, they begin to heat the stove with small wood chips for 30 minutes once or twice a day. For additional ventilation, all cleaning doors and latches are opened (if it rains, they are not opened).
Photo 2. Finished 3 by 3 brick oven. The device is installed near the wall and has a very compact size.
When wet spots disappear from the surface and condensation stops falling on the metal elements, the structure is dry. After this, a control fire is carried out - the furnace is heated at full strength for several hours at maximum draft. If no cracks have formed in the masonry in the area of the firebox (small spiderweb cracks are acceptable), then the stove is ready for use.
Attention! You cannot immediately heat the stove too much - this will cause cracking of the masonry and render the structure unusable even before operation begins. As a result, the entire construction phase will take an average of 1 month:
As a result, the entire construction phase will take an average of 1 month:
- foundation preparation - 10 days;
- laying the stove and chimney - 1-2 days;
- drying of the structure - 14-21 days, depending on the time of year.
After this period, if no shortcomings have been identified, you can start heating the stove at full capacity.
Useful tips for laying swedes
- During the entire laying process, try to monitor the thickness of the seam. It should be 5 mm.
Seam between firebox and masonry
- To prevent the brick from absorbing moisture from the mortar during laying, it is recommended to wet it before construction work. It is enough to dip it in water for at least 1 minute so that it absorbs a sufficient amount of moisture.
- Do not forget to check the vertical and horizontal evenness of the masonry. To do this, use a building level and a plumb line. Use corners to check the evenness of the corners of the oven.
- After laying the stove, wait 2 weeks until it dries well. If you build a stove in the summer, it will dry out naturally. In cold weather, use a fan.
- Any furnace master will tell you that the less metal in the furnace, the better.
Leave a gap between the seamsBut for hanging masonry you cannot do without metal corners, because arched vaults are not suitable here (Swedish vaults are distinguished by their compactness). The only condition that must be observed is that you cannot do anything close to the iron or place the iron on bare brick. In all places where it is planned to join metal parts with brick, a layer of mortar of 5-6 mm should be laid.
- When laying the hob on a brick, it is necessary to lay a layer of clay mortar on it. This will protect the brick from heating.
Swedish stove
By following our detailed instructions, you will definitely be able to arrange the oven correctly. A useful video will help you clearly understand the masonry scheme.
Brick edges and parts
Brick edges and parts
The end of the brick is called a butt, the wide flat side is called a bed, and the side surface is called a spoon. The ribs of the product are called the usenka. Masonry is carried out by placing the product on a bed, which is considered a working surface. In the only option, the elements are placed on spoons if the wall is built with ¼ brick.
Parts of stones other than full bricks are intended for making corners and turning walls and have conventional names:
- three-four (nine);
- four (quad);
- half.
The brick is divided into pieces with a pick, hitting the spoon rather than the bed, while the stone is held leaning on its edge. A small volume of incomplete factory-produced elements is ordered from the supplier.
Laying vaults and arches
Sometimes when laying a stove it is necessary to cover various openings, chambers and fireboxes using simple or complex shapes.
- If the ceiling is in the wall, then it is called an arch, and if it is between the walls, it is called a vault.
- For any masonry order, the number of bricks in each arch must be odd.
- The middle brick in this case will be called a castle brick.
The lintel must begin to be built by laying the heels, which must correspond to the template. Since each arch has a different height, the angle of the heels will also change.
In the following photos you will see options for installing circles and laying an arch for a barbecue firebox.
In the following photographs you can see the masonry of the vault, which is used for storing firewood.
Photo gallery on the topic
What mortar should I use for masonry?
The reliability and durability of the finished stove directly depends on the quality of the masonry mortar. The masonry will be carried out using a sand-clay based mortar.
There is nothing complicated in preparing the solution. Take clay, fill it with water and soak it. Sift the mixture through a sieve and then stir into “clay milk.” Finally, add some water to obtain a sufficiently viscous and plastic solution.
Fireclay clay
Remember, the reliability and strength of the stove directly depends on the correct preparation of the masonry mortar. If you do everything right, the stove will effectively heat your home for many years. Violate the technology or decide to save a lot on materials - the thermal unit is unlikely to be able to fully reveal its potential and stand for any length of time.
Mortar used for laying the stove
Varieties
It is important to understand what types of Swedish stoves there are, since the layout and location in the house will depend on this. The following models are popular:
- with a fireplace, when the stove for cooking is turned towards the kitchen, and the fireplace is directed towards the living room;
- Swedish stove with stove and oven - used for heating the entire room;
- with a couch for a comfortable rest while simultaneously heating the house.
Regardless of the chosen type of structure, it is necessary to correctly determine the pipe cross-section parameter. To do this you need to know:
- dimensions of the combustion chamber by multiplying the length of the firebox by its width and height;
- specific calorific value of fuel - tabular data is used.
When calculating heat transfer, the calorific value in specific units is multiplied by the volumetric characteristics of the firebox. The resulting value is multiplied by:
- Efficiency – 40%;
- combustion level – 80%;
- fuel load level – 63%.
Advantages and disadvantages of a brick stove in the house
So, let's try to understand why an ancient heating device is often preferable to its modern high-tech counterparts. There are several reasons:
- The stove body is an excellent heat accumulator: Thanks to this property, a brick stove has to be heated much less often than a conventional steel or even cast iron one. Some varieties retain heat for up to 24 hours, while firewood needs to be added to the firebox of a metal stove every 4–6 hours.
- The ability to accumulate heat makes a brick stove more economical and less harmful to the environment than its metal “substitutes”. The fuel in it burns in an optimal mode - with the greatest heat transfer and almost complete decomposition of organic molecules into water and carbon dioxide. The excess heat generated in this case is absorbed by the brickwork and then gradually transferred to the room.
- The outer surface of the oven does not heat up to a high temperature.
Due to this, the thermal radiation generated by this unit is softer than that of hot steel stoves. In addition, upon contact with hot metal, the dust contained in the air burns, releasing harmful volatile substances (this can be recognized by the characteristic unpleasant odor). Of course, you can’t get poisoned by them, but they certainly cause harm to your health.
A brick oven (this does not apply to stone ovens) emits steam when heated, and when it cools, it absorbs it again. This process is called furnace breathing. Thanks to it, the relative humidity of the heated air always remains at a comfortable level - within 40–60%. When operating any other heating device that is not equipped with a humidifier, the relative humidity in the room decreases, that is, the air becomes dry.
A steel stove has nowhere to put excess heat, so it has to be either heated frequently, adding small portions of fuel, or operated in smoldering mode. In the latter case, the operating time on one load of fuel increases, but it burns with incomplete heat transfer and with a large amount of carbon monoxide and other substances harmful to the environment - the so-called. heavy hydrocarbon radicals.
What can be opposed to all of the above? A brick oven takes a long time to warm up a cooled room. Therefore, homeowners are recommended to acquire an additional steel convector, which will heat the air in a forced mode while the stove is heating.
It should also be taken into account that a brick oven is a rather massive structure that must be built together with the house. And this should ideally be done by an experienced master, who still needs to be found.
Application of brick kilns
The scope of use of stoves is not limited to their main functions - heating and cooking. Here are some other tasks this unit can solve:
- Smoking meat and fish.
- Melting of scrap metal (cupola furnace).
- Hardening and cementing of metal parts (muffle furnaces).
- Firing ceramic products.
- Heating blanks in a forge workshop.
- Maintaining the required temperature and humidity conditions in the bath.
But in poultry houses, greenhouses, greenhouses and livestock farms it is not recommended to build a brick oven: here it will have to breathe putrefactive fumes, which will lead to rapid deterioration.
Mechanism of action
The operating principle of a long-burning stove is based on fuel pyrolysis, during which not only the wood itself burns, but also combustion products. This process not only significantly increases the efficiency of the unit, but also saves fuel. In addition, with such thorough burning, the stove has to be cleaned much less frequently. The traditional Russian stove has similar characteristics, but it cannot be compared with this stove, which has been improved “in all respects.” It is inferior, at a minimum, in its overly bulky size, as well as the lack of an oven.
Heat transfer depends both on the size of the furnace and its design features, as well as on the type of fuel used. It is worth noting that a long-burning stove can operate on almost anything that burns - wood, sawdust, waste. The masonry of a standard stove in the maximum configuration is made of half a brick; it is equipped with an oven, a hob with several burners, as well as a device for heating water if a water heating circuit is connected to the stove. The firebox is covered with a cast-iron stove in order to increase heat transfer, while the oven is located to the side.
The summer mode looks like this: during the combustion of fuel, hot gases from the firebox pass under the hob, heating it and the oven, and then are discharged through the chimney. In winter mode, the gases, after releasing heat to the stove and oven, do not go into the chimney, but into the upper chamber, where they transfer the remaining energy to the stove body and only then are removed from the unit. You can learn more about the operating mechanism of a long-burning furnace from the video.
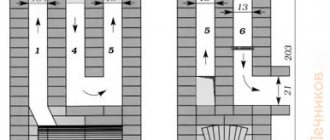
Three options for laying a stove with orders
Below is information regarding the construction of the main body of heating equipment. Laying the foundation is discussed in detail in the previous paragraph of this article. The most popular modifications are selected as examples.
Russian with a high bed
Settles in regions with cold and temperate climates. It is heated once/twice a day.
Below are descriptions of the rows:
- The first should be continuous using cement or lime mortar.
- Starting from the 2nd to the 4th, they begin to build a semblance of a well. On the front side there is a hole for baking. A prerequisite is the presence of a dressing.
- 5th - beginning of the arch. To lay it out, you will need shaped formwork, and the heels of the bricks will have to be pulled off. The operation continues in lines 6 and 7. In the 8th the vault closes.
- Rows 8 to 10 are laid out in one stone. At 11, the cold stove turns off. A layer of sand is poured on top. It should slope towards the rear.
- In the 12th, a continuous surface of refractory stone is laid out over the poured sand. This part of the firebox will be in direct contact with the fire. It is desirable that the floor is perfectly level. Does not work? You can add sand and sand the outer surface.
- Rows 13 to 16 are a crucible. Blocks - 3/4, with a sling. No masonry mortar is required at this stage. To make castles, the stones are cut to 450.
- Starting from the 17th line, the mouth and posterior surface are formed. The cooking chamber is being built. A brick with hewn heels is placed on its edge.
- 18th. The furnace walls are laid out. To fill the free space between the individual chambers you will need sand. You can add cut heels to it.
- 19th - laying out the vaulted opening above the pole. Behind it is the mouth.
- 20th - the walls are leveled. The hole above the pole is reduced. A cross-pipe is formed.
- The 21st row is no different from the 19th.
- 22nd - the vault closes. On the right is a chamber in which soot will accumulate. The view is also located here. With its help, the chimney is blocked so that the heat does not escape into the atmosphere too quickly.
- Lines 22 to 32 - laying out the overpipe, laying the view and building a chimney channel. The cross-section of the latter is 26x26 cm.
After this, all that remains is to remove the outer pipe and mount an additional damper. It will require a steel corner or strip 3 mm thick.
Semicircular chambers can be replaced with ordinary rectangular ones.
Improved "Teplushka"
All brick ovens have one common drawback - the walls heat up unevenly. Builders are trying to solve this problem by introducing changes to the design. This is how “Teplushka” appeared. After fuel combustion, part of the gas leaves the house immediately through the chimney. The remainder goes into the channels and is intended for space heating.
Heat transfer in comparison with the classic Russian modification increases immediately by 2.5 times. Structurally, “Teplushka” is closer to its bell-type analogues. The chamber is divided into 2 parts: food is prepared in the upper part, fuel is burned in the lower part. The floor itself is supported by pre-installed posts. Additionally, there are 4 openings on the sides to allow combustion products to pass through. The minimum chimney height is 5 meters. The countdown is from the bottom of the firebox.
The main differences from the traditional version are the displacement of the channel relative to the firebox. To remove cooled gas, special holes are laid at the bottom of the channel.
Important! The damper must be closed during cooking. You can use a special eye
The orders for the "Teplushka" are presented in numerous diagrams. The main requirement is that to increase heat transfer, the ceiling installed in line 21 is carefully covered with a mixture of sand and debris.
Simple stove with shield
This option is for those who want to build a stove at their dacha or in a small country cottage (no more than 20 square meters) with minimal costs, including temporary ones. The firebox is made of fireclay clinker, optionally red solid (provided that only coal will be used as fuel).
Cooking and burning fuel are in separate chambers. Gases pass through the cooking chamber and pass into the chimney. Photos of brick stoves for the home allow you to see in detail all the necessary masonry sections.
A horizontal channel is installed at the very bottom. Thanks to it, the air near the foundation warms up well. A microclimate favorable for humans is created in the room.
Which oven to choose
Practice provides a choice of three oven oven options:
- Made of cast iron (with thick walls and a massive door;
- Made from thin-walled steel sheet;
- A shellless oven chamber in which the only metal element is the door.
What are the advantages of this or that design?
Cast iron oven
The most expensive and at the same time the most functional type of oven.
Regardless of the location: above the firebox, in the place where hot gases pass through the opening of the chimney, such an oven will heat up evenly due to its high thermal conductivity, and remain operational for a long time after the furnace has finished firing due to the high heat capacity of cast iron.
Thin-walled oven
It can be designed in such a way that it will be surrounded by hot gases from all sides. In this case, the oven warms up and is ready to use quickly. Literally a few minutes after the fuel started burning.
The downside is the very high temperature inside the oven and the low heat capacity of a thin steel sheet. Shortly after the end of combustion, the temperature inside the oven decreases and becomes insufficient for baking bread.
Uneven heating of the oven walls is another drawback of a thin-walled design.
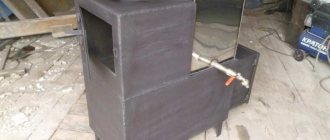
This can be avoided by structures in which a thin-walled steel casing is lined with brick on all sides. The gaps between the oven and the brickwork are minimized or completely absent.
The flow of hot gases does not act on the metal box, but on the outer surface of the bricks with which it is lined.
This design has a high heat capacity, less risk of metal burning, and more uniform heat distribution inside the oven container.
Oven without shell
Essentially, this is an enlarged version of the “stove” - a niche in the body of the Russian stove, which served as an increase in heat transfer and at the same time served as a place for preparing thermostatic dishes - Varents, curdled milk, and a drying rack for clothes and shoes.
The shellless niche must be recessed deep enough into the furnace to ensure good heating of the walls during the combustion process.
The walls of the half-brick niche allow you to quickly warm up the internal cavity, and the high heat capacity of the brick allows you to maintain a high temperature inside the oven for a long time.
Such a shellless oven takes much longer to warm up than its metal counterparts, but it also takes as long to cool down as the oven itself.
An undeniable advantage of a shellless oven is the breathability of the walls. A particularly important quality when baking bread. The brick “under” of the oven prevents burning, and the fat that flows down during the cooking of meat dishes does not burn, but is absorbed into the brick. Gradually it burns out on the outer surface of the brick. A kind of “self-cleaning” of the oven occurs.
Types of brick stoves for the home
Home stoves differ from each other in design, shape and finish. Can be folded into rectangular, square or round structure
This variety will allow you to choose the best option for a specific project, taking into account the purpose of the stove and the interior of the room where the structure will be located
Oven options
The Russian stove is a fairly large structure that occupies a central place in the house. The design includes room heating, a cooking chamber for cooking and baking baked goods. Having a cooking compartment in the oven allows you to cook food according to recipes that simply cannot be prepared any other way. The design of the Russian stove has another important feature - a bed in its upper part for sleeping. In the old days, while warming up on a Russian stove, people treated all kinds of diseases (colds, arthritis, lumbago).
Dutch oven - the efficiency of this structure reaches only 60%. In fact, it is a stove with a firebox and a smoke removal system (chimney). Such stoves are often used in small houses, but only for heating; food cannot be cooked on them. The absence of a hob causes hot air to more effectively heat the brick walls of the stove and the air in the room.
Sauna stove - this design provides wood heating. Usually the front part of the stove goes into the dressing room, from where the firewood is stored. The rear part of the structure is located behind a partition separating the dressing room directly from the bathhouse. Instead of complex chimneys, a metal water boiler is built into the rear of the structure. The stove in the bathhouse performs two functions: it quickly heats the room (within an hour or two) and water for washing. With the help of this stove, the sauna heats up very quickly, but also cools down just as quickly (without regularly adding firewood).
Learn how to build a Dutch oven, a long-burning heating stove, and a bulerian stove.
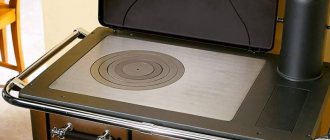
It sits on strategically placed internal brick ledges directly above the firebox for wood or coal, and almost always has one or two round openings. The round holes on the hob are closed using special rings of different diameters made of cast iron. These holes are used for cooking; they are used to add or reduce the temperature under the pots of food being cooked.
A stove with a water heating circuit - this design is usually identical to a brick stove with branched chimneys, but it has one significant difference: a metal container for water is built into the firebox for wood. This water boiler is connected to the heating system in the house, and when the stove is lit, the water in the boiler is simultaneously heated to a boil. Expanding, the water enters the pipes of the heating system. This design is one of the most efficient and energy-saving, and also provides for cooking.
Important! When the stove is placed next to a wall, convection currents of cold air coming from doors and windows actively move around the house. As a result, residents will constantly feel cold and drafts in the floor area.
General recommendations for choosing building materials
You should only take on the construction of a Swedish stove with your own hands if you already have at least some initial masonry experience. This is a rather complex design and should not be chosen as the first experiment.
If you have basic bricklaying skills and have already dealt with installing stoves, then our detailed step-by-step instructions will allow you to master this process. Follow the instructions exactly and build each row in accordance with the indicated diagram.
Do-it-yourself Swedish oven
As mentioned above, the Swedish oven requires a very careful and careful approach. Unlike a traditional Russian or Dutch oven, used brick is not suitable for it. The efficiency and productivity of the Swede directly depends on the quality of the material. It is better to take fireclay or red brick.
Important! It is unacceptable to use silicate or hollow bricks to build a furnace.
You should also pay attention to the choice of solution. To build a firebox, it is necessary to mix a solution of special fireclay clay, which can withstand high temperatures. The clay should be smooth and of medium fat content.
To check whether the kneading is done correctly, take a thin layer of clay and apply it to a vertical surface. It should not drain and the consistency should resemble thick sour cream. Under no circumstances should there be any lumps or unmixed solution in the mixture.
Ordinary clay is suitable for lining a heating structure. If you make a fuel ignition chamber out of it, it will crack and the integrity of the stove may be at risk.
Fireclay brick
Separately, it should be said about the foundation for a Swedish stove. Given its heavy weight, the base must be made strong. It takes at least three weeks for the concrete monolith to harden. If you hurry and start laying on a fresh, not completely hardened foundation, then the heavy weight may cause the stove to become deformed.
One of the weak points of the Swede is the fire door. If you take a budget door from a stamped sheet, it will quickly become loose and fail. Therefore, it is necessary to take a cast door with a mustache, which will need to be securely walled up during laying.
You can vary the size of the stove and oven within 5-10 cm, but the thickness of the oven is of great importance. If you cook the oven yourself, use steel, which does not conduct heat well. If you take thin roofing iron, then such an oven will cool down quickly.
Main features of the order for stoves
In the modern understanding, the arrangement of heating and cooking stoves is a scheme, the main advantage of which is to simplify the procedure for equipping a heating device that provides the most efficient heating of any suburban building.
Advantages
At the same time, it is important to mention that the use of orders allows the owner to take advantage of many advantages of these designs:
- If the owner has an ordering scheme. which was developed with the participation of qualified stove makers, then he will have the opportunity not to spend a lot of money on the services of specialists. Regardless of the availability of special knowledge and experience regarding the construction of stoves, any person can quite quickly, focusing on the order, build a stove that will ensure effective heating of the building;
- Wide variety of design options. If you look on the Internet, as well as look at available sources of specialized literature, you will see a large number of photographs and videos of the construction of classic stove arrangements that can effectively heat a house or cottage at minimal cost. Among them you can find an ordering option that is suitable for any stove, taking into account its design features. For example, if you wish, you can choose an order for an oven or cooking stove;
- Save time. Regardless of the design features of the furnaces for which the ordering is intended, with its help it is possible to complete the entire range of work on arranging a heating installation with minimal time. As a result, this will not only save money, but will also allow you to begin heating the object for which the stove was created earlier than planned;
- Clarity and understandability of the diagram. When developing procedures by qualified specialists, emphasis is placed on ensuring that even a person who is far from this area can understand their essence;
- The exact order of operations. clear instructions regarding materials used. If the order is used, the owner can be sure that everything will be done correctly, and this eliminates the occurrence of problems during the operation of such a stove.
Having the order, the owner of a country house can count on being able to build a fairly high-quality stove with his own hands, regardless of whether there are difficulties in implementing its design. The schemes under consideration, which simplify the process of laying a stove, are very diverse, are accessible to any person and require little time, due to which anyone has the opportunity to create a heating installation that will take into account his wishes regarding dimensions and functionality.
More and more owners of private and suburban buildings are choosing to use the procedures on the basis of which stoves are built in a residential building. Among the main advantages of these schemes, ease of implementation and efficiency should be noted. due to which they are in demand among professional as well as novice stove makers.
An important advantage of the orders is that the presentation diagram is distinguished by a very detailed indication of all the main stages: they are all described in sufficient detail, which as a result makes it possible to create a stove for heating a country house so that it not only does not create problems in operation, but also provides the most effective work on heating premises with minimal costs on the part of the owner to ensure its trouble-free operation.
Building a Swedish stove with your own hands: order and technology
An inexperienced person must follow step-by-step instructions in building the structure. This type of oven is distinguished by its small dimensions. Can be installed in a small room up to 40 m2.
Laying out the oven
The instructions correspond to each row of the heating device:
- The first two rows are solid. During the laying process, you need to adhere to the displacement of the bricks. Also monitor whether the corners and horizontal surface are created correctly or not. The first two ranks are the basis of the entire structure, so mistakes should not be made.
- Then, in two rows, they harness the ash pit - a space for clearing soot. It is necessary to install special doors for the blower and 3 bolts for cleaning.
- For this purpose, fixing paws are used. Afterwards a gap of four to five millimeters is left. It serves to prevent the expansion of iron due to thermal effects.
- Rad 5 is needed for the combustion chamber. The laying is carried out with fireclay bricks. A grate is mounted at the bottom and a gap of five millimeters is left. For stability, they are covered with sand. Then the oven is installed, and fastening is done using a similar method.
- In the sixth row, the chimney and chambers are built.
- Rows seven to nine - this will be the masonry of the firebox - fireclay bricks are used here. A gap must be left between it and the red brick to prevent thermal expansion. The space is not filled with solution. This stage is also used to mount the fire door.
- The eighth row is covered with a vertical canal. So that processed gases pass through the chimney channels. Therefore, the 9th row should consist of bricks that are ground at an angle. You will need a grinder with discs for working on concrete.
- The tenth row provides coverage with a horizontal partition.
- Row 11 consists of a metal welding plate. It also lays the foundation for the continuation of the masonry.
- From twelfth to sixteenth - they create smoke ducts. The inside is being mopped. The 17th and 18th rows should be supported by iron stops to ensure rigidity and reliability. They are installed from strips and corners. The welding compartment is closed. To strengthen the bricks, they are fastened with wire at the corners. At this stage, the cooking chamber must be closed.
- At 19 and 20 - they lay the drying chamber, make special holes for cleaning
- From 21 to 28 they consist entirely of a drying chamber.
- In the twenty-seventh, they make a valve and maintain a gap of five millimeters. The asbestos cord is wound around the frame.
- Twenty-ninth - closes the channels and the entrance of the tube. The masonry is distributed to create a cornice. 30 in a row, the masonry expands by five centimeters.
- In the thirty-first, the initial values are returned.
Order in the structure of a do-it-yourself Swedish stove is the key to creating a properly functioning heating device.
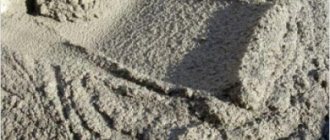
Make a mixture of clay and sand for masonry
Here is a link to a useful video:
Pipe laying
After laying out all the rows, the pipe is extended. Mostly straight, which has no changes in the dimensions of the cross-sectional area. On the technical floor or attic, the brick pipe will turn into a metal pipe. The size of the internal section should not be subject to change due to this. Taking into account fire safety rules, a fluff is installed where the chimney and the ceiling intersect.
Taking into account the operating conditions, the pipe is made at a certain elevation:
- the chimney is located at a distance of 1.5 from the cover, then the head is installed 0.5 m higher;
- the distance of the chimney from the ridge is within 1.5-3 m, then the chimney is raised to the highest point of the roof;
- the chimney distance is more than 3 m, its highest part should be under a conventional line that runs from the ridge at a ten-degree angle;
- if there is a steep roof, the head should be at least 0.5 m higher above it;
- in general terms, the span of the chimney channel from the grate to the cap cannot be less than 5 m.
Each period in the structure is shown to be important. It is strictly forbidden to make mistakes, since this completely affects the operation.
Drying the oven
When construction is completed, the furnace cannot be used. The optimal time for drying is 10-14 days. In the first 2 weeks, drying must be natural. If the weather prevents the solution from drying on its own, then a fan can help.
During the drying process, the cleaning doors must be covered with paper. This material will serve as an indicator. When the paper is no longer wet, the drying process is complete. Once completed, you can slowly start using this heating device.
It is necessary to add fuel in small portions, approximately several kg. When the first batch burns out, you can start laying a new batch or gradually adjusting several pieces of firewood. In this way, the stove will warm up continuously, gradually. Therefore, a certain air temperature is maintained in the home for a long time.
Aspen firewood is an excellent option. They dry the structure well from the inside. It is recommended to use before further commissioning. Firewood from birch or any type of pine should not be used. They are not intended for such purposes. Such firewood gives off a lot of thermal energy and causes the accumulation of a large amount of soot. This is due to the resin content. A clogged chimney accumulates carbon monoxide. The fumes are harmful to health. Timely cleaning is the key to long-term use.
Video: small-sized Swede for country housing
The video and photo describe a detailed memo. A detailed story is a way to build a reliable structure.
Peculiarities
The bold decorative element looks lively and modern despite its ancient origins. Sometimes brick is exposed during repairs during the dismantling of old finishing - wallpaper or plaster. Don’t rush to get rid of such “gifts” of fate. If a brick wall is handled correctly, it will become a source of pride for the owners and will arouse general interest and admiration. Sometimes, in order to restore the beauty of natural masonry, you have to tinker a lot. Cleaning a wall from pieces of plaster, dust and dirt is not so easy. In some cases, simply removing residues is not enough and you have to restore the surface.
When developing a future design project, it is necessary to take into account the following features of this type of finishing:
- it can easily fit into almost any style - ethnic, classic, Provence, pop art, grunge, loft. It will also be very appropriate in an eclectic design;
- the shade of the accent part of the wall does not have to match the color of the base. It may be slightly lighter or darker than other surfaces;
- the material, coated with a special varnish, is able to add light to the room due to its good reflectivity;
- real brick can be successfully replaced with imitation made from various materials;
- the tiled wall will be an excellent backdrop for decoration - photographs, paintings;
- The most successful are considered to be alliances of light brick and finishing with a red or peach tint. Coffee-colored elements go well with gray and beige surfaces;
- Long-term service of a brick is impossible without treating its surface with antiseptic agents that protect against mold and mildew.
Installation in 4 steps
How to install a built-in electrical cabinet? The main thing here is to do everything strictly according to the manufacturer’s instructions and follow safety rules.
Step. 1 Preparation: check the electrical wiring. Basic requirements for the network to which the electric oven will be connected and installed:
- Sufficient level of resistance;
- High-quality wires, the cross-section of which corresponds to the declared power of the device;
- Grounding wire and grounding system (standard requirements when connecting any household appliances at home);
- A circuit breaker that is triggered when the device is overloaded or malfunctions.
Advice! The amount of current that ensures the machine operates is selected individually. This is influenced by the electrical power of the specific model selected.
To connect a built-in oven in accordance with all safety requirements, you must use a powerful copper wire (in fact, it is better to create a separate wiring branch). Since the oven consumes a lot of electricity, you will also need special sockets designed for the power specified in the technical data sheet of the equipment.
The remaining safety rules are as follows:
- Twisted connections of wires are not permitted.
- Direct connection of wires made of different materials - aluminum and copper - is prohibited.
- To connect the wires, you must use screw terminal blocks.
- The connection to the electrical panel must be made through a separate circuit breaker.
Step 2. Next, the built-in oven is placed in a special, pre-prepared niche. If the niche has a back wall, then you need to make a hole in it for the wires.
Step 3. Then the oven is inserted into place and securely fixed with screws (which are included in the kit) with a screwdriver or a Phillips screwdriver.
Step 4. All that remains is to wash all the internal surfaces of the oven, then calcine it at maximum temperature (150 - 250 C) for 30 minutes and after cooling, wipe with a damp cloth. The oven is ready to use!
A little about metal in masonry
Metal is generally undesirable in furnaces - its coefficient of thermal expansion does not coincide with the CTE of brick. In a furnace, of course, it is impossible to do without metal.
Therefore, it is important to follow a few simple rules that will help avoid unnecessary cracks in the masonry.
Cleaning hatches and blower doors are simply installed on a masonry mortar - clay-sand. Naturally, wire is inserted into the holes of the frames and its ends are run into the masonry between the rows.
The fire doors get very hot. Therefore, you cannot insert them tightly - they will tear the masonry or crack themselves. To prevent this from happening, a cord made of asbestos, basalt or kaolin, soaked in a clay solution, is wound around the perimeter of the frame - it will play the role of a thermal compensator and seal the connection.
The oven is installed in the same way. But such winding is required only in the door area. The oven drawer itself is not wrapped. Although it would be good to apply a layer of about 5-10 mm of masonry mortar on top of the cabinet - it will slightly even out the heating and protect it from direct exposure to heat. Of course, such a composition cannot be applied to the side walls - it will fly off during the first fire.
The grate is always placed freely in the firebox so that the gap is at least 5 mm on each side.
The cooking floor (more often referred to simply as a slab) is placed on a thin layer of mortar. To which you can add soaked asbestos or kaolin. Finnish-made slabs are installed a little differently - their flooring and frame are made as separate elements. Therefore, they are simply lined with kaolin wool.
On top of the masonry, along the upper outer corner of the slab, a frame is laid from a steel corner - earthenware. It serves to protect the masonry from destruction - it still happens that the corner is touched by pots or other utensils.
If you make a chamber to a stove with a shield above the cooking floor (add side walls and some kind of ceiling), then you will end up with a design better known as a Swede - a very popular kitchen stove among professionals and DIYers.
Oven installation rules
If an oven made of metal, especially thin-walled metal, is installed in the oven, the oven should be designed in such a way as to isolate the bottom surface from the flow of hot gases as much as possible. This is achieved by laying a layer of brick. The larger the volume of the combustion chamber, the thicker the brick layer should be. If the oven is not located above the combustion chamber, but in the lumen of the chimney or in the channel of the air duct system, then a metal divider is installed under the bottom that diverts the flow of gases to the side surfaces of the oven. This helps prevent the bottom from overheating and food burning.
The lowest-heated part of any oven oven is the top surface. Gases flowing around the oven create vortices above it. The oven top is not getting hot enough. Therefore, it is necessary to install a “stove tooth” in the chimney duct - a structure similar to a fireplace, which reflects hot gases to the top of the oven.
During installation, special attention is paid to the oven dampers, which regulate the supply of gases that heat the oven. They greatly facilitate cooking at any stage of the furnace fire.
Much attention is paid to the junction of the metal oven body and the brickwork. The gap between them should allow the heated metal to expand freely. Otherwise, pressure on the brick lining will lead to rapid destruction of the furnace. This is achieved with elastic layers of asbestos. At the same time, asbestos acts as a heat insulator. It somewhat reduces the speed of heating the oven, but, on the other hand, it reduces the speed of its cooling.
The shellless oven, which is one with the “body” of the oven, does not have all these shortcomings. It heats up and cools down evenly along with the oven. The only inconvenience is the warm-up time before reaching operating temperature.
The process of installing the oven itself is simple. The most difficult thing is to ensure uniform flow of furnace gases so that the container is heated evenly.
This article contains clear, very detailed photo instructions for laying a brick stove with your own hands, tips on how not to make mistakes when choosing the necessary materials and how to correctly place the stove in a private house for optimal heating of a larger area.
Review of more complex stoves with oven and stove
The oven described above is mainly suitable for cooking. The functionality of a small barbecue stove, which is usually installed outdoors, has approximately the same functionality. But there are also more complex designs that successfully perform not only “culinary” but also heating functions. For example, it could be...
- Oven with water box. Its heat output is about 600 kcal/h when heated twice a day.
- Swedish oven. The main advantages of this option are compactness combined with high efficiency.
- Double-bell oven. Effectively heats a room up to 45 sq. m., but at the same time is very compact. The dimensions of the base are 5x4 bricks or 5x3.5 bricks.
Repairing stoves with an oven and stove has its own specifics, like any other stove design for a bathhouse or home. However, this topic deserves separate and detailed consideration.
We recommend that you watch the video to better understand and master the principles of laying a stove.
About problems
Sometimes problems arise after installing the furnace. For example:
- The structure “fell over” to one side. This means the foundation is not dry enough. This is a big nuisance. The oven will have to be disassembled and reassembled.
- The bed doesn't heat up. This means that the air exchange system inside the furnace is not installed correctly. It is likely that the stove will have to be dismantled and checked according to the diagram to ensure that everything is done in strict accordance with it.
- The stove or oven does not heat, which means that the open fire is too far away from them due to the large number of rows. They need to be reduced; to do this, the system must be disassembled.
- Smoke remains in the room - the chimney and pipe do not function. This issue needs to be resolved urgently to avoid an accident. The stove is disassembled and checked for compliance with the diagram. The chimney can be very narrow and sometimes needs to be widened.
- The oven heats up very quickly and cools down quickly. Perhaps the wrong and low-quality brick was chosen, which does not meet the state standard. To solve the problem, you will have to redo all the work.
Do not operate the furnace structure if the unit is not functioning properly. It is better to take the time and redo it than to suffer from carbon monoxide or a weak firebox.
Furnace materials
To make roughing with your own hands, you will need to prepare materials. Try to take all the components for making a stove with a stove bench of good quality, because the design will serve you for many years.
- Ceramic brick. This will be the lining of the product. Take it without chips and one color. It comes in various configurations, so first you should draw up a drawing of the product and decide what appearance it will have. Instead of lining a stove with a stove bench, decorative or ordinary plaster can be used. If plaster is used, the surface can then be painted.
- The brick is fireproof. It is able to withstand high temperatures. Calculate how much you will need to make the combustion chamber yourself.
- Clay and sand will be required when making mortar for laying the structure.
- Fireclay powder will be used as an additive to the solution.
- Grate bars. It is advisable to take ones made of cast iron. Metal ones, when using coal, will burn out very quickly.
- Fire door.
- Blower door.
- Smoke valve.
- For waterproofing, you should take roofing felt.
Selection of bricks, sand, mortar
In order for the stove to serve for a long time, you need to select all the materials correctly. There are three types of bricks:
- Ceramic - can be used to build a stove.
- Silicate ones are generally not suitable in this case, even double M150.
- Fireproof - ideal, but they are often used only for fireboxes and fireplaces, varieties: fireclay, refractory bricks, etc.
Advice: when choosing a brick for a stove, you need to completely abandon the hollow types.
The solution is made from clay. Red clay is suitable if the stove is made of red brick; when using fireclay, special fireclay clay is required. Some stove makers still make their own mortar in the old fashioned way from river sand with a grain size of 1–1.5 mm, clay (in a ratio of 2.5:1) and water. It is advisable to use angular quarry sand without foreign inclusions and the so-called fatty clay. However, it is easier and more reliable to buy a ready-made baking mixture in the store, preparing it according to the instructions.
From the accessories you need to purchase grates, blower and combustion doors, soot cleaners, valves or dampers.
General preferences for all types of stoves
A number of individual features of sauna stoves form a set of requirements that are established regarding the design of the stove:
- the ability to select individual sizes allows you to place the heating structure in paired compartments even of a very small size;
- the power of the furnace should optimally be such as to heat not only the steam room, but also a number of other rooms;
- fuel consumption for heating a cubic meter of space should be minimal;
- the best stoves heat up quickly and maintain the required temperature for as long as possible (read: “Which stoves are best for a bath - a review of the advantages and disadvantages of popular stoves”);
- finally, the stove must provide the bathhouse with hot water, etc.
Type of fuel
Stoves in country houses can be heated in two different ways.
- Solid fuel;
- Universal.
Solid fuels include coal and firewood. They are superior to electric and gas.
Heating with gas or solid fuel can be considered universal. In this case, when one fuel runs out, you can switch to another. From gas to wood or coal and vice versa.
How to make a tandoor
The most important part for making a stove is the cauldron. You should choose the largest and deepest. It needs to be placed upside down, greased with sunflower or olive oil and wrapped in paper sheets. Then a special mixture is prepared: clay is mixed with sand in proportions 1:2, a small amount of wool is added. This solution is coated with the outer surface of the boiler. A hole with a diameter of 40 cm is left in the upper part. The layer of the mixture should be quite thick - about 8 cm, and closer to the base - 10 cm. Be sure to let the product dry for 7-10 days.
There is another way to make a casing: a thick solution is rolled out onto rollers (5 cm in diameter), and then tier by tier is wrapped around the cauldron. For the strength of the structure, it is necessary to tightly connect the resulting turns to each other - press them with your fingers and make tucks. After drying, the cone is removed from the cauldron and placed on a brick or stone foundation. A blower is made at the bottom of the furnace. In Asian countries, adobe is used for the foundation - a building material consisting of clay, straw and various additives.
You can decorate your creation with figures and patterns sculpted from mortar. Next, the tandoor should be fired - close the lid, heat it with dry wood and leave to cool slowly. Such a product will become the pride of the owner of the dacha, because he created it with his own hands.
How to make a brick sauna stove
When starting work on laying bricks for the stove, you should familiarize yourself with the order. It depends on both the material and the size of the oven. In this case, it is necessary to measure the edges each time. Because with any gap, even a miniature one, smoke will enter the room. The bricks always fit very tightly, which depends not so much on effort. How much from a high-quality prepared solution.
The thickness of the seam in each row of bricks should not be less than 3 mm and more than 5 mm.
Ordering a sauna stove
Photo 8 Sauna stove arrangement diagram
- The first row, as mentioned earlier, must be laid out on a previously prepared base. To do this, the foundation under the furnace is covered with bitumen waterproofing or roofing felt. Wet all bricks from the first row with water.
- Install a plumb line with a weight, as shown in the photo
- Lay the second and subsequent rows of bricks in a checkerboard pattern.
- On the 3rd row, as a rule, the blower door is mounted and reinforced with strong wire.
- To securely fasten the door, the bricks around it should be trimmed
- On the 4th row, check the evenness of the walls and the future stove using a plumb line
- The laying of the ash pit and grate begins from the same row. Before installing the grate, make holes in the surrounding bricks that will level out expansion when heated.
- In the 6th row, a door for the blower is installed. In the 7th, a door for the firebox and a grate are installed. From the 8th row, the laying of the chimney begins, which continues until the fourteenth inclusive. On the 14th row, corners are mounted, and on the front side an opening is prepared for a container of water. It is imperative to cover the tank and all doors with asbestos.
- From rows 15 to 18, the walls are laid out in half a brick and at an angle. This begins the formation of a dividing wall, where each subsequent brick will cover the joint in a checkerboard pattern.
- In the nineteenth row, a door is installed that removes steam. Before laying 20-21 rows, steel strips are laid on the bricks to strengthen the fastening (this is where the water container will be installed). Next, the entire container is covered with bricks, possibly even incomplete parts or leftovers.
After laying the bathhouse, it is recommended to plaster it and/or sew it with stones on the mortar in order, on the one hand, to decorate it, and on the other, to eliminate the risk of fire.
General recommendations
For laying the stove it is recommended to use the so-called. fireclay brick containing refractory clay
Such a brick can withstand even the highest temperatures and does not burst when water gets on it. In addition, its decorative characteristics are beyond praise. When planning to build brick ovens for your home, drawings with procedures and safe operation are the most important things you should pay attention to. The minimum permissible distance from the pipe to the wooden surface is 10 cm; The gap between the roof and the chimney must be insulated with a sheet of metal; The area in front of the stove is insulated with a similar sheet
General recommendations for masonry
Before you start building a stove, you need to decide on its location, type of structure, purpose and size.
The following recommendations will help you make the right choice and calculations:
A stove that requires more than 500 bricks to lay requires a foundation that protrudes more than 5 cm on each side. The chimney should not come into contact with attic beams or other wooden roof elements. When buying bricks, you should pay attention to the quality of firing, integrity and strength of the material. Before laying, the brick is soaked in the solution for several minutes. 5. The seams between the bricks in the fuel combustion chamber and the ash pan are up to 10 cm wide, in other areas - at least 3 mm. Each new row begins with corner bricks, the evenness of the masonry is checked with a level or ropes stretched around the perimeter. To avoid cracks on the surface of the stove, dressings are made during laying. It is recommended to leave a hole of a few millimeters between the hob and the brick wall. Tiled or ceramic finishing will allow the stove to fit harmoniously into the interior.
Specialized classification of stoves for baths and saunas
There are a number of different criteria that contributed to the development of a large number of types of stoves for baths and saunas. Let's look at the main classification types to understand what other sauna stoves there are.
The method of heating the premises determines the following types of stoves:
- “Black” - stoves without a chimney, in which smoke is exhausted exclusively through the room and natural air openings: roof, floor, window and door openings.
- “White” stoves are more common because their design involves the installation of a chimney.
Based on the method of heating water, the following furnace designs are distinguished:
- with a water container suspended above the stove or built into the body itself. A boiler or tank is usually used as a container;
- with a coil passed through the oven, through which cold water moves and, when heated, is collected in a special container.
According to the method of placing stones in a special compartment for them:
- in the case when the heater is closed, the stones are placed directly in the chimney and this is not the best option;
- in the open type, the stones are placed in special cast iron or steel containers placed above the firebox.
By type of fuel combustion:
- periodic - allow you to start procedures in the steam room only after all the fuel has burned out;
- constant ones are more popular, since they can maintain a constant combustion process by occasionally adding the material chosen as fuel. When using them, the only question that arises is how exactly the firebox will be placed: inside the stove or it will be taken to the desired room in the bathhouse to simplify the process of adding fuel.
Finally, stoves are divided into several categories based on the type of fuel used:
- solid fuel - on wood, peat or coal;
- liquid fuel or gas - using diesel fuel, bottled or liquefied gas (more details: “How and which one to choose a gas stove for a sauna”);
- electric - furnaces that provide high-quality heating due to heating elements operating from the electrical network.
https://youtube.com/watch?v=m83JFLg4LIo
Bottom line
If you correctly use the information presented in this article, you can choose the most efficient, reliable and durable sauna stove. To do this, when purchasing, you need to focus on all the specified criteria. Also, if desired, you can entrust the choice to specialists who will take responsibility not only for the purchase, but also for the installation of the stove and its subsequent commissioning.