The Dutch oven was first built in the 15th century.
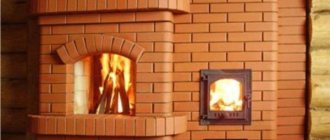
If we talk about its classic look, you need to imagine a rectangle decorated with tiles. This decorative finish first appeared on the Dutch. The home of the Dutch at that time was very small and cramped. Therefore, a miniature design was invented that perfectly heated the house. Its main function has always been heating. But years have passed, and this simple scheme has received a lot of improvements and changes corresponding to the 21st century.
It was not in vain that we started with a historical fact, because many do not know where the name came from and mistakenly call this stove Galanka. Of course, this spelling is easier to write, but things should be called by their proper names.
The structure and elements of a Dutch oven
The main elements of a Dutch oven are the firebox, the duct chimney system and the chimney.
Let's look at each part of the oven in more detail. Figure 4 shows the main elements of the furnace. Whatever the size of the stove being laid out, the fuel chamber should always be spacious and rectangular in shape. This simple design increases the heat transfer of the furnace. A water heating system can also be installed in the firebox.
Duct chimney
Typically, a Dutch oven has a six-channel chimney system, that is, 3 ascending and 3 descending ducts. Hot smoke generated as a result of fuel combustion moves along the ascending channel, heating the walls of the furnace. Cooling down, it falls down to the firebox, heats up again and rises. Through the last channel, the smoke goes into the chimney (Figure 5).
This chimney system allows the stove to heat up evenly and protects it from sudden temperature changes. The appearance of cracks resulting from temperature fluctuations can allow carbon dioxide to enter the living space.
Smoke circulation systems for Dutch ovens
Chimney
An essential element of a Dutch oven is the chimney. Usually has a side connection to the chimney. The connecting link is often a metal tube. The chimney is designed to discharge exhaust gases to the street. When the damper is open, it helps to quickly cool the stove if the stove is heated irregularly.
The standard layout of a Dutch oven is shown in Figure 6.
Standard Dutch oven design
Possible difficulties
Despite the simplicity of the device, the construction of a Dutch oven requires theoretical and practical skills in this area. An inexperienced master can make a mistake at any stage - from choosing a suitable scheme to purchasing materials and installation itself. The price of an error can be either minor external defects or improper functioning of the finished Dutch oven.
Stoves are sources of increased danger. Any mistakes made during construction are fraught with risks to the health and life of household members. The key to high efficiency and safe operation of Dutch ovens is design and installation work performed by qualified specialists.
Design features of the Dutch
The Dutch oven is extremely simple. Armed with the tools and necessary materials, even a novice stove maker can assemble it. A traditional Dutch oven does not have a vent, which ensures a slow, long burning. That is, we put firewood in a large firebox, light it, then close the door and enjoy the warmth for many hours.
A modern Dutch oven is made with a blower and a grate. These two elements were not present in the original; they appeared later. The presence of a blower provides convenient adjustment of the combustion intensity. For example, at the very beginning of ignition, it is desirable to get a powerful flame to warm up the stove and the room. After this, we close the ash door - the combustion intensity decreases, saving firewood. As for the grate, it is necessary for more convenient cleaning.
A large firebox is a key feature of a brick Dutch oven for the home. Some stoves, like many modern heating boilers, have small combustion chambers. A lot of firewood will not fit here, and there are also restrictions on the maximum length of logs. By installing a full-size Dutch oven in their home, consumers have heating units with large fireboxes at their disposal.
The Dutch oven has a vertical design. It takes up a minimum of free space, and greater heat transfer is ensured due to its area formed by the vertical walls.
Advantages of a large firebox:
- Long-lasting combustion - solves the main problem of wood heating associated with frequent addition of fuel.
- Convenient fuel storage – including convenient work with large-sized firewood.
- Ease of cleaning up ash and unburned firebrands - the extra space will make it easier to clean the Dutch oven.
If we talk about heat transfer, the Dutch oven is amazingly efficient. It gives off maximum heat. There are no strange tricks here that contradict the laws of physics. It's all about the multi-channel removal of combustion products. They are actually discharged through many vertical smoke channels. Passing through them, hot gases give off the vast majority of the heat to the brick. This ensures maximum efficiency of Dutch ovens.
Door installation
During installation, the main door is lined with asbestos cord. It will allow the temperature expansion of materials to be absorbed without harm and will ensure tightness around the perimeter. The same as for the bottom door, wire fasteners are placed in the seams, and if the wire harness is thick, grooves are cut into the bricks. When covering the door, half a brick is laid over it or a locking connection is made by cutting the bricks with a wedge.
The subsequent number of rows depends on the estimated volume of the firebox. There can be 3 or 4 of them, based on the required height. As a result, when the fuel chamber is formed, a ceiling is laid on metal supports, with an opening for a continuing chimney.
Required materials and tools
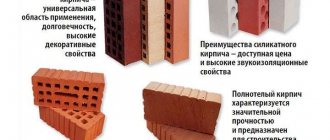
The oven is lined with two types of bricks.
Firebox walls - fireclay bricks
It is yellow in color and can withstand temperatures up to 1600 degrees.
Fireclay brick
The dimensions of fireclay bricks may vary depending on the brand. Thus, ShB-8 brand brick has the same dimensions as ordinary building bricks - 250x124x65 mm. Fireclay brick grade Sh-5 is slightly reduced: 230x114x40 (65) mm.
Signs of high-quality fireclay bricks are:
- fine-grained structure;
- absence of visible pores and inclusions;
- clear ringing sound when tapped with a hammer;
- when dropped, it breaks into large pieces (low-quality ones crumble into small crumbs).
When it comes to the appearance of the brick, darker color does not always mean higher quality. It all depends on the clay deposit: it also happens that lighter fireclay bricks have better characteristics.
It should be noted that since the thermal regime of a Dutch oven is not stressful, its combustion chamber can be lined with M150 ceramic oven bricks, capable of withstanding temperatures up to 800 degrees (not to be confused with ordinary building bricks).
The walls of the firebox can be laid out of clinker bricks, which have high strength and heat resistance. It is much more affordable in cost than fireclay.
Furnace body
The remaining parts of the stove, except the firebox, can be lined with ceramic stove bricks, or with medium-quality bricks with slight cracking.
Ceramic stove brick
Use of used material is allowed.
Materials for clay mortar
Sand
You can use river sand with grains 1 mm in size, preferably angular. But if you want to get a durable stove that can last more than 10 years, you should use sand without organic impurities. Previously, only very expensive mountain sand had this quality, but today, more affordable brick sand can be used instead. It is ground fireclay or ceramic brick.
87e4199ded4b8661b2dd1e0235b55992.jpe
The first option is used in mortars for fireclay masonry, the second - for ceramic masonry.
Clay
Mortars for laying fireclay bricks are best prepared using white kaolin or fireclay marl. Ceramic bricks can be laid on a mortar of any ground clay with fire-resistant properties; Cambrian clay (blue or gray) and gray kaolin are considered the most suitable.
Clay varieties with medium fat content are preferred.
Tools
Among the tools, it is worth noting the order - a flat strip with a cross-section of 50x50 mm, on which marks are applied corresponding to the rows of bricks. Four rows are fixed in the corners in a strictly vertical position (nails are driven into them, which need to be inserted into the seams), after which it will be very easy to make the masonry even.
Tools
Other tools are the usual builder's kit: a hammer-pick, a trowel, a level and a plumb line.
What you need
The masonry is carried out using a solution of red clay, sand and water. The proportion depends on the quality of the constituent components. It is necessary to prepare the following materials in advance:
- brick;
- solution;
- waterproofing;
- boards or panels for formwork;
- metal structural elements (hob, damper and door).
You will also need a set of tools:
- Master OK;
- roulette;
- stapler;
- level and plumb;
- Bulgarian;
- rule;
- tools and equipment for mixing mortar;
- rubber and metal hammers.
The amount of bricks and mortar materials directly depends on the size of the structure.
It is important to follow the order of the design
Preparatory work
Furnaces with a volume of up to 500 bricks can be laid without a foundation, as long as the floors in the room are strong enough (capable of bearing a load of up to 250 kg/m2). A small country Dutch oven with a hob, the construction of which we will further consider in detail, satisfies this condition.
But if the floor in the room clearly does not have the required strength, then it must be installed on a reinforced concrete foundation.
Scheme of the foundation for a heavy furnace
Its depth is usually 400–600 mm, and the edges should extend beyond the outline of the stove by at least 100 mm on each side. It is impossible to connect the structure to the foundation of the building - due to different shrinkage, distortion may occur.
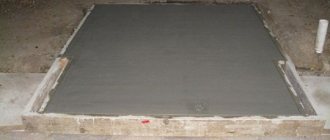
After pouring the foundation, it must be ironed - sprinkled with cement.
Concrete foundation
When the concrete has matured - this takes about 1 month - it needs to be covered with two layers of waterproofing (roofing felt or roofing felt), after which it will be possible to begin building the furnace.
Foundation waterproofing
Before proceeding directly to installing the bricks in place, you need to prepare a clay-sand mortar. The correct ratio of sand and clay depends on the fat content of the latter. To determine it, proceed as follows:
- After soaking the clay for a day, stir it until it forms a dough, after which 5 portions of a solution are prepared with different sand contents: 10, 25, 50, 75 and 100% of the clay volume.
- After twisting each portion into a 30-centimeter sausage with a diameter of 10–15 mm, it is wrapped around a blank with a diameter of 40–50 mm and left to dry at room temperature for 2 weeks.
One way to determine the quality of clay
In the presence of:
- a fine network of cracks or their complete absence, the solution is considered suitable for any part of the furnace;
- large cracks, but not exceeding 2 mm in depth: the solution is suitable for furnace elements with a temperature not exceeding 300 degrees;
- For deeper cracks and breaks, the solution is considered unsuitable.
Having determined the optimal ratio of sand and clay, prepare a solution in the required volume. The clay is also soaked for a day, only after that it is further ground through a sieve. The sand is sifted and washed. The finished solution should have the consistency of sour cream.
Stage 2. Construction of the foundation
First, it is worth noting that from a structural point of view, the foundation being built should not be connected to the main foundation of the house. The further sequence of actions should be as follows.
Foundation for a brick oven
First you need to outline the outline of the future foundation
It is important that the width and depth of the base be 8-10 cm larger than the planned dimensions of the stove. At the same time, you need to check whether the foundation coincides with the location of the chimney pipe
A hole of appropriate dimensions is dug; its depth should be approximately 60 cm.
The bottom of the pit is covered with a 15-centimeter “cushion” of crushed stone. The crushed stone is carefully compacted, its surface is leveled using a mounting level.
8d842bcd869c90ef558187c4ba7d36bb.jpe
44803aff01781fa7a7abafcc9c8d1c74.jpe 183ab32f4531b623bc4a6915cb324607.jpeThen you need to build the formwork for the furnace foundation. For this you can use wood, chipboard and even thick cardboard.
Attention! If the material chosen for the construction of formwork absorbs moisture, then the inside must be lined with roofing felt (although any other waterproofing material is suitable for this). Concrete solution is mixed
To do this, dry cement is mixed with sand in a ratio of 1:3 and filled with the required amount of water. The solution is thoroughly mixed
The concrete solution is mixed. To do this, dry cement is mixed with sand in a ratio of 1:3 and filled with the required amount of water. The solution is thoroughly mixed.
The formwork must be filled with mortar and wait until it dries completely. This often takes a maximum of a week.
Varieties and modifications
There are several common modifications of Dutch ovens:
- Heating (classic). Optimal for heating small residential premises.
- Bell bells. They are distinguished by the most compact dimensions; existing laying schemes allow the construction of miniature Dutch ovens with a triangular cross-section for corner placement.
- Caloriferous. The action is based on the principle of forced air circulation. Optimal for buildings with high ceilings.
- Heating rooms with water heating boilers. They are used when it is impossible to place the stove in the central part of the house. The installation of a Dutch oven with a built-in heating boiler is carried out in the kitchen or in the hallway, after which the heating circuit is installed.
Important! The operation of Dutch ovens with built-in boilers for heating large areas requires the use of coal as fuel. In addition to using the Dutch oven as a purely heating structure, there are possibilities for additionally equipping the stove with a hob, fireplace or stove bench
To do this, at the preparatory stage, it is important to make the required amendments to the selected installation scheme. It is possible to use ready-made schemes available in the public domain
In addition to using the Dutch oven as a purely heating structure, there are possibilities for additionally equipping the stove with a hob, fireplace or stove bench
To do this, at the preparatory stage, it is important to make the required amendments to the selected installation scheme. It is possible to use ready-made schemes available in the public domain
Heating Dutch oven
The principle of operation of the classic Dutch oven is to increase the circulation time of smoke inside the housing due to the construction of winding smoke circulation channels. Before exiting into the chimney, the smoke from the burned fuel transfers its own thermal energy to the body. The stove acts as a heat accumulator: heat accumulates in the housing and is systematically used to heat the premises.
Reference.
Classic Dutch ovens do not require constant heating and warm up quickly after long periods of inactivity.
In addition to the general design features, the differences between Dutch stoves and other types of stoves vary depending on the installation pattern and the presence of additional equipment. The difference lies both in efficiency and in the set of functions.
With water heating boiler
The operating principle of Dutch ovens with a built-in water heating boiler is similar to the classic version.
The presence of a heating circuit increases the efficiency of the furnace by ensuring uniform distribution of thermal energy within the heated premises.
The stove turns from a heat source that implements the principle of air heating into the central element of a liquid heating system.
How to fix the gutter yourself?
When installing any drainage system, it is extremely important to take into account the thermal movement of the gutter and its structural elements, which, depending on the material of manufacture, work differently in tension and contraction. According to the rules, the only movable element of this type should be a hinged complaint, which is mounted without additional gluing - only on a latch
Moreover, modern manufacturers take care of this by making a special, so-called expansion mark inside the gutter, which helps to assemble in accordance with the air temperature that exists at the time of installation
According to the rules, the only movable such element should be a hinged complaint, which is mounted without additional gluing - only on a latch. Moreover, modern manufacturers take care of this by making a special, so-called expansion mark inside the gutter, which helps to assemble in accordance with the air temperature at the time of installation.
Here's how to properly attach a gutter directly to an eaves overhang:
This is interesting: Panels for finishing the facades of private houses - read in order
Foundation arrangement
Despite the relatively light weight for a brick oven, the Dutch oven still needs a high-quality and reliable foundation. An excellent option is a monolithic slab. An important nuance: the foundation must be reinforced both in area and in volume, i.e. deep down. The dimensions of such a foundation must be at least 1.2 x 1.2 m. The Dutch foundation cannot be connected to the base of the main building.
How to make a foundationFoundation for a brick oven
The procedure for arranging the foundation is as follows.
First step. We outline the boundaries of the foundation being developed.
Second step. We dig a pit about 60 cm deep.
Pit for casting the foundation
Third step. We fill the bottom of the pit with a 15-centimeter layer of crushed stone. Carefully level and compact the backfill.
Crushed stone
Fourth step. We lay a mesh of reinforcing bars. The recommended cell size of such a mesh is 100-120 mm.
4dcea99db3f3602135ea3504b9c812d5.jpe 7b0d81e1200f1b1fcb273b87a5c7c53b.jpe 2a7b8137d64e2e40f0cc3440dc3714d7.jpeFoundation pit with formwork and reinforcement
Fifth step. We install vertical reinforcement at the intersection of the rods. We tie all the joints of the elements of the support system with wire.
Sixth step. We install the formwork for pouring the foundation. We cover each wall of the formwork with roofing felt or treat it with resin for waterproofing.
Seventh step. We pour concrete.
Poured concrete
Eighth step. We “iron” the surface of the base. To do this, sprinkle the fill with a small amount of dry cement.
Let the foundation gain strength. It is better to leave it for a month, but many craftsmen begin laying it within a week. At this point the decision is yours.
Order
Before the floor is finished, 2 rows of bricks are made with the seams bandaged, and only then the laying of the first row begins.
The first row is counted from the finished floor mark. The two middle bricks are beveled towards the ash pit. The space between the wall of the ash pan and the rear wall of the furnace is filled with dry sand from the first to the third row inclusive.
In the second row, a blower door is inserted with a gap of 3–5 mm, filled with asbestos cord. The steel legs or wire of the door are embedded in the masonry.
The third row repeats the laying of the second, taking into account the dressing of the seams in 1/2 brick. Bandaging of shortened bricks is allowed less.
The fourth row involves partial covering of the ash pan. A 35x4 mm steel strip is laid under the brick to cover the ash pit. At the back of the oven, the sand is covered with a brick.
Fifth row. A grate is placed on the open part of the ash pan with gaps along the firebox and a gap of 5 mm, which is compacted with sand or ash. The bricks here are beveled according to the order.
In the sixth row, a furnace door is installed with a gap sealed with asbestos cord. The bricks of the back wall are chamfered.
From the seventh to the twelfth row, the firebox is laid with the seams bandaged according to the order.
From the thirteenth to the fifteenth row, the firebox is blocked and the rear smoke channel is laid out.
The sixteenth row involves the installation of cleaning.
From the seventeenth to the twentieth row, the laying of channels is underway.
The twenty-first and twenty-second rows combine two channels: lifting and lowering.
The twenty-third and twenty-fourth rows involve overlap of the middle and posterior canals.
A cleaning system is installed in the twenty-fifth and twenty-sixth rows.
From the twenty-seventh to the thirtieth row, the laying of channels is underway. A valve is installed in the twenty-eighth row.
On the thirty-first row, bricks are laid with releases for future reroofing.
In the thirty-second row, a ceiling is made and a valve is installed.
The thirty-third and thirty-fourth rows continue the laying of the roof and smoke duct.
A little history
There are several versions of the appearance of the Dutch woman in Russia. But they all agree on one thing - the laying of such stoves began in the 18th century, when Peter I issued a decree on the construction of stoves like the Dutch ones. The decree did not prescribe specific instructions for construction, so ordinary Russian stoves were often only lined with tiles or tiles imported from Holland. This is where its other name arose - gallanca. Some scientists are of the opinion that a stove was called a gallanka if it had a chimney structure typical of a Dutch stove.
Interesting: The tall chimney is a Dutch heritage. In order to save space, buildings in Holland were built tall. In order to avoid paying high taxes on chimneys and to heat more rooms, the Dutch began to build stoves with a chimney of several floors.
In encyclopedias, the concept of a “Dutch stove” is defined as a rectangular-shaped heating device that has a channel system of vertical smoke circulation and a side exit to a chimney lined with tiles.
Distinctive characteristics
In today's understanding, the Dutch woman differs significantly from the original model and, first of all, in that it is decorated with tiled, tiled or other materials. The standard version has its own characteristics, which distinguishes the design from its analogues:
- Even a master who is not experienced in the stove business can reproduce the laying of a stove, because this process is carried out according to a simple scheme;
- minor flaws during construction will not affect functionality;
- the classic version of the stove was not used for cooking, so a hob was not installed before;
- lack of grate and blower;
- duct chimney.
Heating and cooking Dutch ovens
The operating principle of all Dutch stoves is elementary - heated air travels along an artificially elongated path to the chimney, but the design schemes differ:
- Shapes: rectangle, circle.
- Dimensions.
- The presence of additional equipment (stove, oven, stove bench).
- Gas distribution systems: multi-channel and bell-type. The latter is more efficient, as it has high efficiency - when fuel burns, heat remains in the chambers. Cold air entering the heated oven passes through, bypassing the chambers. A multi-channel system, in turn, is easier to construct; the number of channels can reach six.
With stove
This design differs from the standard one in that it is equipped with a hob on the 3rd-5th row from the firebox. The best material for such a part is a cast iron plate 5-8 mm thick.
The stove can be solid, only for heating food, or with burners installed in it for cooking. There may be several burners.
With hob and oven
This Dutch design is also equipped with an oven. The oven can be installed above the stove or on the side of the firebox.
The first position is preferable, since the hot air in this case evenly flows around the entire area of the oven. Being located on the side of the firebox, the structure heats up mainly on one side.
Design features of the Dutch
The main elements of a DIY Dutch oven are:
- The chimney is a mandatory element
- Three outlet and three inlet channels (their number may vary) - thanks to them, the room is quickly heated
- Spacious firebox - niche for stowing fires
The stove is built in a variety of shapes: from round to rectangular. The smoke, passing through the first smoke channel, gives off its heat to the walls of the furnace. Then it cools down and, through passes through the second channel, descends to the combustion chamber. Near it, it is heated again and already flows upward through the next channel. Having reached the last one, the smoke goes into the chimney.
Let's get started
To start building a Dutch oven with your own hands, like any other similar structure, you need to prepare everything you need. You will need a standard oven set of tools (trowel, hammers, mallets, bucket, etc.), as well as a grinder with a special diamond-coated concrete circle, a tape measure, levels and a plumb line.
You will also need construction and consumable materials for the work:
- Clay and sand, cement
- Fireproof bricks
- Set of doors (blowing, combustion, for cleaning channels)
- Grate
Negative characteristics
Like other representatives of the heating segment, the review device also has disadvantages:
- The efficiency of the Dutch model does not exceed 40%, so the heat transfer rates here are low in comparison with the Russian analogue;
- Only long-smoldering materials are used as combustible materials. For example, small brushwood quickly burns out and all the heat simply goes out into the chimney.
- If you leave the view not closed, the device will quickly cool down, because The duct type of chimney operates on the exhaust principle.
- The use of high-ash materials is not recommended, because Excessive ash accumulation increases the fire hazard level.
Brickwork
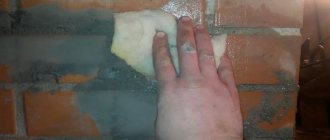
To prevent the heating structure from absorbing large amounts of moisture, each brick must be moistened before laying. To do this, you need to lower it into water for a couple of seconds. If you keep it in liquid for a long time, there will be poor adhesion. and the seams will be too thick. In addition, stains will appear on the stove and it will have a dirty color.
da91dcda8337a49af6f734ab62d7d122.jpe
44e036f049319ecb34e1d5ae284724f0.jpg:large
- It is assumed that the foundation has already been prepared. To prevent moisture from entering, you need to fold the roofing felt in two layers and lay it on the foundation.
- A layer of sand is poured on top, the thickness of which should be no more than 50 millimeters. To do this, it is recommended to use a building level.
- After this, you can lay out the first row of bricks without using the prepared mixture. The total number of rows should be eleven. The order will allow you to make the layout correctly. The solution must be applied in a small layer to the first row.
- For laying the next two rows, prepared mortar and red brick are used.
- Then the brick must be laid edgewise. The seam should not exceed 5 millimeters. In the remaining rows, the thickness should not be more than 8 millimeters; ordering will help to check. Excess mixture can be removed with a regular trowel.
- To make a Dutch oven easy, the back wall must be collapsible. Therefore there is no need to use a solution. Another way is to install a small door, but in this case, heat loss will increase.
- The door is secured with steel wire. It also needs to be finished with fire-resistant material. Asbestos may be suitable for this purpose.
- Until the door is completely lined, you need to continue laying bricks edgewise. From about the eighth row, the brick is laid flat again; the order and building level will help you avoid mistakes in size.
- Subsequent rows are laid out flat, only the brick is also laid edgewise at the back.
- The eighth row completely covers the firebox. This level needs to be laid out askew, order will help with this.
- The ninth row needs to be moved back a little, and asbestos for the hob should be laid on top.
- At the next level, the base for the chimney is prepared.
- On the last row you need to make a flap and exit.
- The Dutch oven is finished with tiles. it can also be whitewashed or painted.
- The gap between the floor surface and the structure is closed with skirting boards.
Before using the oven, it must be completely dry. This will take two weeks. In this case, you need to open the doors of the structure. At home, you need to open all the windows to speed up drying. You can use a stove for heating a room only if there are no damp places on it. If the brick structure was built in the winter season, then it can be dried by lighting a small fire.
A self-built stove will heat a country house or country cottage for a long time
It is important to note that a Dutch oven can be combined with any interior style and can become the highlight of the room’s design. If these instructions are not enough, then you can watch a video on building a structure for a private house
Malyutka stove How to cover a metal stove with bricks in a house Garden stove: selection and installation Swedish stove: features and manufacture
Detailed assembly instructions
Folding a Dutch oven with your own hands is not that difficult – our step-by-step instructions will help you with this. We will use a simple small stove design for small buildings. For example, you can use it to heat a country house. You need to start the assembly with the simplest thing - with the acquisition of tools and necessary materials. To assemble the stove you will need:
The use of high-quality fireclay bricks is not a whim, but a guarantee of reliable fire safety. Therefore, you should not save on buying it in any case!
- Ordinary brick - several hundred pieces.
- Refractory (clamotte) bricks - several dozen pieces.
- Mortar Clay – Used to hold brick together.
- Doors for the firebox, vent and cleaning, as well as the grate, are sold in hardware and specialty stores (check out where they sell stoves and accessories for building your own baths and saunas).
You will also need tools - a hammer for knocking out bricks, a trowel for working with mortar, a building level for leveling the masonry, string to control the vertical position of the masonry, tools for cutting bricks, steel wire for tying doors and asbestos cord for laying between the brick and the doors. We will remember and mention the rest as we progress.
Foundation preparation
In this review we will focus on a traditional unit without a hob. A Dutch oven with a stove is assembled with your own hands in a similar way, but in a different order. All you have to do is find a suitable assembly scheme. You will also need to buy a cast-iron hob - such things are sold in the same place where doors with grates are sold (we wrote about this a little higher).
We are preparing the site for the foundation - the Dutch woman should stand on a solid concrete foundation, and not on a wooden floor. This is the main difficulty in carrying out the work. It is necessary to dismantle the floors and reach the base of the house, build wooden formwork and pour the future foundation. If there are no floors yet, feel free to dig a hole 50-60 cm deep. Next, lay the layers:
- 10-15 cm of sand - compacted carefully and for a long time.
- Up to 20 cm of large stones - compact them again.
- 10 cm of crushed stone - pressed again.
The future screed must be reinforced. We buy reinforcement with a diameter of 8-10 mm, cut it with a grinder into rods of a suitable size, make a lattice with a cell size of 10x10 cm. The lattice should be located in the thickness of the concrete screed. We pour the concrete - the height of the base above the ground is 15 cm. Our foundation for the Dutch oven is ready, but do not rush to assemble it - let the concrete harden.
The recipe for concrete for the foundation is one part cement, 2.5 parts sand, 4.5 parts crushed stone, fill with water to a suitable consistency.
As for clay mortar, leave it to the professionals - they know how to properly prepare the clay and how to make a strong mortar out of it. For hobbyists, special fireproof mixtures for fireplaces and stoves are available for sale. The price of one pack is from 600 rubles.
The order of the little Dutch woman
We will assemble the oven according to the following procedure. It consists of 36 simple rows. At the end we will get an impressive stove, the power of which is quite enough to heat a small house.
Our first two rows are solid - they form the base of the Dutch. Simply lay the bricks according to the indicated pattern and connect them together with mortar. Tap the bricks with the back of a hammer or a wooden mallet, and cover the gaps between them with clay or a refractory mixture.
On the third row, side cleaning doors are installed - through them, the internal smoke channels of the Dutch oven are cleaned. This is where the smoke channels begin. A blower door is installed on the fourth and fifth rows. Pay attention to the fastenings of the doors - they are tied with steel wire, the ends of which are laid between the bricks. An asbestos cord is laid between the metal and bricks.
We have made the next row of the Dutch oven - check the correct installation using a level and vertical strings.
In the sixth row the smoke channels continue, and in the seventh row an innovation awaits us - here the laying of refractory bricks begins, which forms the beginning of the combustion chamber. At this stage we fix the grate. Starting from the eighth row, the Dutch firebox expands in depth. In subsequent rows, the laying of smoke channels continues. On the thirteenth row, the construction of the combustion chamber is completed. It turned out to be narrow, but quite tall.
Rows 14, 15 and 16 are similar to each other. Starting from the 17th row, the firebox of the Dutch oven ends; in the 18th row it is no longer there. In row 19, another cleaning door is installed. Their abundance will allow you to clean the smoke channels at any time without destroying the stove. The main body of the Dutchwoman ends on the 24th row - starting from 25 the chimney goes up.
There are many versions of the masonry of Dutch ovens. In any case, you should end up with a compact vertical unit. A round Dutch oven in a metal casing will require skills in working with a welding machine for its assembly. Such models are characterized by increased compactness; they usually do not have cooking surfaces.
Final work
It is not forbidden to use special “Chimney Sweep” logs to clean the Dutch oven. Read the instructions for the log - this will help you avoid mistakes.
Our Dutch woman is ready, but there is still a long way to go before she starts using it. First you need to let it dry, usually this stage is 21 days. During this time, the concrete screed will fully mature and the fireproof clay mortar will harden. If beautiful smooth brick was used for cladding, you can begin testing. If you plan to decorate with ceramics or tiles, feel free to start work.
Testing a Dutch oven begins with checking the draft. To do this, a wad of paper or newspaper is set on fire in the firebox. If the design matches the diagram, the traction will be excellent. After this, we sweep away the ash, lay in large firewood, and place scraps of paper and small wood chips between them. We light the stored fuel, close the firebox door, and open the ash pan. Now our Dutch woman should warm up. As soon as the room becomes warm, the draft can be reduced - close the vent. Now you need to add new portions of firewood into the furnace firebox from time to time.
Ash is removed from the ash pit as it accumulates; it is recommended to perform this operation at least once every 1-2 days. Two or three times a year, the furnace should be heated to the maximum, which will help avoid resin leaks.
Preparatory work
The weight of the stove is considerable, so they make a full-fledged concrete foundation using formwork:
- Mark the location of the furnace. It is necessary to ensure that the door and window are not on the same line and provide a chimney outlet. The size of the foundation will be 15-20 cm larger than the dimensions of the stove. Using a grinder, dismantle the wooden floor covering.
- Formwork is arranged and the foundation is poured with concrete (the upper level should not reach the floor surface by 2 bricks). Concrete is reinforced not only around the perimeter, but also in depth. To save on materials when constructing a foundation, it is sometimes made of rubble (broken stone, brick or any large construction waste is used).
- Next, they take a break from work for 20 to 25 days to allow the concrete to set.
- Lay a layer of roofing felt folded several times for waterproofing. The layers of roofing felt are connected with a stapler. This is a very important stage, since the Dutch oven is capable of transferring some of the heat to the floor. On a note. If climatic conditions are such that the soil freezes up to one and a half meters, it is recommended to use a layer of basalt cardboard for thermal insulation.
- Plumb lines are arranged to ensure that the oven is strictly vertical. To do this, strings or ropes are pulled, which will act as beacons. If this is not done, each row will need to be monitored not only horizontally, but also with a protractor with a vertical plumb line. If the design “goes to the side,” the performance characteristics of the stove will deteriorate.
- Bricks are selected for masonry and dry masonry is carried out. Mix the clay-based solution in an amount sufficient to use it at a time. On the second day, this solution will lose its quality. Clay is placed in a trough, filled with water and allowed to soak for about 2 days. The solution is stirred, breaking up lumps. The required plasticity is achieved using sand. To improve the quality, the mixture is kneaded with a construction mixer.
How to lay out a high-quality Dutch oven if you have no experience as a mason? There is one trick: before laying out the stove on the mortar, you should practice “dry”.