Any engineering communications, including heating systems, gradually wear out and fail. Malfunctions can be of different types, but when the heating battery leaks, it leads to unpleasant consequences. The sooner a leak in a cast iron, steel or bimetallic radiator is repaired, the less likely it is to flood your apartment and flood your neighbors.
- Why do heating radiators leak?
- The heating radiator is leaking: what to do
- How to fix a weld leak
- Repairing leaks between battery sections
- How to repair a leak in a heating battery: repair methods
Methods for repairing cast iron radiators using cold welding
Before starting to describe methods for repairing a battery using cold welding, it should be noted that cold welding is a temporary remedy for eliminating an individual leak.
A repaired welding leak can last for several seasons with normal handling, but the battery can only be properly repaired by disassembling it and replacing the broken section with a new one. Another point that you need to pay attention to is the size of the patch and the possibility of repairing various damages. If a small leak has formed in a section, then cold welding will cope with this task quickly and efficiently. Another thing is when a large gap has formed in the metal, here you will have to use additional reinforcement - in addition to the first layer applied by cold welding, you will have to use liquid glue and make a bandage. And the most difficult case is when an entire fragment of metal breaks off due to an impact. Cold welding cannot handle such repairs; here you must immediately shut off the coolant supply and call a repair team.
Repair of small leaks on the vertical surface of the section
If a leak has formed on the outer or inner surface of a section and the size of the crack does not exceed 1-2 cm in length, in addition to cold welding, you will also need a metal brush, 100 and 200 grit sandpaper and paint solvent or alcohol.
Before starting work, the supply and drainage of coolant to the battery is shut off and, if possible, water is drained from it.
Use a metal brush to remove the paint at a distance of 1-1.5 cm on both sides of the crack. After this, first with 100-grit sandpaper, and after 200, sanding is done so that the spot at the site of the future patch is sanded down to bare metal.
After this, glue is prepared and the surface of the radiator is degreased. Cold welding for a heating battery is applied to the surface of the patch so that there is a gap of 1-2 mm between the cleaned metal and the paint on the surface of the battery.
After applying the glue, it is actively pressed and left to crystallize for the time specified in the instructions.
Repairing leaks at the joints of radiator sections
This repair case allows for higher quality leak sealing.
The fact is that repairing pipes and cylindrical surfaces is easier than repairing a crack on a flat surface. In this case, in addition to the usual plastic mass, you can later use two-component glue with an additional bandage to increase the strength of the connection. When repairing the junction of sections, not only the leak site is cleaned, but the entire circumference of the junction. The fact is that an incorrectly made connection of sections with an existing leak will subsequently allow coolant to flow around the entire circumference, since the mechanical tightness in it is broken.
The sequence of actions here is as follows:
- The battery is disconnected from the coolant supply;
- The entire surface around the circumference of the joint is cleaned;
- An adhesive composition is being prepared;
- The area where the glue is applied is degreased;
- A layer of cold welding is applied along the entire circumference of the joint of the sections;
- After the first layer has dried, a liquid glue composition is prepared;
- A layer of liquid adhesive is applied to the area, followed by a fiberglass strip and another layer of adhesive applied over it.
- To consolidate the result, 3-4 turns are made with mandatory glue impregnation;
- After this, a metal clamp is placed on top and secured with a screw.
Repairing leaks in nuts and fittings
For repairs in these places, plastic cold welding for radiators is usually used.
As in previous cases, the leak site is cleaned from paint to metal. When cleaning, it is recommended to remove part of the tow from the joint to a depth of 1-1.5 mm, this will make it possible to strengthen the gluing area by cold welding. After cleaning and degreasing, the process of preparing and applying cold welds is identical to the previously described cases.
Thus, cold welding is currently the optimal means for temporary repair of cast iron heating radiators.
Damage to the heat exchanger and pipes
If the heat exchanger of a gas boiler is leaking, the wall may have burned out, a crack or a fistula has formed. Based on the material used, heat exchangers are divided into copper, steel, and cast iron.
Cracks in metal are formed under the influence of thermal stress and hydraulic pressure. Corrosive processes lead to the formation of fistulas. Repairs are carried out by soldering.
Main stages of the process:
- dismantling the heat exchanger;
- cleaning and degreasing the area around the leak;
- soldering using flux and solder;
- trial;
- installation.
If there is a leak in an easily accessible place, complete dismantling of the heat exchanger for repair is not necessary. It is enough to remove the casing, turn off the gas and water, disconnect the electrical wires, and drain the remaining water.
For soldering, select a solder that corresponds to the material of manufacture, for example, copper-phosphorus solder containing silver is suitable for copper heat exchangers; the temperature regime at the soldering site must be observed
The soldering area is cleaned and degreased with a solvent. Soldering is performed using a soldering iron or gas torch. The heat exchanger is installed in place and communications are connected to it.
Tests are carried out by crimping. The circuit is filled with water, the pressure is increased to the test value and monitored using two pressure gauges for at least 5 minutes. If no pressure drop is detected and no leaks are noticed during a visual inspection, the repair can be considered complete.
In case of severe damage, repairing the heat exchanger is impractical. It is simply replaced with a new one. It is also impossible to solder many Chinese-made heat exchangers, since they are made of thin-sheet alloys that cannot withstand soldering.
The most common problems and their symptoms
Although cast iron perfectly tolerates the imperfections of the central heating coolant, and the radiators made from it have wide enough channels so that debris does not accumulate in them, problems can arise even with them. And this despite the fact that there is no wear to this metal. The following factors may be to blame for a cast iron battery bursting or a fistula appearing in its walls:
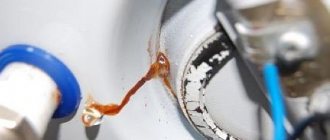
- Everyone knows the heavy weight of radiators made of this metal. If during installation of the structure, insufficiently strong brackets were used, or there were not enough of them, over time it may sag under its own weight and tilt. Even a slight deviation of just a couple of millimeters will reduce the efficiency of the device, and if the distortion is not corrected, then after a few years corrosion will appear in the place where the coolant is missing. At first it will look like a small brown spot, which will grow with each heating season until a fistula forms in its place.
- The reputation of “long-living” is characteristic of both old and new models of cast iron radiators, but provided that they are installed in the contour of an apartment building no higher than six floors. If the heating network is reliable and does not suffer from strong water hammer, then they can be installed in nine-story buildings. Otherwise, under strong water pressure, the cast iron battery may leak at the joints of the sections. In the event that a cast iron battery leaks during the heating season, you need to know in advance how to repair it. Today there are a lot of sealants that will help the device “hold out” until warm days.
- The internal structure of domestic batteries is such that the cast iron from which they are made has roughness that is completely absent in imported analogues. That is why a lot of debris is deposited on the walls over time, which fills the water in the heating network. Suspensions, particles of rust and metals, all settle and make the wide channel so narrow that it is no longer able to easily pass coolant under high pressure. In this case, the structure may burst anywhere, and then you will have to urgently decide how to eliminate the leak in the cast iron battery.
- Gaskets and nipple threads are the weak “link” of heating devices. If cast iron does not have a statute of limitations, then the same cannot be said about the parts that make up the battery. In order not to lead the situation to the point where repair of the cast iron battery is required, the connections must be checked after each heating season and the gaskets on them must be periodically changed.
As practice shows, most often it becomes known that something is wrong with the heating system when repair of cast iron radiators is already required. To find out about a problem in advance, you need to listen for “help signals” that indicate the presence of defects.
Leaking aluminum radiator: how to fix it yourself
A leaking aluminum radiator is a big problem. The most unpleasant thing is that it occurs at the most inopportune moment, during the heating season. But don’t despair if your aluminum battery is dripping – the situation can be corrected.
In this article we will tell you what to do if an aluminum radiator leaks. How to locate a leak and identify the faulty section. You will learn how to fix a leaking aluminum radiator and what steps to take to prevent the problem from happening again.
Causes of damage to aluminum radiators
Aluminum radiators are not durable compared to bimetallic and cast iron ones. In apartment buildings, they most often leak due to pressure drops in the system and water hammer.
Changes in water or coolant temperature also affect the condition of the batteries. If a liquid hotter than 100 degrees circulates in the heating system, it can damage the gaskets and sealant.
When water or coolant boils, the pressure in the central heating system (central heating system) can rise significantly. This often results in damaged sections. In some cases, an aluminum radiator may simply burst.
Sometimes problems are due to incorrect installation. Moreover, an aluminum radiator can leak several years after installation. In this case, you can only rely on yourself and hope that the other batteries were connected correctly without violating the installation standards.
If you have cheap aluminum batteries installed, there is a risk of manufacturing defects. No one is immune from this and it cannot be determined in advance. Therefore, before you buy a radiator, think about it: isn’t it easier to pay a little extra and buy a good battery than to fix problems?
Locate the leak
When an aluminum radiator leaks, the most difficult thing is to determine the location of the damage. Believe me, it's not as easy as it seems.
When you see a puddle on the floor under the radiator, you can determine which section the water is coming from. But the shape of the sections is such that it is difficult to look under the outer feathers; the gap between them is usually 4-6 mm. Therefore, you will not be able to determine the real cause and location of the damage.
First of all, inspect the joints at the top of the radiator. They are visible through the gaps between the feathers that remove air. If there are drops of water on the connection or it is wet, you are lucky and you are deprived of most of the problems with “making a diagnosis”. You can proceed to the section “How to fix a leak between sections of an aluminum heating radiator.”
The lower joints are difficult to inspect, since you cannot get close to them. You can feel them with your fingers, but it’s better to be smart. Use a small mirror to examine them.
To better see the inside of the radiator through the mirror, shine a flashlight on it. The light reflected by the mirror will fall on the inner parts of the sections.
If all connections are dry, then the problem is more complex and a crack has appeared on the side wall of the radiator. In this case, water drips onto the floor from one of the feathers.
The easiest option is to simply remove the damaged section. But if you don’t want to do this, you will have to find the leak and fix it.
Checking the side walls of aluminum radiator sections
Now comes the hardest part...
The problem is that 95% of leaks occur only when water or coolant is under pressure in the radiator. It won't work to remove a section, fill it with water and see where it comes out from.
Unfortunately, at this stage you will have to work hard. To find out exactly where the aluminum radiator is leaking, you will have to dismantle the sections.
If your radiator is installed and connected correctly, then there are taps on the lower and upper pipes, and they are connected to each other via a bypass. You need to do the following:
- Close the valves on the supply and return pipes;
- Open the bypass;
- Drain the radiator.
To drain the water from the battery, first unscrew the top plug, then the bottom one. When the water has completely drained, you can begin dismantling the sections.
If there is no bypass or taps, you will have to turn off the entire heating system. This is not difficult to do in a private home. In an apartment building, for this, contact the employees of the housing office, housing and communal services or a regular plumber. In some houses (especially new ones) you can turn off the heating only in your apartment.
Options for leaks and searching for section damage
In this situation, two options are possible (see figure).
Options for radiator side wall leaks.
If an aluminum heating radiator leaks from the side of the section that is located further from the supply pipe, you must do the following:
- Using a nipple wrench, unscrew the nuts located between the leaking section and the intact one located further from the pipe (see figure) ;
Places for unscrewing the nipple nuts of the section located further from the water supply.
If a leak appears from the side of the section located closer to the supply pipe, proceed as follows:
- Using a nipple wrench, unscrew the nipple nuts located between the leaking section and the intact one located closer to the pipe (see figure) ;
- Unscrew the damaged section;
- Turn it so that the wall on which there is a leak is located further from the pipe;
- Install the damaged section using a nipple nut and wrench.
Places for unscrewing the nipple nuts of the section located closer to the water supply.
After these manipulations, you need to completely seal the radiator:
- Screw the bottom plug;
- Install the Mayevsky tap in the upper hole of the radiator and unscrew it two turns;
- Open the water supply and close the bypass slightly.
After this, the radiator will begin to fill with water, and the air will exit through the Mayevsky tap. When water comes out instead, turn off the tap. There is now fluid in the radiator that is under pressure.
At the site of a crack or break in the radiator wall, water will begin to leak out. It's done - you've found a leak.
If the joints between the nipple nut and the radiator were treated with sealant, you will also need to use it. This also applies to the places into which the plugs and Mayevsky tap are screwed.
How to eliminate a leak between sections of an aluminum radiator
There are three reasons why leaks may occur at the joints between sections, namely:
- Gaskets or sealant allow fluid to pass through;
- The nipple nut is cracked or its thread is broken;
- Thread failure in the section mounting hole.
First, completely unscrew the nipple nut and inspect it. If it is cracked, just replace the old one with a new one. If there is damage to the thread of the mounting hole in the section or the nipple nut, you can simply wrap it with fum tape and install it in place.
If there is no visible damage, replace the gaskets. Some radiators (especially cheap ones) use a sealant. Sometimes nothing is installed at the connection points. Be sure to put in a good gasket, even if it wasn't there. Remove any remaining old gasket or sealant completely.
Repair of side walls of aluminum radiator sections
If a crack has formed on a section, then only argon soldering will help. Cold welding and sealants are powerless here - they will not be able to penetrate deeply and securely fix in the metal.
If you have an individual heating system whose pressure does not exceed 5 bar, you can use automotive radiator sealant. But this is too expensive an option - the sealant is not cheap, and you will have to pour a lot of it into the system.
If there is a pinhole at the leak site, you can use cold welding. The main thing is that it gets inside the radiator. Then, after hardening, the cold weld will form a kind of plug and will hold well. This option is not suitable for small holes.
Hole on the wall of an aluminum radiator. It can be sealed using cold welding.
- Using cold welding, you can seal holes with a diameter of more than 2 mm. Here is the full algorithm of actions:
- Heat a piece of cold weld under hot water (wrap it in plastic to avoid contact with moisture);
- Knead it;
- Apply cold weld to the hole and push it inward;
- When you are sure that part of the weld is in the internal radiator channel, remove the residue from the outside.
Before applying cold welding, the radiator must be dry and degreased. To do this, pour a little solvent or white spirit into the hole and wait until it dries.
What am I doing wrong?
Most people think this: if an aluminum radiator leaks, it’s enough to simply fix the leak. But think about it - if something went wrong, there is a reason for it. Without eliminating it, you risk stepping on the rake a second time.
After repairs, be sure to reduce the pressure in the system. In a private home, this is quite simple to do - adjust the pump or configure the controller on the equipment.
In an apartment building - open the bypass slightly or screw the valve on the supply pipe. If the radiator has a thermostat, lower the temperature.
Key methods to combat leaks
If it is not possible to immediately call an emergency team, you can use the following techniques:
- self-tapping bolt;
- plaster-cement bandage;
- sealant;
- rubber gasket and clamp;
- fabric with water- and heat-resistant adhesive impregnation;
- welding
The easiest way to eliminate a leak in a cast iron battery is to secure a self-tapping screw in the identified hole. Next, you need to take care of installing a new radiator as quickly as possible.
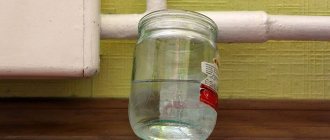
Hermetic seal
You can purchase polymer or powder based sealant at a hardware store. In air, this composition polymerizes, with its help you can gain time to organize a full repair. Two-component variations harden after mixing all components.
Cold weld is a two-part sealant sold in compact tubes, usually containing epoxy resin and metal powder. Before using cold welding, the area must be thoroughly cleaned and degreased. It is necessary to remove paint and rust, preferably with allowances to increase the accessible contact area. Sharpening is easiest done using a stone, which is usually used for sharpening knives.
The instructions on the tube describe in detail the method of use recommended by the manufacturer; please note that some varieties cannot be used in wet conditions - water can become an obstacle to full polymerization
Manufacturers offer liquid welding and thick welding, with a consistency reminiscent of plasticine. Before use, you need to knead both components in your hands so that the polymer acquires a uniform color without inclusions, then it is applied in a thick layer to the defective area. It is advisable not to introduce water into the system until the composition is completely polymerized. When properly applied, after a few hours a durable coating is formed that prevents the release of moisture.
Clamp and gasket
This technique is applicable to repair damage at the junction of the heating device and the main pipe. You can use a piece of a bicycle inner tube as a rubber band; it is secured with a clamp or wire.
Moisture resistant glue
Another emergency temporary measure, convenient if it drips from the joint between sections. The fabric is impregnated with glue that is resistant to heat and moisture, and the problem area is wrapped with it. By the time it dries, the water will no longer appear on the surface. A two-component epoxy composition is perfect for solving this problem.
Bandage with cement and plaster
You need to prepare alabaster, cement, a small container of water at room temperature, a medical bandage and salt. The cement is diluted in a container so that the consistency resembles low-fat sour cream; you need to immerse a bandage cut into strips into the mixture and, after it is soaked, wrap the workpieces around the damaged area. Alabaster (gypsum) will be needed if it is necessary to carry out repair work without shutting off the water - this mixture sets faster.
Leaks that occur at the threaded connection are eliminated with salt. The fabric or bandage is soaked and rolled in salt, and wrapped around the joint. The above-mentioned cement bandage is applied on top.
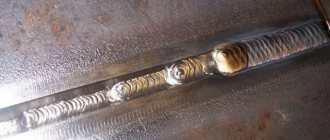
Welding
This technique is only suitable for steel appliances; here you will need a welding machine. Arc welding is dangerous, it is better to use gas welding - this way you don’t have to worry about damaging the area around the leak.
Air jams
The cause of cold batteries is usually air, which does not allow water to flow freely.
An air lock forms for several reasons.
:
Oxygen bubbles accumulate in one of the radiators or at the highest point of the heating system. Because of this, the bottom half of the radiators will be hot and the second half cold. Gurgling sounds also occur when the equipment operates. In multi-storey buildings in the highest apartments, boilers completely stop working.
In older apartment buildings, many of the pipes have long since expired. Therefore, they can cause accidents and reduce heat levels
. Microelements contained in the coolant are deposited inside the pipelines. They impede normal water circulation. The correct solution would be to replace the products, but this is not always possible.
Layers of scale form on the inner surface of the boiler, which reduces the pressure in the system. This problem is caused by the use of hard water, saturated with minerals and salts. Special reagents must be added to the equipment to soften the quality of the coolant.
When pipes are corroded or improperly connected, leaks occur. If it is in a visible area, it is easy to seal the hole with sealants. It is more difficult to deal with a problem hidden in the wall or floor. In this case, you will have to cut off the entire branch, fix the problem and install a new section. In addition to sealants, you can use special parts to clamp the pipeline, corresponding to its diameter. If it is not possible to purchase such devices, then it is enough to make a clamp. The leak area is covered with a piece of soft rubber and secured tightly with wire.
If a leak is detected at the radiator or at its junction with the pipe, wrap the hole with a strip of fabric, after soaking it in moisture-resistant construction glue. Sometimes cold welding is used. To avoid such problems, before the start of the heating season, inspect the entire system for damage. It is imperative to start the boiler and check the quality and reliability of its operation.
Construction of cast iron radiators
This type of heating device consists of sections. Models of the old type, even today, are produced in the form of “accordions”, while the new generation has a flat outer panel, which provides better heating of its entire area. When operating, these devices use two types of heat transfer:
- Radiation, or as professionals call it, radiation accounts for up to 25-30% of heat. It not only heats the air, but is transferred to nearby objects, providing better heating of the room.
- Convection produced by the heating battery ensures constant movement of air masses around the room and accounts for about 75% of the heat transfer.
The structure of the cast iron battery, despite all the external changes, remained the same. It consists of sections equipped with:
- plugs;
- locking devices;
- traffic jams;
- shank and thermostat;
- locknuts;
- nipples and gaskets.
No matter how strong cast iron is, even it has its limits. As a rule, the service life of cast iron radiators is 25-30 years, and with proper care and optimal operating conditions they can operate without interruption for 50 to 100 years.
The same cannot be said for the parts that hold the sections together, such as spacers. With frequent water hammer, they can “sway” or crack over time. In this case, a leak appears between the sections of the cast iron battery, which, if not eliminated in time, can cause a serious accident and a threat to human health and life.
To avoid this, you need to check the condition of cast iron radiators after the end of the heating season. In this case, you can detect completely different problems in the heating system.
Read other useful information about cast iron batteries on our website:
Prevention and care of radiators in summer
After the completion of the heating season, the pipeline must be tested (pressured) with increased hydraulic pressure. This is done in order to identify weak points and repair areas where ruptures or coolant leaks have occurred. The house main is subject to periodic internal flushing by utility services. Water is supplied to the system along with compressed air under pressure. A temporary break is made on the return line (unwinding of one of the connections) to drain dirty water through a hose or hose.
Dust and dirt accumulate on the outer surface of the batteries and on their ribs, which must be washed off in the summer with a cloth moistened with soapy water. Once warm, the cleaned surfaces can be coated with fresh paint. This will make them dry faster. Make the paint layer thin, otherwise it will crack later.
To avoid damage, do not use the equipment as supports or tie clotheslines to the risers. Read about warm floors on a wooden floor on our website.
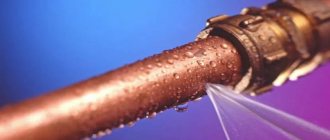
The main reasons why pipes leak
The main cause of leakage is oxidation. Corrosion mainly occurs on the outside of the pipe. This is explained by the fact that the material is constantly influenced by unfavorable external conditions - temperature changes, air and water. All this contributes to the appearance of rust on the material. When such a problem occurs, a leak forms. It is typical for steel and cast iron devices.
The cause of leaking plastic pipes is the use of material for the heating system that is not intended for this purpose. In order to save money, pipes for cold water supply are installed. This is the main mistake. When hot coolant is supplied, they are deformed or mechanical defects appear on the material, which leads to a leak. This problem also occurs on pipes intended for the heating system. The reason is poor quality material.
Leaks also appear due to poor installation of the heating system. Poorly performed welding of butt seams leads to this problem.
Another reason for a leak is wear and tear on the heating system. If the operational period of the material has expired, defects appear on it.
Mechanical damage causes leakage. This applies to plastic materials.
Why do pipes wear out?
For the installation of heating systems in residential buildings and apartments, metal pipes and radiators are most often used. They are highly wear-resistant, have a long service life, and high heat transfer. But even the most wear-resistant structures have a limit of strength and lifespan.
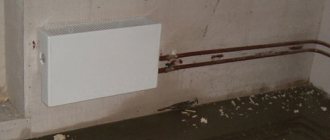
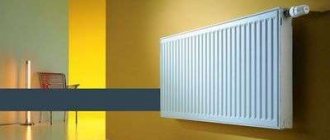
Steel heating radiator
Most often, leaks occur on metal pipes and batteries. Possible causes of wear
:
- Aggressive coolant environment and external factors causing metal corrosion. This process occurs due to condensate entering hard-to-reach and unprotected areas and contributes to the gradual destruction of the walls.
- Factory defects - to protect yourself from purchasing such products, ask the seller for a quality certificate with a Quality Control Department stamp.
- Long service life and mechanical damage. No matter how strong the metal is, it cannot withstand constant increased physical and mechanical loads. The equipment is constantly under high pressure, so it gradually becomes thinner and wears out.
- Incorrect insertion, violation of threaded connections, installation technologies. The most vulnerable places where water leaks most often are welds, joints, threaded connections and the areas around them.
- Violation of the normal operating mode: the cause of a battery breakthrough can be excessive or, conversely, insufficient pressure in the system, as well as a violation of the operating mode.
Signs of damage or “I didn’t touch anything”
Let us note several possible reasons for the failure of heating radiators:
- The radiator was chosen incorrectly from the very beginning. Depending on the diameter of the pipes, the pressure and temperature of the water in the system, different types of radiators are installed.
- Repair of a heating battery can also be caused by the fact that it was incorrectly connected to the pipes of the heating system.
- If the central heating system creates harsh working conditions. For example, if the coolant has increased acidity and sharp pressure changes are observed, this leads to the metal experiencing electrostatic or electrochemical corrosion.
- If the coolant is of poor quality, it will form deposits at the joints of the battery sections and in the places where the pipes are attached.
- Poor quality coolant will also clog radiators and pipes - this will entail the frequent need to flush them.
Plaque in heating system pipes
- Intersectional gaskets can wear out and threaded nipples can be destroyed. Therefore, you need to regularly change the gaskets between sections.
- Clicking noises in the heating radiator are not necessarily a breakdown, but if they appear, you need to call a specialist; you may need to soundproof the heating radiators. Since the heating radiator makes noise, it can cause discomfort or cause its breakdown.
Now let’s outline the main signs that your batteries require careful inspection and repair in the future or urgently:
- When the heating season is in full swing in the literal sense of the word, the rooms suddenly become noticeably colder, that is, the heating radiator does not heat.
- Plaque has appeared at the joints and fastening points; this may cause the heating radiator to not work in the future.
- The heating battery has leaked or the heating radiator has burst.
If your batteries are already older than you, it is better to replace them, because, most likely, you are guaranteed to permanently repair the heating battery yourself. After all, modern models will be more efficient, since their thermal conductivity is higher: the rooms will become warmer, and heating costs will be lower. In addition, the new batteries will be more beautiful.
Sometimes it's easier to replace an old battery than to repair it
If it is not possible to replace the batteries, then you will have to repair the heating radiator yourself, and as soon as possible. It’s best - whether it’s a problem of how to fix a leaking heating battery, or you just hear noise in the heating batteries, immediately contact specialists who will carry out professional diagnostics.
Unbalancing and installation
Another reason why water does not circulate in the heating system is improperly carried out imbalance during renovation or redevelopment of the apartment. This is affected by the uncontrolled installation of new radiators and heated floors.
The radiators on some floors continue to function normally, while on others they will remain cold because no coolant is supplied to them. Although the craftsmen can easily balance the distribution of water across all risers, in several apartments the system will not work.
If some residents removed the thermostats when replacing heating equipment, then heat will not flow into their neighbors’ homes. To fix this problem, you need to eliminate the thermostats in all apartments. You can increase the heat supply if you follow the example and also replace all radiators. Bimetallic or aluminum batteries fit harmoniously into modern heating systems. You must first obtain permission to replace devices, since you cannot do this yourself.
In a private house, batteries located closer to the boiler heat up more than others. To restore the balance, you need to turn off the control valves and limit the access of the coolant to nearby radiators. But sometimes the new battery does not heat up. If the entire system worked normally before its installation, then the problem lies in improper installation. When welding several polypropylene pipes, the master overheated the product, which caused its internal diameter to decrease. A specialist must redo all the work free of charge. All structural elements must be securely and efficiently fastened.
What to do in case of a breakthrough: step-by-step instructions
If your battery is leaking, you won’t be able to fix the leak on your own, but you can minimize the consequences and prevent serious damage. The sequence of your actions should be like this:
- Remove children and pets from the room; if hot water is spurting out, you need to throw something thick, such as a blanket, over the radiator to prevent thermal burns.
- Turn off the power to the apartment or at least turn off electrical appliances that are located near the battery.
- Turn off the water. If there are no shut-off valves in the apartment, then you can shut off the coolant supply at the main pipeline at the entrance to the basement, but this method is used in exceptional cases, because the entire house will be left without heat.
- Call an emergency plumbing team.
- Take possible measures to eliminate (reduce) the leak.
How and what can you fix with your own hands?
If the leak is small, you can try to fix it yourself. For this you will need:
- Find the exact location of the leak. Use dry toilet paper (napkins or newspaper) for this. By looking at the wet spots, you will understand where the water is flowing from the pipe.
- If a leak has formed in a cast iron battery, it is eliminated with a self-tapping bolt, which is screwed into the resulting hole.
- If you have the necessary materials, you can make a plaster-cement bandage. Strips of a regular bandage are moistened in cement or gypsum mortar and applied to the leak site.
- If a leak has formed at the threaded connection between the pipe and the radiator, you can use a salt dressing. Strips of bandage soaked in water are rolled in salt and applied to the leak site. Salt dissolves in water and cokes the point of damage. A cement bandage is applied on top.
It is important to understand that all these measures are temporary; if even a small leak in the system occurs, over time this can lead to an emergency and serious damage. Therefore, it is better to replace such a device
Where to go in other cases?
If a serious leak occurs, you need to call the management (maintenance) company. It is her responsibilities that include eliminating leaks and organizing repair work.
Drawing up an application
After eliminating the malfunction, a report is drawn up, which records the amount of damage. If heating radiators need to be replaced, residents must file an application addressed to the management company (who should repair and replace heating radiators in apartments?). The application is drawn up in any form, but it must contain the following information:
- name of the management company and details of its director;
- the applicant’s personal data and specific address;
- text demanding replacement of radiators and indicating the cause of their damage;
- signature and date of submission.
We do not recommend completing the documents yourself. Save time - contact our lawyers by phone:
The application must be registered as a written appeal, in which case it must be considered within 3 deadlines and a written response must be given, in accordance with paragraph 34 of Government Decree No. 416.
The radiator is leaking. What to do legally
If your heating radiator is leaking, then, of course, the management company, the service company that services your home, will do everything possible to ensure that you repair and repair your radiator yourself. One should not think that the officials and managers of these organizations have not heard of the Resolutions of the Government of the Russian Federation and the State Construction Committee listed in the first part of our note. We heard!
Replacing a heating radiator with your own hands
But they will try to come up with different clauses like: “We serve until the first valve, and the rest is all yours!”
As a rule, if you seriously intend to resolve the issue in court, then the nerves of officials and managers cannot stand it, and they lose ground. But sometimes they can outplay you. For example, your battery tap is leaking. Who should change it? As a rule, such a crane is not listed in the technical documentation (especially if you live in a Khrushchev or Brezhnevka building built in the 60-70s of the last century). This means that you installed it yourself, and you yourself must take care of it.
The pipe is leaking - what to do at the first stage
In the event of a fistula appearing on the central heating riser, from where water is gushing out, we offer the optimal plan of action:
Organize the coolant drain into a bucket or basin by quickly wrapping the pipe with any rag. This way you will preserve the flooring, personal belongings and furniture, and prevent flooding
Proceed with caution - in winter the temperature of the network water reaches 90 ° C.
Spend 2-3 minutes calling the dispatcher of the heating supply organization. Report the accident, call the plumbers. While the repairmen are getting there, try to close the riser yourself
Too hot a coolant will still not allow you to close the fistula under pressure. Taps should be found in the basement heating point located under the entrance. Observe where the riser penetrates the ceiling and close the nearest valve. As a last resort, turn off the main house tap during repairs.
In the current reality, craftsmen often have to wait 2-3 days (reasons: holidays, weekends, accidents at other facilities). It is impossible to leave residents without heat for a long time, so in case of delay, make an improvised clamp from scrap materials:
- Find a rubber glove, a bicycle tube, or a ready-made medical tourniquet. The second component of success is soft steel wire with a diameter of 2-4 mm.
- From a glove (bike inner tube), cut a strip 4-5 cm wide, as shown in the photo.
- Applying the end of the strip to the pipe 1 cm below the fistula, wind it with tension. The goal is to tightly seal the hole with several layers of rubber.
- Hold the “bandage” with your hand and secure it with wire. It is better to wind the latter tightly, turn to turn, helping with pliers. Now the common valve in the basement can be opened.
Also use the procedure described above when a cast-iron central heating radiator is leaking heavily and there are no shut-off valves. Typically, radiators leak at the joints between sections, and a temporary clamp should be applied there.
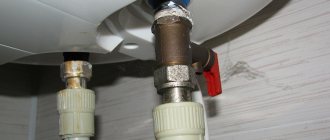
When a leak forms from under the nut, the connection must be repacked
If a trickle of water is observed at the place of the threaded connection of iron pipes, you need to unscrew the fixing nut from the coupling with a gas wrench. Wrap the exposed thread with a braid of fresh flax (clockwise) and tighten the nut again. The plumber will show the considered sealing options in the video:
Watch this video on YouTube
In a private home, eliminating a leak is greatly simplified - just shut off the required valve or quickly empty a section of the heating network. It is not necessary to wind the rubber; it is better to repair the hole using a more reliable method. When the leak in the apartment is temporarily fixed, you don’t have to wait for locksmiths - choose the right time and finally seal the hole using any of the methods presented below.
The use of rubber gaskets and conventional clamps
Before repairing bimetallic heating radiators, you should prepare some materials and equipment:
- Pliers.
- Aluminum clamps.
- Wire.
- Classic gasket made of durable rubber.
The repair technology includes a certain list of important stages. A gasket is placed in place of the leak and everything is secured with a clamp. If you don’t have the right tools at home, then a simple wire and a bicycle tube will do just fine. From this material you can carefully cut a piece of rubber of the appropriate size. You can secure the homemade gasket with strong wire. To achieve a good tie, you need to use pliers.
Types and causes of leaks
As a rule, a leak occurs in the off-season, when the heating is turned off, as the metal cools down, the metal narrows and water begins to seep into the threaded joints.
If the heating radiator is leaking, then it is necessary to determine the cause and location of the breakdown. Each plumbing point consists of a heating radiator and an adjacent pipeline. The connections of these elements can be disrupted under the influence of the following factors:
- Long service life as a cause of wear;
- Poor installation of the heating system;
- Mechanical impact, brute force;
- Corroded metal.
Depending on which elements the coolant leak occurred between, the following types of failures are distinguished:
- Violations of the seal between the riser pipes and the battery pipes;
- Partial destruction of the main pipes that connect the radiator and the riser;
- Leakage in the area of intersection connections;
- Formation of a fistula or crack in one of the radiator sections.
For each of these cases there is a different way to eliminate the accident. If the battery is dripping, don’t rush to find out what to cover it with. You may not need to smear at all.
Dripping between the nozzle and the main pipe
Car clamp with rubber band
A leak at the junction is often the result of improper installation, or a domestic situation where the batteries were used as a support for heavy objects or residents. To complete the repair you will need:
- Car clamp or wire;
- A piece of thin and flexible rubber.
Procedure:
- Cut strips of rubber measuring 5x35 cm or use a rubber bandage from a pharmacy;
- Wrap the strip around the damaged area;
- Secure the rubber with wire or a zip tie.
In this situation, a clamp will be a more suitable option, since it is inexpensive and fixes the damaged joint reliably, evenly, without the risk of overtightening.
Main pipe leaks
There are always two such pipes. One for supplying coolant to the radiator, and the second for discharging cooled water. They are made of steel and tend to corrode and wear out from the inside over time for two reasons:
- Filling with water in the off-season;
- Impurities in water supplied through heating mains.
Most often, the question of what to do if the heating radiator is leaking arises at the height of the heating season. In the event of an accident, a cement-plaster bandage is used on a straight section of pipe. To prepare it you will need:
- Non-sterile bandage;
- Cement;
- Alabaster;
- Container for mixing the mixture.
Procedure:
- Mix cement with water to the consistency of liquid sour cream;
- Prepare strips 25-30 cm long;
- Soak the bandage strips in the mixture;
- Wrap them around the damaged area layer by layer;
- Continue until a tight bandage is obtained.
If a stream of water gushes like a fountain
Wooden wedge in a pipe
If a fistula has formed and water flows in a stream, then you can hammer in a wooden wedge before the mechanics arrive. The wood gets wet and holds water well.
Threaded connection is leaking
In the case when a leak in the heating battery has formed in the thread area, a bandage is used again, but this time a salt one:
- Wet the bandage;
- Roll strips in salt;
- Wrap the damage;
- Apply a cement dressing.
Leaks between sections of cast iron radiator
If a heating radiator drips between the sections, it’s not difficult to figure out what to do. The joint is represented by a small straight section, which can be easily repaired temporarily. Necessary materials:
- Car clamp with tightening corresponding to the direction of the screw;
- Flexible rubber gaskets;
- Epoxy adhesive;
- A piece of fabric.
Procedure:
Cold brew
- Soak the fabric with glue;
- Wrap around the perimeter of the joint;
- Secure the rubber gasket and apply a clamp.
Leaking from the radiator walls
A reasonable question when a battery leaks is what to cover it with? If the accident occurred in the wall of one of the sections, then it will have to be covered with cold welding. There is no more effective way yet. The “cold welding” ball must be pressed tightly to the leak site and kept in this position for 3-5 minutes
After half an hour, the mixture will completely harden, and after another day the battery will be ready to perform its functions. As a conclusion, it is important to note the following. All of the above measures are “first aid” actions.
If the heating system fails once, this means that it is time to prepare for a major overhaul. Calling a specialist will be the best prevention of serious problems
https://youtube.com/watch?v=N8q7haSut7M
Video:
Application of universal welding
Thanks to this device, you can eliminate absolutely all traces of leakage. Welding allows you to eliminate leaks in any type of battery in just a few minutes. The master can purchase a high-quality installation in a specialized store.
This option is in great demand, since the result of the manipulations performed is not afraid of the negative effects of moisture and high temperatures. Welding is one of the most reliable ways to eliminate leaks in a heating system. If a person has not previously encountered such a device, then it is better to entrust all manipulations to a specialist.
A variety of products for filling holes in cast iron products
Eliminating a leak at the connection between the radiator pipe and the main pipe
Leaks at the joints of the pipe and radiator pipe are caused by:
- improper installation when connecting the battery. The connection is made either by welding or threading. In both cases, the slightest carelessness during assembly, for example, non-compliance with welding conditions or misalignment of the pipes being connected, when their ends are pulled together with force to align, different pipe diameters will manifest themselves already in the first months of operation;
- mechanical bending loads in the joint area. They arise as a result of a simple everyday situation, when one of the residents uses the battery as a support, wanting, for example, to straighten a curtain on a curtain rod. Even if a hundred-kilogram owner stood on the radiator, there would still be a distortion and a break at the junction of the two pipes.
To stop the leak, you can use a car clamp or use a rubber band and a piece of soft wire. The rubber from a bicycle inner tube will cope with the task of temporarily stopping the leak. You need to prepare strips 4-5 cm wide and up to 35 cm long. Secure the rubber strip wrapped around the damage with wire. Automotive clamps are good because they are inexpensive and allow the possibility of securely and evenly fastening them to a damaged joint, without the risk of overdoing it when tightening, as is the case with wire.
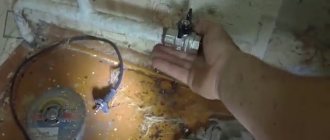
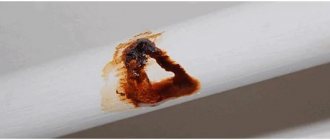
Fistula removal
Any breakdown occurs due to a reason. A fistula on heating system pipes or on a radiator is no exception. If a small brown spot appears on parts of the heating system, do not think that it is just paint peeling off. This is the beginning of an irreversible process. But if you know how to remove a fistula in a cast iron battery, you can prevent destruction and extend its service life.
Causes of corrosion:
- Given the constant increase in the cost of utilities, some, in order to save electricity, connect a neutral cable to the heating circuit. Currents move through the pipes using the coolant method and provoke corrosion. This situation can only be saved by the appropriate service, which will find the offender and make repairs;
- a high level of water acidity harms even corrosion-resistant cast iron;
- The batteries have expired, or deposits on their walls have damaged the metal. Even a small fistula or crack under the influence of water pressure will cause the battery to rupture and hot water to flow from it. If the battery drips a little, you can use a clamp. If it runs in this stream, it is better to use a double-sided clamp.
We recommend: How to install central heating on a balcony?
If the coolant has ruptured the place where the fistula is present, then the question arises, is it possible to weld the battery? Cold welding is usually the emergency solution. But even if it has restored the tightness, you need to call specialists from the heating network to check the condition of the heating equipment.
Repair of cast iron batteries can be done independently with the help of tools and the necessary materials, but only if non-critical breakdowns are detected. Cold welding is an easy and quick way to restore a heating device, but even it will not guarantee that nothing terrible will happen in the future. To make sure that the heating device and all its parts will serve for a long time and will not cause harm to people, it is necessary to either completely replace the repaired device after the end of the cold season, or call specialists to check its stable and reliable operation.
YouTube responded with an error: Access Not Configured. YouTube Data API has not been used in project 268921522881 before or it is disabled. Enable it by visiting https://console.developers.google.com/apis/api/youtube.googleapis.com/overview?project=268921522881 then retry. If you enabled this API recently, wait a few minutes for the action to propagate to our systems and retry.
Elimination of leaks at joints
Very often, the coolant begins to leak where some elements are joined - for example, a pipe and a radiator are connected. There can be quite a few reasons for this. Most often, the problem is the wear of the material with which the threads were sealed during installation.
If the coolant does not gush out like a fountain, but only drips slightly, and for some reason you do not have the opportunity to stop the heating system to carry out a full repair, then you can try the following method. Drip a small amount of alcohol onto the tow that is wrapped around the joint. Then apply BF glue there.
When interacting with alcohol, it will become liquid and can flow into the connecting element, and then harden there. But the disadvantage of this method is its low reliability. In addition, someday later you will have to take a very long and painful time to disassemble such a glued joint.
Therefore, it is still advisable to ensure that you have the opportunity to undergo normal repairs. It consists of disassembling a leaking threaded connection and then reassembling it, making it better. Naturally, this procedure can only be carried out after stopping the supply of coolant to the segment of the system being repaired.
- Carefully unscrew the nut. This must be done slowly so as not to damage the thread.
- Once the thread surface is free, remove all sealants that were used during installation. As a rule, this is tow or FUM tape. Don't forget to clean the sealant as well. You can go through the sandpaper a couple of times, bringing the cleanliness of the thread to perfection. Finally, it is advisable to degrease the surface using acetone or the like.
- Next, do everything in reverse order. Screw on a new FUM tape, wrap flax tow on top, lubricate the whole thing with a high-quality sealant and assemble the connection. Tightening the nut must be done no less carefully than unscrewing it. This is especially true for old radiators, where the elements are already on their last legs.
If a leak occurs at the junction of radiator sections, the problem is usually deformation or wear of the sealing gasket. Ideally, this element should be replaced with a new one. To do this, the battery needs to be disassembled into sections - step-by-step instructions for carrying out this work are on our website. To disassemble you will need a special plumbing wrench and quite a lot of patience, but it is quite possible to complete all the steps.
After disconnecting the sections from each other, clean the joints from all contaminants - of course, initially remove all old sealing materials. Then install new gaskets. It is better to choose non-rubber and non-silicone ones, since they do not withstand high temperatures very well and, as a result, do not last very long. The best option is paronite, which will perform its functions perfectly for many years.
After installing the new gaskets, reassemble the radiator and connect it to the system. If during disassembly you find that the problem is not in the seal, but in damage to the section itself, then the best option would be to replace it.
Instead of regular epoxy, you can use special products called cold welding. Working with them is done in much the same way. Some compositions can be used even on wet surfaces, that is, if it is not possible to stop the flow of coolant.
Cold welding can be liquid or solid. In the first case, the work is carried out according to the same principle as with conventional epoxy glue. In the second case, the product is kneaded and then used as putty. When using it, be sure to wear gloves, since the composition is chemically active and can adversely affect the skin.
Regardless of what product you use to seal the leak between the sections, remember that this solution is temporary. After the end of the heating season, you will still need to take this issue more seriously, disassemble the connection and fix the problem. Good luck!
Sealing
Next you need to act according to the circumstances. If the “hole” is located in the upper part of the battery, and when the heating system is stopped, water stops flowing from the damaged area, then repairs can begin. If a leak has formed in the lower part of the radiator, then before the “treatment” of the equipment it is necessary to drain the coolant either from the entire system or from a specific element (usually this is possible with a bypass that allows liquid to bypass the equipment being repaired).
Naturally, before gluing, you need to wipe and thoroughly dry the area you will be working with. In addition, you need to clean the surface of peeling paint and similar debris. Otherwise, the result will not be of satisfactory quality.
Epoxy resin can be used in its original form, that is, directly after purchase in a store. But you can slightly improve the composition, giving it greater final strength. To do this, an additive is added in the form of bronze or aluminum powder. It is very easy to obtain the powder by using a rasp to process any part of the corresponding metal - naturally, having previously placed a sheet of paper under the work area, on which the powder will collect. Add the resulting material to the epoxy and mix properly.
If for some reason you cannot use epoxy glue, then instead you can use zinc white, diluted to a thick paste. In any case, the work is carried out in the same way.
- Cut the fabric into strips. The width of each of them should be twice the diameter of the area being repaired. Calculate the length so that you can wrap the element 6 or 8 times.
- Coat the area to be repaired with epoxy resin or zinc white. Naturally, this must be done not only at the leak itself, but also at a certain distance on both sides of it.
- Wrap a fabric strip tightly over the area treated with adhesive. Then coat it and repeat the procedure with the next strip.
- After all the fabric strips have been wound (the topmost one, of course, no longer needs to be coated with adhesive), secure the whole thing at both ends with clamps or strong wire.
you can find
How to seal a heating radiator with a leaking radiator
A heating radiator complete with heating system pipes is a design with a low level of reliability in terms of tightness of connections and strength of elements.
The connections of pipelines supplying hot water and discharging cooled water to the radiator, the joints of sections (and there are often more than 12 of them!), plus corrosive wear of the walls of a cast iron radiator, are a kind of concentrators of deformation changes leading to depressurization of the heat-conducting path. They manifest themselves both in drip leakage of joints (“crying,” as they say in everyday life), and in a catastrophic outflow of water from a ruptured radiator.
Clogged heating system riser
A clogged heating system riser in an apartment building is determined by the cooling of heating radiators in several apartments. Typically, such radiators can be located vertically one below the other, depending on the configuration of the specific heating system. Usually, with such a breakdown, the upper floors receive enough heat, and the lower floors freeze. This is especially noticeable when there is a strong minus on the street.
The reasons that lead to clogging of the riser are usually laid down at the installation stage. A decrease in the diameter of the riser pipe by 0.25 compared to the design one leads to clogging with oxides and debris after just a few years.
Removing such a clogged system riser usually requires the work of a qualified team of plumbers. Often, such repairs also require the consent of other residents, including apartments that are not directly affected by the emergency.
Eliminating leaks at the joints of radiator sections
Sometimes it is quite difficult to determine the location of a radiator leak, as water begins to curl over the entire surface of the battery. To find a place where the material could not withstand the pressure of water, you should completely wipe the surface of all sections and carefully inspect them. When you see where water appears, you should turn off the shut-off valves so that there is no liquid left in the radiator. After this, use the Mayevsky tap to reduce the pressure.
You should begin eliminating the leak only after water has stopped dripping from the rusted area. To eliminate intersectional leaks in the radiator, cold welding can be used. The most common type is epoxy mastic with various additives.
But first you need to clean the junction of the sections. The first step is to clean the surface of paint, and you can use a steel cable to remove rust and dirt. The reliability of the patch made will depend on the quality of cleaning of the joint.
After purchasing a specific product, you should carefully read the instructions, since some types of such compounds are not intended for a certain type of pipe. Usually, to create the desired composition, it is necessary to combine several components and apply it to the damaged area using a syringe. The mastic dries in about 3 hours, after which the battery can be used again. One-component compounds are also often used, which must be kneaded before applying to the battery.
Important! It is worth remembering that increasing the thickness of the patch does not affect its strength. To get rid of a leak, it is enough to apply the composition up to 4 mm thick.
Fistula in the rib of the battery
This type of leak can be considered one of the most unpleasant, since it requires significant effort to eliminate. But temporarily, you can use a simple method to eliminate such a leak. If the hole where the leak came from is small, then you will need to enlarge it a little. For these purposes, the water is completely shut off and the pressure in the batteries is reduced. After this, using a small drill, the hole is slightly drilled out. This is done in order to insert a peg into the hole from which water is leaking. It can be cut from a small wooden block. It will swell with water and plug the leak well.