Stove maker Evgeny Krasovsky Articles 01/10/2019
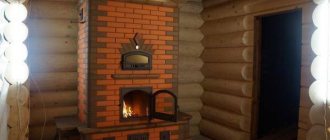
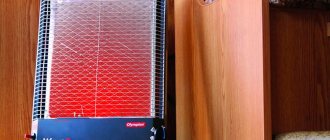
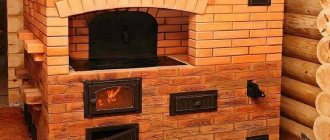
Winter is not the season for a stove maker. But I have a job and there are clients who want to have a brick heating stove with a fireplace door with glass and a “white-style” bread chamber in their home. I am grateful to them for the opportunity to work with an interesting project.
Below is a 3D sketch of the future furnace. Door – Vesuvius 224. For the bread chamber – Vesuvius 270. Blower, cleaning doors and rotary valve – also from Vesuvius.
Brick heating oven with bread chamber sketch
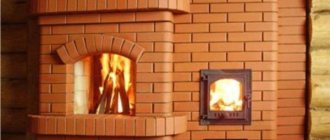
Vitebsk brick. As usual, it’s a struggle with the “twist” for even seams. The oven will have shelves: a large lower one - like a wooden shelf and a small upper one - decorative.
Vitebsk brickwork
In the bread chamber it will be possible to cook various dishes close to a Russian oven. There is a bread chamber of the same design in the oven at my mother’s house. My mother is very pleased with her. In about a week the project will be completed and delivered, and I will share photos of the finished stove.
Features of country stoves
In order for brick stoves and fireplaces for a dacha to bring maximum benefit, it is recommended to build them taking into account the following capabilities and features:
- The presence of a hob and oven. This will allow you to use the unit not only to heat your home, but also to replace a standard stove. On such a stove you can cook food, bake and boil water;
- Dryer. This structural element, as a rule, is represented by one or more comfortable and spacious shelves, on which, if necessary, you can place wet or washed clothes and shoes. Also, if necessary, you can safely dry various berries and mushrooms on such shelves.
At the bottom of the unit is complemented by a firewood
Small shelves are suitable for drying berries
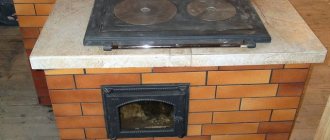
The design is equipped with a convenient hob
Additional tips from experts:
- In order to heat an area of about 40-60 square meters, the installation must have large overall dimensions and double walls lined with high-quality ceramic stove bricks. In order for such a structure to warm up, on average it will take from 60 to 120 minutes;
- For a small country house of about 10-20 square meters, a more miniature model is suitable. This option is highly economical and warms up quickly (within 30-50 minutes).
Tips to help you at work
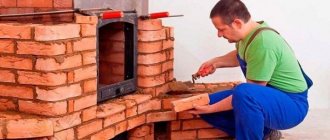
If you decide to do the assembly yourself, we recommend taking the following useful tips as a basis to help you organize and carry out the work:
- Brick fireplace stoves for summer cottages must have the same thickness of seams in all areas (4-6 millimeters);
- The evenness of the first row is checked both using a standard level and in a diagonal direction;
- Before you start laying the next row, additionally check the evenness of the previous one. To do this, use a protractor. The horizontal is checked using a building level, and the vertical is checked using a plumb line;
- If you plan to install a hob, to better fix it and protect the brick from constant overheating, apply a large layer of fresh clay mixture (about 5-7 millimeters) to it;
- In order for the heating unit to have good draft, the device is equipped with a summer operation. Thus, the removal of gases and all decomposition products will be carried out in a short way;
- A stove with a fireplace for a brick cottage should be laid out starting from the corner in each row;
- The joints of the previous row must be covered with bricks of the next one;
- The cross-section of the chimney and smoke collector always have the same diameter and shape.
Small shelves are suitable for drying berries
Small shelves are suitable for drying berries, fruits, plants, and also have a decorative function
Brick kilns can be equipped with
Brick stoves can be equipped with a purchased metal or cast iron hearth
In order to increase efficiency and heating speed
In order to increase efficiency and heating speed, the design can be equipped with several hearths
For a detailed visual acquaintance with the preparatory stage of work and useful recommendations for the construction and selection of a brick fireplace for your summer cottage, you can also watch the video in this article.
https://youtube.com/watch?v=_VU5gnzsNUE
Fireplace installation
After the foundation has dried, you can begin to arrange the structure. The first row is laid continuously. The second row is positioned in such a way as to outline the gas passage, the blower chamber and the place for the firebox. Next, following the drawings, you need to model the fire chamber with masonry, forming the bottom, which is the third row.
To make ceilings, you can use metal corners - they act as a support and block the door opening. With this condition, you need to lay out the fourth and fifth rows. After this there are several layers with the installation of the door. And already in the ninth row, the hole is covered with brick, laying several more rows.
On the eleventh layer it is necessary to insert a hob, so first you need to lay out the brick dry, measure the area under the slab, and only then lay it together with the structure. A few rows after - you need to lay them according to the pattern, securing the holes in the frame with wire.
On the sixteenth row you can lay the beginning of the arch under the slab, not forgetting the steel strips for support. In subsequent masonry, model the arch. On the nineteenth layer, the gap between the bricks needs to be increased for the valves and then the cleaning doors must be installed. In the next masonry, install a strip of steel on smaller valves, and in the twenty-first row, lay the strip on top of the luggage - the base of the chimney will be on it.
The chimney begins from the twenty-second level of the masonry - the channels need to be made narrower and gradually blocked. The luggage is led according to the scheme up to the twenty-sixth row, where a common latch is installed from the same steel corner.
Next comes the covering of the furnace - these are the next two rows, after which the chimney is laid. It is built according to a scheme with ligation and shifting of bricks halfway to a certain height.
After finishing, you need to dry the stove and gradually light the fireplace.
Classical
You can use this arrangement for a fireplace that will be located in a medium or large room. In addition, the classic arrangement is used for a simple brick hearth. The classic option for arranging a fireplace is advantageous in that you can redesign it yourself, and it won’t take you much time.
To make a classic or simple order, you must follow the instructions.
At the first stage, if you want to get an unusual and uncomplicated appearance of the fireplace, the base row must be laid out on edge. When forming this series, it is best to use a pre-prepared drawing. In addition, the diagram - drawing will greatly simplify your task and help you place all the stages one by one.
At the second and third stages, the laying is done flat, i.e. layer. The first to third rows should be filled with building materials. The fourth row is the bottom horizontal surface in the fireplace. It is folded according to your drawing.
At the fourth stage it is necessary to make a blower. A wood-burning fireplace or stove should always have a place to collect waste - combustion products. In addition, here it is necessary to make a grate; most often, metal versions are made. This lattice will be needed for the next fifth row; you will place it on the bricks. The next step is to press the metal grid with the next layer.
At the sixth and seventh stages, it is necessary to begin laying the portal. Laying should start from the bottom. The portal should be built up to the thirteenth row. It is worth noting that on the eleventh row it is necessary to make a special mirror tilt. At the eighth stage, the formation of the slope should be completed; this will be the sixteenth row. The laying must be continued until the seventeenth row and then the formation of the facade must begin.
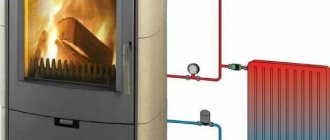
Which fireplace stove is better: choosing the material
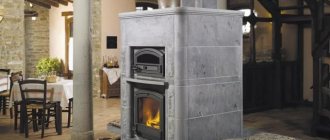
We will talk about what materials can be used to make a long-burning fireplace stove for the country house and home. In general, metal fireplaces, to protect the walls from very high temperatures, are lined (lined) with heat-resistant materials from the inside. Most often this is fireclay brick, but it can also be heat-resistant ceramics (more expensive models). This also leads to the fact that many models do not heat up much on the outside - you can easily hold your hand. The main heat is emitted through the door and this must be taken into account when choosing the location of the stove - the distance from the opposite wall should be greater, otherwise it will get very hot.
A long-burning fireplace stove for the cottage and home with ceramic cladding not only looks good, but you won’t get burned on it
To ensure that the walls of the heating device are safe, they are lined with heat-intensive materials such as natural stone, special ceramic tiles, etc. The second (cheaper) option is to install a metal casing that protects against touching the heated case.
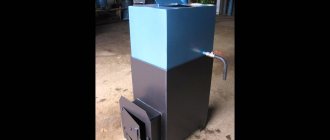
Steel: black and structural
The most inexpensive fireplace stoves are made from ordinary black steel. The most budget option, but also the fastest to burn out. To make the furnace walls last longer, they are made of considerable thickness - 5-8 mm is not the limit. To protect against corrosion, the oven is coated with special paints.
More expensive fireplace stoves are made of structural steel. This material has increased resistance to high temperatures. Due to better heat tolerance, the wall thickness is smaller, but the cost of fireplace stoves made of structural steel is higher (due to the price of the material).
Stainless steel
The stainless steel used is heat-resistant, the wall thickness rarely exceeds 3-4 mm. The surface can be matte, polished or blackened, sometimes painted with heat-resistant powder paints.
There are very few stainless steel models
Stainless steel fireplace stoves are expensive, and their durability largely depends on the quality of the seams. To prevent alloying metals (which give the metal its stainless properties) from burning out during welding, welding must be carried out in a protective environment. And this is complex, expensive equipment. And the price of such models, all other characteristics being equal, is higher. But if the seams were welded under normal conditions, the destruction of the metal begins very quickly, since due to high heat it has ceased to be “stainless” and heat-resistant.
Cast iron
This material is one of the most durable. The walls of the ovens are quite thick and massive. So a cast iron fireplace stove takes longer to warm up, but it also takes longer to cool down. And it also takes decades for normal cast iron to “burn out.” But there is another risk of destruction: if water gets on the hot surface, the cast iron may crack. So, if you are planning to buy a cast iron fireplace stove with a stove, you will need to be very careful with it. The good news is that most of the “cast iron” is assembled from fragments using bolted connections or using the tongue/groove principle. If the stove fails, you can disassemble it, order only the required part, and replace it. But this is only possible if the model is not discontinued.
Fireplace stoves of various shapes are made from cast iron.
There is one more point: cast iron is a heavy thing.
Therefore, when purchasing, pay attention to the weight. Without a separate foundation, you can install stoves weighing up to 200 kg (with fuel and chimney)
And even in this case, if the floor is wooden, additional reinforcing beams may be needed.
What you need
To arrange the fireplace yourself at home, you will only need a checkered sheet of paper, a pen and calculation data for the future plan. And, of course, a share of your attention and patience. If you choose an order from ready-made drawings, then first you should pay attention to the area of the room where you decided to build a fireplace.
Blueprints
Once the location is chosen, it is necessary to make a drawing of the shape and future design. Having understood the future appearance of the fireplace, you can proceed to the basics: calculating the heating elements and their interaction. A full-fledged drawing can only be made by craftsmen, so it is recommended to take ready-made designs of a Swedish stove as a basis and add your ideas directly there. When choosing which heating device to install, be guided by your needs.
The calculation of the fireplace part is correlated with the size of the room. To calculate the heating capacity of the stove, it is recommended to use a standard table. The best ratio of width to height is defined as 3:2, but the depth of the fuel part is usually taken in the proportion of 1:2 or 2/3 of its height.
The quality of the stove’s operation also depends on the draft, so do not forget about calculating the cross-section of the chimney. Its size should be 1:10 of the area of the firebox window. Indicators need to be rounded and solid bricks used in construction. Do not forget that the rounded chimney has a diameter of at least 150 millimeters.
These photos serve as a guide for individual adjustments. The visual content will also show the direction of gas flows and the parts with the greatest heat transfer.
Calculation of basic parameters, drawings and orders
First of all, you need to choose a location for installing the unit, and then draw up a preliminary sketch of the shape and design. Having decided on the configuration and dimensions, you can begin to calculate the main elements of the heating device. Since only experienced specialists can fully calculate the structure, we recommend taking the design and dimensions of one of the Swedish or Dutch stoves as a basis and integrating a fireplace of our own design into the finished structure. Of course, when choosing a heating device, you need to correlate its power with your own heat needs.
As for the calculation of the fireplace part, it is carried out based on the dimensions of the room. To determine the size of the firebox, you can use a ready-made table. The ideal ratio of width to height is considered to be 3:2, but the depth of the firebox is taken to be equal to 1/2 or 2/3 of its height.
Table for calculating the size of the fireplace insert
You need to understand that the performance of a heating device depends on how well the draft is organized, so calculating the cross-section of the chimney is no less important than determining the parameters of the firebox. Experienced stove makers take its size to be 1/10 of the area of the combustion window. The resulting value is rounded up so that a whole brick can be used when building a chimney. If a round chimney is installed, then its cross-section should be at least 150 mm.
The fireplace stove that we offer for production has a hob and can be used both to divide a room into two zones and to heat an adjacent room. In the latter case, the rear wall of the structure is built into the pier.
Diagrams and arrangements of the heating device are given below. With their help, you can not only repeat an existing design, but also develop your own. In addition, a visual picture of the structure of the internal chambers will make it possible to understand the direction of gas flows and determine the surfaces with the most intense heating.
Device and principle of operation
The fireplace stove is installed on a foundation slab, arranged on a drainage pad made of sand and crushed stone. The structure has two combustion chambers. The one that forms the working area of the fireplace has an increased height and can be equipped with a glass door. Often it has a curved shape - this way it is possible to increase the area of the reflective surface.
Scheme of gas movement inside a combined type heating device
The firebox is made in both rectangular and trapezoidal shapes. In the latter case, it tapers to the rear wall, which is inclined, with a small threshold - a fireplace tooth or a gas threshold. Its purpose is to hold carbon deposits that settle on the walls of the chimney. Above the firebox there is a smoke collector, which goes into a direct gas channel.
The firebox has reduced dimensions and lower air supply. Depending on the configuration of the heating device, the roof of the firebox is equipped with a hob or covered with brickwork. Combustion products from the firebox rise into vertical channels arranged in accordance with the schemes of Dutch or Swedish stoves.
Internal structure of the fireplace stove
If you plan to use the fireplace and stove at the same time, then install a common chimney with two separate chimney channels.
To prevent combustion products from entering the room, the smoke ducts of both devices are equipped with valves, which are closed as necessary. In addition, the chimney is equipped with an additional damper, which prevents heat from escaping after the fuel has completely burned out.
Option for a bath
Most modern owners of country and country houses build bathhouses on their property, which also include the installation of a stove. You should understand this issue well and not make hasty decisions. Therefore, before we choose the right stove, let's look at their main characteristics.
Many stove makers agree that a heater stove is most suitable for a bathhouse. However, such a structure can only be mounted on a previously poured foundation. This is necessary because the initial weight of the structure is about 700 kg. This is not suitable for every bath, because sometimes steam rooms are very small.
Bath stove option
Such stoves for summer cottages are capable of raising the temperature to 600°C degrees, despite the fact that it will take about four hours to heat it. The disadvantage of the structure, naturally, is its significant mass, as well as large dimensions, which eat up useful space. But at the same time, they are able to heat not only the steam room of the bathhouse, but also the adjacent room, which is very important in the cold season.
If you need to heat a building using a more modern method, then choose structures made of high-quality steel or cast iron. The cost of such products is reasonable, and the level of heat maintenance is sufficient, and if you place stones in a special tank, the heat will be released much longer and more evenly.
The choice of stove is made on the basis that 1 kW of power is required for each square of space. If you need to further increase the period of maintaining a high temperature in the steam room, then metal stoves are lined with bricks.
In addition, modern baths can be equipped with electrical products. Such models are easy to use, have a heat regulation function, an on/off timer, and do not require the construction of a chimney, while being able to maintain a comfortable level of humidity.
In conclusion, it is worth saying that everyone should choose a heating device for their home or cottage, because there is no ideal formula, and what is suitable for one may be completely unacceptable for another.
Other options
Based on the previous orders, you can easily also follow the order of the stove - Dutch or Swedish. The main thing is to make the right drawing and plan everything clearly.
In addition, a very interesting option for creating with your own hands would be to arrange a fireplace for a barbecue with a cauldron. The project for arranging such a fireplace is simple and consists of a brick cabinet with a recess for a pot. The entire structure is quite light in weight, and that is why you can do without a bulky foundation.
If you love baking homemade bread, then why not consider a bread chamber setup? A fireplace oven with a bread maker has been quite popular lately. The arrangement of a stove with a stove bench can be no less interesting; such a stove is considered unique due to the fact that it combines not only heating functions, but also the ability to cook food. Such a stove will allow you to feel and touch Russian traditions.
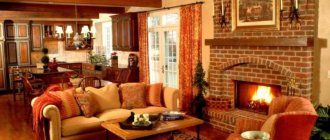
Design Features
Having heard about fireplace stoves for the first time, owners of country houses often shrug their shoulders: why waste effort on building a heating device of such a design, if you can build one of the well-proven stoves such as a Dutch oven, a Swede stove, a kolpakovka stove, etc. That’s all. the fact is that they do not know the operating features of fireplace stoves, but during their development they combined all the best from two completely different heating devices.
Combining a stove with a fireplace allows you not only to heat the room efficiently, but also to make its interior unforgettable
The main advantage can be considered that to heat the room, you can use two modes of operation of the dual heat generator.
Fireplace mode
In this case, the smoke from the fireplace will be directed through a special smoke collector into a flue located on the rear wall of the heating device and then directly into the chimney. The construction of an almost straight channel avoids a decrease in draft, so the intensity of firewood combustion will be maximum.
Using a heating unit as a fireplace is very convenient for irregular fires, for example, in a country house or in country houses, where people visit only on weekends in winter. In this case, the temperature in the room will become comfortable literally within one hour.
Advantages of the stove
Combustion products do not “fly out into the chimney,” as is the case with a fireplace, but are redirected into additional channels located on the sides of the heating device, where they transfer all the heat to the walls of the structure. The duration of combustion of the same amount of fuel during furnace combustion increases significantly, since the operation of the unit most often occurs at the border of smoldering. This is achieved by adjusting the air flow through the blower. Thanks to the expansion of the furnace array, it has improved heat-accumulating properties and allows the accumulated heat to be released for a long time even after complete combustion of the fuel.
If irregular operation is expected, then most often the heat generator is operated according to the following scheme:
- When kindling, a vertical channel is opened, which switches the unit to fireplace mode.
- After the temperature in the room rises to a comfortable level, close the valve of the vertical channel and close the ash door to maximize the combustion duration.
As you can see, the fireplace stove is a successful symbiosis of several heating devices. However, its advantages do not end there.
Using a fireplace cassette increases the hygiene of the design and facilitates the construction of the heating device
Heating devices can be made with either an open or closed fireplace insert. In the latter case, a door made of heat-resistant glass or a special cast-iron cassette (liner) is used. Limiting the amount of incoming air allows you to increase the operating time of the fireplace and increase its efficiency.
The design of a deck oven and its operating principle
To heat country houses, they increasingly began to resort to brick stoves, abandoning a variety of electrical appliances and gas.
The stove has always made it possible to quickly and for a long time warm a living space with living heat. The main thing in stove heating is the ability to initially accumulate heat and then gradually release it. The most economical option for brick fireboxes is a hearth stove. It is more common throughout the world.
A stove is called a hearth if it has a surface where fuel for kindling is placed.
The hearth oven is loved for its economical use. Top combustion in such a furnace occurs evenly and does not consume a lot of fuel. During the combustion process, the fuel is oxidized due to air masses entering through the furnace door, which releases heat.
If you look at the structure of the hearth stove itself, you will get three main parts of the firebox:
- The lowest tier is a chamber for loading heating material.
- The level above is responsible for combustion. The highest temperature is recorded in this area.
- The upper floor removes gases after burning wood and generates heat.
The main elements of a fireplace stove with increased heat capacity are in the following order:
A fireplace stove can replace any heating appliances and can become an excellent oven. You can learn how to install it at your dacha from the video. It is the winding serpentine air duct that allows the heated air in the firebox to rise, pass through the entire structure of the stove and thereby heat the stove bench. On the 9th and 8th rows, overlap is performed on the firebox and bed. Next are the rows for the hob and oven, and another row that separates the oven from the wall. After the lintel has been laid out, it is necessary to use simple or, if desired, decorative masonry above the oven chamber: with a wedge or an arch. Next, a metal corner is used above the stove for cooking, and a decorative shelf is made from it. Subsequent rows will combine all the chimneys into one and windows will be made on the walls of the stove.
Next we lay out the pipe. It has a square shape, and the optimal pipe laying will be 2 and a half bricks. The ceiling through which the pipe passes is insulated using basalt slabs in several layers.
When we build brick ovens, we need to know all the nuances and have designs; even the smallest detail can disrupt the design.
What it is
Arrangement is one of the most important stages of work when building a fireplace. It is needed in order to correctly carry out the future laying of the fireplace itself. The final result depends on the correctness of its preparation and planning. To protect yourself from unnecessary mistakes and waste, you need to draw up a fireplace laying diagram.
If you wish, you can create such a diagram with the arrangement of the fireplace yourself, or you can use ready-made samples or the services of qualified craftsmen. Thus, you will be able to independently carry out various orders, as well as, for example, ordering a stove with a heating shield.
The design documentation includes:
I. Graphic part of the project (working drawings):
- Plan for placing the furnace on the foundation with designation of dimensions and pipe riser (for large furnaces and furnaces with an offset pipe riser);
- Appearance;
- Vertical cuts;
- Consumption of materials;
- Technical data of the stove, fireplace, barbecue with their features;
- Orders of the furnace with images of each brick and furnace casting. Explanatory callouts;
- Calculations and graphic images of complex furnace elements. Projects that have vaults and arches with curved outlines are accompanied by graphic images of formwork calculations and the technology for their manufacture;
- There are two options for installing a pipe channel - brick and sandwich pipe.
Additional graphic material:
- Technology for lining the smoke teeth of fireplaces, lining fireboxes, if present in the project;
- Ceiling trim and otter projects.
II. Theoretical part of the project:
Technology of laying stoves, fireplaces, barbecues (detailed description of the entire range of stove works), including:
- Composition and preparation of solutions used for masonry and finishing of stoves;
- Finishing the surfaces of stoves and fireplaces;
- Drying and commissioning of furnaces;
- Oven operation and care;
- Tools and accessories for furnace work;
- General provisions for laying stoves;
- Fire safety requirements.
III. Video “Masonry of a heating and cooking stove-barbecue”:
At the request of the customer, a video film is attached to any of the projects, which contains the full cycle of laying the heating and cooking furnace No. 202 from the foundation to the installation of the sandwich pipe, inclusive. The duration of the video is 55 minutes. The cost of the video without taking into account the cost of the project is 400 rubles.
Notes:
- Only original designs are used to ensure the performance and durability of stoves, fireplaces, and barbecues;
- All stove designs contained in the catalog are intended for wood burning;
- The scope of projects is indicated in catalogues;
- If the description of the project in the catalog states “The project is made in 3D”, it additionally includes:
- Appearance (color):
3D-orders with images of each brick and furnace casting (colored).
An example of a project completed in 3D. The remaining projects from the catalog will be translated into 3D.
Attention! If the location of the pipe duct or the combustion door does not correspond to the location of the ceiling opening and the layout of the room, or in furnace complexes their components should be swapped, then, at the request of the customer, the graphic part of the project is sent in a mirror image. Discounts: 1
When ordering two or more projects, a permanent 15% discount is provided for subsequent orders of one or more projects. Note: if the amount of the discount when purchasing two projects exceeds the cost of one of them, then it is included free of charge. 2. When ordering a training kit for purchasing projects from the catalog, a permanent 25% discount is provided
Discounts: 1. When ordering two or more projects, a permanent 15% discount is provided for subsequent orders of one or more projects. Note: if the amount of the discount when purchasing two projects exceeds the cost of one of them, then it is included free of charge. 2. When ordering a training kit for purchasing projects from the catalog, a permanent 25% discount is provided.
At the request of the customer, a contract is concluded.
Layout of a brick stove-fireplace
In the case when a homeowner is building a heating stove with a fireplace for the first time, the order is very important. Without it, quality work is impossible. Even stove makers with extensive experience use procedures when laying fireplaces and stoves. The presence of a diagram allows you to calculate the required amount of building materials and thereby avoid unnecessary costs (about
Review of the best domestic fireplace models
Russian is very noticeable on the fireplace stove market. Consumers leave positive reviews about the company's products. The best assembly is considered to be the stoves from the Ardenfire series. The products use some elements from the best foreign manufacturers: Germany, France and Japan, and are assembled using unique technologies. Each series is characterized by being equipped with heat-resistant glass, sufficient power up to 12 kW and compactness.
Corner stove-fireplace "Amur" - wood-burning
The stove is designed to heat 90 sq. m area. The manufacturing technology is combined: the firebox is laid with fireclay bricks and lined with high-quality steel. The brick is designed for 5 years, after which it should be replaced. The firebox door has high-quality heat-resistant glass of Japanese origin. There is excellent heat flow through the door and good visibility of the fire. Glass is self-cleaning and can withstand high temperatures.
Corner stove-fireplace “Cupid”
The firebox has a volume of 73 liters and can provide power up to 10 kW. The weight of the entire structure is 157 kg, which allows you to quickly install the fireplace stove. High efficiency 3 kg of firewood allows you to keep the room warm for 8 hours.
Attention! This is a wood-burning model of a corner stove-fireplace for a summer cottage; it cannot be heated with coal. Guarantee of at least 10 years of work. Guarantee of at least 10 years of work
Guarantee of at least 10 years of work.
Corner fireplace-stove "Neva" - wood-burning
A very compact model with a height of 87 cm and a width of 64 cm. The small size of the fireplace allows it to be installed in the smallest cottage. The model has gained well-deserved popularity among domestic consumers.
Corner fireplace-stove "Neva"
The power is enough to fire 60 square meters. m. of housing. This compact model warms up the home in 3 hours; you will need to add 3 kg of firewood to keep the room warm for 8 hours.
The weight of the structure is 95 kg, allowing installation to be completed in a couple of hours by connecting the pipe to the chimney. The manufacturer provides a 1-year guarantee of flawless operation.
The group's products produce products that comply with European standards, but are designed specifically for our climatic conditions.
Corner wood stove fireplace "Bavaria"
The domestic manufacturer Ecofireplace produces long-burning stoves that are popular with private homeowners. The company supplies a wide variety of models of heating structures, including high-quality options for corner wood-burning stoves and fireplaces for country houses.
Fireplace stove "Bavaria"
A sample of European quality, with small dimensions, it is capable of heating a room of 80 square meters. m. Made of high quality steel, the grate is made of cast iron, the self-cleaning system is heat-resistant glass. It has a very stylish look: the glass is framed by black steel doors, the side panels are trimmed with ceramics.
The design is equipped with a hob, without an oven. The depth of the firebox allows you to place wood logs up to half a meter, while the height of the fireplace is 86 centimeters. As on almost all Bavaria models, the corner fireplace stove has an economical fuel consumption mode.
The service life of Bavaria stoves is at least 10 years.
A fireplace is very useful for any home, and it is unlikely to get in the way or spoil the appearance. Such heating structures have many advantages that owners of home fireplaces enjoy. External energy independence of housing; if gas or electricity is turned off, the house will remain warm due to heating by the fireplace. It has high performance and can be used as the main source of heat for a summer residence. Fuel can be purchased as needed, at any time of the year.
Options for heating stoves 3 by 3 bricks
The simplest option is a heating device with a ducted gas distribution system:
- The ashpit communicates with the room in which the structure is installed.
- Firewood is loaded into the fuel chamber, which passes into the ash pit through the grate.
- Hot gases from fuel combustion rise through a system of channels to the chimney, heating the body of the stove.
- The valves are used to regulate draft.
- Cleanout doors - to remove soot from the channels.
The appearance of the stove can be improved by installing a transparent fireplace door instead of a cast-iron firebox, or by using bricks of different colors in the masonry.
An inexpensive and easy-to-use option is a kitchen stove with a three-channel heating panel. Its operating principle is the same as that of the heating structure; the addition is a cast-iron stove installed directly above the combustion chamber. The device operates in two modes - summer and winter.
The summer one is activated when the lower damper is open - the heat goes directly into the pipe with a direct current. This mode is necessary not only in the warm season, but also during long-term cooking ( more than 2 hours ). The dimensions of the oven at the base are 3x3.5 bricks ( 760x880 mm ), height 22-32 rows ( 1550-2500 mm ).
A small heater 3x3 bricks can also be built for a bathhouse with a steam room area of no more than 15 m2. The firebox is fired from the dressing room, which saves space in the steam room. Hot air from the firebox moves along the perimeter of the metal box for stones and comes into direct contact with the stones through the slotted arch.
Features of country stoves
In order for brick stoves and fireplaces for a dacha to bring maximum benefit, it is recommended to build them taking into account the following capabilities and features:
- The presence of a hob and oven. This will allow you to use the unit not only to heat your home, but also to replace a standard stove. On such a stove you can cook food, bake and boil water;
- Dryer. This structural element, as a rule, is represented by one or more comfortable and spacious shelves, on which, if necessary, you can place wet or washed clothes and shoes. Also, if necessary, you can safely dry various berries and mushrooms on such shelves.
At the bottom of the unit is complemented by a firewood
At the bottom of the unit is complemented by a firewood rack, in which a small supply of dried and ready-to-use firewood can be stored
Small shelves are suitable for drying berries
Small shelves are suitable for drying berries, fruits, plants, and also have a decorative function
The design is equipped with a convenient hob
The design is equipped with a convenient hob
Additional tips from experts:
- In order to heat an area of about 40-60 square meters, the installation must have large overall dimensions and double walls lined with high-quality ceramic stove bricks. In order for such a structure to warm up, on average it will take from 60 to 120 minutes;
- For a small country house of about 10-20 square meters, a more miniature model is suitable. This option is highly economical and warms up quickly (within 30-50 minutes).
Main types of heating units
When choosing a fireplace stove for a brick dacha, we recommend that you first choose for yourself one of the most suitable varieties, having previously familiarized yourself with the features, advantages and disadvantages of each:
| Type of design | Description |
| With hob | Brick fireplace stoves for a summer residence with a hob are intended exclusively for cooking. This option is well suited for installation in small one-story country houses that are not inhabited during the cold season. In houses with installed stoves of this type, as a rule, there is electricity or gas, through which, if necessary, heating is carried out. In most cases, the models are supplemented with a special boiler tank intended for heating water. |
| With heating and cooking functionality | For a summer residence, a brick stove fireplace with heating and cooking functionality simultaneously combines several functions and allows you to cook food, heat water and simultaneously heat the house. This design is often used as the main source of heating. The fireplace can have any dimensions, depending on which it is complemented with useful shelves, countertops, devices for drying clothes, an oven and other elements. |
| With standard functionality | A brick fireplace stove for a summer residence, which has simplified functionality, is usually used exclusively as a heating device and does not have additional capabilities. Such furnaces are characterized by simple installation and small dimensions, weight, high power and good performance. |
Separation according to design features
A brick fireplace stove for a summer cottage may differ not only in its functionality and the presence of certain auxiliary elements, but also in other external details, depending on which we can distinguish three additional categories:
Russian stoves. They began to be built and used by our ancestors. The features of this design include the presence of such structural elements as: a bed and a shelf on which it is convenient to dry clothes. This variation is primarily suitable for placement in a house that needs a firebox all year round. It is not suitable for a simple dacha, since with periodic use and rare use the structure loses its strength and tightness, and cracks and other defects begin to appear on the surface. Also, with prolonged downtime, the brick begins to quickly accumulate moisture and in order to completely heat and warm up all the rooms in the house, the fireplace will need to be lit for about 2-3 days. The Russian stove has large dimensions and is not suitable for installation in small spaces;
Russian fireplaces are large
Russian stoves are characterized by the presence of a large and comfortable bench
The Dutch oven is installed in houses that require regular and constant heating
An example of a ready-made order for a Dutch woman
The Swedish stove is equipped with a hob and is suitable for the cold climate of Russia
Efficient and miniature Swede: an excellent solution for a summer house
Layout of a simple fireplace
As an example, the article will consider the arrangement of a brick fireplace, which is planned to be placed in a wall opening in a room with an area of 20 “squares”. Its external and cross-sectional appearance is shown in the photo.
- the rear wall of the structure will open into the adjacent room;
- the opening will be blocked by a wedge lintel;
- the volume of the combustion chamber will be 0.3 “square”, and the dimensions will be 62x49 centimeters;
- the depth of the firebox will be 32 centimeters;
- the side walls of the firebox need to be rotated 30 degrees, and the back wall, starting from the fourth row, tilted forward by 23 degrees and thus obtain a pass;
- the fireplace will be equipped with a solid fireplace with an ash pit measuring 26 × 26 × 13 centimeters;
- vertical wells are provided in the side walls to ensure circulation of air masses;
- in the fifth row it is necessary to make holes for air intake;
- heat will enter the room through air vents provided in the side walls in rows 16-17;
- under will be raised above the floor level by 40.5 centimeters;
- a steel grate will be installed above the fuel pit;
- a cleaning door is provided in the rear wall at the level of the pass;
- the smoke collector chamber will be laid out in six rows of masonry, it will gradually narrow and exit into a chimney with a cross-section of 26 × 13 centimeters;
- Clay-sand mortar is used for masonry;
- the fireplace arrangement includes the installation of a valve on the 28th row with a hole, the dimensions of which must coincide with the cross-section of the smoke exhaust channel;
- at the point where the chimney exits into the attic or to another floor, a fireproof cut will be installed;
- The back wall of the firebox will be laid out in horizontal rows and covered with a metal screen. Special pins are required for fastening; they are walled into the masonry;
- for the installation of a pass, when making a fireplace with your own hands - the ordering is to overlap the bricks by ¼ in 13-14 rows. Read also: “Installing a fireplace with your own hands in the house.”
To lay a fireplace from rows 1 to 21, the following building materials and products will be required:
- bricks - 396 pieces;
- clay – 0.2 m³;
- sand – 0.2 m³;
- furnace valve;
- cleaning door;
- roofing felt – 2 m²;
- stainless steel - sheet with an area of 0.3 m².
To lay a chimney, you need to purchase bricks at the rate of 70 bricks per meter of height.
Brick stove: laying in rows
Before you start laying, you need to draw up a correct work plan and if you stick to it, you will get the desired result.
The rows of masonry are as follows:
- We lay out the first row without mortar, leaving 5 mm gaps between the bricks. After laying out the first row, you need to check the evenness of the walls with a level or rule and measure the diagonal of the laid out rectangle. If the diagonal is the same, then the angles are right angles.
- Next, we place the 2nd row on a solution of clay and sand with bandaging of the seams. Laying the firebox of the fireplace stove begins from the 3rd row. Starting from the 9th row, the firebox window is covered with an overlap of bricks. The ceiling can be made in the shape of an arch, that is, the bricks can be laid out in a semicircle.
- We cover the 13th row with a wedge overlap. But until the 14th row is laid out, which will press the overlap, it will not hold. And it is for this reason that before laying the 13th row, it is necessary to make a wooden shield and secure it in the firebox using wooden supports at the level of the upper edge of the 12th row, and only then do the laying of the floor, that is, the 13th row.
- At the end of the ordering, you don’t have to take out the shield, as it will burn out after the first fire of the fireplace stove, but the ceiling will be held in place due to the pressure of the upper rows of masonry. And together with the overlap on the 13th row, they also begin to push the fireplace shelf forward. This shelf is pulled out by 5 cm, and on the next tier it is pulled out by 7 cm. bricks placed on the ceiling significantly increase its strength due to the bandaging of the seams.
If the description seems difficult to you, the diagram in the photo can always come to the rescue, where all the rows of masonry are indicated in detail.
Heating stove with bread chamber
The work on laying the fireplace stove has been completed. Below is a photo.
Heating stove
A wooden shelf will be installed on the bottom brick shelf. For an aesthetic connection to the brickwork, a 5 cm wide groove is left.
Shelf space
Foundation installation
The pouring rules are the same as those used when assembling a stationary heater. To begin with, you need to highlight the outline of the base and make a 100 millimeter indent from the fireplace itself. If the installation takes place in a room with parquet, the base for the stove is cut out.
Work algorithm:
- make a recess from 0.5 m to 0.7 meters;
- fill the bottom of the boiler 10 cm with sand, compacting it and spilling it with water;
- cover the sand with crushed stone and compact it thoroughly;
- from crushed stone, at a height of 5-7 cm, install a mesh of reinforcement;
- install formwork along the base (align the upper cut of the boards at the same level, which will ensure leveling of the foundation);
- mix sand, crushed stone and cement mortar (3:1:4), then pour a homogeneous mass into the base;
- compact the concrete, then level it using a rule, passing through parts of the formwork.
After pouring the foundation, you should wait a week for complete setting. Do not forget to separate the concrete from the installation with waterproofing, such as roofing felt.
Preparatory work
Before starting construction, it is recommended to purchase the necessary materials and prepare the tools. After this, you can proceed to the preliminary stage - choosing a location and arranging the foundation. The furnace itself is erected only after the base has completely dried.
Tools and materials
In order to build a stove combined with a fireplace with your own hands, you will need a minimal set of tools. Most likely, you already have all of the following.
- Building level.
- Roulette and metal ruler.
- Trowel (trowel).
- Hammer-pick.
- Grinder with cutting wheels for stone and metal.
- Rubber mallet.
- Containers for water and solution.
- Plumb.
- Joining.
- Rule.
- Construction corner.
- Bayonet shovel.
- Hammer.
- Mooring cord.
- Tamping.
To build the foundation you will need:
- Waterproofing (you can use roofing felt or plastic film).
- Sand (it is better to use coarse river sand).
- Crushed stone of medium fraction.
- Mesh for reinforcement (can be replaced with pieces of reinforcement, metal rods or pieces of corners, pipes, etc.).
- Edged boards for formwork construction.
- Nails and steel wire.
- Cement.
Quality cast iron will set the tone for the design of the entire structure, so why not choose the best that is on the market?
You will also need other materials necessary for the construction of walls and arrangement of various areas of the fireplace stove:
- red solid brick brand M-150;
- fireclay refractory brick, grade ША-8;
- clay and sand or a special composition for laying stoves;
- metal corners with a shelf size of at least 5 cm;
- plywood and boards for making a template (if the ceiling of the fireplace insert is made in the form of an arch);
- metal valves;
- blower door;
- sheet asbestos or basalt cardboard;
- combustion door;
- doors for cleaning channels;
- grate;
- cast iron stove with burners;
- steel wire for installation of stove cast iron;
- finishing materials (if you plan not to join, but to use another type of decoration of external surfaces).
In addition, if the design of the heating device provides for the installation of a fireplace cassette, then it is necessary to purchase it at the design stage. This will allow you to accurately determine the amount of brick and know whether there is a need for fireproof materials.
How to choose a construction site
When determining the installation location of the fireplace stove, you should follow the same rules as for installing conventional heating appliances. When constructing a structure near wooden walls, a gap of at least 40 cm must be maintained between them and the stove. In addition, installation of a heat-resistant screen made of metal sheet, asbestos board, plasterboard and other non-combustible materials is required.
When choosing a place to install a fireplace stove, you need to consider all options
The gap between the walls of the room and the stove is needed not only to ensure the safety of the structure, but also to carry out periodic inspection and repair of the side surfaces of the heating device.
If the installation of the heating unit is planned on the periphery of the room, then choose one of the internal walls, since proximity to the outer perimeter will contribute to the rapid cooling of the stove and a decrease in its thermal efficiency.
Preparing the base
To lay any stationary heating device, a solid foundation is required. Since we are dealing with a structure that essentially consists of two separate units, the foundation must ensure the stability and reliability of a wood-burning heat generator with increased mass.
Increased demands are placed on the foundation of the fireplace stove, because it ensures the reliability of the entire structure
The scheme of work for the construction of a concrete slab, which is used as a support for a fireplace stove, is no different from the algorithm for pouring the foundation of other stationary heaters. First, mark the contour of the base - it should protrude beyond the perimeter of the heating device by at least 100 mm. If the building is installed in a room with a wooden floor, then the part that falls under the stove is cut out. Further work is carried out in the following order:
- Depending on the characteristics of the soil, they dig a pit with a depth of 0.5 to 0.7 m.
- The bottom of the pit is filled with a 10-centimeter layer of sand, which is well compacted and spilled with water.
- The sand is covered with the same layer of crushed stone, which also must be thoroughly compacted.
- A reinforcing mesh is installed at a height of 5–7 cm from the crushed stone. To do this, you can use metal pins driven into the ground or lay the armored belt on wooden blocks.
- Formwork is installed along the contour of the foundation.
When installing formwork, it is important to set the top cut of all boards exactly level. In the future, this will make it easier to level the plane of the foundation slab and create a good foundation for ensuring the geometric accuracy of the structure.
- A solution is made from sand, crushed stone and cement (ratio 3:1:4), which is poured into the prepared mold.
- The concrete is compacted by bayoneting and tamping, and then leveled by running a rule along the parallel elements of the formwork.
After the initial hardening of the solution, the structure is covered with plastic film and left until completely set. Cement manufacturers recommend curing concrete for 28 days, but in fact, you can start building a heating device within a week. The main thing is not to forget to separate the foundation from the masonry with a layer of waterproofing. There is no more suitable material for this than roofing felt, which is used to cover the concrete in two layers.
Preparation of the solution
If factory-made building mixtures are used for laying bricks, they are prepared according to the recommendations indicated on the packaging. We suggest using the experience of experienced stove makers, who say that there is no better material for laying stoves than clay.
The consistency of the clay solution should resemble thick sour cream
Masonry mortar is made from clay and sand, adding water in the amount necessary to obtain the consistency of thick sour cream. In this case, the amount of sand is determined based on the fat content of the clay. As a percentage, it can reach 30–35%. It is best to mix solutions with different compositions in several containers, make small cakes from them and let them dry completely. The composition whose sample is least likely to crack is considered suitable for work.
Before preparing the solution, the clay must be kneaded and plant residues and other impurities removed from it. After this, the material is soaked in water for a day. You should not mix a large amount of working solution at once - it is prepared as needed. The fact is that when settling, the sand will still settle to the bottom, so additional mixing will be required. And this is a waste of time and energy that no one needs.