Gas boilers are produced by different companies, which is accompanied by the supply to the market of equipment that requires an individual approach to installation and operation. But you don’t really want to overpay for calling a specialist for installation work, do you? But how to connect an Ariston gas boiler yourself, taking into account the individual characteristics of the purchased equipment?
We will try to help you deal with this problem - our publication will discuss the procedure for installing, connecting and configuring a gas boiler. The order of work when performing the first startup of the equipment is also given. The presented material is supplemented with visual photos and a video.
Wall mount
Initially, I installed a coaxial angle on the boiler and measured the distance from the edge of the boiler to the center of the corner - it, as indicated in the instructions, was 105 mm.
The distance from the center of the corner to the top of the boiler is 105 mm
You can immediately fasten the narrow clamp, not forgetting to put the sealing gasket.
Before tightening the clamp, it is necessary to insert a sealing gasket
My house is sheathed on the outside with vinyl siding, so I immediately decided to mark it so that the hole for the pipe would fit entirely on one strip of siding.
Some sites suggest first making a hole for the chimney, and then screwing in the mounting strip. I decided to screw the bar first. As mentioned above, the kit includes two dowel nails. They are designed for mounting the boiler to a brick or concrete wall. Since the house was built from sandwich panels, I fastened the plank with roofing wood screws.
The bar is set horizontally and secured with five galvanized screws
Further in the wall, a through hole with a diameter of 10 mm was drilled. The center of the hole corresponded to the center of the coaxial pipe. I cut out the hole for the pipes on both sides using an electric jigsaw.
After cutting the hole and hanging the boiler, you can install a coaxial chimney
It is better to install the chimney together - one pushes the pipe from the outside, the other puts on the internal insulating gasket (made of hard plastic) and the clamp (it is more convenient to immediately screw the screws into the clamp).
The pipe is installed, the clamps are tightened
Due to the fact that the outer insulating gasket is quite elastic, it fits quite tightly to the siding.
Coaxial pipe after installation
I'll end this for now. Next comes the soldering of polypropylene pipes, the connection of polypropylene pipes with metal-plastic ones and the installation of additional taps on the heating system. Only after this can Ariston be launched.
To be continued…
- https://sovet-ingenera.com/gaz/equip/kak-podklyuchit-gazovyy-kotel-ariston.html
- https://starsb.ru/shop/folder/skhemi-podklyucheniya-kotlov-ariston
- https://xn--80ayehece2h.xn--p1ai/installation-of-boiler-ariston/
Correct maintenance of the device
The fact that problems have arisen in the operation of the device may be indicated by some changes in its operating mode. For example:
- increasing the time for heating water to a given temperature;
- the appearance of unusual sounds accompanying the operation of the device;
- the appearance of foreign impurities in tap water, changes in its color, smell or taste.
If at least one of these signs is observed, you should immediately clean the water heater. To do this you will have to perform the following operations:
- Disconnect the device from the power supply.
- Remove the protective cover.
- Disconnect the contacts of the electrical wires.
- Shut off the cold water supply.
- Use a hose to remove any remaining water from the tank.
- Unscrew the bolts that hold the heating element.
- Remove the heating element and descale it.
- Clean the inside of the drive from dirt and scale particles.
- Rinse the device thoroughly.
- Check the serviceability of the magnesium anode.
- If necessary, replace this element immediately.
- Wait for the cleaned tank to dry completely.
- Reinstall the heating element.
- Reassemble the device.
- Check the reliability of all fastenings.
- Connect the water heater to the power supply.
- Check for grounding.
The heating element should be removed from the tank carefully; the bolts may be too stubborn; sometimes the heating element is difficult to remove due to too much scale. The heating element is cleaned by mechanical or chemical means, as is the removal of contaminants from the tank. If a large amount of scale is found inside the device, you should consider reviewing the operating mode of the water heater.
This phenomenon is often observed when the device operates at maximum power for a long time. It is recommended to set the maximum heating temperature no higher than 60 degrees to increase the life of the device and reduce the number of breakdowns. If the body of the heating device receives an electric current, the heating element may be deformed and ruptured, or there may be a breakdown in the control system.
Operating instructions for Ariston gas boilers
Before purchasing an Ariston gas boiler, you need to understand that if the buyer does not understand its installation, it is better to contact experienced specialists and entrust all the work to them. After all, even with the most detailed instructions, it is not a fact that the matter will end successfully. In this case, there is every chance of damaging the equipment, after which you will have to call repairmen, and this will result in additional costs.
It is very important to keep children away from the equipment. To do this, after, you need to have a conversation with them and explain in accessible language that you cannot twist or place anything on the unit, this should only be done by an adult
If the family leaves, for example, on vacation, after the boiler is turned off, it is also necessary to shut off all gas and water supply pipes. Only after this is the equipment disconnected from the network.
If any model has a display, all indicators that it displays must be strictly monitored. It may display any problems or deviations from normal operation that occurred during the heating process.
One of the most important points in the instructions for gas equipment is safety precautions. Before connecting the boiler, you need to familiarize yourself with it first.
Features of replacing a faulty heating element
If the boiler stops heating the water to the required temperatures, then the heating element should be replaced. To do this, you need to perform the following procedure:
- Disconnect the device from the electrical network.
- Stop supplying water to the container.
- Connect a hose to the drain valve and drain all the water into the sewer.
- Remove the protective box by removing 2 screws.
- Remove the return valve from the pipe.
- Drain the remaining water from the tank.
- Using a wrench, unscrew the nut that secures the flange.
- Carefully remove the old heating element without damaging the flange.
- Clean the walls of the container from accumulated dirt. If the inside walls have a special protective enamel, then there is no need to remove scale. You may simply damage the protective film. This layer of scale will protect the walls of the vessel from rust formation.
- The magnesium anode is removed and repaired if required.
- A new heating element is being installed. You need to do exactly the opposite of all the work.
- Checking operation after final assembly of all parts. The tank should not leak. Otherwise, you need to put in new gaskets.
Ariston water heater repair
How to properly install a wall-mounted boiler
Before installation, unpack the heat generator and check the completeness of the device. Make sure the stock fasteners will fit your walls. For example, special fastenings are required for aerated concrete; ordinary dowels are not suitable.
We follow the following order of work:
- Mark the outline of the heating unit on the wall. Make sure that the technological distances from building structures or other surfaces are observed: 0.5 m from the ceiling, below - 0.3 m, on the sides - 0.2 m. Usually the manufacturer provides a diagram with dimensions in the operating instructions.
- For a turbo boiler with a closed chamber, we prepare a hole for a coaxial chimney. We drill it at a slope of 2-3° towards the street so that the resulting condensate flows out. The process of installing such a pipe is described in detail separately.
- The heat generator comes with a paper installation template with marked holes. Attach the sketch to the wall, level it using a building level, and secure the diagram with tape.
- It is better to mark the drilling points immediately. Remove the template and make holes 50–80 mm deep. Make sure that the drill does not go to the side, this happens on brick partitions.
- Install plastic plugs into the holes, screw in the hanging hooks to the maximum depth using pliers. Together with an assistant, carefully hang the device.
When marking holes in a wooden log wall, make sure that the fastening is on the crest of the log. Screw the hooks directly into the wood, without plastic plugs.
Turning on the gas boiler
A prerequisite for warranty service of a gas boiler is that the first switch-on must be carried out exclusively by a specialist from the gas service. If the user follows all instructions and safety precautions when starting up independently, then you can also count on the reliability and durability of the heating system.
The initial start-up of a wall-mounted boiler is carried out strictly after checking the following points.
The first thing you need to do is make sure that the gas pipes are tight when the gas valve is closed and open. If gas flow is not recorded within 10 minutes after connecting all pipes, then it can be stated that the system is sealed.
The gas supplied from the main pipeline must meet the requirements specified in the instructions for the boiler. When transferring the unit to process a liquefied mixture, you need to change the nozzles in advance.
You also need to check the pressure level in the system. It should be as recommended. The air intake and carbon dioxide exhaust pipes should be checked for blockages.
Sometimes users encounter the problem of poor circulation of the pump. Often the cause is low mains voltage. This problem is solved by installing a stabilizer
It is necessary to make sure that the room with the boiler has a working ventilation system. Additionally, the smoke pressure safety switch is checked.
After carrying out the preliminary work, the procedure for starting the boiler follows:
- The gas boiler is connected to the network, the gas supply to the device is opened;
- Check that all valves at the inlet and outlet of the coolant into the unit are open;
- Press the button or turn the switch on the boiler dashboard depending on the switching method specified in the instructions.
You can adjust the temperature using the corresponding buttons. Working in automatic mode, the boiler independently turns on the burner if it is necessary to heat the water in the system. If the boiler is double-circuit, then when hot water is turned on, the burner automatically turns on for heating.
On the boiler display, after the initial start-up, it is recommended to configure all boiler parameters. The instructions usually indicate the sequence of necessary actions.
The interlock system cuts off the gas supply if the burner does not ignite within approximately ten seconds. When starting for the first time, it may be necessary to remove the ignition lock due to the presence of air in the gas line. You need to wait until the air is replaced by gas. The lock is removed when the device is restarted.
To start a floor-standing gas boiler, you need to carry out the same preparatory procedures as for a wall-mounted one. Before starting up, you need to ventilate the boiler room, make sure that all heating pipe taps are open and that there is draft in the chimney. You can check the traction using a piece of paper.
There are two options for turning off a floor-standing gas boiler. You can turn off only the main burner or the main burner together with the pilot
Switching on the floor-standing boiler:
- The door of the device is opened, the position of the boiler control knob is checked in the off position.
- The gas supply valve opens.
- The control knob is set to the piezo ignition position.
- Next, press the handle for 5 - 10 seconds so that the gas passes through the pipes and displaces the air. The piezo ignition button is pressed.
- Then the presence of a flame in the burner is checked. If the burner does not light, the procedure is repeated.
After igniting the main burner, you can use the control knob to adjust the heating temperature.
Installation of solid fuel units
These units are installed in a private house in dry rooms, the dimensions of which are directly proportional to the dimensions and power of the unit. The walls of the boiler room must be plastered or covered with sheet iron. Their connection diagram implies the presence of supply and exhaust ventilation, which will provide good draft.
The boiler is installed level on a horizontal foundation covered with a layer of sheet iron. The foundation should be 10 cm larger than the base of the unit along its entire perimeter. The safety zone on the firebox side is at least 40 cm.
There are installation standards for operational safety, which are specified in the installation requirements or are freely available in open sources of information. They must be followed!
Tools and materials
To connect to the heating system you need to purchase:
- two ball valves with a coupling-fitting connection with a diameter of 50 mm;
- two bends of the same diameter;
- pressure gauge;
- safety valve;
- automatic air vent;
- two ball valves with a diameter of 15 mm;
- three steel couplings with a diameter of 50 mm;
- transitions 57 x 32 mm with a wall of 3 mm;
- bends 57 x 3.5 mm;
- chimney with gate valve;
- pipes 57 x 3.5 mm;
- heat-resistant sealant;
- plumbing winding;
- circulation pump.
Harness
The unit's piping is equipped with a safety system, which consists of a heat accumulator, a three-way valve for mixing cold water, and a thermostat. What need to do:
- place the boiler on the foundation;
- connect the heating pipes with the obligatory use of ball valves, sealing the joints with plumbing tape;
- make grounding and connect the power cable;
- install a safety system (pressure gauge, safety valve, automatic air vent);
- assemble the chimney, sealing the joints of the elbows with heat-resistant sealant;
- fill the heat exchanger with water;
- check the location of the grate, ignition valve, cleaning plug, etc.;
- Reduce the pressure in the heat exchanger to operating level;
- install the dampers in the chimney and firebox to the required position;
- carry out laying firewood.
In general, any heating equipment can be connected to a heating system with your own hands if you use the right approach and have basic knowledge and skills.
The desire to live in comfort, to enjoy the convenience of constant availability of hot water is quite understandable. The current level of technological progress can easily satisfy such a desire. There are quite a lot of convenient engineering solutions that are applicable even for a small house or one-room apartment.
The connection diagram for a double-circuit gas boiler takes into account all possibilities. You can act according to general principles or reduce fuel consumption and use a boiler for a hot water supply system or heating circuit, where it will serve as a heat accumulator.
First start-up and setup of the boiler
When the installation work and connections are completed, you can proceed to setting up and testing the equipment.
Performing the first run
The initial action that accompanies the first start-up of an Ariston brand gas boiler is to fill the heating circuit with water. In this case, it is necessary to set the radiator air valves to working (open) condition.
The same actions aimed at bleeding air from the system apply to the boiler circulation pump. As the circuit fills with water, air is removed from the system, and the water pressure on the pressure gauge reaches 1 - 1.5 atmospheres, the tap on the make-up line is closed.
The first start-up of a gas boiler is usually accompanied by preparatory operations related to filling the system with water, bleeding air, and checking the tightness of gas lines
At the next stage of commissioning of a gas boiler, actions related to the gas supply are performed.
The procedure is approximately as follows:
- open the doors and windows of the workroom;
- exclude the presence of sources of open fire;
- check the burner circuit and control system for leaks.
Testing the control unit and burner for leaks is performed by briefly opening (no more than 10 minutes) the main shut-off valve of the gas line. In this case, the solenoid valve and manual boiler damper are set to the closed position. With this position of the system, the gas flow meter should show a zero result (no leakage).
Setting manipulations with the control panel
Modern gas heating equipment is equipped with a control panel where the user can set the desired operating parameters of the unit. Next, we’ll take a closer look at how to set up an Ariston brand household gas boiler.
Control during operation of the boiler, as well as control in the first start-up mode with the necessary settings, is carried out through the Ariston user control panel
Actually, the user’s actions on the control panel are obvious here:
- Turn on the device by activating the ON/OFF button.
- Mark the operating mode parameters on the display.
- Mark the service mode functions on the display.
Next, the gas parameters are checked, for which the front panel of the boiler is dismantled, the control panel plate is lowered and test manipulations are performed by connecting the measuring pressure gauge to the pressure tap pipes.
These operations are the prerogative of gas service specialists. Doing it yourself is not recommended, as you need to clearly know the functionality of the equipment.
Ariston remote control keyboard layout: 1 – information screen; 2 – DHW temperature regulation; 3 – mode selection key (Mode); 4 – “Comfort” function; 5 – ON/OFF key; 6 – “Auto” mode; 7 – reset key “Reset”; 8 – heating circuit temperature regulation
Then the boiler is started in test mode through the “Chimney Sweep” system function. To enter test mode, activate the Reset button and hold it pressed for at least 5 seconds. The test mode is exited by re-activating the reset key.
Maximum/Minimum Power Testing
This type of test also involves control sampling of pressure at specialized points of the equipment, followed by measurement of parameters on a pressure gauge. It is necessary to disconnect the combustion chamber compensation tube. Again, the “Chimney Sweep” mode is used, activated through the control panel.
The boiler is tested for the minimum power level in the same way. True, the modulator adjusting screw is additionally used if it is necessary to adjust the minimum operating pressure of the boiler. In this regard, there is a video below, where for some reason the modulator is called a motor.
Putting equipment into operation
The process of starting the device involves the following user actions:
- Activate the ON/OFF button.
- Select standby mode.
- Hold down the Mode button for 3-10 seconds.
- Wait for the air removal cycle to complete (about 7 minutes).
- Open the linear gas valve.
- Switch on the DHW operating mode using the “Mode” button.
If all the actions were performed by a specialist from a specialized company, then he checks the compliance of the gas pressure during operation of the unit and draws up an appropriate report.
He also provides instructions on the safe operation of gas equipment and puts the boiler under warranty.
How to work with the menu
By pressing the “OK” button once, the number 2 will blink on the digital indicator - this will be the first digit of the future three-digit code (Menu Group Number)
Using the plus and minus buttons you can change this value from group number 2 to any other group. To fix the selected group for further entering the code number, you need to press “OK” again - after this the second digit of the future three-digit code begins to blink (Submenu)
Having selected a submenu, fix it by pressing the “OK” button again and similarly select and fix the third digit (Parameter)
All! Now the screen will no longer display the three-digit code itself, but the set value of this parameter, which can be changed by pressing “plus” or “minus”. Having made the necessary changes, do not forget to commit them by clicking “Ok”.
Please note that after selecting the desired menu, after a few seconds of inactivity, a three-digit code will begin to be alternately displayed (to remind you where you are) and the parameter corresponding to this menu.
The ESC button is used to exit the settings menu and return to the previous step. The exit is carried out step by step, one press is equal to one step back.
Let's practice
Now, if you want, practice to better understand the switching order. For example, enter menu code 701; this will turn on the forced air removal mode, essentially turning on the pump in the boiler for 6 minutes.
When this mode is turned on, the “P I -” symbol will light up on the display. You can exit the “Anti-Air” mode without waiting 6 minutes by pressing ESC.
Then, using ESC, try to go back and switch to mode 300, which means (Set water temperature in the boiler) in the values you can see the temperature that is currently set by your DHW regulator.
Specifications
Almost all gas boilers from the Ariston brand have a power of 15 to 30 kW. Thus, each client will be able to select the necessary indicators for the size of their apartment or house. It is also worth noting other distinctive characteristics of such gas equipment:
at maximum efficiency, boilers have a high level of efficiency; all wall-mounted boilers have Russian instructions and symbols on the equipment itself, so citizens do not have problems with operating the unit; most models from this manufacturer are able to cope perfectly with water in the system and low pressure; Particular attention to this equipment should be given to those people in whose homes voltage surges often occur. Ariston boilers cope with such network surges without any problems; all models are very easy to operate
To start using the boiler, you don’t need to study the instructions for a long time; all operating features are intuitive and accessible even to those who are installing such a unit for the first time.
In some cases, the boiler cannot simultaneously heat water and provide sufficient heating of the room; this applies to budget models. In this case, a person needs to think about installing an additional boiler.
Removing air pockets in the system
It's better to start with batteries. To remove air pockets, a Mayevsky tap is usually installed on them. We open it and wait for the water to run. Did you run? Let's close. Such manipulations must be done with each heating device separately.
How to start a boiler with your own hands photo
After the air is removed from the batteries, the pressure in the system will decrease and the pressure gauge needle will drop. At this stage of work, the solution to the question of how to start the boiler involves re-filling the system with liquid.
Now, the most difficult thing is that starting gas boilers requires bleeding air from the circulation pump. To do this, the boiler needs to be disassembled a little. We remove the front cover and look for a cylindrical object with a shiny lid in the middle, which has a slot for a screwdriver. After we have found it, we put the boiler into operation - we supply it with electrical power and set the water heating controls to the operating position.
Relieving air from the circulation pump when starting the boiler photo
The circulation pump will immediately turn on - you will hear a faint hum and loud gurgling and many incomprehensible sounds. This is fine. As long as the pump is aired, it will be so. Take a screwdriver and slowly unscrew the cap in the middle of the pump - as soon as water starts seeping out from under it, screw it back. After two or three such manipulations, the air will come out completely, the strange sounds will subside, the electric ignition will work and start working. Check the pressure again and add water to the system if necessary.
Basically, that's it. While the system is warming up, you can begin to study the instructions in detail (if, of course, you have not already done so) and start debugging the system that involves starting the boiler. Everything is simple here - the batteries closest to the boiler need to be screwed on, and the ones farther away need to be turned on to their full potential. This debugging is carried out using control valves installed on the supply connection pipe to the heating radiator.
Heat exchanger clogged, reduced throughput
Often the fouling of the internal walls of the heat exchanger with scale or mud deposits is the cause of problems with hot water. If tap water does not undergo pre-filtration (rough cleaning) and the temperature of the hot water is too high, the walls of the heat exchanger become overgrown with scale and dirt over time, reducing their thermal conductivity and flow area. Each time the user increases the DHW temperature on the boiler more and more in order to obtain the desired result on the mixer. As the temperature rises, scale forms even faster and, as a result, the temperature of the boiler's hot water supply is at its maximum, and the water does not heat up enough. This process has a particularly negative effect on a boiler with a bithermic heat exchanger. Plate heat exchangers are easy to clean.
How it works
To minimize problems with the device, you should study its structure and operating principles. Typically, private households use storage models rather than flow-through ones, which allow them to use electricity more efficiently. Such a device consists of a heat exchanger tank, inside of which a heating element is installed - a heating element, connected to the power supply.
An important part of the device is the thermostat. This element allows you to maintain a constant temperature of the water inside the storage tank. Water flows through pipes into the heat exchanger. If its temperature is too low (and this is usually the case), then the thermostat sends a signal and turns on the heating element.
The water is heated until it reaches the required temperature. After this, the thermostat operates again and turns off the heating element. Hot water is taken from the tank and replaced with cold water, the heating process is repeated again and again. This is a general diagram of the design and operation of a conventional storage water heater.
Flow models are designed somewhat differently. They heat not a static volume of water, but a flow. They use more powerful heating elements that start when the water is turned on and stop when it is turned off. To study the operation and design of a particular model in more detail, you need to carefully read the technical documentation accompanying it.
The heater tank is a durable stainless steel container, one or two millimeters thick. No matter how resistant this material is to corrosion, these processes still periodically arise and develop, which leads to water leaking from the device. One of the common causes of such breakdowns is electrocorrosion.
To prevent it, you need to regularly, i.e. annually replace the magnesium anode installed inside. This element is designed specifically to prevent electrocorrosion
Over time, it wears out, and storage tank owners overlook replacing this important part.
As a result, the tank, which has been serving well for some time, suddenly begins to leak. The incorrect condition of the magnesium anode can also affect the condition of the heating element. On the outside, the storage tank is usually enclosed in a metal or plastic housing, and it also has an insulating shell that prevents heat loss.
Damage to the outer shell and insulation occurs rarely, usually due to careless handling of the device. Cracks and chips on the body of the water heater may not disrupt its operation, but this will lead to a deterioration in the properties of the heat insulator and will negatively affect the functioning of the device as a whole.
Inlet and outlet pipes for cold water and outlet pipes for hot water usually do not cause any problems if the heater is installed correctly. Typically, a water heater is equipped with two thermostats, one of which is designed to control the water temperature, and the second monitors the condition of the first device.
Sometimes a third thermostat is used, which determines the working condition of the heating element. In any case, a broken thermostat will have to be completely replaced. There are capillary, rod and electronic types of thermostats. Their design is different, but the principle of their operation is similar.
The insulating gasket not only serves to seal the connection between the elements of the water heater, it is also necessary as an electrical insulator. It is recommended to replace this element regularly during each maintenance of the water heater.
The thermostat shows to what temperature the water inside the device is heated. If this element breaks, the water heater will still perform its functions, although data on the degree of heating will not be received.
Recommendations for turning on a Baxi gas boiler
If you are wondering how to turn on a Baxi brand floor-standing gas boiler, you need to follow a certain technology. At the first stage you must open the gas valve, usually it is located under the equipment itself
It is important to make sure that the system has the required pressure, only then can power be supplied to the device. Then press the “Start” button and set the device to “Winter” or “Summer” mode
The panel has special buttons with which you can set the desired temperature values in the boiler and hot water supply circuits. This will allow the main burner to turn on. If you purchased a gas boiler, you need to ask how to turn it on before unpacking the product. After you have completed all the above steps, you need to make sure that the boiler is working, this will be indicated by a special burning flame symbol on the display.
General information and connection
A double-circuit gas boiler is a heating device equipped with burners and two heat exchangers. The work is structured in such a way that it is possible to heat several circuits. One is used to supply hot water to heating radiators or other heat consumers, the second provides the need for hot water.
The connection diagram for a double-circuit gas boiler to a heating system is quite simple. Both gravitational and forced coolant circulation are available for use. The complexity, electronic equipment, and controllability of the harness depend on the needs. The heating structure can provide for branching into multiple consumption circuits using hydraulic arrows.
Basic models of Ariston boilers
Below are popular products that are positively rated by experts and owners.
For ease of assessment, the main characteristics are given in standard tabular form. For each gas double-circuit wall-mounted boiler "Ariston 24", the manufacturer's instructions and accompanying documentation contain extended information about the product.
BCS 24FF
| Options | Values | Notes |
| Type, power | gas | Convection boiler "Ariston" 24 kW double-circuit. |
| Efficiency, % | 93,7 | Consumption per hour – 1.59 kg (2 cubic meters) of liquefied (natural) gas. |
| Productivity, l/min | 13,5 (9,6) | At a temperature of +25 °C (+35 °C). |
| Equipment | — | Electronic control, automatic diagnostic system, combustion control, shutdown when overheating. |
Uno 24 FF
| Options | Values | Notes |
| Type | gas | Convection, double-circuit, 24 kW. |
| Efficiency, % | 92,5 | — |
| Productivity, l/min | 13,9 (10) | At a temperature of +25 °C (+35 °C). |
| Equipment | — | Electronic control without display, combustion control, shutdown when overheating. |
Genus
| Options | Values | Notes |
| Type | gas | Closed chamber, dual-circuit, from 23.7 to 30 kW of power in different modes. |
| Efficiency, % | 94,5 | Consumption per hour – 1.59 kg (2 cubic meters) of liquefied (natural) gas. |
| Productivity, l/min | 14,5 (11,6) | At a temperature of +25 °C (+35 °C). |
| Equipment | — | Electronic control, circulation pump, automatic diagnostic system, expansion tank. |
Egis Plus
| Options | Values | Notes |
| Type | gas | Convection, double-circuit with a closed chamber, up to 28.7 kW. |
| Efficiency, % | 94,5 | Consumption per hour – 1.59 kg (2 cubic meters) of liquefied (natural) gas. |
| Productivity, l/min | 13,6 (9,7) | At a temperature of +25 °C (+35 °C). |
| Equipment | — | Electronic control, expansion tank, overheat shutdown. |
Self-installation of wall-mounted gas heating boilers
Installing a gas boiler with your own hands - we do it right However, not all manufacturers of gas heating equipment allow the installation of their heating units independently:
- Ariston, Viessmann, Bosch and a number of others oblige buyers to install a wall-mounted gas boiler exclusively by employees of certified centers;
- Some manufacturers, such as BAXI, Ferroli, Electrolux, are more loyal to this issue and do not prohibit unauthorized installation of wall-mounted devices. But in any case, for commissioning activities when arranging a heating structure, services will be needed from specialists who have permission to connect gas and electrical equipment.
Weaknesses of the water heater
The Ariston brand is considered one of the most reliable. But despite this, these boilers have their drawbacks. Very quickly after purchasing the device and starting its operation, the display indicating the main parameters of the boiler’s operation breaks down. However, it is intended for the convenience of the user. A broken display does not affect the operation of the boiler in any way.
Although the manufacturer indicates that the device is frost-resistant, the water from it must be completely drained during downtime. Frozen residues may damage the device.
The temperature maximum of the Ariston boiler is 80 degrees. But it is not recommended to use it. The boiler will fail very quickly in this case. It is best to heat up to 60 degrees.
If all these disadvantages are taken into account during operation of the device, then it will last for many years.
Do-it-yourself Ariston water heater repair in the video below:
Some of the existing breakdowns can be easily fixed on your own; for some, the equipment will have to be taken to a service center.
Filling the heating system with water
Starting a gas boiler begins with filling the heating system with water. Everything is simple here - modern double-circuit boilers do not require the installation of a special system feeding unit. It is already built into the boiler and equipped with a special tap, which, as a rule, is located at the bottom of the boiler in close proximity to the cold water connection pipe. Open the feed tap and slowly fill the system with water.
Starting the boiler - how to fill the system with water
A very important point in the operation of any boiler equipment is fluid pressure. To control this parameter of the heating system, almost all boilers are equipped with a pressure gauge. During the process of filling systems with water, it is necessary to monitor the pressure and after it reaches 1.5-2 atm, filling the system will need to be stopped. In principle, the operating pressure of a boiler may vary depending on the manufacturer and model - therefore, see the instructions for the boiler for the exact operating pressure.
Do-it-yourself first start-up of a gas boiler
Cold or insufficiently hot water flows from the boiler
The cause of a malfunction of this nature may be a breakdown of the heating element, thermostat and a large layer of scale on these devices. Before determining the cause of the malfunction of the Ariston 80-liter water heater and doing the repair yourself, you should turn off the power supply and drain the water.
Then, using a 13 mm wrench and a Phillips screwdriver, remove the protective box and unscrew the bolts on the mounting plate
Carefully remove the flange on which the heating element and thermostat are attached. Now you need to descale these 2 devices
The thermostat should be unscrewed, cleaning the attachment points to the flange from sediment, then carefully, using a screwdriver, free the thermostat from scale. You can check the functionality using a tester; the absence of a signal on its contacts indicates a malfunction and the need for replacement, since the thermostat cannot be repaired
You can also check the heating element for functionality using a tester by connecting the ends of the tester to the contacts of the heating element. If there is voltage, the heating element is working, but it needs to be cleaned
The heating element can be cleaned using a screwdriver, carefully removing pieces of deposits
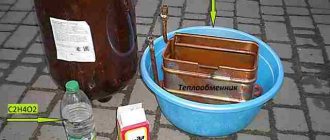
Then you need to prepare a solution of citric acid - 100 g per 1 liter of water and immerse the heating element in the solution. The effect of the solution on the device will be indicated by air bubbles that appear as a result of the reaction. If this action is not enough for complete cleansing, you can put the vessel with the solution and heating element on low heat.
After cleaning the heating element, you need to descale the tank
Be careful not to damage the inner surface of the tank. If it is possible to remove the heater from the wall, cleaning can be done using a solution of citric acid, pouring it into the tank
After these manipulations, assemble all the parts in the order in which they were disassembled and carefully insert and secure the flange. Make sure that during assembly there are no distortions of parts, do not overtighten the bolts, change the gasket between the body of your storage boiler and the flange, since the flange gasket was also exposed to salts
Specifications
Almost all gas boilers from the Ariston brand have a power of 15 to 30 kW. Thus, each client will be able to select the necessary indicators for the size of their apartment or house. It is also worth noting other distinctive characteristics of such gas equipment:
at maximum efficiency, boilers have a high level of efficiency; all wall-mounted boilers have Russian instructions and symbols on the equipment itself, so citizens do not have problems with operating the unit; most models from this manufacturer are able to cope perfectly with water in the system and low pressure; Particular attention to this equipment should be given to those people in whose homes voltage surges often occur. Ariston boilers cope with such network surges without any problems; All models are very easy to operate. To start using the boiler, you don’t need to study the instructions for a long time; all operating features are intuitive and accessible even to those who are installing such a unit for the first time.
To start using the boiler, you don’t need to study the instructions for a long time; all operating features are intuitive and accessible even to those who are installing such a unit for the first time.
In some cases, the boiler cannot simultaneously heat water and provide sufficient heating of the room; this applies to budget models. In this case, a person needs to think about installing an additional boiler.
First start-up and setup of the boiler
When the installation work and connections are completed, you can proceed to setting up and testing the equipment.
Performing the first run
The initial action accompanying the first start-up of an Ariston brand gas boiler is water. In this case, it is necessary to set the radiator air valves to working (open) condition.
The same actions aimed at bleeding air from the system apply to the boiler circulation pump. As the circuit fills with water, air is removed from the system, and the water pressure on the pressure gauge reaches 1 - 1.5 atmospheres, the tap on the make-up line is closed.
Conclusions and useful video on the topic
A video about the features of the first start-up of the Ariston boiler, in particular, the service setting of the circulation pump is demonstrated. Essentially, this is the work of specialists, but as the video shows, you can do it yourself:
Wall-mounted gas boilers from the series of modern equipment of the Ariston brand are quite complex equipment, even for domestic purposes. Hence the logical conclusion regarding the installation and startup of the Ariston gas boiler - the initial startup of the system should be entrusted to specialists. Expenses, of course, are inevitable, but on the other hand, this ensures the correct operation of the gas system.
Have you installed and configured an Ariston brand gas boiler yourself or entrusted this work to specialists? Share your experience with other visitors to our site in the comments block - add a photo of your boiler, tell us about the difficult moments that you encountered during the process of installing the equipment yourself.
General characteristics of Ariston boilers
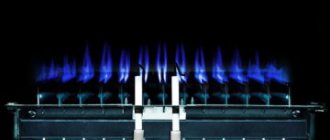
The description of Ariston gas units must begin with the characteristics of their main part - the burner. This element is used to burn fuel and release thermal energy into the heating system.
Types of boiler burner:
- regular
- modulation
The modulation burner is more convenient to use. It provides automatic power control depending on the temperature of the device.
According to the type of exhaust of combustion products, burners are divided into:
- closed type
- open type
Units with a closed burner are safer to use. In this case, natural gas combustion products do not enter the room. No use required. A coaxial pipe is simply connected to the device and taken out.
The design of the coaxial pipe provides for the presence of two layers, which ensures the simultaneous removal of waste and the flow of air from the street into the burner.
Equipment with an open burner requires the use of a chimney to remove combustion products.
Technical data of Ariston gas appliances
- Ariston boilers are used for heating and water heating, that is, they are double-circuit.
Each modification has its own characteristics, but the common type of fuel is gas. - The gas combustion chamber can be either open or closed.
If there is a chimney, units with an open chamber are used. And in apartments of multi-storey buildings, where there are not always chimneys, equipment with a closed combustion chamber is used. - Power.
Using this indicator, the gas consumption required to heat the room is calculated. - Compactness.
Wall-mounted units are used in small, narrow rooms. Floor-standing units used in production or warehouse areas are heavier and require more space for installation. - Availability of a control unit.
This element is indispensable when the water is turned off or when there is a sharp decrease in gas. In case of any malfunction, the unit will immediately turn off the device, which will prevent breakdown. It can also help you save fuel consumption.
What are the advantages of Ariston gas boilers
Recently, the popularity of the Ariston brand has increased significantly due to high-quality gas boilers, and this is not in vain. operates silently and consumes fuel in the smallest quantities possible. This will allow the owners of the unit to save on utility bills and, at the same time, provide comfort and warmth to the home.
The client will receive a high-quality device that provides round-the-clock water supply and heating to the house, even with a large area of up to 500 square meters. Also, do not forget about the longevity of each boiler. The periods specified in the guarantee are much more modest than they actually turn out to be. The dimensions of the equipment are much more compact than those of other brands, which means that it can be installed absolutely anywhere, even in a small apartment with limited space.
General characteristics of Ariston boilers
The description of Ariston gas units must begin with the characteristics of their main part - the burner. This element is used to burn fuel and release thermal energy into the heating system.
Types of boiler burner:
- regular
- modulation
The modulation burner is more convenient to use. It provides automatic power control depending on the temperature of the device.
According to the type of exhaust of combustion products, burners are divided into:
- closed type
- open type
Units with a closed burner are safer to use. In this case, natural gas combustion products do not enter the room. No use required. A coaxial pipe is simply connected to the device and taken out.
The design of the coaxial pipe provides for the presence of two layers, which ensures the simultaneous removal of waste and the flow of air from the street into the burner.
Equipment with an open burner requires the use of a chimney to remove combustion products.
Boiler service menu
For all manipulations with switching modes, only 4 buttons are used - Plus, Minus, Ok/Menu, ESC.
It is important to understand that not all boiler menu items will be available to you; some of them will only become available when additional devices are connected to the boiler, such as external sensors or a solar collector. And most menu items are accessible only by service code, I’ll talk about this below, but for now let’s “practice on cats”
And most menu items are accessible only by service code, I’ll talk about this below, but for now let’s “practice on cats”
Our cats will have meanings that are open to free access. But first, read how to work with the menu.
Tables with three-digit codes, descriptions and set values
The values added in the white fields are the values used in my boiler. If there are no corrections, then I have the same values as those printed in the table. To enlarge, click on the photo of the table.
Double-circuit gas appliances make our lives more comfortable and enjoyable. They are quite practical to use, suitable for heating country houses and small apartments. They are used for heating industrial or warehouse buildings with an area of no more than 500 sq.m.
The advantages of Ariston boilers are that in addition to heating buildings in winter, they heat water used in everyday life all year round. This is quite convenient and does not require the installation of additional equipment.