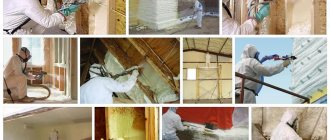
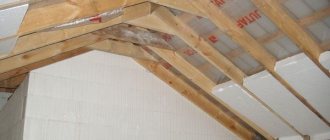
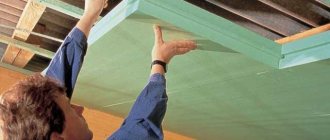
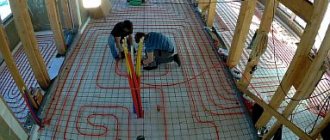
If the floors in your home are cold, this can lead to several problems, including those related to the deterioration of the health of household members. In the winter cold, walking on such a surface is completely uncomfortable. Insulation is most necessary for private houses built on one floor, and apartments located on the ground floor of multi-story buildings. Professionals unanimously recommend insulating the floor using polyurethane foam, which has the highest characteristics of protection against cold and moisture penetration.
Expert opinion
Konstantin Alexandrovich
Rigid and dense polyurethane foam does not have the disadvantages inherent in commonly used mineral wool. The coating made from it has no seams, it does not get wet and does not shrink, and its installation is carried out in a short time. In addition, polyurethane foam does not require a vapor barrier. Insulating the floor with polyurethane foam allows you to obtain the maximum heat-saving effect, which will remain stable over a long service life and will not require a significant investment of time, labor and finances.
Polyurethane foam (PPU)
Among the types of insulation existing on the construction market, polyurethane foam is considered a material with a high degree of efficiency. It has a significant list of high technical qualities.
He also has weaknesses. First of all, you need to familiarize yourself with the advantages of polyurethane foam, which are inherent in it as insulation.
Advantages of PPU
- Features a high level of adhesion to any type of surface.
- Qualitatively fills all existing surface defects and cavities.
- Thermal insulation measures can be carried out in a short time without excessive labor costs.
- When applied, it forms a monolithic coating that completely eliminates the formation of cold bridges.
- The service life of this insulation is at least 35 years.
- The operating temperature range is from -50 to +140 degrees Celsius.
- Has extremely low thermal conductivity.
- Does not support the development of fungi and mold.
- Has high mechanical strength.
- The material does not interact with chemicals such as acids and alkalis.
- It is characterized by reduced moisture absorption rates (in the case of using polyurethane foam with a closed pore structure).
- Provides high-quality insulation from extraneous sounds.
Disadvantages of polyurethane foam insulation
There are not too many negative aspects, but they do exist.
- The material is subject to fairly rapid destruction when exposed to ultraviolet radiation. This type of coating should not be left in direct sunlight.
- If the insulating coating is damaged, it will not be easy to restore it due to the specifics of the material application.
- The method of thermal insulation by applying polyurethane foam is quite expensive. Moreover, as the volume of work decreases, the cost of applying 1 cubic meter of insulation increases.
- The use of this method completely eliminates the possibility of ventilation of the insulating layer and the base underneath it.
- Polyurethane foam has a high degree of flammability and, when burned, can release toxic compounds.
- To work with liquid polyurethane foam, it is mandatory to use personal protective equipment, in particular, a special suit and respiratory protection.
- Application of the material in rooms where the temperature level is less than - 10 degrees Celsius is not recommended.
Waterproofing
Low air temperature in an uninsulated basement can lead to condensation on the warm surface of the ceiling. If moisture is constantly in contact with the wood, even high-quality treatment will not save it from fungal damage.
Condensation is also dangerous for mineral wool and loose foam - moisture entering the pores reduces the thermal insulation properties of the materials. Therefore, it is impossible to do without installing a waterproofing film material.
The waterproofing film is laid over the installed rough base. Make sure that the overlap of the canvases is at least 12 cm, and glue the joints on both sides with reinforced tape. The canvas is laid over the walls to a height of about 20 cm; it must follow the contours of the mounted structure so that thermal insulation material can be placed in the cells between the joists.
Features of PPU
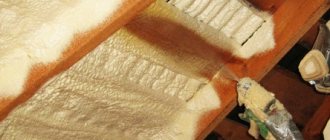
If you use the method of spraying polyurethane foam to insulate floors, the whole process will take no more than a couple of hours. The specialist will evenly spray the thermal insulation material into the space between the joists, that’s all science. The work process, although it does not seem too complicated, has many features. Installing a high-quality polyurethane foam coating in the floor area, the service life of which can be about half a century, is not an easy task.
This is due to the following nuances:
- The process of polyurethane foam formation consists of the creation and logical completion of the chemical interaction between the constituent substances of the mixture. They must be mixed qualitatively in a strictly defined proportion, as a result of which a uniform foam of microscopic bubbles is formed at the output. It is applied under high pressure, which allows the resulting coating to be highly durable and chemically neutral, with excellent thermal protection.
- To achieve the maximum level of thermal insulation of the surface, it is necessary to select the correct brand of mixture for the manufacture of polyurethane foam. The thickness of the spray layer is calculated individually in each individual case and depends on the materials used to cover the floor and temperature indicators.
- When carrying out floor insulation work, polyurethane foam should be applied in uniform layers of small thickness. This technique will avoid the formation of voids and other flaws.
Good quality of work on thermal insulation of floors with polyurethane foam can be ensured only with a high level of qualification of the employee, availability of equipment of the necessary power and some practical experience.
Required materials and tools
It is better to entrust the insulation of polyurethane foam to professionals. In this case, there is no need to buy materials. If there are no companies with professional equipment in the region, buy a disposable “PENOGLAS™ KIT-400” kit or a semi-professional “FOAM KIT-600” kit for self-spraying.
The list of auxiliary materials depends on the type of floor base and the safety of the logs. If they need to be replaced or completely installed, you will need:
- wooden beam;
- OSB sheets, plywood or gypsum fiber board;
- wood screws 3-4 cm long for attaching the log to a metal corner or U-shaped profile;
- self-tapping dowel;
- U-shaped metal profile, studs or corners;
- primer;
- waterproofing impregnations for wood.
The list of necessary tools:
- perforator;
- screwdriver with cross bits;
- jigsaw or wood saw;
- roulette;
- construction knife;
- level;
- marker or construction pencil.
Classification of types of polyurethane foam
All products based on polyurethane foam can be characterized according to the following characteristics:
Type:
- Professional compositions - applied only using specific installations. Thermal insulation work is distinguished by high quality workmanship, but at the same time, the price of specialist services is also significant.
- Semi-professional foam - supplied in spray bottles and intended for household use.
By temperature:
- Summer formulations – the temperature range of use is from +5°C to +35°C;
- Winter – allow spraying at air temperatures down to -20°C;
- All-season foams - the operating temperature range is from -10°C to +30°C.
Basic structures for insulation
Thermal protection of vertical elements in a private house is required in three cases:
- insulation of the floor above a cold basement;
- interfloor ceilings;
- attic floor in the presence of a cold attic.
In the second case, work is carried out to improve sound insulation characteristics.
Insulation in a wooden house helps prevent the following problems:
- overconsumption in the heating system;
- violation of the temperature and humidity conditions of the room;
- rotting of floor structures;
- the appearance of mold and mildew.
In a private house or country house, it is worth thinking about carrying out thermal insulation measures at the design stage.
Technologies for applying polyurethane foam
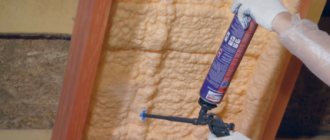
The algorithm for applying foam aerosol insulation in a balloon package is as follows:
- The cylinder is equipped with a blowing tube or mounting gun. The cover is removed in advance.
- Then you need to mix the composition. To do this, just vigorously shake the container for at least one minute.
- The surface to be insulated must be abundantly moistened, which will increase the degree of adhesion of the materials to each other.
- The container must be turned upside down so that the bottom is at the top. The voids are filled to 30% of their volume, since after application the composition begins to increase in volume.
When the gap is completely filled with foam insulation, its surface should be slightly moistened. This will improve and accelerate the polymerization of the composition. The time required for the final hardening of polyurethane foam can vary significantly among different manufacturers of the composition. Surface hardening usually occurs approximately 20 minutes after spraying. It will be possible to correct the insulation by cutting it no earlier than 4 hours from the moment of application. The period of full strength gain for balloon floor insulation lasts at least 24 hours.
Providing protective equipment
When spraying foam for installation in a balloon version on the floor surface, you should take into account the fact that the substance is difficult to remove from clothing and skin. The process must be carried out in a special suit using protective gloves and glasses.
If polyurethane foam is sprayed using professional equipment, all manipulations are carried out in protective clothing, which 100% eliminates the possibility of accidental contact of the composition with the skin and mucous membranes of the respiratory and visual organs.
Thermal insulation of the floor by spraying
Application of polyurethane foam to the floor surface during insulation must be done using special equipment. The components that make up the foam insulator are located in different containers. Preparation of the working staff takes place directly at the work site. Substances are fed into a cylinder, where they are mixed and react in the required manner, after which they enter a spray nozzle and are applied under pressure to the surface to be insulated.
Preparatory work
The technology of preparatory work is influenced by the place where the polyurethane foam is sprayed, i.e. The floor is insulated with polyurethane foam from below or above the floor, as well as the type of base: wooden or concrete.
Insulation from below
When insulating the floor from the basement, ground floor or lower part of a building located on screw piles, the complex of work comes down to removing dirt and dust. Particular attention should be paid to greasy (oil) stains. They must be removed with chemical reagents. But when spraying polyurethane foam, the easiest way to do this is with a hammer drill (for a concrete floor slab) and a chisel (for wood). In both cases, the oily material is removed. If a sub-wood floor has an oil stain on the boards, they need to be replaced.
A pothole in concrete is primed with “Betonokontakt”, after which the foam will not only hide the defect, but also strengthen the damaged area, acting as a repair mortar. Rotten boards are removed from the wooden base of the floor. Other problems such as cracks, fallen knots and creaking do not affect the quality and durability of the insulation.
Insulation of a wooden floor from above
Insulation of wooden floors with polyurethane foam begins with preparing the base. It is cleared of construction debris and dusted. Boards and joists damaged by rot, mold and mildew are removed (you can ignore other defects). Waterproofing impregnation is applied over the entire surface.
Insulation of the concrete base
Insulation of the concrete base is carried out under the screed and along the joists. In the first option, preparation of the base comes down to removing dirt and dust, as well as degreasing oily areas. Open joints between slabs, cracks and chips will be filled with foam and bound.
More thorough preparation is needed when insulating along joists. In this case, the following work is performed:
- the old screed is dismantled;
- Construction debris and dust are removed from the surface of the base;
- the passage of logs is marked;
- logs are installed.
Removing the old screed. During operation, the screed becomes covered with a network of cracks, peeling, cavities and other defects appear. It is better to remove such a screed. To do this, you need to use a hammer drill, since a chisel and hammer will take several days to complete the work.
Surface cleaning. Construction debris is removed from the surface of the ceiling, after which the base is vacuumed or removed with a damp cloth. There is no need to carry out repair work - the foam will hide defects and bridge cracks.
Marking. Pre-applied markings on the base of the floor with a pencil or marker will help you install the joists correctly. The process is carried out in several stages.
- Stage 1. The line of passage of the outer lags is drawn. They should be located at a distance of 5-7 cm from the wall.
- Stage 2. The distance between the extreme lags is measured.
- Stage 3. The value obtained during the measurement is divided into segments of 50-60 cm (this step should be between the logs).
- Stage 4. Attachment lines for internal joists are drawn.
Installation of logs. Concrete joists can be installed using several methods. But at the same time, the logs are pre-cut to size and then treated with waterproofing impregnations.
1. Fixing the timber to the concrete base is carried out using U-shaped metal elements, which are attached to the floor with dowel screws. The log is inserted between the pillars of the element and screwed to it with wood screws, 2 on each side. Using a level, it is necessary to constantly monitor the horizontal position of the beam.
2. Studs are used for fastening. They can be fixed to concrete using anchors or heels. After this, a nut and washer are screwed onto them, and through holes are drilled in the joists, through which the beam is placed on a series of studs. Fixation is carried out with a nut and washer screwed on top. The mounting diagram is clearly visible in the photo. A detailed description of each step can be found in the work “Insulating the floor on the balcony.”
3. A two-layer lathing is used. The bottom row is attached to the concrete with a metal corner, and the top row to the bottom with long wood screws. To obtain a perfectly flat surface, you can use wedges.
