Purpose of the temperature sensor
When installing a heated floor, the temperature sensor in the heated floor becomes an integral part. It is necessary to maintain optimal temperature conditions. The presence of a sensor will prevent damage to the flooring material and the warm floor itself.
The structure of the sensor is not complicated, it consists of two wires connected to a thermocouple, in turn, the two ends act as sensors.
Before installation, you must first check the serviceability of the temperature sensor and the design of the heated floor. The manufacturer states these coatings on the packaging. When checking, if the deviation from the norm is 10%, installing a heated floor is acceptable in this case.
How to regulate the temperature in the house - 3 ways and determining the optimal mode
The main task of maintaining temperature conditions is to create comfortable living conditions, subject to optimal use of resources.
This can be achieved in several ways. The first of them is to set the optimal degree of heating of the coolant in the underfloor heating circuits.
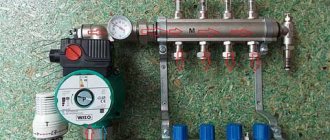
The second is the complete cessation of its entry into it. The easiest way is to use pipes with a maximum operating temperature of 90-95 degrees for the heating circuit. This allows you to install a circular pump with a thermostat in the system, as well as a reverse valve.
The installation location of the pump is the return pipe, and the temperature of the coolant in this place is no more than 70-80 degrees Celsius. If the heating of the coolant reaches critical values, the thermostat turns off the pump and the heating goes into standby mode.
As the floor cools, the circulation pump turns on again, supplying a new dose of hot water into the circuit pipeline. Practice shows that this method is the most effective and reliable for stable heating operation with heated floors.
The second method of adjusting the degree of heating involves the inclusion of a three-way valve or mixing valve in the system. With this approach, chilled water from the return to the hot supply is mixed through a three-way valve. That is, the maximum temperature of hot water from the boiler is reduced by adding cooled water.
If a 3-way valve is used, adjustment can be made manually or via a servo drive. The mixing valve regulates the temperature of the coolant according to a pre-entered control value.
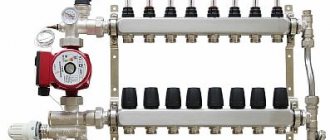
The third way to regulate the heating of the coolant in a home heating system is to use a mixing unit. Such a device can be made from the following components:
- 3-way valve;
- circulation pump;
- bypass jumper;
- thermometer;
- thermostatic head;
- maximum temperature control relay.
Considering the composition of the components used, the unit for adjusting the degree of heating in the heating system turns out to be quite expensive.
But the temperature change in it occurs very quickly, because it is produced by mixing water from the return pipe into the main coolant flow. In this case, the combustion intensity in the boiler automatically decreases.
In accordance with the established regulations, the fuel consumption mode is always optimal.
The number of nodes in the combined system can be any, and each will work autonomously in accordance with the established settings.
Thus, it is possible to maintain a higher air temperature, for example, in a children's room and at the same time a lower one in the bedroom of adult members of the family. Such a unit is especially effective for controlling the temperature in the installation of water floors.
To use this method of adjustment there is only one requirement - the entire heating circuit must be arranged in accordance with European requirements. The temperature of hot water from the boiler should not exceed 67 degrees.
And now we will consider the method of adjusting the thermal and hydraulic conditions using a thermostat. It is installed in a room, and adjustment is made by setting this device to the desired temperature for that particular point. Heating is controlled by a servo drive on a specific circuit.
Watch the video
Automatic water heated floor
Such a device works successfully in conjunction with a homemade manifold, a three-way valve and a mixing unit. Its popularity is due to the ease of adjusting the heating mode and the relative cheapness of the device.
Find out how water heated floors work depending on the type of connection.
Features of the sensor for heated floors
If you do not install a sensor when pouring a heated floor, this may later lead to disruption of the system or, on the contrary, to damage. Sensors are installed for thermoregulation; its advantages include low cost and independence from electricity.
It works whether there is electricity or not. The disadvantages include a short service life.
- Electronic sensors with remote tracking are considered more convenient to use and monitor. You can monitor the temperature status of the heated floor while outside the house.
- There are more expensive, but at the same time more functional thermoregulation sensors. They have various programs built into them. For example, you can program it to maintain a certain temperature to avoid overheating.
- Using a sensor, you can set the system to turn on at a certain time, which will significantly reduce energy consumption.
Options for installing sensors with an infrared beam are possible. The sensor operates on batteries and determines the temperature of the floor surface. Install it on the wall using adhesive tape.
Review of the best thermostats
To control underfloor heating systems, you cannot do without thermostats. They are installed in every room, but if the area is small, then one per apartment is enough.
There are a variety of regulators on sale from different brands: mechanical, electronic, programmable, single or multi-channel, wall-mounted or rail-mounted, so the choice is difficult.
We will consider popular models from trusted companies that combine price and quality, this will make your choice easier.
Teplolux TR 520
Telux TR 520 is an inexpensive model. It is not difficult for them to adjust the temperature level of the heated floor. The device is an electronic programmable type, so it is possible to program it in advance to turn on, and when you find yourself at home, it will be warm there.
The regulator has a graphic display, it reflects the selected programs and the heating degree in the room at the given minute. A temperature sensor and user-friendly interface make settings easy.
Main characteristics:
- minimum temperature level - 5 degrees, maximum - 35;
- power - 3500 W;
- communication current - 16 A;
- Warranty period - 3 years.
Pros of the model:
- low price;
- beautiful display - will fit into any room;
- the ability to adjust the heating level for any day;
- “anti-freeze” mode;
- Air temperature adjustment is available.
Disadvantage: after disconnecting, you need to configure it again.
The thermostat is suitable for electric and water heated floors.
National comfort 711
The model is inexpensive and has a rich set of equipment. The set includes a floor and air temperature sensor, a large graphic display that is backlit. The regulator has a self-diagnosis function, its results are reflected on the screen. Warranty period - 1 year. The device saves up to 30% resource.
The negative aspects of the model are low protection, so it is not recommended to choose it for a bathtub or shower; problems may also arise when pressing the buttons (as they are not very well located).
Varmel RTC 70.26
Electronic wired mechanical thermostat, it is easy to adjust the heating degree quite accurately. There is a wheel with divisions for adjustment. Designed for both electric floors and water systems. Operates at a minimum temperature of 5 degrees, maximum - 40. Permissible load level - 3600 W. Warranty - 1 year.
Installation is carried out in an installation box. Among the advantages are the on and off buttons. There is a remote type sensor with a 3 meter wire. Minus - produces a clicking sound when switching.
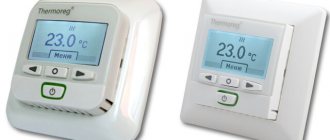
Thermo Thermoreg TI-200
A simple, cheap device with an indicator and a temperature sensor. With it you can quite accurately adjust the desired heating level and maintain it. The heating indicator is set on a scale, and the presence of a two-pole switch makes it easy to turn off the regulator.
Mechanical type device. Operating temperature from 5 to 40 degrees. Maximum load - 3600 W. Guaranteed service life 3 years.
This type has many advantages - it is compact, low cost, easy to operate, and has an “anti-freeze” function.
Disadvantages - the inability to adjust heating by day of the week, lack of a display.
Terneo SX
This thermostat for heated floors is “smart” and equipped with a touch panel. It is chosen when remote control is required, since it can be controlled via a smartphone. The interface is simple, which makes it easy to configure.
Hysteresis can be adjusted to reduce the number of switches on and off. Installation is simple - it is installed in a metal box on the wall.
Terneo SX has a number of useful functions: timer, child lock, departure mode. The device is equipped with a temperature sensor.
Main characteristics:
- temperature level from +5 to +45;
- thermostat power 3000 W;
- Warranty period - 3 years.
The advantages include low price, ease of operation, fast response of the screen to touch, and the ability to track statistical data on operation and electricity consumption.
Disadvantages - connection to a smartphone is not made the first time, low-quality plastic.
SpyHeat ETL-308B
The mechanical thermostat is compact in size, easy to use, high quality, and inexpensive. It has a pleasant appearance and works for a long time without interruption. The case is equipped with a temperature switch, an indicator, and a shutdown button. The setting is carried out by turning the switch.
The disadvantage is a possible clicking sound when the heating relay is activated.
Characteristics:
- minimum temperature - 15 degrees, upper limit - 35;
- maximum power - 3600 W;
- there is a temperature sensor;
- service life - 2 years.
Rexant R70XT
Inexpensive compact mechanical wired thermostat with simple controls. The switch operates smoothly, which allows you to change the heating degree by one division. The case has a system power-on indicator. The device is mounted in a distribution box. The regulator is reliable and will last a long time.
Settings available within the range of +5 - +35 degrees. Power level 3500 W. Warranty period - 1 year.
Nest Learning Thermostat 3.0
This model is the third generation of this type. Externally, the regulator is no different, only it has a larger disk size and higher resolution (320 by 320 piculs).
The device is equipped with a large display and new functions: auto schedule, programming, auto shutdown, notification in case of regime violation. Management is simple, possible with a smartphone via the Internet. Installation is also quite simple. Warranty - 2 years.
The only downside is the high price.
Menred RTC 70.26
Inexpensive thermostat for mechanical electric floors with hidden installation and remote sensor. Wired control, with the ability to regulate floor heating.
Maximum load - 3600 W, temperature range from 5 to 40 degrees. The thermostat is equipped with a light indication. Warranty - 3 years.
Installation of the device is simple; it is installed in a mounting box.
Grand Meyer HW500
A universal, inexpensive electronic model of a programmable type controller, controlled by buttons, they can be locked. Has several modes. Equipped with thermal sensors - built-in and wired, working together and individually.
The backlight turns on automatically and turns off after 20 seconds. The advantage of the view is that the settings are saved when turned off. The device is compact, but despite this, the design is modern with a bright display. There is an option to adjust the air temperature.
The disadvantages include a click when turned on, no locking when the mode is off.
Operating temperature fluctuations are 5 - 35, it is possible to increase the limits to +99. Power 3600 W, communication current 16 A. Warranty period 2 years.
Electrolux ETA-16
This electronic device has a small display and a minimum number of icons. The screen glows brightly and lights up when you touch any button. The interface is clear, it is easy to set the regulator to turn off, set and maintain heating at a given level. The device is equipped with a temperature sensor.
Externally, the regulator is made in a modern way, so it will not spoil the design of the room.
The temperature can be set from 5 to 50 degrees. And the permissible power is 3500 W. Warranty period - 3 years.
Devi Touch
The model is suitable for underfloor heating and heating systems. It has a load limit of 3680 W. Microprocessor control unit, touch display. Operating temperature level from 5 to 45 degrees. Warranty - 5 years.
The Devi programmable thermostat has many options - frost protection, absence of people in the room, open window. The advantage is that it saves electricity, which allows you to significantly reduce heating costs. It is possible to adjust the air temperature level. In addition, the device is multifunctional and easy to set up.
The disadvantage is that the instructions are unclear; they do not show the principle of connecting the cable to the regulator.
Caleo 520
A surface-mounted device with a control sensor. It has a backlit display that shows the temperature. Equipped with an additional function - keypad lock.
You can note the simplicity of the setup process and ease of use, as well as the low power of the device. Temperature range from 0 to 40 degrees. Warranty period - 2 years.
Additional advantages include reasonable price and modern design. Disadvantages noted by users are relay clicking.
Almac IMA-1.0
Almac IMA-1.0 is a modern, electronic, inexpensive, high-quality device. Its purpose is warm floors and air conditioners. Equipped with temperature sensors - portable and built-in.
It is easy to adjust the temperature. A positive feature is that the hysteresis can be adjusted; the lower and upper temperature limits are set with high accuracy.
Technical indicators:
- limit temperatures - from -50 to +110 degrees;
- power - 3600 W;
- warranty - 1 year.
Types of sensors
The types of sensors for measuring the temperature of a heated floor vary depending on the installation location. There are two types of sensors, external and sensors built into the floor heating system.
Step-by-step installation instructions
For the thermostat to work and accurately determine the temperature, it is not enough to choose it correctly; it is also important to install the device correctly. Installation usually does not cause problems, but we decided to clearly explain this.
Regardless of which regulator you decide to install, you should start by choosing a location for it. It should be convenient to use. It is necessary to calculate so that the device is located close to the sockets and doors, the height from the floor is 1.5 meters. It cannot be mounted near a window.
Usually, the thermostat kit includes instructions that you need to read.
Sequencing:
- Before starting work, the installation site is de-energized;
- the wires from the heated floor must already be connected to the socket box;
- then the sensor is installed - it is placed in a corrugation, one end is brought out into the socket box, and the second is located between the heaters (cable or infrared film floor plates);
- insulation is removed from the floor wires - 6 cm;
- the cable screens are connected to the yellow-green wire, then everything is placed in the socket box;
- the top panel of the thermostat is removed - you need to insert a straight screwdriver into the groove from below, pressing the lid will snap off;
- the floor wires are connected to the required terminals of the regulator according to the diagram;
- the wires are carefully bent, the device is inserted into the socket;
- the frame is installed and the top panel is attached.
The floor heating thermostat is connected, all that remains is to check its operation.
Functionality of thermoregulation sensors
When choosing a sensor, everyone should base their choice on the required characteristics, such as:
- Which type of sensor suits you? Larger, programmable, mechanical or electrical;
- How do you want to install the sensor, in or outside of the system;
- Number of channels one or two;
- The sensors can be of different styles and colors to suit you;
- Methods of thermoregulation, sensory, remote or electrical.
Installation and connection of the thermostat
Before installation, carefully read the operating instructions for the device. Typically it contains the following installation instructions:
- thermostat height above floor level – 1.5…1.7 m;
- do not place the regulator with an air sensor near sources of heat or cold - heating radiators, air conditioners, ventilation openings;
- technological distance from window and door openings – 1 m (minimum);
- maintain the maximum distance between the thermostat and the distribution manifold of water transformer substations (the cable length is indicated in the instructions);
- the external sensor is located exactly in the middle between the underfloor heating loops at a distance of 500 mm from the wall;
- The floor temperature sensor is mounted inside the corrugated pipe; it should be easily pulled out after pouring the screed.
Surface-mounted devices are screwed directly to the wall, the wiring is laid in grooves. A recess is made under the built-in thermostats, and a regular socket box is installed.
Advice. To connect the regulator, use a two-core copper cable with a cross-section of 0.75 mm². The connection diagram for an electric heated floor circuit with an external sensor looks like this:
If the cable heating section consumes more power than the thermostat can switch, you need to use a modular contactor in the circuit. The specified actuator is mounted on a standard DIN rail.
Here the thermostat sends a control signal to the contactor, which opens the power line
Some versions of thermostats have a contact for connecting a timer. This solution allows you to reduce the temperature in the room by 5 degrees once a day without purchasing an expensive digital model of the device. The timer circuit is shown below.
The Latin letter L in the diagram indicates the phase wire, N - zero (neutral)
Let's move on to water heated floors. The simplest way is to connect the thermostat to the servo drive directly (in series). Just first find out the type of drive, “normally open” must be connected to the normally open contact of the device, “normally closed” - to the break contact. Often, manufacturers put the appropriate markings on the terminals - NO or NC. The COM contact is common.
To implement multi-zone underfloor heating in a private home with wireless thermostats, use the following circuit diagram. Terminal numbers and other details are not indicated here, since equipment from different manufacturers has different markings.
Reference. Patch panels, receivers and wi-fi modules are produced by many well-known manufacturers - Legrand, Danfoss and others. How the thermostat-switching unit combination functions is described in the video.
Types of sensors
Let's take a closer look at each type of sensor, its advantages and disadvantages.
- Electronic-mechanical. The most affordable option for a thermoregulation sensor. Its mechanism is extremely simple. It consists of a metal plate that changes with temperature changes. With such a mechanism, it is extremely difficult and almost impossible to set the exact required temperature.
- Electric. The sensor consists of a small screen and additional buttons. The sensor determines the floor temperature by measuring the floor surface. Unlike the first one, this sensor will help you set the temperature you need exactly to the degree you need. You can configure and control it using buttons.
- Programmable. The most expensive of thermostats, but also the most functional. With its help, you can both adjust the temperature that suits you, but also set a specific operating mode. You can program the system to run at specific times. Thereby reducing energy consumption in your absence. The floor may become warm before you arrive.
There are various designs and colors of programmable sensors. From the whole variety, you can choose the one that suits you. It is equipped with a screen that displays data about the warm coating.
Connecting the device
When asked how to connect a heated floor sensor, every specialist will answer that this can be done in two ways:
- direct connection “cable – thermostat”;
- using a junction box.
We recommend: DSP on the floor along the joists
Heated floor sensors are usually connected to a separate power line of the panel using copper power wires, the cross-section of which is approximately 2.5 square meters. mm. To protect the system from electrical leakage, an RCD and a circuit breaker should be installed in the panel.
Directly in the room where the heated floors are located, another distribution box is installed, to which the cable from the main panel is supplied. Then two tubes are passed from the box to the floor with the main heating cable and the one that will feed the installed sensor.
Thermostats differ:
— Use in everyday life or at work.
— Temperature control limits.
— Permitted electrical power of the load.
— Installation location (wall-mounted, for a socket, on a DIN rail).
— The presence/absence of thermal protection, blocking keys from changing settings, operation in the event of a breakdown/absence of a temperature sensor, and others.
This will determine which thermostat you need to choose.
Thermostats according to the control method can be electromechanical or electronic (digital screen or touch display). For most electronic thermostats, the option of programming operating modes for the future is available, most often for a week in advance.
Let's take a closer look at how to choose the right thermostat.
Electromechanical
Electromechanical thermostats are the easiest to use and affordable. They control the air temperature according to the thermal comfort that a person feels. It is controlled using a rotating wheel and a temperature scale. This regulator is installed in small rooms. The relative amount of energy savings in this case is small. But it is definitely greater than if the consumer manually turns on/off the power to the heater.
Electronic
Electronic devices differ from electromechanical ones primarily in their higher level of information content. They display the current temperature value on a digital screen (display). They (like electromechanical thermostats) can control the operation of heating systems for rooms of different sizes. Depending on the electric power of the heater (2000 VA or more), thermostats are available with a current of 16/20/30 A. If the load power exceeds the same value for the thermostat, it should be connected via a magnetic starter (contactor) to protect against overload. Electronic thermostats have a wider range of functions than electromechanical ones:
- Adjustable hysteresis.
— Overheating protection (thermal protection).
— Ability to continue operation in the event of an accident or damage to the sensor.
— Turning on heating with a time delay (30 minutes - 4 days).
— Counter of operation of the regulator with load and others.
Programmable
Programmers will allow you to save even more energy. These are electronic regulators with the ability to set an individual schedule for a week in advance and many other functions. These include:
— Programmable heating operating modes – “Timer”, “Manual” or “Departure”.
We recommend: How to check the levelness of the floor
— Function for detecting a window open for ventilation. If a sharp drop in temperature is detected in a heated room, the heating is turned off for 30 minutes to save money.
— Configuring the sensor to measure one of the temperatures - floor, air or air with a floor limit.
— Heating programming (for 7 days). You can set up to 3 or 16 (in one day) periods of maintaining a comfortable temperature.
How to choose the right sensor
When choosing a sensor, you must rely on additional characteristics, type of installation and type of coating
. We list the necessary characteristics for selecting a sensor.
- Power. The power of the sensor and the underfloor heating system must match each other. Otherwise, it is necessary to purchase an additional device for power regulation. If this is not done, the system will quickly fail.
- Functionality. The heated floor system is regulated using sensors. They, in turn, allow you to maintain a comfortable temperature for you. Arrange the working hours, or reset the already stated data, arrange the ones that are suitable for you.
- Usage. Programmable sensors can be an overwhelming task for older people. Choose sensors that you won't find difficult to use.
- Connection. If you decide to install the sensor yourself. You need to study the instructions for the heated floor temperature sensor in detail. Installing it yourself may be difficult. It's better to consult a specialist.
- External characteristics. The thermoregulation sensor should not only perform its function, but also not attract unnecessary attention. It should fit harmoniously into the interior. Sensors are available in various sizes and colors to suit different interiors.
The choice of sensor for thermoregulation of a heated floor depends on your preference and required characteristics. You should not choose the most expensive sensor with the most functionality if its use in the future will cause you difficulties.
When choosing a sensor, read the instructions on how to install a temperature sensor in the system.
Choosing a thermostat on the balcony: tips
There are no fundamental differences in the approach to choosing regulators for a loggia and a balcony. It is based on the same criteria, but the main thing is that the control equipment must withstand the connected load. Otherwise, the apartment owner should be guided by his own preferences and financial capabilities. The regulator must meet aesthetic requirements and be durable, otherwise frequent replacement will involve additional financial costs for the purchase of equipment and its re-installation.
For your information!
On mechanical thermostats that use a floor heating sensor, the scale simply shows numbers. The user sets a comfortable temperature, focusing on his feelings.
If frequent temperature changes are expected on the balcony, it is advisable to install a mechanical thermostat. In addition, it must have a remote sensor mounted in the floor. This configuration will ensure maximum efficiency of the system, and the apartment owner will not feel discomfort from visiting the balcony.
For insulated building structures, where strict adherence to temperature conditions is necessary, devices with electronic programming capabilities are installed. The temperature sensor can be used built-in or combined. The regulator will be able to maintain comfortable air and floor temperatures at the same time.
Photo of temperature sensor for heated floors
Share with friends
Reviews
“I took Kaleo UTH-150 to install heated floors in the bathroom. The device was originally planned to be installed in a power outlet box. I figured it out quickly with clear instructions in Russian, and connecting did not cause any problems. The device operates in 2 modes: programmable and emergency. The required functions are set using the operating buttons on the front of the panel. The current temperature and settings are displayed on a seven-segment LED display. The regulator looks stylish, is easy to use, durable and functional. In addition, the kit includes replaceable covers that allow you to adapt the device to any interior.”
“I am the happy owner of a heated floor managed by Devi. The thermostat is equipped with a touch display. It meets the needs of even the most demanding owner: reliable, 5-year warranty, can be installed in frames of sockets with switches. With proper installation and correctly set settings, the device pays for itself within a year.”
Heating a bathroom, loggia or balcony with an electric heated floor is a simpler and more affordable way compared to other heating systems. The efficiency of the entire system and energy efficiency depend on the choice of thermostat.
Source
