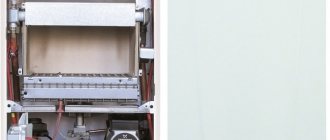
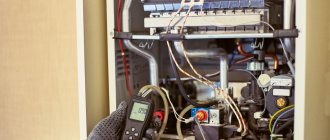
How to connect a single-circuit boiler?
The connection diagram for a gas boiler in a house depends on several determining conditions, namely the type:
- Heating systems.
- Coolant.
- Combustion chambers of the boiler.
As well as the number of circuits in the boiler, the presence of heated floors, a convection or condensation boiler.
If you are busy connecting a gas boiler with one circuit, then you need to think as follows.
A single-circuit boiler has one heat exchanger, which heats the water. Previously, they were bought for heating. But today they add a boiler and also use it to supply hot water.
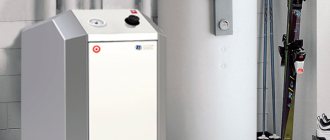
There are wall-mounted and floor-mounted, differing in power. When connecting a floor-standing gas boiler, know that it is more powerful, but at the same time heavier, suitable for a large house.
Another nuance is that only two pipes with coolant can be supplied.
If you connect a gas boiler to the heating system according to this scheme, the carrier will “walk” through the system and come to the boiler to reheat. The valve and tank help reduce pressure.
The most affordable way to connect a boiler to a gas boiler is through a three-way valve.
A boiler is a container for water. It also heats up thanks to the heat exchanger. Hot water comes into it from the coolant.
Priority is given to heating water for DHW. If the water in the boiler becomes cold, the valve operates and the carrier goes into it. In the boiler, the medium transfers heat back to the boiler to heat up again.
Water circulates between the boiler and the boiler until the water in the boiler is warm enough. Then the valve operates again, the refrigerant from the boiler is released to keep the room warm.
Consequently, another cycle begins, between the heating and the boiler.
After connecting a gas boiler to the system, users often have a question: “How long does it take to heat up the boiler?”
Everything determines the volume:
- For a capacity of 80 liters – about 50 minutes.
- For a capacity of 200 liters – about 6 hours.
Reheating occurs in about an hour.
Types of heaters
Water heaters are divided into electric and gas.
Electrical devices are:
- Cumulative.
- Flow-through.
The heating method for electric ones is the same - using a heating element. If you install a gas water heater, it will work by burning gas.
Correct installation of a solid fuel boiler in a closed heating system
A huge advantage of solid fuel boilers is that their installation does not require any permits. It is quite possible to carry out the installation yourself, especially since this does not require any special tools or special knowledge. The main thing is to approach the work responsibly and follow the order of all stages.
Boiler room arrangement
The disadvantage of heating units used to burn wood and coal is the need for a special, well-ventilated room. Of course, it would be possible to install a boiler in the kitchen or bathroom, however, periodic emissions of smoke and soot, dirt from fuel and combustion products make this idea unsuitable for implementation. In addition, installing burning equipment in living rooms is also unsafe - the release of fumes can lead to tragedy.
A solid fuel boiler is best installed outside residential premises
When installing a heat generator in a boiler room, several rules are followed:
- the distance from the combustion door to the wall must be at least 1 m;
- ventilation ducts must be installed at a distance no higher than 50 cm from the floor and no lower than 40 cm from the ceiling;
- There should be no fuel, lubricants or flammable substances and objects in the room;
- The base area in front of the ash pit is protected with a metal sheet measuring at least 0.5 x 0.7 m.
In addition, at the location where the boiler is installed, an opening is provided for the chimney, which is led outside. Manufacturers indicate the configuration and dimensions of the chimney in the technical data sheet, so there is no need to invent anything. Of course, if the need arises, you can deviate from the documentation requirements, but in any case, the channel for removing combustion products must provide excellent traction in any weather.
How to properly install a chimney
When installing a chimney, all connections and cracks are sealed with sealing materials, and windows are also provided for cleaning the channels from soot and a condensate catcher.
Preparing to install a heating unit
Before installing the boiler, select a piping scheme, calculate the length and diameter of the pipelines, the number of radiators, the type and quantity of additional equipment and shut-off and control valves.
Despite all the variety of design solutions, experts recommend choosing combined heating, which can provide forced and natural circulation of the coolant. Therefore, when making calculations, it is necessary to consider how a parallel section of the supply pipeline (bypass) with a centrifugal pump will be installed and to provide for the slopes necessary for the operation of the gravity system. You shouldn’t give up on buffer capacity either. Of course, its installation will entail additional costs. However, a storage tank of this type will be able to level out the temperature curve, and one load of fuel will last for a longer time.
Connecting the boiler to a heating system with a dual-purpose buffer tank
Particular comfort will be provided by a heat accumulator with an additional circuit, which is used for hot water supply. Considering the fact that due to the installation of a solid fuel unit in a separate room, the length of the hot water circuit increases significantly, an additional circulation pump is installed on it. This will eliminate the need to drain cold water while waiting for hot water to flow.
Before installing the boiler, be sure to provide space for the expansion tank and not forget about devices designed to reduce pressure in the system in critical situations. A simple strapping diagram that can be used as a working design is shown in our drawing. It combines all the equipment discussed above and ensures its correct and trouble-free operation.
You will learn even more information about the arrangement of the boiler room and installation of equipment from our article:.
Installation and connection of a solid fuel heat generator
After carrying out all the necessary calculations and preparing the equipment and materials, installation begins.
- The heating unit is installed in place, leveled and secured, after which the chimney is connected to it.
- Heating radiators are mounted, a heat accumulator and an expansion tank are installed.
- A supply pipeline and a bypass are installed, on which a centrifugal pump is installed. Ball valves are installed in both sections (direct and bypass) so that the coolant can be transported by forced or natural means.
We remind you that the centrifugal pump can only be installed with the correct orientation of the shaft, which must be in a horizontal plane. The manufacturer indicates diagrams of all possible installation options in the product instructions.
- The pressure line is connected to the heat accumulator. It must be said that both the inlet and outlet pipes of the buffer tank must be installed in its upper part. Thanks to this, the amount of warm water in the container will not affect the readiness of the heating circuit. We definitely note the fact that cooling the boiler during the reboot period will reduce the temperature in the system. This is due to the fact that at this time the heat generator will work as an air heat exchanger, transferring heat from the heating system to the chimney. To eliminate this shortcoming, separate circulation pumps are installed in the boiler and heating circuits. By placing a thermocouple in the combustion zone, you can stop the movement of coolant through the boiler circuit when the fire dies out.
Installing separate pumps on the boiler and heat exchange circuits can solve the problem of heat leakage through the boiler when it cools down
- A safety valve and an air vent are installed on the supply line.
- Connect the emergency circuit of the boiler or install shut-off and control valves, which, when the water boils, will open the main line for its discharge into the sewer and the channel for supplying cold liquid from the water supply.
- Install a return pipeline from the heat accumulator to the heating unit. A circulation pump, a three-way valve and a settling filter are installed in front of the boiler inlet pipe.
- An expansion tank is mounted separately on the return pipeline.
Note! Shut-off valves are not installed on pipelines that are connected to protection devices. These areas should have as few connections as possible.
- The upper outlet of the heat storage tank is connected to a three-way valve and the circulation pump of the heating circuit, after which the radiators are connected and the return pipeline is installed.
- After connecting the main circuits, they begin to install a hot water supply system. If the heat exchanger coil is built into a buffer tank, then it will be enough to simply connect the cold water inlet and the outlet to the “hot” line to the corresponding pipes. When installing a separate indirect heating water heater, use a circuit with an additional circulation pump or three-way valve. In both cases, a check valve is installed at the cold water supply inlet. It will block the path for heated liquid into the “cold” water supply.
- Some solid fuel boilers are equipped with a draft regulator, the function of which is to reduce the flow area of the blower. Due to this, the air flow into the combustion zone is reduced and its intensity, and, accordingly, the temperature of the coolant is reduced. If the heating unit has this design, then install and adjust the drive of the air damper mechanism.
Installing an automatic draft regulator will allow you to control the fuel combustion process
The places of all threaded connections must be carefully sealed using plumbing flax and a special non-drying paste.
After installation is completed, coolant is poured into the system, centrifugal pumps are turned on at full power and all connections are carefully inspected for leaks. After making sure that there are no leaks, fire up the boiler and check the operation of all circuits at maximum modes.
Features of integrating a solid fuel unit into an open heating system
The main feature of open heating systems is the contact of the coolant with atmospheric air, which occurs with the participation of an expansion tank. This container is designed to compensate for the thermal expansion of the coolant that occurs when it is heated. The expander is installed at the highest point of the system, and in order to prevent hot liquid from flooding the room when the tank is overfilled, a drain tube is connected to its upper part, the other end of which is discharged into the sewer.
Open type expansion tank design
The large volume of the tank forces it to be installed in the attic, so additional insulation of the expander and the pipes suitable for it will be required, otherwise they may freeze in winter. In addition, you must remember that this element is part of the heating system, so its heat losses will lead to a decrease in the temperature in the radiators.
Since the open system is not sealed, there is no need to install a safety valve or connect emergency circuits. When the coolant boils, the pressure will be released through the expansion tank.
Special attention should be paid to pipelines. Since the water in them will flow by gravity, the circulation will be influenced by the diameter of the pipes and the hydraulic resistance in the system. The last factor depends on turns, narrowings, level changes, etc., so their number should be minimal. In order to initially impart the necessary potential energy to the water flow, a vertical riser is installed at the outlet of the boiler. The higher the water can rise along it, the higher the coolant speed will be and the faster the radiators will warm up. For the same purposes, the return inlet should be located at the lowest point of the heating system.
Finally, I would like to note that in open systems it is preferable to use water rather than antifreeze. This is due to higher viscosity, reduced heat capacity and rapid aging of the substance upon contact with air. As for the water, it is best to soften it and, if possible, never drain it. This will increase the service life of pipelines, radiators, heat generators and other heating equipment several times.
Pay attention to the article on choosing coolants for heating systems:.
How to connect a double-circuit boiler?
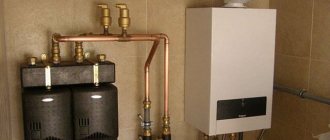
Connecting a double-circuit gas boiler is especially important because it has two refrigerants. One is the main one for warmth in the house, and the second is secondary - for hot water. And often we are talking about connecting a wall-mounted gas boiler.
The refrigerant, which takes heat from the burner, goes to the firebox and then returns cold to the boiler. But if you use a hot tap, cold water will flow into the boiler through the second pipe.
Thanks to the valve, the coolant does not leave the boiler, but is included in the main circuit - an additional heat exchanger. The refrigerant prepares water for domestic hot water. And as soon as you close the tap, it is again spent on the battery.
Please note that according to user reviews, this option is not very effective. There is enough water either to wash the dishes or to wash yourself. At the same time, you can call it summer. The solution to the problem is a boiler.
The refrigerant heats the water only in the boiler, and the other circuit is closed. The connection diagram of the boiler to a double-circuit gas boiler allows you to use the equipment longer. So the additional heat exchanger, as a rule, breaks down within the first year.
In this case, hot water from the boiler goes to the boiler. And when it becomes too small, the boiler starts heating to fill. It can also be done so that the boiler is filled with boiler liquid, and the heat is maintained at a level thanks to the heating element.
Models and characteristics table
The Kupper line is quite wide and includes both basic OK boilers and the PRO series. All models differ in design and technological parameters.
Consumers are offered multi-purpose configurations, long-burning modifications and standard solid fuel units.
Kupper units are presented on the market in the following basic versions:
- Boiler Cooper Praktik 8.
- Boiler Cooper OK 9.
- Boiler Cooper Praktik 14.
- Heating boiler Cooper Expert 15.
- Heating boiler Kupper OK 15.
- Boiler Cooper Carbo 18.
- Boiler Cooper OVK 18.
The classification of boilers “OK” stands for heating boiler, and “OVK” additionally has a hob for food preparation.
In addition to the basic options, the Teplodar company produces a series of boiler units “PRO”:
- Boiler Cooper PRO 22.
- Boiler Cooper PRO 28.
- Boiler Teplodar Cupper PRO 36.
- Boiler Teplodar Cupper PRO 42.
These are multi-purpose units with the principle of long burning, a large loading chamber and a long period of operation on one load of firewood up to 8 hours. These solid fuel boilers are equipped with an additional chamber that produces pyrolysis gas.
Heating connection
Flow-through boilers can be portable or stationary.
The instructions for the equipment will help you avoid mistakes and position the pipes correctly. The circuit may be different, determined by the model and manufacturer.
If the heating system is already in use, then before connecting the gas boiler, you need to drain it and rinse everything. And check if antifreeze can be used with your equipment.
For a single-circuit boiler
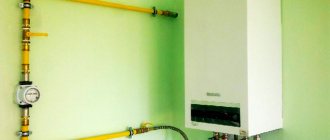
When connecting a gas boiler, the circulation pump is placed on the reverse side. Taps are needed to separate the system and the boiler without draining the coolant.
Plus, change the filter, which saves the equipment from clogging, and it must be placed in front of the equipment on the horizontal part of the pipe.
The refrigerant pipe from the boiler is connected to the boiler pipe with a tap. The same taps should be on the remaining pipes. They are needed during draining and repairs.
For a double-circuit boiler
When connecting a double-circuit gas boiler, a filter is also required. In this case, there should be two of them - rough and magnetic.
The outlet pipe is connected to the pipe with a tap. We recommend installing a valve as well. Seal with tow or foam.
Electrical connection
There are two ways to connect a gas boiler to the network:
- Plug into the socket.
- Cable with three cores.
The choice is determined by the equipment model. But you always need to work through local protection. Connect to the panel. And don't forget to ground. It would be great if there were stabilizers or backup sources if the plugs suddenly went out.
The circuit breaker must be located next to the equipment. In any case, there must be a local outlet. And she must eat through a machine.
Building a ground connection on a gas pipeline or battery is prohibited! According to gas service standards, the resistance does not exceed 10 ohms.
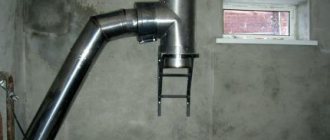
Chimney connection
To connect a gas boiler you do not always need a chimney. You can check this by looking at the instructions for your model.
If a chimney is still needed, then it is important that its diameter coincides with the boiler outlet pipe. Usually the diameter determines the power.
Chimneys are installed in the internal wall of the house or behind it. You can make no more than three bends along the pipe.
And the first section, which connects the chimney and the boiler, should last no more than 25 cm. Do not forget about the cleaning hole inside the pipe.
If the combustion chamber is open, then it would be a good idea to also install a supply pipe.
The best material for a chimney is roofing tin . Or anyone else who isn't afraid of acid. The same applies to accessories. Do not connect the boiler and chimney with corrugation, just as you can use a brick chimney.
If you use a coaxial chimney when connecting a gas boiler in a private house, then place it directly into the wall. That is, it is a chimney when the pipe is in the pipe. One of them carries steam, and the second carries air. Moreover, this type should move away from the wall by half a meter or more.
And if the boiler has condensate, then you still need a slope in its direction.
Uninterrupted power supply to boilers - how long is required?
To choose a boiler backup power supply, you must first ask yourself the question for how long you need to reserve electricity. The most common situations in which uninterrupted power supply to boilers is required are the following:
- Constant short-term power outages associated with exceeding consumption limits or worn-out networks. Duration – 0.5 – 2 hours.
- Short-term power outages while work is being carried out to connect new subscribers, while fuse links are being replaced at transformer substations, and during the elimination of minor accidents. Duration – 3-6 hours.
- Short-term power outages in the event of an emergency shutdown of the system due to short circuits, in case of malfunctions in the transformer substation. If the team leaves regularly and quickly, the city is nearby. Duration – 12-24 hours.
- Possible emergency situations associated with difficult weather conditions or the inability of emergency teams to quickly respond. Duration – 1-3 days.
To understand which power source for the boiler will be optimal, you should estimate the best option for each of these situations, and then choose for yourself how to implement it.
Boiler connection
There are several options for connecting a boiler to a gas boiler.
The valve is placed on the battery. And a pipe is run from it to the container, where it enters the pipe. The refrigerant pipe leaving is directed to the battery with a “return”.
We also recommend connecting the outlet pipe to the pipe.
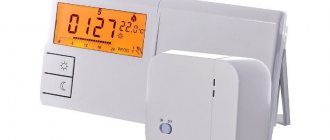
When connecting wall-mounted gas boilers, the valve is controlled by the boiler itself. And in floor-standing models, you can connect a thermostat to the valve for direct control.
Priority is given to water supply. Two pumps are used. The thermostat is placed on the tank, it also signals a drop in degrees, the pump turns off and the tank pump starts. Don't forget to install the valves.
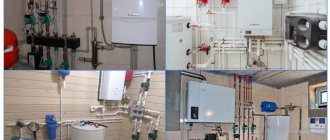
The diagram is relevant when there is a multi-circuit (radiator, heated floor, hot water boiler). Thanks to the arrow and manifolds, the agent is divided equally between all circuits.
