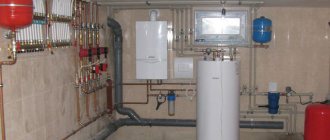
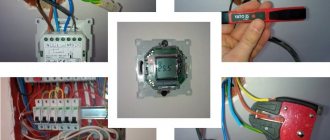
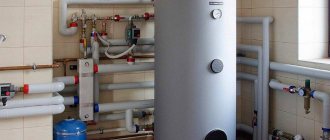
Manual and automatic adjustment of room temperature from modern heating sources is carried out using thermostats or thermostats.
They are mechanical and electronic. Each of them has its own pros and cons.
Among electronic models, three types are most widespread:
- thermostat for water heating
- for electric underfloor heating
- for gas boilers or boilers
In appearance, they are all very similar to each other, but their circuitry is different.
Let's take a closer look at the features of connecting a thermostat to a gas boiler, its diagram, errors and possible problems when operating such devices.
Benefits of using a thermostat
To choose the right thermostat model, turn it over and carefully examine the back side. Namely, the diagram, inscriptions and contact blocks.
If it says “Dry Contact”, you have made the right choice. This is the designation for thermostats designed to work with gas boilers.
The term “dry contact” means that in any condition there is no voltage at these terminals. That is, the supply of 220V power to the L and N blocks of the thermostat will not be connected in any way to the dry contacts, and the voltage will never get there.
Unlike underfloor heating thermostats, as in the diagram below. Their power supply contacts (3-4) and load contacts (1-2) are connected directly to each other.
Why do you need this thing for a gas boiler? Without such a programmer, the boiler, after reaching the set temperature, will operate with a delay of approximately 3 minutes.
It turned on, worked, reached the temperature and went out. After three minutes it turns on again and everything repeats in a new cycle. The device will start up about 200-240 times per day.
Thus, over the entire heating season, the gas boiler will turn on and off 40,000 times. By connecting a thermostat, you reduce these commutations several times, thereby achieving not only gas savings, but also reducing wear and tear on heating equipment.
Review of manufacturers
Oventrop (Germany) is considered the leader. They have a large selection of wall and desktop units with LCD displays and more options. There are reliable models with mechanical control.
Universal room thermostats with wide programming capabilities are produced by the German factory Watts. They allow you to set night and day modes, as well as control all thermostats in the house from one point. Timers offer several options for factory and custom settings.
Mechanical contact thermostats are produced by the Italian brand Emmeti.
What temperature should I set?
The logic of work here is as follows. In factory settings, the boiler heats water according to the coolant temperature.
By installing an external thermostat, we thereby give it a command to heat the water not as the boiler wants, but according to the settings of the thermostat, i.e. to a certain temperature in a particular room.
With normal insulation of the house and minimal heat loss, a gas boiler with a thermostat will operate for only 3-4 hours per day.
If the thermostat after installation did not affect the operating time of the boiler in any way, then most likely the temperature on the gas appliance is set lower than necessary. The regulator sensor simply does not have time to warm up to the desired value and operate, while the temperature of the coolant has already reached the specified threshold.
The instructions separately specify the minimum temperature on the boiler when using an external thermostat. As a rule, it should be at least 65 degrees.
Initially, it is recommended to set the design temperature on the heating device, which completely covers the heat loss of the building. When these heat losses are not known, values from 60 to 70C are taken for a standard heating system.
If you live in a relatively warm climate, and in winter you do not raise the temperature in the batteries above 45C, you will still have to increase it to work with the thermostat.
Some people wonder, what is the point of installing a regulator and how does this lead to savings?
There is nothing to worry about because the temperature will be higher:
- firstly, the boiler cycles less, warms up the system faster
- secondly, at a higher coolant temperature, the heat in the rooms lasts longer
- and the maximum efficiency of batteries is observed precisely at t 65C-70C, and not at +45C
Rules for installing a heat regulator
The operating principle of the temperature controller is not the only thing that the future owner needs to know if he is used to relying only on himself in everything and prefers to install the equipment himself. The device must be installed at the point of water supply to the radiator. Cast iron models are not suitable for installing appliances. These are not all the restrictions, so for the device to operate effectively, you need to familiarize yourself with a few more rules before installation.
- Vertical installation of the device is prohibited, because in this case its operation will be constantly affected by rising warm air currents. The minimum distance from the floor to the device must be 800 mm.
- The temperature regulator is not hidden in a niche or covered with screens or curtains, as any obstacles will lead to incorrect readings. A possible solution is to purchase a thermostat with an external, remote sensor. This element is attached to the wall.
- The sequence of installation of several devices in a home is different. In private houses, installation always starts from the upper floors. In apartments - from those rooms where temperature fluctuations are most noticeable: these are rooms “facing” south, kitchens, living rooms.
- A ball valve in front of the thermostat is the best option. Yes, the thermostat can act as a shut-off element, but there is no need to subject the device to unnecessary loads. A serious mistake is installing a ball valve between the thermostat and the radiator.
There is one more feature: this is the difference in the installation of the device on one- and two-pipe systems. In the first case, it is necessary to install a bypass - a section connecting the inlet and outlet pipes. The purpose of the element is to ensure the movement of coolant even when the thermostat valve is closed
There is one important condition: the diameter of the bypass must be smaller than that of the supply pipe. For example: 16 versus 20 at the riser
The thermostat is always mounted on the supply pipe, the valve is placed on the return pipe. There are no other differences in installation on different systems. The device installation process is standard. The device has a thread for which fittings are selected, or threads are cut directly onto the pipe.
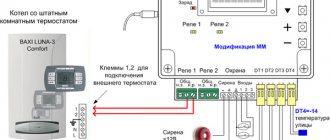
Where and where to connect the wires on a gas boiler?
To connect the thermostat from the boiler terminal block to the Dry Contact contacts, you need to connect two conductors.
According to the instructions, the recommended cross-section of copper conductors is at least 0.75 mm2.
The cable length to the thermostat installation site should not exceed 50 meters.
Look for the necessary terminals on the boiler itself in the manufacturer's instructions, or refer to the inscriptions on the terminals.
These terminals are most often located on the back of the control board.
However, sometimes manufacturers take them outside the board.
During installation, some installers also connect the cable here and take it out, so that the consumer does not later go to the board and mess up something. Since the thermostat has not yet been installed, the ends of the cable are short-circuited.
By the way, be careful with this remote pad. Some consumers have encountered the problem of factory wires being mixed up, such as with Protherm.
As a result, everything started to work as it should, only when connected back.
Initially, there is a jumper between the terminals. If the jumper is broken, the gas boiler will simply stop working.
When connecting the thermostat, the factory jumper is removed and a cable laid to the installation site of the thermostat is installed in its place. The most important thing is that you don’t need to change any internal settings on the boiler.
A low voltage control pulse (usually 24V) is supplied through these contacts.
We have a control device (thermostat) and a slave (boiler). Between them, a set of requests and responses is constantly transmitted over a low-current line.
The principle of operation here is simple - by closing the dry contact, we thereby allow the operation of the boiler, by opening it, we interrupt the data transfer and prohibit it. Closing and opening occurs through the thermostat relay, depending on the set temperature on the device and comparison of the current readings in the room.
When triggered, the burner is first switched off, then after a certain period (pump run-on time) the circulation pump is switched off. Although the pump operation algorithm may differ in different models.
One of the algorithm options
It is not advisable for the pump to turn off immediately after the thermostat is activated. In this case, set the run-on time from 5 to 10 minutes in the menu. Then the entire heating system will cool evenly and the time intervals for automatic operation will increase.
On expensive models that support the OpenTherm protocol, through a remote programmer you can control many built-in parameters of the boiler, and not just turn it on and off.
Here are clear examples of where to connect the thermostat for different boiler models:
BaxiBoschElectroluxVaillantJunkersBuderusViessmanFerroliAtronAlfa CalorImmergas
What happens if the thermostat fails? How will the boiler behave in this case?
It all depends on the position in which the dry contact remains. If it is closed, nothing bad will happen. The boiler will simply start operating according to its last set program.
If it is open, the heating will not start and will not work.
Please note that the thermostat does not affect the operation of the burner in hot water supply mode.
A voltage of 220V is supplied to the power contacts of the thermostat - phase and zero (L and N). This can be done either from a separate outlet or junction box, or taken directly from the boiler itself.
On a regulator with dry contacts, it makes no difference where the phase or zero is connected, but on models for electric underfloor heating this plays a significant role in the issue of operational safety.
Since if the connection is incorrect, only the neutral conductor will break, and the phase will be constantly on duty on the heating cable.
Device selection
The choice of device must be approached intelligently.
Often people buy a device with a considerable number of options that they then never use. What to consider? Let's look at this in more detail. A remote thermostat can be wired or wireless.
The presence of a wire eliminates the need for batteries, but such a connection will bring a lot of other problems when the device needs to be installed in an adjacent room. Laying a wire along the wall or drilling a through hole for it is not the best solution for a room after renovation (or if there are no plans to carry out renovations there in the near future). The wireless sensor not only does not require connection, but can also be moved to any other room
Even before purchasing, it is important to know the range of the device and how it works through walls. For example, some cheap sensors work reliably only in the line of sight, but if the situation changes or if they are far away, they may lose the ability to transmit a signal to a module installed near the boiler. Purchasing a device from the same company that manufactured the boiler will help you avoid some connection problems.
Boiler and thermostat from the same company
As already mentioned, it would be good if the device was purchased for an installed boiler from the same manufacturer. The most successful combination was achieved by the famous brands Baxi (baxi), Protherm (Proterm) and Vaillant (Vailant). In the illustrations below you can see the variety of these devices.
Vaillant
Adjustment method
Controls can be:
- in the form of buttons, and all data is displayed on an electronic display;
- Mechanical control implies the presence of a regulator with indicators printed on it.
Thermostats can be simple or multifunctional.
- A simple device can only maintain the temperature in the room preset in its settings.
- The programmable thermostat has a rich set of functions. It can be configured by changing the boiler parameters remotely, setting the desired temperature conditions at different times of the day. You can also set settings for each day of the week.
- A thermostat with a built-in hydrostat function will allow you to control, maintain and change the microclimate of the room by changing the humidity level.
Mechanical or electronic thermostat
By the way, for a gas boiler you can use another simple type of regulator, which does not even have to be supplied with 220V voltage. For example, a mechanical thermostat Termec Emmeti or other similar models.
Here is a "normal" Termec wiring diagram.
You need to use only normally closed contacts 1 and 3, completely eliminating 220V alternating voltage (L and N).
The built-in sensor will close and open the internal contact when the temperature in the room changes. He doesn't need any nutrition. In this case, the entire logic of heating operation is similar to that discussed earlier.
Just don’t forget that almost all mechanical models have a very large hysteresis. You cannot create a comfortable room temperature with their help.
Therefore, whenever possible, choose electronic devices with a WiFi connection. Fortunately, nowadays you can find very decent and inexpensive options from the Chinese.
For example, such as this one (thousands of satisfied customers and positive reviews). More details
Some models have contacts labeled NO (normally open), NC (normally closed) and COM (common). Someone advises connecting through them, namely through NC and COM.
However, be careful, there are different thermostats and always read the instructions. An alternating voltage of 220V can also be supplied through them, and you will thereby start a phase on the control board where it is not needed.
Here is a striking example of such multifunctional regulators Fluoreon and Beok.
On multifunctional devices, the temperature in the room is also determined using the built-in temperature sensor.
However, they have terminals on the body for connecting and external (Sensor). It is most often used for heated floors.
Tips for DIYers
The benefits of installing a thermostat are obvious. The payback of the devices is also beyond doubt. Nevertheless, the desire to save money on installing such a useful device still remains strong. This often encourages home DIYers to do everything themselves. And not only to install the device yourself, but also to assemble it from scrap materials.
Theoretically, it is possible to make a thermostat with your own hands. To do this, you will need a thermistor that reduces resistance when heated. Then another resistor is connected to the network, with the help of which the temperature will be programmed. The 2I-NOT element will operate in inverter mode, and voltage will be supplied to it. A capacitor is connected to it and to the trigger. To control the relay, the galvanic isolation on the triac is enhanced. The device can be made either on a mole rat or on a printed circuit board.
Using such a simple circuit, you can assemble a thermostat for almost any boiler. But is it worth interfering with the operation of high-tech equipment? It is up to the home owner to decide. Experts do not advise experimenting with homemade devices, especially since you can find accessories for any boiler on the market.
Installation location
As you know, the air temperature in a room with traditional radiator heating systems warms up unevenly. It is lower near the floor, higher under the ceiling.
Based on the presence of a built-in temperature sensor in thermostats, their installation height is regulated.
Such thermostats should be placed at a height of 1.2-1.5 m from the floor level and as far as possible from heating sources, including protection from direct sunlight.
It is also not recommended to place thermostats in the hallway or kitchen.
OWEN.
TPM500-WiFi is not a room controller at all.
But this is an industrial thermostat with a powerful relay, a large indicator and direct access to OwenCloud.
It costs only 3600r.
But the functionality is extensive, as it should be for an industrial device.
OwenDeviceControl application.
The cloud service has a WEB interface with DEMO input.
There is another option for using OWEN industrial automation devices as a thermostat with Wi-Fi.
This is a combination of TRM200 and PV210, costing 3900 + 3900 = 7800 rubles.
TPM200 is a two-channel meter with a universal input, RS-485 and a household wall-mount design.
PV210 is a network gateway for accessing the OwenCloud RS-485 Wi-Fi service.
But this is automation at a completely different level.
Connecting a heated floor thermostat to a gas boiler
Consumers often wonder whether it is possible to use a standard 220V thermostat for underfloor heating to work with a gas boiler?
What if you haven’t found a special thermostat with dry contacts, but you already have a model for heated floors in stock. Such a connection is possible.
However, for this you will need to “untie” the 220V voltage. In most underfloor heating thermostats, it comes to the power terminals and is then removed from the terminals going to the heating cable. And as mentioned above, when working with a gas boiler, “dry contacts” are used, through which low voltage pulses are transmitted.
If you directly connect the cable from the boiler control board here, you will cause a short circuit and damage your boiler.
For a safe connection, you will have to add an intermediate relay or an additional contactor with normally open contacts to the circuit.
From the thermostat terminals, instead of the underfloor heating cable, you supply 220V voltage to the relay coil (contactor), and through its normally open contacts (1-2 or 3-4), connect the wires to the gas boiler.
The principle of operation here is the same as discussed earlier. However, keep in mind the following feature.
Since this is a thermostat for heated floors, most likely it will work according to the scheme: air sensor + floor sensor. This means that it will require you to install and set a temperature limit using a floor sensor, which you will not have.
Therefore, in the settings you will have to unplug the floor sensor and leave only the air sensor in operation. How to do this, read in detail in the instructions for your model. There may be differences between different devices.
For example, with the Devi Touch, for this you have to break a special jumper on the back side.
In order to avoid all these difficulties and problems, it is better to initially choose the right thermostat model.
Advantages and disadvantages
The advantages of Baxi Slim boilers include:
- High reliability, resistance to external and technological loads.
- Ability to heat large areas.
- The use of cast iron parts (heat exchanger) allows you to increase the service life of boilers by approximately 5 years.
- High efficiency of equipment, the efficiency of which is above 90%.
- Wide range of boiler capabilities allowing installation in heating circuits of various types.
- The ability to simultaneously heat rooms and supply hot water.
- Self-diagnosis, availability of control over the operation of all important structural elements.
- The installations are adapted to Russian technological conditions.
The disadvantages of boilers are considered to be:
- Energy dependence of units. Stopping the power supply means stopping the heating circuit of the house.
- Demanding installations regarding power supply stability.
- The weight of the boilers is large, which complicates transportation.
- The cost of equipment and spare parts is very high and is a significant factor limiting demand.
The advantages and disadvantages of Baksi floor-standing boilers differ little from the qualities of other samples, since they are directly related to the design features of these installations.
Variety of accessories
There are a lot of accessories and additional equipment for Baxi boilers on the market. We list the main ones:
Clear display
Digital timer. The device allows you to program the operation of utility networks for a certain period. When using it, the boiler will turn on/off at the time specified by the consumer. You can use this device not only for programming heating, but also for boilers. Room thermostat, or thermostat. This device maintains the set temperature and allows you to control the microclimate. A boiler equipped with a programmer will operate in automatic mode. In this case, no intervention from the consumer in the operation of the unit is required. Outdoor temperature sensor. To maintain heat in the house, it is necessary to take into account the temperature of the outside air. The delta (difference) between room and street temperatures directly determines the power with which the boiler must operate. The outside temperature sensor allows you to maintain a constant mode no matter what the weather is outside the window. Room temperature sensor. It is recommended to install it together with the device described above. Both devices, working in pairs, guarantee the so-called self-adaptation of the boiler. Digital control panel. This is a real highlight. You can install it in a convenient place. With its help, not only control, but also diagnostics of the system occurs. This device can be used in conjunction with the programmer or separately from it.
These are not all the accessories that can be connected to Baxi indoor gas boilers. You should take a closer look at the most common device - a thermostat, or thermostat.
