Heavy cast iron and steel engineering systems have been replaced by lighter communications made of polypropylene. Polymers are used for water supply and heating installations in cottages, mansions and even in the country. Connection technology allows you to create reliable networks.
Therefore, it will be useful for developers and future owners of real estate to become familiar with the types and diagrams of systems. This will allow you to control the work of master plumbers or independently create an effective and durable thermal circuit at the site.
Advantages of polypropylene pipes
You can save money when heating your home by installing a heating system made of polypropylene pipes. After all, polymer products and their installation cost less compared to metal parts.
Construction concept
This makes it possible to lay inexpensive, durable utility lines, since PP pipes under standard conditions will last 50 years. They are also different:
- Light weight, which simplifies the installation process and reduces the load on the supporting structures of the building.
- Good ductility, preventing rupture when water freezes inside the pipe parts.
- Low likelihood of blockages due to smooth walls.
- Resistant to high temperatures.
- Easy installation using special soldering equipment.
- Excellent soundproofing properties. Therefore, noise from moving water and water hammer is not heard.
- Neat design.
- Low thermal conductivity, allowing not to use insulation material.
Unlike cross-linked polyethylene pipes, polypropylene pipes cannot be bent due to increased elasticity. Bending of communication is carried out using fittings.
Polypropylene also has high linear expansion. This property makes it difficult to install in building structures. After all, the expansion of pipes can cause deformation of the main and finishing material of the walls. To reduce this property during open installation, compensators are used.
Types of heating plastic
Most often in heating systems the following types of pipes are presented by type of material:
- PVC: unplasticized polyvinyl chloride;
- PVC-C: chlorinated polyvinyl chloride;
- PVC – ordinary polyvinyl chloride;
- ABS plastic: acrylonitrile butadiene styrene;
- PP, PP-H: polypropylene;
- PE polyethylene: low density - LDPE, medium density - MDPE, high density - HDPE;
- cross-linked polyethylene - PEX;
- PVDF polyvinylidene fluoride;
- PB polybutylene.
It is necessary to take into account that the pipes that are installed in the heating systems of small private cottages and the pipes for multi-apartment high-rise complexes are installed differently. This is mainly due to cost and technical requirements for coolant pressure.
Installation products combine several different materials to improve the quality or specific properties of the final material. Examples include multilayer pipes, plastic fittings with an integral brass threaded element, or anti-diffusion layers on polyethylene pipes.
Classification of polypropylene hoses
Depending on the conditions of use, in accordance with GOST (ISO 10508), polypropylene pipes for heating a private house or other facility have 5 classes. The third group of long elements is practically not used in the construction of thermal circuits of buildings.
Fragment of heating made of PP pipes
Polymer hoses are classified depending on the operating temperature and coolant pressure:
- Class 1 - used when installing water supply networks with water heated to 60 °C and a pressure of 0.4 MPa;
- Class 2 - used for the installation of water supply systems that can withstand 0.6 MPa and are capable of moving coolant up to 70 °C;
- Class 4 - used when installing low-temperature radiators and underfloor heating up to 70 °C and 0.8 MPa;
- Class 5 - used during the installation of high-temperature radiators with heat resistance up to 90 °C and 1.0 MPa.
Rarely used, class 3 is produced by manufacturers for the installation of low-temperature radiators and underfloor heating systems up to 50 °C.
The maximum temperature for the first and second groups can be 95 °C, for the third category - 65 °C, and for types 4 and 5 - 100 °C. With these values, communications are allowed to operate for a maximum of 100 hours over the entire period of operation.
Characteristics
Technical characteristics determine the scope of application of the products. The manufacturer indicates them on the packaging of the pipes or on the plastic surfaces themselves. Options:
- the material from which the parts are made;
- diameter of plastic pipes;
- maximum coolant temperature;
- the maximum pressure that the pipe can withstand;
- sizes of plastic pipes for heating.
To indicate characteristics, a labeling system for products made from different types of plastic was developed.
Pipes for hot coolant
Heating system made of polypropylene pipes
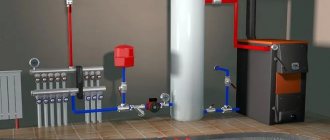
The technical characteristics of the object and the amount of allocated funds affect the heating installation scheme. In apartments in multi-storey buildings it is connected to the Central Heating Network, and in private houses - with an individual boiler. Regardless of the type of object, the system can have one of three designs.
Single-pipe
The system is characterized by simple installation and quantity of materials. It uses one pipe for supply and return, which reduces the number of fittings and fasteners.
It represents one closed circuit with alternating vertical or horizontal placement of radiators. The second type is used specifically in private homes.
As the coolant passes through each radiator, its temperature decreases. Therefore, a single-pipe circuit is not able to heat the entire object evenly. There is also the difficulty of temperature control, since the heat loss factor is not taken into account.
If the radiators are not connected through valves, then when one battery is repaired, the heat supply is stopped throughout the entire facility. When installing such a network in a private house, an expansion tank is connected. It allows you to compensate for changes in pressure in the system.
A single-pipe circuit allows the installation of radiators with temperature controllers and thermostatic valves that allow for the correction of heat loss. Ball valves, valves and bypasses are also installed for repairing individual sections of the thermal circuit.
Two-pipe
The system consists of two circuits. One of them is for serving, and the second is for returning. Therefore, a larger number of pipes, shut-off valves, fittings, and consumables are installed. This increases installation time and budget.
The advantages of a 2-pipe network include:
- Uniform heat distribution throughout the entire facility.
- Minimal pressure loss.
- Possibility of installing a low power pump. Therefore, coolant circulation can occur by gravity.
- Repairing an individual radiator is possible without shutting down the entire system.
A 2-pipe system uses a passing or dead-end coolant flow pattern. In the first case, it is allowed to install batteries with the same heat output or radiators with different power, but with thermostatic valves.
The associated circuit is used if the thermal circuit is long. The dead-end option is used for short highways. When installing a 2-pipe network, it is necessary to install radiators with Mayevsky taps. Elements allow air to be released.
Collector
This system uses a comb. It is a collector and is installed on the supply and return. This is a two-pipe heating circuit. A separate pipe is installed both to supply coolant to each radiator and to return cooled water.
The system may consist of many circuits, the number of which depends on the number of batteries.
When installing a collector heat circuit, an expansion tank is installed. It holds at least 10% of the total volume of coolant used.
During installation, a manifold cabinet is also used. They try to place it at an equal distance from all batteries.
Each circuit in the manifold system is a separate hydraulic system. It has its own shut-off valves. This allows you to turn off any of the circuits without stopping the entire system.
Collector
Advantages of the collector network:
- It is possible to regulate the heating temperature of any heating device without damaging the remaining batteries.
- High efficiency of the system due to the direct supply of coolant to each radiator.
- It is possible to use pipes with a smaller cross-section and a less powerful boiler due to the high efficiency of the system. Therefore, the costs of purchasing equipment, materials and operating the network are reduced.
- Simple design process, without complex calculations.
- Possibility of installing heated floors. This allows you to create a more aesthetically pleasing interior, since there is no need to install traditional batteries.
To install a collector system, a large number of pipes, fittings and shut-off valves will be required. You will also need to purchase combs, a circulation pump, an expansion tank and a cabinet for manifolds.
A large number of elements increases the complexity of the installation process. The installation of batteries is carried out together with Mayevsky taps to prevent airing of each circuit.
Video description
In our video we’ll talk about heating in a private country house.
Our guest is the author and presenter of the Teplo-Voda channel Vladimir Sukhorukov: Safety is an absolute advantage of a water heating system. But besides the positive aspects, it has disadvantages:
- The difficulty of heating large rooms due to significant heat loss during the circulation of coolant through the pipes;
- Additional costs for hiding an extensive network of pipes and heating devices under the cladding to preserve the aesthetics of the appearance of the rooms;
- Large battery dimensions;
- Possible problems may arise after draining the coolant from the pipes, in the form of air plugs.
What a thermal imager shows if there is air in the sections Source zerocreation.ru
Diagrams by type of coolant supply
The radiator will work effectively if the coolant is evenly distributed across all sections.
Warm and cold water have different densities. The heated coolant always tends upward. In the system it is replaced by cold, denser water. This feature is taken into account when supplying coolant to the batteries.
Coolant supply diagram
Upper eyeliner
Each radiator has vertical channels connecting the horizontal upper and lower manifold. The presence of these elements allows the coolant to circulate in the device.
With the top connection, mainly only the top of the battery heats up. To prevent such an effect, a jumper is installed after the first rib in the direction of flow of the coolant. Therefore, the heated water first falls into the lower collector.
Then it passes through all sections of the radiator and enters the return pipeline. As a result, the top connection turns into a diagonal way to connect the battery.
If there is no jumper in the radiator, the supply pipe is connected at the top, and the return pipe at the bottom from the opposite end of the battery. This option is called diagonal strapping.
Bottom eyeliner
This is the easiest way to tie. The scheme involves installing the boiler in the basement or on the ground floor. From the heat generating unit, the main pipeline is led to the attic, where the expansion tank is installed. A starting line is laid from the tank, but not lower than 1.5 m to the first radiator.
The supply and return are connected to the batteries at the lowest points on opposite sides. All radiators in the system are connected to pipelines in the same way and installed in series.
When installing a heating circuit with natural circulation, the pipes are laid at an angle. The last battery must be located above the boiler. The height difference between the final radiator and the heat generating unit should not exceed 3 m.
Connection in progress:
- circulation pump;
- bypasses;
- shut-off valves;
- Mayevsky cranes.
Pumping equipment runs on electricity. When it is turned off, circulation of the coolant is possible only in a natural way. Therefore, it is better to lay pipelines at a slope.
Selection of PP heating pipes
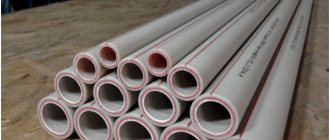
Heating systems are created from polypropylene pipes with reinforcement and a layer of anti-diffusion material that blocks the access of oxygen. Therefore, you need to pay attention to the labeling.
PP pipes
If it is necessary to connect a polymer heating circuit to a solid fuel boiler. First, a section at the supply and return with a length of at least 1.5 m made of steel or copper is installed.
How to choose the diameter
Accurate selection of sections and lengths of individual sections of the pipeline system is carried out using hydraulic calculations. If the area of the house does not exceed 250 m², the computational process need not be carried out.
The diameter is selected based on the required total battery power. In this case, the cross-sections of the main pipes and risers will be larger compared to the same dimensions of the inlet and outlet sections near each radiator.
Hydraulic calculation allows you to determine:
- required coolant volume;
- pressure loss in the entire pipeline system and in areas from the boiler or pumping unit to each battery.
To determine the flow rate of heated water, the heat losses of the house are divided by the product of the heat capacity of the coolant and the difference between its temperatures at the outlet and inlet of the heat-generating installation
The speed of water movement is calculated by the ratio of its flow rate in a certain area to the cross-sectional area of the pipeline.
Pressure loss is calculated by multiplying the length of a pipe with the same diameter and the specific friction loss. The last value is taken from reference literature or obtained from the manufacturer.
Resistance losses are calculated for fittings, fittings and equipment. The required value is determined by the product of the density of the coolant, its speed squared, which is divided by two, and a special coefficient indicated by the manufacturing company.
All obtained resistance values are summed up. The result is compared with control values. Error-free hydraulic calculations can be performed by qualified specialists.
Connecting the collectors
When piping the boiler and connecting it to the collectors, you should install taps on the boiler itself with “American” connections (detachable connections) - this will help you easily remove the boiler in an emergency.
At the inlet to the boiler (return) it is necessary to install a dirt filter and after it also install a tap. This condition is required.
Pay attention to the installation of dirt filters in the photo. They must be installed thus. so that dirt accumulates in them and can be unscrewed and cleaned. In this case, dirt will accumulate at the bottom in the corners of the pipe joints under the influence of gravity.
During the process of installing heating for a wooden house made of rounded logs, after starting the heating, I had to wash the dirt filter mesh five times. So much fine wood dust got inside the pipes during operation.
Pressure gauges, thermometers, automatic make-up are not necessary.
To piping the boiler, it is necessary to observe the internal cross-section of the pipes at the outlet of the boiler and try not to narrow them. Typically this is a ¾” metric thread at the outlets of wall-mounted gas/electric boilers. Accordingly, the PP pipe will be 32 mm or 25 mm cross-linked polyethylene.
Installation of heating from polypropylene pipes
Creating heating from polypropylene pipes with your own hands begins with installing a boiler. Only professionals can perform error-free installation.
Boiler room, fragment of heating system with pp pipes
They will issue a document confirming proper installation. It will not allow you to lose the warranty of the equipment manufacturer.
Strapping sequence
First, preparatory work is carried out. The installation locations of radiators are determined. This allows you to perform a hydraulic calculation if necessary. Then the process is carried out in the following order:
- A riser from the boiler, an expansion tank and a starting line are installed.
- Heating devices are installed in each room.
- The installation points for fittings and shut-off valves are outlined.
- The circulation pump is being connected.
- PP pipes are installed. When laying in building structures, insulating material is used.
- Radiators are connected to the created thermal circuit of the house.
Finally, system checks are performed. The pipeline network is filled under pressure with water or air to check the tightness of the joints. After successfully completed tests, the heating system is fully launched.
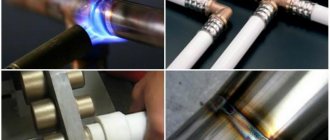
Solder connection
To join polypropylene elements, socket soldering is used if the PP pipes have different diameters. Straight parts are inserted into each other. A special soldering iron is used to heat the elements. The same equipment is used when joining using fittings.
Elements with a large identical diameter are connected by end soldering without the use of couplings. Another type of equipment is used to heat the parts. Its kit often includes a trimmer.
Soldering equipment
The tool, in the form of a soldering iron, is equipped with nozzles of different diameters. Its cost is approximately from 20 to 100 dollars.
Soldering is carried out as follows:
- Straight sections are cut to the required length using a pipe cutter.
- If necessary, the ends are cleaned to remove burrs and debris.
- Nozzles of the required diameter are attached to the soldering iron.
- The two elements being connected heat up.
- One part is inserted into another until it stops without turning around its axis.
The created joint is held motionless for several seconds until the polypropylene cools. The result is a tight and durable connection.
Gasket in walls
Due to the expansion of polypropylene when heated, the laying of PP pipes in house structures is carried out with heat-insulating material. This is glass wool, mineral wool or other heat insulator.
With hidden installation, a minimum of joints are made. It is better to install hatches at the junction points.
The grooves in the walls are created using a grinder and a hammer drill. After laying the pipelines, the tightness of all joints must be checked. Only upon completion of the tests are the grooves sealed with cement or gypsum mortar.
Self-installation in a private house
Installation of PP pipes with your own hands is carried out in compliance with the technology. The work is carried out sequentially.
Heating from polypropylene pipes in a private house
Project preparation
Design documentation allows you to determine the procedure for installing a heating system made of PP pipes. It is developed taking into account:
- Number and type of pipes and manifolds.
- Number of filter elements, pumps, radiators, shut-off valves and other devices.
- Volume of the expansion tank and water heating equipment.
- Arrangement of thermal circuit elements in compliance with standard distances.
All drawings are developed on the same scale. To accurately determine dimensions, plans of the premises and, if necessary, the surrounding area are used.
Tools and materials
The exact quantity of materials can be determined by design documentation. The main ones are pipes, fittings, batteries, valves, pumps and expansion tank. The work also uses fasteners, primer and solutions for sealing grooves.
The following is used as a construction tool:
- hammer drill or electric impact drill;
- Bulgarian;
- bubble or laser level;
- roulette;
- hammer;
- screwdriver or screwdriver.
The type of construction tool depends on the material of the house. The installation equipment used is influenced by the way the individual parts of the heating circuit are installed.
Soldering tool set
For soldering, use a special household soldering iron with attachments. Adjustable wrenches will be needed to install radiators, threaded fittings and other elements of the heating circuit.
Installation procedure
The location of the pipeline and its individual components is displayed in the project. Installation is carried out in the following order:
- marking;
- installation of fasteners;
- soldering of individual sections and the entire thermal circuit;
- installation of shut-off valves;
- connecting radiators to the system.
When installing PP pipelines, plastic clips of a certain size are used for the outer diameter of the elements. They are attached to the house structures using dowel-nails or self-tapping screws.