We welcome our regular reader and offer him a new article on heating devices.
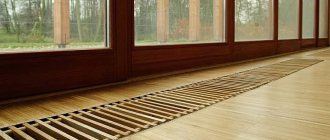
Since the appearance of the first fire in a cave, people have been constantly looking for the most convenient, safe and economical methods of heating. We want the house to be warm, but the pipes and radiators are not visible. Engineers came up with the idea of hiding the heating pipes in the floor under the screed - this allows you to get a very comfortable, efficient and almost ideal heating system.
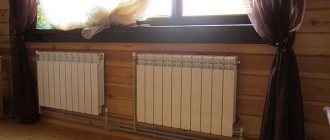
Fireplaces and stoves are not suitable for apartments and large houses, local heating is also not very comfortable; The traditional heating system using radiators or registers has some disadvantages:
- Warm air rises, and it becomes cool below the floor.
- Radiators and communications take up space and collect dust.
- Constant air convection increases the amount of suspended dust in the air.
- Wiring and radiators do not decorate our houses and apartments at all;
- Radiators covered with decorative screens and curtains provide worse heat.
When heating using underfloor heating, all these problems are solved; in addition, such heating is approximately 15-20% more economical compared to radiator or convection heating.
Therefore, the idea of creating a warm floor in housing is becoming increasingly widespread in both private houses and apartments.
Heating of the screed can be done using wires and electricity or using pipes and hot water. Heating with electricity is more expensive - gas or other types of fuel are cheaper. The cost of more expensive installation of a pipeline system pays off after several years of operation. If you weigh all the pros and cons of the “warm floor” system, the pros definitely outweigh.
Principle of operation
The principle of operation of a water heated floor system: a system of pipelines through which the coolant is supplied is laid in the screed. Warm pipelines heat the screed, the screed transfers heat to the floor covering, and the covering transfers heat to the room. The floor under the furniture is not heated.
Such a heating system creates a favorable temperature distribution over height and helps save the amount of heat consumed (and finances) compared to a radiator system. With a conventional heating scheme, warm air from the radiators rises to the ceiling, heats it, and only then heats the room - with the convection method, the energy loss for heating the ceiling, walls and windows (batteries are installed under them) is quite large.
It is especially effective to use lower heating in a house if there is second light or high ceilings - in this case, savings increase, according to some data, even up to 50%.
Determination of heat transfer
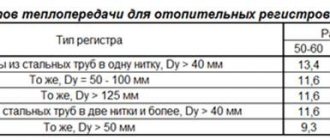
Thermal emission (heat transfer) of a “warm floor” depends on the temperature of the water and the pitch of the pipe, as well as the temperature difference between its surface and the air in the room. Its value can be determined by calculation or using ready-made tables.
It must be said that manufacturers of underfloor heating systems recommend different temperature differences between forward and return water, for example, 5 or 10 °C. The smaller this value (with the same pipe laying pitch), the higher the heat transfer of the floor (the average temperature of the coolant is higher), and the temperature gradient is smaller (the floor is heated more evenly). At the same time, with a smaller temperature difference, a higher coolant flow rate is required, and, accordingly, it is necessary to use pipes of larger diameter, which leads to an increase in the cost of the system. Perhaps a temperature difference of 8 °C is a kind of “golden mean”.
Why do pipes in the floor need to be insulated?
Pipes in the floor must first of all be isolated from dynamic mechanical influences when people move and static loads from furniture standing on top. Although heating wiring is not installed under the furniture, there will still be chairs, dining tables, tables, ottomans, flowers and other easily movable pieces of furniture on top. Communications in the screed must be thermally insulated from below so that heat is not wasted on useless heating of the floor structures.
It is necessary to distinguish between the laying of a low-temperature underfloor heating pipeline in the floor and the laying of heating pipelines. Heating has a temperature of 70-80-90°C, communications with this temperature strongly heat the floor and screed, causing a temperature difference - this can cause cracking of the screed and concrete structures. Therefore, heating with high temperatures should be insulated.
Wiring types
According to clause 6.3.3 of SP 60.13330, pipelines made of polymer materials are allowed in apartment heating systems when the coolant parameters should not exceed: temperature - +90 0C, pressure - 1.0 MPa.
Important! The method of laying pipelines should ensure easy replacement during repairs.
According to the paragraph, it is recommended to install heating under the floor made of polymers hidden in a corrugated pipe. Open installation is allowed behind baseboards and screens where mechanical damage and direct exposure to ultraviolet radiation are excluded.
It is recommended to use the following types of wiring:
- double-tube beam;
- two-pipe perimeter;
- mixed.
Radial
Two-pipe radial wiring involves connecting a separately located device to the apartment's distribution cabinet. Filling of the floor is carried out only after installing the corrugation, installing fastenings to the floor, installing a compensation loop, and testing it to the permissible pressure.
According to building codes, heating under the floor in an apartment is laid without joints. Products of the PE-X line are produced by enterprises in coils; it is recommended to calculate the required footage in advance.
system for distributing pipes along the floor from the comb
The best option is radial wiring, in which each device is connected to the distribution manifold individually. There are no intermediate connections on the path from the collector to the device, which ensures high reliability. In addition, changing the flow rate through one of the devices has virtually no effect on the operation of the others.
Perimeter, mixed
When radial wiring in the middle of the floor is undesirable for any reason, two-pipe perimeter wiring is used. It is laid along the baseboards under the floor or openly, but surrounded by screens.
When installing the plinth, take into account the location of the perimeter wiring so as not to damage the heat pipe. When several individual radiators are located along the wall farthest from the distribution cabinet, radial wiring is used to the nearest device, then perimeter wiring between the remaining devices.
Laying a heating pipe under the floor in an apartment is invisible, does not affect the appearance of the room, and does not require opening when repairing or replacing the pipeline.
Advantages of closed installation
There are many advantages to a closed floor heating system:
- The main advantage is that a correctly installed and well-functioning system creates ideally comfortable conditions in the room: the air above the floor is very warm, the air near the head is warm, and cooler near the ceiling. Parents of small children will especially appreciate this method of heating their homes.
- The second advantage is efficiency - the coolant temperature is lower, heat is consumed more efficiently, the living area of the room is heated - windows, walls, ceilings, air under the ceiling, and the floor under the furniture do not heat up. With a ceiling height of 2.5 m, the savings are about 15-20%, with higher ceilings or second light – sometimes reaching 50%. Quite expensive installation of pipelines pays for itself in several years.
- Durability - a water heated floor system will last about 30-40-50 years (depending on the material. Copper structures will last 100 years). Floor heating operates at a low temperature and low pressure - therefore, all pipelines and collectors operate in a gentle mode and wear out less.
- Easy to install. The only difficulty is in the design work.
- Easy to use.
- The screed has a high thermal inertia - the room slowly cools down when the heating is turned off.
- Saves space indoors.
- Saves the housewife's cleaning efforts.
- The warm floor is not noticeable - and radiators with wiring usually disrupt the design of the room.
- The system is quite easy to combine with an existing radiator system.
- You can only heat floors in separate rooms - children's rooms, bathrooms.
- In the presence of radiators and constant convection, there is quite a lot of suspended dust in the air; when heated from below, such strong convection does not occur, there is less dust in the air - this is especially important for allergy sufferers and asthmatics.
How to order a service?
You can find out the cost of services for laying heating pipes on the floor and immediately call a specialist at the San-Remo company. Our employees have extensive experience and the necessary equipment to solve this problem.
The surveyor travels to any address to inspect the facility, assess the scope of work and calculate the cost of wiring and the cost of materials. The specialist draws up a suitable scheme taking into account specific conditions, and also advises the customer on any issues. Each of our clients is satisfied with the end result.
We provide our clients with good discounts:
- 5% when ordering services up to RUB 15,000.
- 8% when ordering work with a total cost of 15,000 to 20,000 rubles.
- 10% when ordering services in the amount of 20,000 rubles.
- 10% for pensioners, disabled people, WWII or Labor Veterans.
- 5% when submitting an application through the online form.
To order the installation of heating pipes on the floor, call the number (main) or (senior foreman). Or fill out the online application:
By clicking the “We’ll call you back” button, I accept the terms of the Personal Data Privacy Policy and give my consent to the processing of my personal data.
Disadvantages of placing heating pipes in the floor
Disadvantages of the "warm floor" heating system:
- The most serious drawback is the difficulty of repairing communications if they are damaged. The rule of laying only a single piece of pipeline in a screed should be strictly observed.
- Flooding of housing with warm water due to a leak creates considerable problems.
- Significant cost of the entire complex of work on installing the system.
- Significant cost of the pump, manifold with mixing unit.
- It is necessary to allocate space for a manifold cabinet - one cabinet for each floor in the house;
- Design complexity - it is advisable to involve specialists.
- Such a system cannot be installed in apartment buildings in which it was not provided for in the project (and this only happens in new buildings). The large weight of the screed creates a large load on the floor slabs and creates the risk of breaking the load-bearing structures of the house. The law prohibits connecting underfloor heating systems from central heating and hot water supply systems.
- The height of the entire screed + insulation structure reaches 110-120 mm, the weight of the screed is large - this should be taken into account when designing a house (both in terms of the height of the room and the strength of the floor structures).
- The heating system limits the choice of floor covering - carpet, parquet with good thermal insulation properties make the heating ineffective. Preferably tiles, stone, porcelain stoneware, laminate. Only high-quality linoleum can be used - in cheap varieties, when heated, substances with an unpleasant odor will be released.
- Significant thermal inertia - the screed warms up slowly.
- Water heating systems cannot be cooled below zero - it will not be possible to heat a porch, terrace, garage and paths or equip a “weekend” cottage with such a system. You can use antifreeze, but it is expensive, and antifreeze is very poisonous.
Types of floor pipes
Four types of pipes are used for heating installation: cross-linked polyethylene, metal-plastic polypropylene, corrugated steel, copper (and copper in a plastic sheath). Copper is very expensive, difficult to install, and requires equipment and a welding specialist. Therefore, despite their strength and durability, they are very rarely used in underfloor heating systems.
Metal-plastic polypropylene
Polypropylene is the most popular heating material. It is resistant to corrosion, quite durable, somewhat fragile (compared to other plastics), quite plastic, chemically inert, and can withstand hydraulic shocks. The big advantage is the low price and easy installation.
Can operate at high temperatures, but has a high coefficient of thermal expansion and elongates greatly as the temperature rises. Reinforcement with aluminum foil reduces this disadvantage. A pipe, especially a reinforced one, does not bend well - it is mounted using soldering/welding. Therefore, this is a budget and reliable, but not ideal material option for installing heated floors.
Corrugated stainless steel
Corrugated stainless steel pipes are also produced. The advantages of such a pipe:
- Strength.
- Long service life.
- Corrosion resistance.
- Chemical inertness - they practically do not become overgrown with calcium and magnesium salts from the inside.
- Flexibility over a very wide range.
- High resistance to mechanical loads.
- High temperature resistance.
The disadvantage of metal corrugation is its rather high cost. This variety has not become widespread only because of low consumer awareness.
RE-X pipes
Cross-linked polyethylene has cross-links between its molecules, resulting in the formation of a three-dimensional cellular network with cross-linked molecules. Cross-linked polyethylene (PE-X) has significantly greater strength than low- and high-density polyethylenes, and greater strength compared to metal-plastic. The durability of cross-linked polyethylene is about 50 years.
PE-X is resistant to high temperatures - can withstand heating up to +95°C (for a short time - up to +110°C); has other advantages of plastics: not subject to corrosion, resistant to hydraulic shocks, plastic, not fragile, chemically inert, not overgrown with salts from the inside. Compared to polypropylene, it has a lower coefficient of thermal expansion.
The disadvantage of RE-X is its relatively high cost.
Stainless steel and copper in the heat supply system
Heating pipes made from stainless steel are characterized by reliability, high corrosion resistance to various environments and coolants, strength, resistance to mechanical damage, durability, hygiene, and most importantly, aesthetics and versatility. The most common grades of metal are 10Х17Н13М2Т and 12Х18Н10Т, the latter grade can withstand temperatures of 1000 degrees. What are the disadvantages, you ask? The disadvantage of such a product is its enormous cost, so stainless steel is most widely used in the technological workshops of industrial enterprises, and not in the apartment.
Heating systems made with copper pipes are durable, resistant to corrosion, and also have high strength.
Heating systems made using copper pipes are durable, resistant to corrosion, and also have high strength. The temperature range for using copper is up to 200-250 degrees. Copper products are universal and have an antibacterial effect. An indisputable argument is that such a circuit can withstand five times defrosting, does not allow oxygen to pass through, and is resistant to ultraviolet radiation. Copper pipes are connected using soldering and press fittings. The disadvantages include: high cost, susceptibility to mechanical action from suspended abrasive particles in the transported medium, inadmissibility of connection with steel and due to undesirable electrochemical processes.
Tips for choosing
The choice of pipes for pouring into the screed depends primarily on your financial capabilities. But it’s not worth saving on structures that are poured into a screed for decades - it can be very expensive.
The best and most durable pipes are copper and plastic-coated copper. They can last 100 years or even more. But they are the most expensive, they have complex installation - you will need a specialist.
Stainless steel corrugation is very durable - you can count on 50 years. The price is lower and installation is easier. Cross-linked polyethylene will last approximately 40-50 years. Pipes made of polypropylene metal-plastic are less durable. In addition, it will not be possible to lay them in a screed without welding using couplings and angles - the pipes bend poorly and are supplied in 6 m sections. Any connection increases the risk of leakage.
In practice, pipes made from PE-X are chosen. It has almost optimal price-quality ratio. But more and more often they use stainless steel corrugation. In any case, the choice is yours.
approximate cost
The cost of cross-linked polyethylene pipes with an oxygen layer with a diameter of 16 mm is from 70 rubles; stainless corrugations with a diameter of 15 mm - from 150 rubles; copper products with a diameter of 15 mm - from 270 rubles per linear meter. Metal-plastic polypropylene products cost from 15 rubles per meter.
Installation methods
The pipeline is laid using two methods:
- Spiral laying - “snail”. This form of installation is suitable for large rooms and ensures a more uniform distribution of heat over the entire area of the room.
- Parallel laying - “snake”, “double snake” (or “meander”). This method is more often used in small rooms. Its disadvantage is uneven heat distribution. The pipes are positioned so that the beginning of the pipeline (the warmest slab) is located at the coldest wall - the outer one with windows.
When laying the system, the laying step (distance between pipes):
- In bathrooms, bathtubs, swimming pools - 100 mm.
- In living rooms - 150 mm.
- In auxiliary rooms - up to 300 mm.
The diameter of the pipes ranges from 12 to 20 mm, in very rare cases -25 mm (in public buildings).
For filling
Most often, pipes are filled with screed. This method is used if floor heating is installed in rooms with reinforced concrete floors. Thermal insulation is laid on the ceiling, then waterproofing, then pipes, then the screed is poured and the finished floor is laid.
Under wooden covering
Most often, a warm floor is installed in a screed, but what to do if both the house and the floor are wooden? In this case, you can also install a heated floor.
The layout of the pipeline and connection to the collector completely coincides with the installation of a heated floor when poured into the screed.
Logs are installed on the wooden floor. Cuts for pipes are made in the joists. Insulation is laid between the joists, and pipes are laid on top of the insulation. Then they cover it with boards or durable plywood and lay the finished floor - usually laminate or linoleum.
Another option for installing a heated floor on a wooden floor: insulation is laid between the joists, sheet material is laid on the joists - plywood, OSB, chipboard, plates 20 mm thick are cut from the same material, the width of the plates is equal to the distance between the pipes, the plates are screwed to the sheet material, in Foil and pipe are laid in the grooves, then laminate. A layer of galvanized or aluminum can be laid on top of the pipe for better heat transfer.
Temperature regulation
In principle, an underfloor heating system has the property of self-regulation, since as the difference in air and floor temperatures decreases, the heat flow decreases, but the absence of regulators can lead to overheating of the floor surface. The following types of regulation are possible:
- The supply water temperature changes in accordance with changes in the outside air temperature, for example when using an underfloor heating system as the main one. In this case, as in the case of radiator heating, energy savings and better regulation by valves on the manifolds are achieved.
- The water flow in the circuit decreases (or stops completely) when the set room temperature is reached. The temperature of the supplied water remains constant. Adjustment is carried out using valves on the manifolds.
- The water flow in the circuits decreases as the return water temperature increases to the value set on the regulator (thermostatic valve RTL or Multibox-RTL). This system is used, as a rule, for small rooms, for example, baths, toilets, hallways, etc. Its advantage is its simplicity and low cost.
- Regulation of water flow using a sensor installed in the floor. This option is well suited for swimming pools, showers, children's rooms, etc., when priority is given to a comfortable floor temperature.
- Combined systems, which are various combinations of previous options.
In most cases, especially in the presence of high-temperature heat sources, control by air temperature and return temperature is used; the temperature of the supplied water is constant.
Formulas for calculation
Water flow in the circuits is calculated using the formula
G = 3.6 ⋅ Q/4.19/∆T, kg/h,
where Q is the heat loss of the room (or part of the heat loss when using a “warm floor” together with radiator heating), W;
∆T – temperature difference between supply and return water (usually from 5–10 °C).
Since the loops have different lengths and flow rates, it is necessary to hydraulically balance (link) the loops.
Linking is carried out either by tuning valves by calculating pressure losses, or by setting the design flow rate on flow meters (rotameters) in the collectors. This method is more convenient.
The pressure loss in the pipe can be calculated using the formula
∆Р = L ⋅ R , Pa,
(L – circuit length, m; R – linear pressure loss, Pa/m.)
We also provide a formula for determining the length of the contour:
L = F/b,
where F – floor area, m2; b – pipe laying pitch, m.
DIY installation
Installation of a heated floor system is quite simple and can be done independently.
Required tools and materials
For installation you will need:
- A container and mixer for mixing the solution, buckets, shovels, a crowbar, usually a trowel, a long trowel.
- Drill, pliers, construction knife, glue, construction tape.
- Grinder, discs, calibrator, round file.
- Fittings, pipes, reinforcement mesh 50×50 mm, pipe fastenings, pipe cutter, insulation, cement mixture, waterproofing film, press pliers.
- For wooden floors - joists, saws, pipes, pipe cutters, fittings.
Leveling the surface
It is very important to level the surface of the ceiling. There are two reasons:
- Thermal insulation boards will not adhere firmly to the ceiling and may sag during operation - this will lead to cracking of the screed and may lead to a violation of the tightness of the pipes.
- If the difference in the base is more than half the height of the pipe, then there is a high probability of air pockets in the raised parts of the pipe, interfering with the movement of warm water and reducing the efficiency of the system.
Most often, the surface of the subfloor is quite flat, but in some cases it is necessary to repair the surface with mortar or install a new leveling screed.
Preparation of the thermal insulation layer
Insulation must be installed under the heating pipelines - usually slabs of dense extruded polystyrene foam (not expanded polystyrene) of high density with a thickness of at least 35 mm (preferably 50 mm). Sometimes hard slabs of mineral wool are used, but this is not the best way. You can use a cork. It’s good if the insulation is foil. You can lay a foil waterproofing film. Do not lay penofol.
The thermal insulation is protected from above with a waterproofing film. There are films with markings, heat-insulating boards with clamps and markings.
A damper tape is fixed along the wall. Sometimes it is recommended to lay a strip of insulation along the wall.
Pipe laying and fastening
Pipes are laid on the waterproofing according to the design. The length of one circuit should not exceed 150 m - otherwise the hydraulic resistance of the pipes simply will not allow the pump to push water through the pipe. The contours should be approximately equal in length.
If pipes need to be bent, do it carefully, preferably using a template so that folds do not form on the pipes at the bending points. If there are no fasteners on the thermal insulation, then special plastic strips (mounting rails) with locks are installed to secure the pipes at the required distance from each other. You can secure pipes with U-shaped anchor brackets (clips). It is necessary to secure the pipe so that it does not “float” when pouring the screed.
Rules for assembling heated floors
After laying, the pipes are connected to the collector using fittings. Each circuit must be able to be switched off using taps at the inlet and outlet.
Then the system is tested, filled with water and heated. Test technology: pressure and temperature are gradually increased over several hours. If possible, the pressure is adjusted to 0.6 MPa (6 bar, 6 atmospheres). Test the system for at least 24 hours, bleeding the air several times.
Then the temperature and pressure are reduced, but the system is left filled with water - the screed is poured when the system is filled.
Creating a reinforcement mesh
Then the reinforcing mesh is laid - for this, a mesh with a cell of 50x50 mm is used.
Installing reinforcing mesh and pouring screed
The system is then filled with solution. The pipeline should be filled with water at room temperature - 20-23°C, the pressure should be 0.3 MPa. It is better to use a ready-made cement dry mixture marked “for water-heated floors.” You can add plasticizers for heated floors to ordinary cement mortar.
The screed is poured from the walls. It’s a good idea to cover it with polyethylene - this improves the maturation process of the solution and improves its quality. Drying out the surface for the solution is undesirable, and it is impossible to moisten a large area. The screed completely hardens after 20 days, but you can walk on it a couple of times after 10 days, not earlier.
