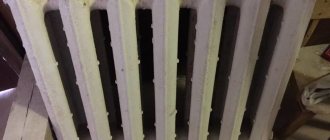
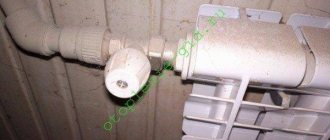
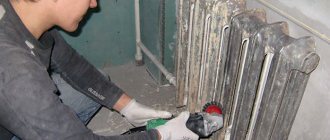
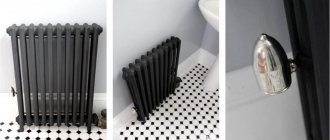
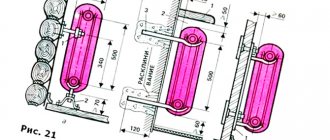
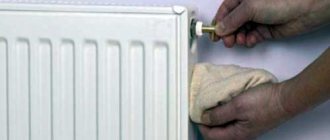
The efficiency of cast iron heating radiators and the reduction in their heat transfer depends on many factors, including the cleanliness of the internal cavities. The high temperature of the coolant contributes to the accumulation of scale on the walls of the sections. Periodic draining and refilling can cause radiators to dry out, which leads to corrosion. Particles of scale, rust, and other mechanical impurities that get inside due to poor water filtration mix with the coolant and clog the batteries and pipes. As a result, the quality of heating decreases and fuel consumption increases.
Periodically washing cast iron batteries with your own hands helps to cope with this problem. You can really do this work yourself, without resorting to the help of any companies. You should prepare for cleaning and follow the sequence.
Signs by which you can understand that it is time to clean your heating appliances:
- Uneven heating of the radiator. At normal pressure and temperature in the network, without airing, the top of the battery is hot and the bottom is cold. Or vice versa. And also with hot supply pipes, the radiators are barely warm.
- The heating system takes longer to warm up than usual.
- A clear symptom of the presence of large contaminants in the battery is an increase in energy consumption.
How to disassemble a cast iron radiator
The joints of the old battery are quite strong.
In many cases, they “grow together” in such a way that strength alone is not enough. Therefore, before disassembling the battery, it should be placed on boards and properly prepared. The simplest preparation involves heating the joint. To do this, use a hair dryer or a blowtorch. The latter can burn old paint. However, it's not scary.
More serious preparation involves heating the metal to such an extent that it begins to glow. After this they try to unscrew the nipple. This can be done both when the alloy becomes very hot, and when it has cooled noticeably. The second option is even better, because during cooling the gasket becomes covered with cracks and the strength of the connection becomes weak. He is often shown in videos.
To disassemble a battery made of cast iron, you need to perform the following steps:
- Unscrew the plugs (plugs).
- Place the radiator key on top of the device so that the flattened end rests on the nipple. Make a mark on the key where the battery ends using chalk or electrical tape.
- Insert the key inside the bottom hole.
- Turning it along the axis to the right and left, insert it into the product up to the drawn mark.
- Determine which way the nipple is screwed. To do this, bait it with the right and left sides. If you manage to bait it with the right side, then you need to unscrew it counterclockwise.
- If you manage to move the nipple, then make one revolution. Next, a similar procedure is done with the nipple at the other end of the section.
- Both nipple nuts are unscrewed in turn. Otherwise the section will crack.
- In the same way, you need to unscrew all sections.
If it was not possible to disassemble the heating battery in this way, you will have to saw through the section that is leaking. At the same time, they saw it in the center of the nipple. The work is carried out by picking up a grinder or a hacksaw.
Another option is to break the bad section with a sledgehammer. You need to break the middle part of the section. The nipple, which remains unharmed, is unscrewed using a plumbing wrench. It can also be knocked out using a hammer and chisel. Then you need to clean the threads in entire sections.
Classification
Radiator cleaning procedures are divided into different types, depending on the auxiliary means used and the area of influence.
There are significantly more options, but only those that can be done independently and at home without the use of specific equipment will be covered.
Outdoor
It is used to refresh the appearance of the product, remove accumulated dust, dirt and renew the top protective layer of paint. In turn, it happens:
Chemical - requires the use of active substances that enhance the effectiveness of cleaning with a damp sponge or microfiber cloth. Mechanical - used to remove the outer coating for the purpose of updating it. The following tools are used: grinder, brush, sandpaper, etc.
Using additional means, you should pay special attention to the joints of the sections and the line with the battery, so as not to damage them. Thermal - also used to remove a layer of paint from a cast iron battery. An industrial hair dryer or blowtorch does the job faster, but it also affects the rubber sealing gaskets between the segments
If you do not want to disassemble the battery into sections, it is better to abandon this method.
Internal
Responsible for the quality of heat transfer from the radiator and its throughput.
- The mechanical method requires the use of a brush or wire with a hook, with the help of which the limestone build-up is cleaned or chipped off. In this case, specialists use a blowing station. Then the product is washed with water from the inside and mounted in its original place.
- Chemical is often performed after mechanical to enhance the effectiveness of the latter, but it can also be an independent procedure. It requires the mandatory use of an active substance that will dissolve or weaken the structure of deposits inside the product.
Tools for disassembling a cast iron device
Their list consists of:
- Radiator key.
- Chisels.
- Hammer.
- A small sledgehammer.
- Brushes with metal bristles.
- Blowtorch.
- Plumbing wrench No. 2,3. They need to unscrew the side plugs or plugs.
In many cases there is no radiator key. The situation is complicated by the fact that it is almost impossible to find in construction stores. Of course, it exists in the markets. Also, plumbers must have such a key.
The key itself is a round metal bar. which is 18 mm in diameter. One end is flattened and resembles a spatula. It has dimensions 28x40 mm. Thickness 6 mm. At the other end there is a welded ring. You need to insert a lever into it. As for the length of the key, it should exceed half the length of the radiator by 30 cm.
You also need to prepare several boards. Chocks may be suitable instead. They will be fitted with a battery before disassembly.
How to wash cast iron radiators
The efficiency of cast iron heating radiators and the reduction in their heat transfer depends on many factors, including the cleanliness of the internal cavities. The high temperature of the coolant contributes to the accumulation of scale on the walls of the sections. Periodic draining and refilling can cause radiators to dry out, which leads to corrosion. Particles of scale, rust, and other mechanical impurities that get inside due to poor water filtration mix with the coolant and clog the batteries and pipes. As a result, the quality of heating decreases and fuel consumption increases.
Periodically washing cast iron batteries with your own hands helps to cope with this problem. You can really do this work yourself, without resorting to the help of any companies. You should prepare for cleaning and follow the sequence.
Signs by which you can understand that it is time to clean your heating appliances:
- Uneven heating of the radiator. At normal pressure and temperature in the network, without airing, the top of the battery is hot and the bottom is cold. Or vice versa. And also with hot supply pipes, the radiators are barely warm.
- The heating system takes longer to warm up than usual.
- A clear symptom of the presence of large contaminants in the battery is an increase in energy consumption.
Flushing heating systems in a private home
In private homes, especially those located outside the city, the problem of cleaning the heating system is more acute. This is due to the fact that the water circulating in the system is taken from wells and reservoirs where it is not purified. Thus, much more sludge and other small fractions accumulate in heating radiators, polluting the pipeline. In this case, it is much more advisable to clean the entire heating system rather than individual radiators.
Flushing of cast iron pipelines is carried out in the summer, but not during the heating season! Before starting cleaning, you must open all valves to bleed air from the batteries. This procedure is best done by a practicing master plumber. This work requires care to avoid a flood and damage to the equipment.
There is no need to release water from the boiler; the steam line is closed during cleaning. When the air is released and the corresponding valves are closed, then water is released throughout the entire heating system. Water should be supplied until clear water flows from the heating pipes.
For better cleaning, you can add cleaning agents to the pipelines: soda ash, whey, vinegar. You can use chemical compounds: car radiator cleaner or concentrated “Mole” alkali.
After using chemical compounds, the pipelines must be thoroughly washed. To do this, heat the boiler and run hot water through the system, which will wash away any remaining rust, oil stains and cleaning agent residues.
The system flushing procedure must be carried out 1-3 times a year. This will depend on the purity of the water supplied to the pipelines.
It is important to note that after the heating season there is no need to release water from the system. This is due to the fact that empty radiators are more susceptible to corrosion than those filled with water.
During the summer, the water in the pipes also rusts and therefore, before the next heating season, it is necessary to drain the rusty water and flush the system with the addition of bleach.
When to clean heating radiators
The main indicator of comfort level is the room temperature. According to established standards, its minimum value for apartments and residential buildings is 18°C, but many begin to feel comfortable only when this indicator reaches 21°C, or maybe even higher. What to do if the temperature in the apartment is below the established standards, and representatives of utility services claim that they supply heat in full. Most likely, this is the case; the radiators in your apartment are simply clogged - a problem that occurs quite often. The following factors indicate that your radiators require flushing:
- when testing the heating riser, you suddenly discover that its temperature is much higher than the temperature of the heating radiators;
- in one room the radiators work at maximum efficiency, while in another they are barely warm or do not heat at all;
- it’s warm in your neighbors’ apartment, but you keep complaining about the quality of heating in your apartment;
- the heating radiator in its upper part is slightly warm, and its bottom is cold;
- Radiator sections do not warm up equally.
If at least one of these symptoms is detected, then it is necessary to begin “treating” your radiators.
This can be done in different ways, but it must be done, since you will still have to pay for heating. And what to pay for, you ask yourself a completely logical question. Thus, without delaying it, the problem must be solved. If you do not yet know how to flush a heating radiator, we recommend that you talk to specialists or carefully read these instructions.
Pneumopulse radiator cleaning
Where will we place it?
Typically, radiators are placed where the greatest heat loss in the apartment is expected. As a rule, this is the area under the window or on the side of the corner wall of the house. Even if the apartment is located in a well-insulated building and is equipped with double-glazed windows, the window is the place where the air temperature will be the lowest during the cold season.
Choosing the optimal location for the radiator
If you do not place a radiator under the window, then the cold air entering from outside will gradually fall down and spread across the floor. From physics lessons we know that warm air moves upward. This means that, moving away from the battery and rising to the ceiling, it will create a kind of barrier to the cold flow from the street. According to SNiP recommendations, the size of the battery should occupy at least 70% of the window, otherwise the warm air will not create the necessary barrier.
If the batteries are too short, a situation may occur where cold zones form on the sides. As a result, the room temperature will be low even with a powerful radiator. As you can see, it is not always only the battery power that provides a comfortable microclimate in the apartment.
We disassemble and clean the cast iron battery
A cast iron radiator is a heating device that over time can lose its thermal power due to dirt that floats along with the coolant and remains inside the sections. In addition, gaskets may be destroyed. And this results in the destruction of the paint layer and leakage of the heating device.
In the first case, it is enough to remove the radiator and clean or rinse it. Otherwise, in addition to cleaning, it still needs to be disassembled. If the heating battery is relatively new, then there should not be any difficulties in disassembling it. However, if there is a device in the house that is 40 years old or more, then disassembling it will be accompanied by problems. After all, for a long time:
- The joints of the sections “grow together”.
- The internal protrusions of the nipple are corroded by the coolant.
True, the situation is somewhat simplified by the fact that once upon a time, for a better connection, tow with paint was wound around the nipple. Thanks to this, the tow prevents the section from merging with the nipple. A rubber gasket was always placed at the joint formed by the sections. In many cases, it is its drying out and covering with cracks, as well as subsequent destruction, that causes water leakage, which deteriorates the appearance of the paint.
Can you see everyone?
Why are we talking about different ways to dismantle radiators?
How do they differ in connection methods?
- Fittings used. Traditionally, for the installation of Soviet-style cast iron radiators, a combination of a conduit (a pipe with a long thread) and a lock nut were used; now the batteries are more often connected with American ones - quick-dismount fittings with union nuts;
The photo shows the connection of an aluminum sectional radiator by an American woman.
Connection on the lines.
The location of the connections relative to the radiator. The connection can be one-way or two-way
This is important when installing on squeegees: one of the radiator plugs through passage will have a left-hand thread.
A special case
- In many houses built in the 80s and 90s, convectors are used as heating devices. The convector is a coil made of a steel pipe of the same diameter as the riser, with fins that increase heat transfer. The typical method of connecting a convector and a steel line is a butt weld.
The heating device is connected to the riser by welded seams.
Cleaning batteries using special equipment
Cleaning cast iron batteries without removing them can be done using special equipment. The following complex equipment is intended for domestic needs:
- pneumatic pistol "Typhoon";
- device for electrohydropulse influence ZEVS-24;
- cleaning device Krot-Mini.
Air pistol "Typhoon"
Flushing the battery with a Typhoon pneumatic gun
The equipment is compact and easy to use. It is used to perform targeted impact on blockages in water and sewer pipes with a diameter of up to 150 mm. The essence of the process is a hydraulic ram to remove hardened deposits from the walls of equipment and adjacent risers with a shock wave at a speed of 1.5 km/h, which spreads over a distance of up to 60 meters.
Pneumatic pistol "Typhoon" in action
This cleaning of the heating system allows you to completely remove contaminants that are not amenable to conventional hydraulic flushing.
"Typhoon" is indispensable as a plumber's tool for clearing blockages in various hard-to-reach places. Depending on the configuration and weight, the device has 6 modifications and the following indicators:
- internal cleaning diameter up to 150 mm;
- maximum firing range to the target is 60 m;
- special valve design for kinetic ramming;
- pressure gauge on the body;
- Possibility of manual inflation.
Comprehensive flushing of heating batteries
As a rule, “Typhoon” is used in conjunction with the ZEVS-24 automatic installation and the Krot-Mini device for cleaning hard-to-reach objects.
Installation ZEUS-24
ZEUS-24 has small dimensions and sufficient power to destroy hardened heating devices, internal and external water supply and sewerage networks that are firmly stuck to the inner walls. The essence of its work is based on the electrohydropulse effect on solid contaminants in pipes with a diameter of 7 to 150 mm. The electrical discharge created by the device leads to the generation of a shock wave and powerful hydrodynamic flows that act on hardened clogs, scale and deposits.
Procedure for hydropneumatic flushing of heating radiators (batteries)
- destruction of blockages of any strength;
- safety of the equipment being cleaned;
- cleaning of hard-to-reach bent and spiral pipes;
- wear resistance of manufacturing materials;
- protective shutdown on the plug.
Krot-Mini device
The device has the following advantages:
- ability to work with various drums and spirals with a diameter of 6 to 13 mm;
- easy drum replacement procedure;
- to facilitate work, the distribution pipe is located inside the drum;
- automatic spiral feed;
- durable and flexible spiral made of hardened steel cable, entwined with hardened steel wire;
- high torque allows you to remove stubborn dirt;
- standard equipment consists of 4 different nozzles, allowing for complete cleaning of pipes and removal of foreign objects;
- For use in wet rooms, the device is equipped with an RCD.
Flushing heating batteries with the Krot-Mini device
How to ensure warmth and comfort in your home depends on everyone’s choice and preferences. You can extend the life of old equipment or replace it with new, more modern one.
How to wash cast iron radiators and chemistry will help us again
What is the cause of battery contamination? Over time, the quality of water leads to a lot of mechanical particles settling in heating systems. A very small wire, etc., moves along the heating risers simultaneously with the water. During the non-heating season, water is drained in most cases. This leads to pockets of rust appearing in the pipes.
Supplying hot water under pressure exfoliates rust particles, and they also settle on the batteries. And the water itself, released into the heating system, is very often not considered clean. This accumulation of very different debris in cast iron heating systems leads to the fact that for years they eat up the rust waste circulating through the system and the battery becomes clogged.
Over time, this affects the quality of heating. Even with very good heating of cast iron pipes, they can only be warm or slightly warm, although the riser itself is hot. If this happens, it is a sure sign that the heating system is clogged and needs to be cleaned.
Do-it-yourself cleaning, cleaning, and flushing of cast iron batteries and radiators
Since this difficulty does not bypass any person, let’s look at how to clean cast iron radiators
If you don't take into account the weight of the object, the cleaning job is far from difficult. There are several options for how to clean heating systems.
From the following you can choose the ideal option for yourself.
You can clean the battery from debris using soda ash, car heater cleaners, whey, vinegar essence and many other options.
Cleaning cast iron batteries begins with dismantling them. However, if they do not have many layers of paint, they can be disassembled into very small parts to make them easier to handle. This procedure should be done during the season when the apartment is not heated.
One option is to pour ordinary soda ash into hot water and pour it into the heating system. In this case, plugs should be installed at both ends of the heating system. The battery can be shaken and after a short time, approximately one hour, knocked around the perimeter with a wood hammer so that the corrosion adhering to the walls is released.
Next, open one plug and connect the hose, previously combined with the water meter unit. Open the second plug and open the tap. We immediately apply high pressure so that under pressure more rust comes out of the battery. If you have an air blower at your disposal, you can use it to create more pressure.
Washing cast iron batteries can be done with a product prepared for washing a car heater. Before pouring the product into the heating system, read the instructions for the dosage for a specific volume and follow it.
So, the product is poured in and hot water is added, but the battery is not completely filled. For 2 hours, parts of the battery must be moved at intervals of 10 minutes. At the end of this time, the heating device is washed with strong water and in large quantities so that no corrosive particles remain.
How to clean a cast iron battery with whey? The serum is poured into the battery and, as with soda ash cleaning, the heating system is tapped and turned over to agitate the serum. The acid contained in the serum will eat away the rust and cleanse your heating system of it.
In order to reduce the amount of rust on batteries in the future, you can remove a small tip of the pipe with a plug in front of the inlet hole and attach magnets to it. The magnet will attract rust, and all that remains is to occasionally open the plug at the end of the pipe to remove corrosive particles.
Signs of contamination of a cast iron battery
Since after the end of the heating season the water is drained from the system, and it remains dry all summer, this causes the formation of corrosion even in the most resistant metal. For many years, small rust formations do not cause harm to the heating network and its elements, but over time, the layers of rust become thicker, changing the quality and efficiency of radiators.
You can notice that cast iron batteries require flushing based on several signs:
- If during the heating season it is discovered that one of the sections or the entire radiator is colder than the rest of the devices, then this is a clear sign that the channels in it are littered or narrowed by a coating of rust.
- When the temperature of the riser exceeds the heating of the battery, this is another sign that the hot water is not entering it in full.
- If the radiators throughout the apartment are slightly warm, you should not immediately scold the “careless” heating network workers. You need to find out from your neighbors how hot their batteries are. If their apartment is warm, then you should think about how to wash cast-iron radiators in the operating conditions of the heating network.
- Another clear sign of a blockage may be uneven heating of the battery. If this is not an air lock, which is easy to check by opening the Mayevsky tap, then it means scale or debris.
- It happens that in one radiator one section is colder than the other. This means that the channel in this place is clogged. Since flushing cast iron radiators in individual sections is impossible, the entire structure will have to be dismantled.
These are the main signs that your batteries need cleaning. In order not to take matters to such extremes, it is better to carry out preventive flushing of heaters, although sometimes you can entrust this process to heating network workers before the start of a new heating season.
Alternative way
If the battery is in such a condition that it is not possible to wash it, then you can paint it. To do this, it is recommended to take a special acrylic-based enamel for radiators, which is odorless and dries within an hour, while the brushes can be easily washed with water after use. If we are talking about non-residential premises, then it is permissible to use ordinary PF-115 enamel, or alkyd enamel for radiators.
Of course, you can immediately smear the battery with paint in the dirt, but it is better to approach this issue more thoroughly:
- The first step is to clean most of the surfaces of the battery, remove as much old paint as possible using a spatula, and then sand off any rust.
- Wipe the heating element with a wet cloth to remove any remaining paint. When the battery is dry, you can degrease it with white spirit or another solvent.
- Ideally, you need to apply a primer so that the paint layer lasts longer and better.
After this, you can begin painting the batteries. It is necessary to paint during the period when the heating is turned off, so that the paint is easier to apply to the surface of the radiator and there are no smudges. As a last resort, at your own peril and risk, you can paint a working battery. At the same time, to reduce its temperature, you can turn off the hot water.
Don't forget to take care of the surrounding interior: spread newspapers and protective film. Prepare brushes, one regular and one special, designed for batteries with a long handle and curved bristles.
Apply paint from top to bottom, this will make it easier to control its consumption. It is more convenient to paint the internal structural elements first, and then the external ones. It is best to paint in two layers in order to paint the entire surface of the battery without flaws.
https://youtube.com/watch?v=m406kHhwM0E
Painting batteries is a last resort; it is best not to bring them to this state, wash and clean them regularly, especially since this process, put on a permanent basis, will not take much of your time and effort. Use the methods described above, combine them to get the best result.
Another interesting article: How to wash windows without streaks.
Washing with soda ash and whey
According to videos filmed by various experts, cleaning with soda ash is carried out as follows:
- Plugs (plugs) are placed on the two holes of the outer section.
- Soda ash is diluted in hot water. Half a standard pack for 6-10 liters is enough.
- They lift the heating radiator from the floor, placing it on the section with plugs. The section with two free holes should be at the top.
- Water with soda ash is poured through one hole. Air will escape through the other. Therefore, it does not need to be drowned out.
- Plug both holes and place the battery on the floor. The heating device must lie down.
- So that the soda ash can eat away any adhering dirt, rust, and possibly even old paint that has come in with the water, the radiator needs to be shaken. To do this, grab the top and raise/lower it several times. The bottom should not come off the floor. The same is repeated on the other side.
- Relax for 1 hour, watching a video on the Internet about the features of removing old paint from cast iron and applying new paint.
- Lightly tap along the entire perimeter with a wooden hammer. This is done so that the dirt is completely removed from the walls. At this time, the paint may come off. This means that it was poorly attached to the cast iron.
- Place the radiator on the nightstand so that one of the plugs is in the air.
- Place a bucket under the plug and unscrew the plug.
- After draining the water, the radiator should be flushed. To do this, unscrew the plug at the opposite end and insert the hose from the water supply. Open the tap. Water will flow into the radiator under pressure, thanks to which it will be possible to wash away dirt and completely clean the heating device.
To clean the radiator with serum, you need to follow all the steps described above. Just use whey instead of soda. This process, of course, can be seen in various videos.
Dismantling of bimetallic and aluminum sectional products
To disconnect the radiator from the system and remove it from its mounting location, you must do the following:
- Stop water circulation and relieve pressure.
- If the heating battery is hot, you need to wait until it cools down and then disconnect it from the system. To do this, you need to unscrew the connecting couplings at the inlet and outlet.
- Move the coupling away from the radiator along the pipe and remove the device from the brackets.
- Drain the remaining water and place the product in the disassembly area, face up.
- Pull out and rinse the filter immediately to prevent dirt from drying on it.
Dismantling of bimetallic and aluminum sectional products
At the next stage, the radiator is disassembled into separate sections. To avoid damage during operation, you need to figure out which way to turn the nipple nut. This element is a ring-shaped nut with an external thread and grooves inside on both sides. In this case, one nut has both right and left threads. If you unscrew it, the adjacent sections of the battery will evenly move apart, and when twisted, they will tighten.
Nipple nut
Manufacturers usually make marks on the face of plugs and sleeves that indicate thread directions. O denotes right-hand thread, “S” denotes left-hand thread. To accurately determine the direction of movement, it is recommended to take a loose nipple nut and try to attach it to the threads in the radiator. Having decided which way it twists, it will become clear where to turn the key to separate the sections.
Installation of nipple nut
Having decided on the direction of the thread, insert the nipple wrench into the radiator and slide it towards the desired nut. The notches on the tool will help you do this. When it is in the grooves, insert the lever into the hole on the other side. It will take force to move the nut out of place. Call an assistant to fix the radiator in one place.
Repair of bimetallic radiators
When the nut has moved half a turn, go to the other side to unscrew the second one and do the same. After making sure that both nuts rotate without applying much physical force, gradually unscrew one side or the other, moving 5-7 mm.
Gasket between radiator sections
After disconnection, take away the metal spacers that were between the sections. If they are in good condition, then they can be installed back during reassembly; if in bad condition, then use them as a sample for purchasing new ones. Silicone gaskets must be changed.
How to flush a heating radiator at home
It must be emphasized that cleaning the batteries should be done at the end of the heating season.
Scheme of chemical flushing of the heating system.
To wash the heating battery yourself, you need to drain the water from the heating system and dismantle the radiator. Washing is carried out with mixtures of caustic soda, acetic acid, whey, and also using household chemicals.
Radiator cleaning is done at home in the bathroom. In order not to destroy the enamel of the bathtub, thick rags are lined on its bottom, and a mesh is placed in the drain hole so that large contaminants do not seep into the drain.
Flushing the cooling system on a Priora car. The dude mixed 2 antifreezes and ended up with an “explosive mixture”...
All plugs must be removed from metal batteries, and hot water should be poured into the open holes. After the first fill, the radiator must be shaken and the water and debris must be drained. Pour water a second time, but with the addition of a cleaning agent: soda ash or caustic soda, whey, vinegar. Vinegar essence with a concentration of 70% is used in the entire bottle for one radiator.
After pouring this solution, the plugs should be closed and the device should be left for at least 1 hour. After the time has passed, the battery must be shaken well and tapped with a wooden hammer so that the remaining rust and plaque are separated from its inner surface. The solution is drained and clean water is added again. Flushing with water is carried out so many times until clean water flows out of the battery.
It is also important to thoroughly rinse the radiator cavity because residual lactic or acetic acid can provoke the formation of rust.
Radiator cleaning diagram.
As a cleaning agent for a heating device, you can use a car radiator cleaner. To do this, pour hot water into the cast iron cavity with the addition of this liquid. Only a few grams of radiator cleaner should be added, strictly following the instructions on the package.
After closing the holes, the battery should be turned over and shaken every 10 minutes. After two to three hours, the water with the chemical composition is drained and the radiator is washed with plenty of water.
As a cleaning agent, you can use cleaning compounds for sewer pipes, for example, “Mole”.
Heating appliance cleaning products
Sometimes batteries are cleaned using the so-called mechanical method. By simply tapping sections of a cast iron radiator, they try to separate the scale from the internal walls and then remove the debris with water under pressure. However, this method is quite harsh and, to some extent, destructive. Its effectiveness is also highly questionable.
Chemical or complex methods are much more reliable. So, what is the best way to wash cast iron radiators at home? The following tools cope with this task:
- household chemicals containing caustic soda;
- special products designed for cleaning batteries;
- citric or acetic acid;
- solution for cleaning car radiators.
You can also use concentrated alkali to flush Krot sewer pipes. All these drugs are good, but their effectiveness is different.
The most productive products are a product for car radiators and a special solution for flushing radiators, but they are the most expensive. Acetic and citric acids are good at dissolving salts and deposits when they are present in small quantities. Soda-containing solutions of household chemicals perfectly wash away dirt, but do not clean complex deposits. They will be a great help for prevention purposes.
In difficult cases, special means should be used, since it is best to clean cast iron batteries at home with special solutions. A good effect is achieved by the joint use of chemicals in combination with a light mechanical method (tapping).
Preparing to wash batteries
The first and main condition is that cleaning should be done at the end of the heating season or before it begins, since washing cast iron batteries in winter is unrealistic and unreasonable.
First of all, it is necessary to empty the heating system of coolant. Then you need to disconnect the radiators and take them outside. This is the best option.
If this is not possible, then the work will have to be done in the bathroom or right in the place where the appliances are installed. In this case, you need to take care of ventilation, because the cleaning process will not be accompanied by the best odors. In addition, you need to think about where dirty liquids will be drained. Either stretch the hoses to the sewer, or prepare containers, and also cover the floor and wall with film.
Best answers
Mikhail Zolnikov:
Place a large damp cloth behind the battery. Take a hair dryer, turn it on full power and blow through the radiator. If the dust still does not blow away, go over the battery with a brush or toothbrush. If the vacuum cleaner supports the function, you can plug in the hose for blowing and blow it out with a vacuum cleaner.
Leave the Soviet batteries. I changed it and now I regret it. To make them warmer, it is fashionable to treat the surface of the battery with PAINT DESTRUCTOR liquid, it will eat off all the paint in half an hour, scrape off the scraps of paint with a spatula, prime and paint. Previous layers of paint act as thermal insulation.
I would recommend installing taps on the connections to the battery - when the apartment is hot, you can turn off the battery with this tap. This is especially true in April-May, when it is warm outside and the radiators are hot.
Liliya Chudinova (Tikhonova):
vacuum cleaner, no? ? I clean mine like this, with a narrow nozzle and everything is ready.
Julia))):
Handles... Take a rag and wash it. That's the whole secret.
Verochka - Kind Soul:
I agree with Mikhail... And I myself just wipe it with a damp cloth and a brush...
*~*Green-Eyed Beauty10000*~*:
Toothbrush and damp cloth)))
Happy *))):
I have a Karcher steam cleaner. Ideally copes with this kind of work. And so only with a brush.
pa44a pa44a:
toothpaste + glass cleaner, and a rag.. ideal!!

