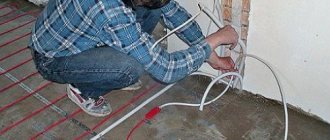
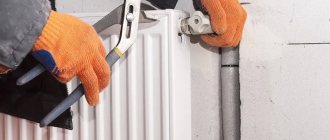
The installation or reconstruction of a heating system involves the installation or replacement of heating devices. The good news is that, if you wish, you can handle this yourself without the involvement of specialists. How heating radiators should be installed, where and how to place them, what is needed to carry out the work - all this is in the article.
It is possible to install heating radiators with your own hands
What is needed for installation
Installation of heating radiators of any type requires devices and consumables. The set of necessary materials is almost the same, but for cast iron batteries, for example, the plugs are large, and they do not install a Mayevsky valve, but instead, somewhere at the highest point of the system, they install an automatic air vent. But the installation of aluminum and bimetallic heating radiators is absolutely the same.
Steel panel ones also have some differences, but only in terms of hanging - they come with brackets, and on the back panel there are special arms cast from metal, with which the heater clings to the hooks of the brackets.
These are the arms that hook the hooks
Mayevsky crane or automatic air vent
This is a small device for releasing air that may accumulate in the radiator. Placed on the free upper outlet (collector). It must be on every heating device when installing aluminum and bimetallic radiators. The size of this device is significantly smaller than the diameter of the manifold, so you will also need an adapter, but Mayevsky taps usually come complete with adapters, you just need to know the diameter of the manifold (connection dimensions).
Mayevsky crane and method of its installation
In addition to the Mayevsky crane, there are also automatic air vents. They can also be installed on radiators, but they are slightly larger in size and for some reason are only available in a brass or nickel-plated case. Not in white enamel. In general, the picture is unattractive and, although they deflate automatically, they are rarely installed.
This is what a compact automatic air vent looks like (there are more bulky models)
Stub
The side-connected radiator has four outputs. Two of them are occupied by the supply and return pipelines, on the third they install a Mayevsky valve. The fourth entrance is closed with a plug. It, like most modern batteries, is most often painted with white enamel and does not spoil the appearance at all.
Where to install the Mayevsky plug and tap for different connection methods
Shut-off valves
You will need two more ball valves or shut-off valves that can be adjusted. They are placed on each battery at the input and output. If these are ordinary ball valves, they are needed so that, if necessary, you can turn off the radiator and remove it (emergency repairs, replacement during the heating season). In this case, even if something happens to the radiator, you will cut it off, and the rest of the system will work. The advantage of this solution is the low price of ball valves, the disadvantage is the impossibility of adjusting heat transfer.
Radiator taps
Almost the same tasks, but with the ability to change the intensity of the coolant flow, are performed by shut-off control valves. They are more expensive, but they also allow you to adjust the heat transfer (make it less), and they look better externally; they are available in straight and angular versions, so the piping itself is more accurate.
If desired, you can install a thermostat on the coolant supply after the ball valve. This is a relatively small device that allows you to change the heat output of a heating device. If the radiator does not heat well, you cannot install them - it will be even worse, since they can only reduce the flow. There are different thermostats for batteries - automatic electronic ones, but more often they use the simplest one - mechanical.
Related materials and tools
You will also need hooks or brackets for hanging on walls. Their number depends on the size of the batteries:
- if there are no more than 8 sections or the length of the radiator is no more than 1.2 m, two mounting points on top and one on the bottom are sufficient;
- For every next 50 cm or 5-6 sections, add one fastener at the top and bottom.
You also need fum tape or linen winding and plumbing paste to seal the joints. You will also need a drill with drills, a level (preferably a level, but a regular bubble one will do), and a number of dowels. You will also need equipment for connecting pipes and fittings, but it depends on the type of pipes. That's all.
Work order
To properly replace heating radiators in an apartment, you must:
- Coordinate the modification with the operation service.
- Purchase the necessary materials.
- Perform preliminary assembly of components.
- Prepare tools.
- Agree with the team (if you do not plan to do the work yourself).
- Register the alteration with the Housing Office and decide on the date for the work.
- Remove old radiators.
- Install brackets.
- Hang new batteries.
- Make connections to heating pipes.
- Check the system operation.
During the preliminary assembly of the units, all the necessary elements are installed: plugs, gaskets, Mayevsky taps, etc. In addition, you can mark in advance the places where the pipes will be cut. In this case, you should use a plumb line and level to ensure that the new radiator is level.
If the supply pipes also require replacement, it is necessary to prepare these elements: cut pieces of suitable length, attach tees, etc. All this is done in order to quickly complete the installation after draining the water from the heating system. This measure will be more than relevant if the need to replace old batteries arises during the heating season.
Welding is used to replace metal pipes. The edges of the structures will need to be threaded to securely connect them to the radiator
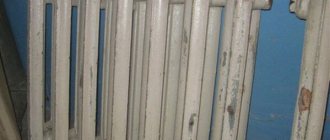
The procedure for removing old batteries depends on whether the pipes also need to be replaced. If the supply lines need to be preserved, you will have to carefully unscrew the old battery. At the same time, it is important to maintain the squeegee - a sufficiently long thread on the edge of the pipe. The radiator is secured with a nut and coupling, which will have to be unscrewed.
The procedure can be quite complicated. If the parts do not budge, you can try to loosen the connection using anti-corrosion compounds. In the most extreme case, the radiator is simply cut off with a grinder. There should be at least 10mm of thread left. Burrs should be removed from it.
If you decide to leave the old steel pipes, then dismantling the radiator must be carried out carefully so that the threads on the pipes remain intact
If it was not possible to maintain the flow, you will have to extend the pipes and also cut new threads. The removed locknuts can later be reused when installing a new radiator. It is much easier to dismantle the radiator if the pipes are also replaced. In this case, they are simply cut off in a suitable place. This is usually where the system turns toward its neighbors above and below.
Now you need to install the brackets and then hang the new radiator on them. At this stage, it is sometimes necessary to adjust the length of the supply pipe. All that remains is to restore the threaded connection. It is very important to perform the compaction correctly. For this, flax or plumbing thread is usually used.
Some craftsmen do not recommend using FUM tape on such connections. The seal is wound clockwise so that it forms a cone growing from the edge of the thread. Then screw on the connecting nut. If some of the seal remains outside, this is normal. But its layer should not be too thick.
Such work generates a lot of waste. They are best done during major renovations, after the windows are installed.
To achieve maximum tightness, sometimes the seal is impregnated with paint, after which the lock nut is screwed on. Then the protruding insulation is also impregnated with paint. A water-based composition is not suitable for these purposes. Once the paint has dried, it is very difficult to unscrew the connection.
Once the connection is complete, remove the protective film from the radiator. It is also necessary to check the position of the air vent. Its hole should be directed upwards. To check the quality of work, you need to ask plumbers to pump water into the heating circuit under pressure.
It is better to remove the film in which the new radiator is packaged after it is installed, so as not to accidentally damage the coating
This will allow leaks to be identified and repaired immediately. During operation, it does not hurt to observe the radiator for the first time, and also check the condition of the connections to make sure that they are not leaking.
Where and how to place
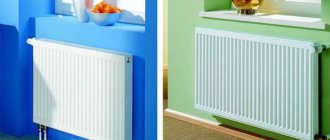
Traditionally, heating radiators are installed under the window. This is necessary so that the rising warm air cuts off the cold from the window. To prevent the glass from sweating, the width of the heating device must be at least 70-75% of the width of the window. It must be installed:
- in the middle of the window opening, permissible deviation - 2 cm;
- distance from the radiator to the floor - 8-12 cm;
- to the window sill - 10-12 cm;
- from the back wall to the wall - 2-5 cm.
Distances from radiator to window
These are all recommendations, the observance of which ensures normal circulation of warm air in the room and its effective heating.
Read how to choose polypropylene pipes here.
Dismantling risers
In residential buildings with a bottom spill, risers are discharged in pairs. Which of the risers is connected to the riser that needs replacement is found out from the residents living on the top floor. Most often, the jumper is located in their apartment.
When examining the basement to look for risers, you need to navigate the entrances. When the required entrance has been found, you need to understand how the apartment is located relative to the flight of stairs in order to determine the necessary pipes. Then both risers are blocked by unscrewing the plugs or opening the vents.
In order not to take risks and not waste time searching, you can, for an additional fee, invite plumbers from a service organization who will discharge water from the riser under their own responsibility, quickly and efficiently.
How to install correctly
Now about how to hang the radiator. It is very desirable that the wall behind the radiator is level - this makes it easier to work. Mark the middle of the opening on the wall, draw a horizontal line 10-12 cm below the window sill line. This is the line along which the top edge of the heating device is leveled. The brackets must be installed so that the top edge coincides with the drawn line, that is, it is horizontal. This arrangement is suitable for heating systems with forced circulation (with a pump) or for apartments. For systems with natural circulation, a slight slope is made - 1-1.5% - along the flow of the coolant. You can’t do more - there will be stagnation.
Correct installation of heating radiators
Wall mount
This must be taken into account when installing hooks or brackets for heating radiators. Hooks are installed like dowels - a hole of a suitable diameter is drilled in the wall, a plastic dowel is installed in it, and the hook is screwed into it. The distance from the wall to the heating device is easily adjusted by screwing in and unscrewing the hook body.
Hooks for cast iron batteries are thicker. This is a fastener for aluminum and bimetallic
When installing hooks under heating radiators, keep in mind that the main load falls on the upper fasteners. The lower one serves only to fix it in a given position relative to the wall and is installed 1-1.5 cm lower than the lower collector. Otherwise, you simply will not be able to hang the radiator.
One type of brackets
When installing the brackets, they are applied to the wall in the place where they will be mounted. To do this, first attach the battery to the installation location, see where the bracket “fits,” and mark the location on the wall. After placing the battery, you can attach the bracket to the wall and mark the location of the fasteners on it. In these places, holes are drilled, dowels are inserted, and the bracket is screwed. Having installed all the fasteners, hang the heating device on them.
Floor fixing
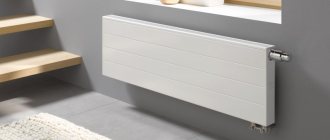
Not all walls can support even lightweight aluminum batteries. If the walls are made of lightweight concrete or covered with plasterboard, floor installation is required. Some types of cast iron and steel radiators come directly with legs, but not everyone is satisfied with their appearance or characteristics.
Legs for installing aluminum and bimetallic radiators on the floor
Floor installation of heating radiators made of aluminum and bimetallic is possible. There are special brackets for them. They are attached to the floor, then the heating device is installed, and the lower collector is secured with an arc to the installed legs. Similar legs are available with adjustable height and some with a fixed height. The method of fastening to the floor is standard - with nails or dowels, depending on the material.
What time of year is best to change batteries?
Replacing the battery can take from 10 minutes to 3-4 hours.
In a private house, if everything is prepared and the material has been purchased, the time of year can be ignored. Turning off the heating for 1-2 hours, even in severe frost, will not greatly affect comfort.
In an apartment building, late spring or early autumn is chosen to replace a radiator without shut-off valves. During the heating season, the entire riser is turned off. Management companies are reluctant to do this, since even a short shutdown will result in a complaint from the residents of the entrance, and those who are particularly important may demand a recalculation.
In addition, after resuming the heat supply (filling the system), there is a possibility of water hammer, which can lead to an accident in any apartment and flooding of neighbors, for which the management company will also be responsible. During working hours, some apartments are left unattended, which can lead to unpleasant consequences, since it is impossible to find out about a leak in a timely manner.
In the summer, utility services carry out preventive work, including pressure testing the system, which can complicate the replacement process, since the supply of coolant can be carried out unexpectedly and at a time when residents are absent. Summer is a holiday period and the price for replacing batteries at this time may be higher.
Conclusion: in a private house, work is carried out as needed, in an apartment building - in May–June or August–September. Shut-off valves allow you to work at any time.
Options for piping heating radiators
Installation of heating radiators involves connecting them to pipelines. There are three main connection methods:
- saddle;
- one-sided;
- diagonal.
Connection options
If you install radiators with a bottom connection, you have no choice. Each manufacturer strictly binds the supply and return, and its recommendations must be strictly followed, since otherwise you simply will not get heat. There are more options with a side connection (more about them is written here).
Strapping with one-sided connection
One-way connection is most often used in apartments. It can be double-pipe or single-pipe (the most common option). Metal pipes are still used in apartments, so we’ll consider the option of tying the radiator with steel pipes on pipes. In addition to pipes of a suitable diameter, you need two ball valves, two tees and two bends - parts with external threads at both ends.
Lateral connection with bypass (one-pipe system)
All this is connected as shown in the photo. With a one-pipe system, a bypass is required - it allows you to turn off the radiator without stopping or draining the system. You cannot put the tap on the bypass - you will block the flow of coolant through the riser, which is unlikely to make your neighbors happy and, most likely, you will be fined.
All threaded connections are sealed with fum tape or linen winding, over which packaging paste is applied. When screwing the valve into the radiator manifold, much winding is not required. Too much of it can lead to the appearance of microcracks and subsequent destruction. This is true for almost all types of heating devices, except cast iron. When installing all the others, please do not be fanatical.
Welding option
If you have the skills/opportunity to use welding, you can weld the bypass. This is what the piping of radiators in apartments usually looks like.
With a two-pipe system, a bypass is not needed. The supply is connected to the upper entrance, the return is connected to the lower entrance, taps, of course, are needed.
One-way piping with a two-pipe system
With bottom wiring (pipes laid on the floor), this type of connection is made very rarely - it turns out inconvenient and ugly; in this case, it is much better to use a diagonal connection.
Strapping with diagonal connection
Installing heating radiators with diagonal connections is the best option in terms of heat transfer. In this case it is the highest. With bottom wiring, this type of connection is easy to implement (example in the photo) - the supply on this side is at the top, the return on the other is at the bottom.
A single-pipe system with vertical risers (in apartments) does not look as good, but people put up with it because of the higher efficiency.
Coolant supply from above
Please note that with a one-pipe system, a bypass is again required.
Coolant supply from below
Strapping with saddle connection
With bottom wiring or hidden pipes, installing heating radiators in this way is the most convenient and least noticeable.
With a saddle connection and lower single-pipe wiring, there are two options - with and without bypass. Without a bypass, the taps are still installed; if necessary, you can remove the radiator and install a temporary jumper between the taps - a squeegee (a piece of pipe of the required length with threads at the ends).
Saddle connection for one-pipe system
With vertical wiring (risers in high-rise buildings), this type of connection can be seen rarely - the heat losses are too large (12-15%).
Briefly about the main thing
The battery installation must be carried out in accordance with the requirements of SNiP. The choice of model for specific application conditions should take into account the operating parameters of the system:
- Pressure.
- Temperatures.
- Coolant composition.
Based on the type of material and design, radiators are divided into aluminum, bimetallic, steel, cast iron, copper and plastic. They can be connected to the system in lateral, diagonal and bottom ways. Radiators are installed in places where cold is most likely to penetrate into the room in accordance with the instructions and technology.
Useful tips
Regarding rental housing, the picture is unclear. Thus, according to Government Decree No. 491 of August 13, 2006, heated elements are included in the common property of the house. A Art. 65 of the Housing Code of the Russian Federation states: the landlord is obliged to monitor the proper condition of common property and repair it as necessary. In fact, management companies and housing offices carefully hide this information, encouraging residents to replace heating devices at their own expense. Those who wish to assert their rights can apply to the court. But there is certainty regarding privatized apartments. There, the repair of utility networks is the responsibility of the owners.
If the radiator bursts, you must immediately call the operating organization (UK or Housing Office). In some entrances you can find a telephone number on the wall to call an emergency team. The second thing you need to do before the repairmen arrive is to localize the leak (throw a blanket over the battery) and try to collect the water in a placed container (basin). The third step is to turn off the water. If there is no shut-off valve in the apartment, you will have to turn off the entire riser in the basement, the key to which is usually kept by the plumber on duty. Read about the cast iron heating and cooking stove on our website.
Shut-off and control valves.
As a shut-off valve, each radiator must be equipped with two ball valves. The specific manufacturer is not so important, the main thing is that the faucet is made of high-quality plumbing brass brand CW617N and is original, that is, not a fake. Counterfeit manufacturers often use cheap raw materials, which has a detrimental effect on the reliability of the ball valve. I chose ball valves from Valtec, which have proven themselves well over the entire time I worked with them, and I have 12 years of installation experience. In addition, these are the only faucets that have a white flywheel, which goes well with the color of the radiator in the interior.
To increase comfort, I also recommend installing thermostatic valves with thermal heads along with the ball valve, which allow you to automatically maintain the user-selected comfortable temperature. When choosing a valve, it is important that it matches the type of heating system, single-pipe or two-pipe. For single-pipe systems, only 2 models from manufacturers Valtec and Danfoss are common on the market. My personal choice is Valtec, as they are much more attractive in price and have universal mounting points for a thermal head, allowing you to choose any thermal head according to design. In my opinion, the cutest and most compact ones on the market are Valtec 1000 and Oventrop Uni SH.
Only thermal heads of the same brand are suitable for Danfoss thermostatic valves, but they have, in my opinion, an unattractive design, so I install these valves only when the customer has a need to install programmable thermal heads that allow programming different temperatures for different times of the day, for example, it’s warmer during the day , while sleeping - cooler.
I would also like to note that all the stories from “experienced” plumbers that valves often get clogged are based only on the wrong choice of valve type. If you install a valve from a two-pipe system on a one-pipe system, which has a much smaller nominal diameter, then the radiator may not work immediately, and not because it is clogged with scale. Over 12 years of installation, I have not received a single complaint from my customers that radiators equipped with thermostatic valves began to warm up worse.
