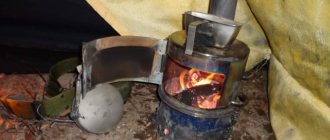
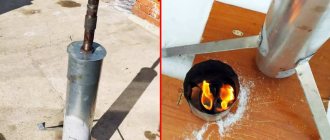
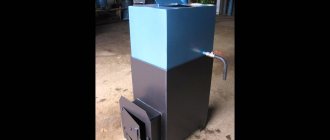
Not long ago, very compact portable Robinson stoves appeared on the market, designed for cooking in camp conditions: hunting, fishing, in the country. No matter how much it costs, making it yourself is much cheaper: you will need several pieces of square pipe, a small piece of sheet steel for the blower door, rods for making legs and a grate. Everything is so simple that with a little experience in welding, it can be welded in a couple of hours. In the article we will publish the available drawings, show several options for finished stoves indicating the dimensions and materials used, and post a video lesson on the principles of their construction. Based on these materials, you can make a Robinson stove with your own hands.
Robinson camping stove
Rocket stoves are attractive due to their simplicity of design and cost-effectiveness. But, behind the apparent simplicity, there is an exact calculation. It is very undesirable to deviate in size: everything will stop working altogether or fuel combustion will be extremely inefficient.
Operating principle
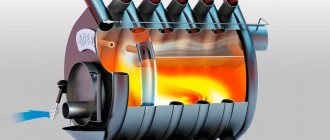
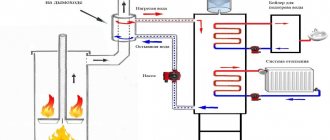
This device is made on the basis of a heating rocket stove. The mechanism of its operation is as follows. There is a bunker, which is a fuel compartment in which solid fuel burns. Combustion products enter the horizontal section of the pipe, and then into the vertical section. At the initial stage of the furnace operation, intense heating of the chimney is observed. When a high temperature is reached, the device enters operating mode. This happens when the gases formed during the combustion of wood in a vertical pipe ignite and produce good heat.
Robinson's device is a somewhat simplified rocket stove. This is explained by the different purposes of the units. The first model does not require space heating, but only water heating and cooking. But the principle is the same. Firewood smolders in the bunker, which heats the chimney, where the gases then burn out. In this case, the chimney must be quite long so that no combustion products remain.
In order for the reactive furnace to operate efficiently, the following rules must be observed when installing the structure:
- The chimney must be at least twice as long as the horizontal or inclined section.
- The length of the fuel compartment must coincide with the horizontal section. Typically the firebox is installed at an angle of 45°, although there are designs with an angle of 90°. But they are less convenient in terms of fuel loading.
- The cross-section of the chimney should not be smaller than the fuel compartment itself.
Advantages and disadvantages
The advantages of a rocket-type furnace include:
- High thermal output, which in some cases reaches 18 kW;
- High efficiency;
- Ultra-efficient operation, which is characterized by complete burnout of firewood, coals and soot loaded inside;
- Even waste from the woodworking industry (chips, leaves, twigs, branches, leaves, regardless of the degree of humidity) is suitable for combustion;
- Economical combustion and low wood consumption;
- High temperature conditions at the outlet (heating a large container of water is carried out in a few minutes).
Along with the advantages, stoves of this type also have disadvantages:
- Installing a water heating coil reduces the thermal efficiency of the furnace;
- The continuous combustion cycle makes it impossible to install a rocket stove in garages and bathhouses;
- The small size of the firebox does not allow loading a large amount of fuel at once; to ensure long-term combustion, firewood is constantly added.
Device
Robinson factory camping stoves are made from a profile pipe with a cross-section of 150×100 mm. Homemade structures are made of the same size. In this case, the bunker is made of a profile pipe, and the chimney is made of a round pipe. In order for there to be normal draft, the chimney pipe must have a diameter no less than the cross-section of the firebox.
For this size of the fuel compartment, a chimney no longer than 90 cm is allowed. But such dimensions make the unit inconvenient for transportation, so it is better to limit it to a minimum of 60 cm.
A steel rod is used for the legs. They are threaded, making the supports easy to install and remove. However, after using the jet stove many times, it becomes quite sooty, so the process of screwing the legs is not very pleasant. However, other options are also common, where a steel sheet is used to make the stand or non-removable legs are installed. But this makes the structure larger and more inconvenient to transport.
Robinson factory stoves do not provide air supply to the combustion zone, and they also do not have an adjustable lid that changes air access. This point can be corrected in homemade ovens. A plate is welded inside the bunker for flammable substances, at the bottom of which there is a grate. Fuel is placed on a flat element. Air enters the combustion zone through the grate, and a damper can be installed at the top of the firebox, with which the air supply will be regulated. It is made somewhat smaller than the firebox and should not completely block the hole, otherwise air will stop flowing into the compartment and the fire will go out.
This design of a reactive furnace provides a number of advantages:
- a small amount of solid fuel allows you to bring water to a boil in a short time, heat up food or cook simple dishes;
- Robinson is not afraid of the wind, so the fire does not go out;
- the jet stove is easy to install;
- the device does not smoke or smoke;
- factory models are made of high-quality metal and coated with heat-resistant paint that can withstand high temperatures;
- fuel does not burn out too quickly;
- the device allows you to dry firewood;
- the design is stable and easy to use;
- the rocket stove heats up quite quickly;
- maximum surface temperature reaches 900 °C;
- Thick steel (3.5 mm) ensures the durability of the device.
The price of the factory model is approximately 5 thousand rubles. But you can save money by making such a unit yourself. This task is doable if you have certain skills.
Advantages and disadvantages
Homemade long-burning rocket stoves have many admirers, and for the following reasons:
- simplicity and low cost of installation: to build such a thermal device, you do not need to incur large expenses for the purchase of expensive materials, fixtures and fittings. Minimal experience in the furnace business is also required;
- self-regulation and undemandingness to the natural draft of the chimney;
- The efficiency of the rocket furnace is a variable value and largely depends on the design, the main thing is to extract as much thermal energy as possible from the flue gases;
- fuel can be added on the fly.
Despite the attractiveness and simplicity of the unit, heating with a rocket stove has its negative aspects. It is a mistake to think that you can shove firewood of any quality into the firebox. Wet wood will not provide the required temperature in the chamber, and the pyrolysis process will not proceed. In the worst case scenario, smoke from the furnace can pour into the room. Also, the “rocket” requires constant supervision, especially in terms of fire safety.
Self-made rocket stoves are unsuitable for a bathhouse, since they give off relatively little heat in the infrared range, which is very important for a steam room. The surfaces of the stove that emit heat have too small an area and it will not be possible to heat the bathhouse properly
DIY Robinson factory model
Making a rocket stove similar to the one produced in factories is not a difficult task. There are not so many structural elements in this model:
- Metal pipe with a diameter of 100 mm and a length of 600 mm.
- A fuel box of 300×150×100 mm is made from a 3 mm steel sheet. To do this, it is cut into plates: 2 300x150 mm, 2 300x100 mm and one 150x100 mm.
- The grate grate is made from scraps of reinforcement with a diameter of 7-8 mm and a length of 120 mm.
- A metal plate 200x150 mm, which will divide the bunker into a fuel compartment and an ash duct.
- Three 13 nuts for screwing the legs. They will be installed on the bottom of the hopper.
- From a pipe with a diameter of 100 mm, rings with a height of 25-30 mm (3 pieces) and one with a diameter of 110 mm are cut.
- Three studs of the same length or M8 bolts for the legs. You can use 3 pieces of rod with similar threads.
As for the dish stand, its configuration is not fundamentally important for the operation of the device. Therefore, this element can be done differently. In this case, it is important to follow the rule that the stand should not block the chimney opening, so as not to disrupt the draft.
In the model under consideration, 3 rings are cut in half and welded to a metal rod.
This design is more complicated than the previous one in that the cross-section of the box is rectangular, and the chimney is round. Therefore, it is important to correctly perform the operations of connecting two parts into one device. In general, the production technology is as follows:
- It all starts with making a plate with a grid that will divide the bunker into two parts. To do this, pieces of reinforcement are welded to the flat element in increments of 10 mm.
- The resulting part must be welded to the rear and side walls of the bunker. The distance from the bottom edge to the plate with the grid should be 30-35 mm. The part must be attached using a welding machine parallel to the bottom edge.
- Then you need to carefully weld the joints of the walls together.
- The bottom is attached to the resulting structure, and nuts are attached to it.
- The top plate is welded to the back and side walls.
- A cut at an angle of 30° is marked on the pipe. The unnecessary part is cut off.
- The end that has acquired the shape of an oval must be attached to the upper section of the hopper. In this case, the pipe is placed at the very bottom of the upper plate and equidistant from the side walls. This element is outlined with a marker, and a hole is cut according to the markings. To do this, you can use a welding machine or a metal cutting device.
- Then you need to attach a pipe to the resulting hole. A stand is installed on top of it, and the legs are screwed into the nuts. Now the rocket stove can be tested. After this, it is covered with heat-resistant paint.
Exploitation
A stove of this type, like any top-combustion heat generator, operates with maximum heat output only when the chimney is well heated. Therefore, before loading the main portion of fuel into the combustion chamber, the device must:
- warm up the chimney well. For these purposes, you can use any quickly flammable fuel, such as paper balls, sawdust or shavings. It should burn not in the firebox, but in the ash pit. The level of heating of the chimney can be judged by the attenuation of the sound or a change in its tone. Next, you can start adding the main fuel to the firebox. It is no longer necessary to set it on fire; it should flare up from the coals remaining from the burnt “fast” fuel;
- manually regulate the flow of air into the combustion chamber. A rocket stove in a garage is not capable of adjusting itself to changing environmental conditions and the quality characteristics of the fuel, so it must be adjusted manually. After loading the main fuel batch, the ash door should be opened completely, and when a characteristic hum appears in the furnace, it should be closed enough so that the tone of the sound in the furnace is reduced to a rustling sound. As the wood burns, the door needs to be closed more tightly, achieving the same rustling sound. If this is not done, then excess air will enter the furnace and cool the intermediate gas mixture. In this case, the pyrolysis process immediately stops and the oven begins to make a roaring sound.
Only dry wood can be used as fuel for such a stove, since the appearance of an excessive amount of moisture when burning wet wood can provoke reverse draft and interfere with the creation of the temperature necessary to begin the pyrolysis process.
To ensure the safety of users during operation, the following rules must be observed:
- do not use liquid fuels for kindling and do not add them to the stove during the burning period;
- avoid contact between open areas of the contact body and the surfaces of the furnace, since the cylinders and its other metal parts will become very hot during combustion;
- It is prohibited to place the device near flammable surfaces;
- Clean the chimney at least once a week, and preferably after each use of the device.
Manufacturing a modernized Robinson furnace
The model described in the previous section can be improved with the help of a door that is installed on the fuel hopper. But if you make the sash on hinges, it will simply tilt upward, which will not allow you to adjust the draft. Such a part can only be in the “closed” or “open” position. It will be much more effective to use a damper that moves vertically or horizontally. To install it, you need to weld small corners measuring 10x10 mm or 15x15 mm onto the hopper.
In addition, the following options for modernizing the furnace are noted:
- the fuel hopper can be made of thicker steel, for example 5 mm;
- replace the round chimney pipe with a square one;
- for the stand, use a different design: as an option, take corners, balls or other elements that are at hand;
- change the stand for the camping rocket stove, for which a metal plate and a piece of reinforcement can be used to make a leg.
To make a modernized stove, you will need the following materials:
- Square pipe with a cross-section of 160×160 mm and a length of 400 mm. The firebox will be made from it.
- Square pipe with a cross-section of 120×120 mm and a length of 600 mm. It is needed to make a chimney.
- A five-millimeter sheet of steel and a piece of reinforcement with a diameter of 7-8 mm. The element separating the fuel compartment and the ash duct will be made from them. The size of the part should be 300×155 mm.
- Steel sheet 350×180 mm. This material is necessary for the manufacture of a stove stand.
- Steel sheet measuring 160×100 mm.
The production technology of this model of camp stove is not fundamentally different from the creation of similar structures:
- A metal plate with a grate must be welded to the walls of the bunker.
- Then the back of the container is attached, and the chimney is attached on top.
- When the entire structure is ready, a metal stand is welded to it from below, and an additional support is made from a piece of reinforcement. You can also use part of the vertical pipe that remains after cutting.
- Pieces of corners are welded on top of the vertical pipe, which will form a stand for dishes. Its height should be 40-50 mm.
- The hole in the fuel tank must be closed with a hinged door or a flap inserted into the corners.
- The finished product can be tested. If everything went well, the welds are cleaned and the reaction furnace is coated with heat-resistant paint. This will not only give the product a more attractive appearance, but will also protect the metal from corrosion.
Tools and materials
The main difference between rocket-type stoves and other solid fuel devices is the horizontal channel through which gases formed during combustion move more slowly. As they move, they actively give off heat, allowing you to heat a room or cook food using less fuel.
There are many options for manufacturing such stoves, but the most reliable, simple and aesthetically pleasing is the design made of refractory bricks. It can be used in the country house, in the garage and even outdoors by installing a canopy on top. There are options with a stove bench - such stoves are usually installed in construction temporary sheds or lodges.
To assemble a rocket-type stove yourself, you will need:
- simple red stove brick (the quantity depends on the size of the structure);
- fireclay bricks for laying out the firebox and bunker;
- sand and clay for binding solution;
- chimney pipe;
- doors and hinges;
- grates;
- blower;
- intermediate cap;
- construction mixer;
- container for solution;
- metal grate;
- trowel;
- grinder equipped with a diamond blade;
- pick;
- mallet;
- shovel;
- building level;
- tape measure and marker.
For a small but fully functional rocket stove you will need 21 bricks. This device is suitable for heating a room and heating food. If you intend to use coal for kindling, it is better to take a fireproof material that is not subject to cracking. For a stove with a stove bench, you need more building material; it is advisable to purchase it with a reserve.
How to do with a bed
A more complex option is a stove with a stove bench, which is placed indoors. It is universal: suitable for heating a room, drying clothes, cooking.
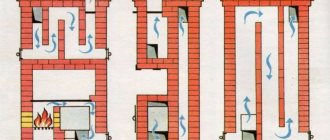
- The principle of masonry is similar to that described above, but the design is more complex. First lay out the base, then place the bricks in the second row, forming channels for heating the bed. In the second row, mark the mortgages for the doors.
- The third row completely follows the contours of the second. In the fourth, close the fuel channels, form a firebox and a vertical channel for the smoke to escape.
- Place a bench in the fifth and sixth rows, and continue forming a smoke channel in the fuel zone. Work continues according to the standard pattern for the next few rows.
- Having finished laying out the fuel, you need to attach the doors with hinges.
- In the twelfth row, start laying the chimney. Insert the pipe into place and remove it through the hole in the roof.
- The next row forms the hob in the fuel zone. Place an asbestos gasket on it, which is covered with a steel sheet.
- The fourteenth and fifteenth rows complete the formation of the chimney; lay a low wall between the stove bench and the fuel zone.
- The folded stove needs to be dried. Place a little fuel into the combustion hole and continue heating until the wet spots disappear from the brick. Typically the oven takes at least 3 days to dry; speeding up the process can lead to cracking.
The rocket stove is a reliable and inexpensive design that will last for several years and will not require repairs. You can use coal, firewood, ready-made briquettes and any flammable waste as fuel.
Preparing the foundation
- in the place where you plan to place the stove, make a hole 0.5 meters deep, the length and width can be increased to 0.7 meters;
- approximately 0.3 meters high, fill the prepared hole with very fine crushed stone and carry out thorough compaction;
- prepare a cement composition based on cement-sand in a ratio of 1 to 4, dilute the mixture with water and pour it onto the crushed stone;
- within 24 hours the base will dry and become hard - place several sheets of roofing material on top for reliable protection from moisture;
- prepare a concrete composition of cement, sand, fine gravel and water in a ratio of 1:2:4 and pour it onto the roofing material;
- carefully level the base using a building level;
- after drying, make a brick platform approximately 0.7 meters in width and height;
- also arrange a protective brick screen up to 1.2 meters high - in the future the stove will be located in close proximity to it, approximately at a distance of 0.2 meters.
General principles
The portable portable stove "Robinson" was made on the basis of a heating rocket stove. The same principle is applied: firewood burns in the bunker-fuel compartment, the fire, due to the air flow, enters the combustion zone - a horizontal section of the pipe and partially rises up the smoke tube. First, while the stove is not heated up, all the energy is spent on heating the chimney. Then, when it warms up, the gases from high temperatures ignite again, and secondary combustion of the gases occurs. Modern gas-generating pyrolysis boilers are designed according to the same principle.
How does a rocket stove work?
In the Robinson oven, everything is a little simpler: we don’t need to heat the room. Its main task is to heat water and cook food. But the principles remain the same: the fire must heat the chimney, and its length must be enough to burn off the gases. Therefore, for normal performance, adhere to the following proportions:
- The length of the chimney must be at least 2 times the length of the horizontal (sloping) section.
- The height of the fuel compartment is approximately equal to the length of the horizontal section. Therefore, in the Robinson stove, the firebox is made at an angle of 45°, although the fuel compartment can be located at an angle of 90°, but it is not very convenient to place fuel this way.
- The cross-section of the chimney should not be smaller than the size of the firebox.
About the design
The Robinson rocket stove consists of the following elements:
- Firebox.
- Pipe for removing generated smoke.
The design feature of the fuel bunker is located not only vertically, but also horizontally, at an angle. The method of placement depends on the desire of the person, the features of the structure in which the finished stove will be installed.
This is what a rocket stove made from a pipe looks like
An option can also be used in which the fuel bunker will be located between the chimney and two elements of a horizontal pipe section. This is done in order to lengthen the surface heated during fuel combustion, thereby increasing the efficiency and time of warming up the room.
Conventional schemes for creating furnaces have:
- A firebox located vertically and connected to the chimney by a piece of pipe (its length can be different). The area connecting the elements is used for cooking (hob).
- A firebox located directly next to the pipe (the diagram is used in the case when the stove must perform the function of a heating unit).
- A firebox fixed at an angle to the pipe (for ease of loading fuel into a special compartment).
The stove can have two fireboxes at once. A special feature is their location on the sides of the structure in a vertical position. Pipes must have a large cross-sectional size. The purpose of the oven is to heat a container with liquid, which is placed on a special stand (this option is used to supply hot water).
Design options
Drawings and photos of a vertical stove made of pipe 530
As with the horizontal format, the 530-diameter labor is ideal for use if you are making the oven yourself rather than enlisting the help of a professional. A stove for a bathhouse made from pipe 530 vertically will help you make drawings with all the necessary markings. Needless to say, this makes your work much easier, because the most difficult thing is to make the necessary markings. Of course, the proposed options are not an axiom. You are also free to make necessary changes to them. With one condition - if you really know what you are doing!
Drawings and photos of a horizontal stove made of pipe 530
Very often, a 530 diameter pipe is used to make a sauna stove. It allows for longer combustion of wood, significantly increases the performance of the stove, and is generally more convenient to work with. Therefore, photos and drawings of a stove for a bathhouse made of pipe 530 in horizontal format will be useful to you if you decide to build this type of building. Below we offer you popular options that have been tested in practice.
This “baby” will allow you to quickly warm water in extreme conditions
A stand for a container with water can easily be made from the bottom or lid of a jar by cutting out the middle of it, then making cuts on the inside of the resulting circle, and bending them down to form legs. This stand fits perfectly on the edges of the jar. The stand can also be made from steel wire by carefully bending several pieces and fastening them together.
Robinson type camping stoves
Today, various compact rocket-type camping stoves are on sale, with different names, including “Robinson”. However, an experienced craftsman, having looked at the structure of such a device, will immediately understand its design and will be able to draw up a drawing according to which it will not be difficult to manufacture it.
It is clear that the manufacture of such stoves will be available only to those home craftsmen who have the skills of plumbing and welding and have the necessary equipment and tools at their disposal.
Every good home owner should be familiar with welding technology!
In the everyday life of a private home, there are very often situations where it is very difficult to do without welding work. It is not enough to have a device - you need to have certain skills. We hope that a special article on our portal dedicated to the basics of working with electric welding
, will be a good tutorial for beginners.
You need to know that all camp stoves operating according to the principle described above have common parameters that must be taken into account when drawing up a drawing diagram, otherwise malfunctions may occur in the functioning of the structure. These characteristic features include the following:
- The vertical pipe must be at least twice as high as the length of the combustion hopper.
- The height of the fuel hopper, installed vertically, should be approximately equal to the length of the horizontal connecting section of the stove and the width of the combustion opening.
- The best location for the combustion chamber would be to install it at an angle of 45 degrees, since the plenum clearance is optimally located in it, and it is also convenient to place fuel in it.
- It is recommended that the cross-section of the fuel bunker inlet be approximately equal to that of the vertical pipe.
The first version of a camp stove
This model of camping stove is simple in design and manufacture and very compact in size. It does not require a large amount of materials, and it can be made in just a few hours.
Expert advice
You can insulate the walls not only with brick, but also with some other materials: asbestos-cement slabs, mineralite (fiber cement slabs) and cover them on top with decorative metal sheets, stainless steel, and special ceramic tiles.
You can install ready-made purchased doors as doors. By placing a glass door on the firebox, you will get a beautiful visual effect of a live fire, like in a fireplace.
It is advisable to protect the iron body with a decorative grille to protect visitors from burns. Sometimes stones are placed behind these grates and used as an open heater.
Brick rocket - building a stationary structure
If you do not plan to take a home-made cooking unit with you on hikes, it is possible to build a permanent stove out of brick. According to the principle of its operation, it will not differ in any way from standard designs. True, the labor and time costs for its construction will be considerable. The peculiarity of Robinson brick is that the fire channels of the stove are made of fireclay material. But the upper part of the structure - the cap, is again made from a metal barrel or cylinder.
Externally, brick ovens may differ from each other (different drawings suggest building stationary rockets with different geometric characteristics). The scheme of their construction is always the same. It is given below:
Source
Why we choose plastic
The modern chemical industry has advanced quite far in the production of plastics that meet all the necessary requirements. Plastic today has the following properties that make it preferable among many others:
- the material has the greatest durability among all others and lasts up to 50 years without failure,
- it is resistant to environmental influences. Even when exposed to direct sunlight, high-quality plastic does not fade or dry out, as happens with wood. High humidity will not cause it to rot slowly. Plastic is also resistant to many aggressive chemical environments,
- plastic panels are quickly and relatively easy to install; you don’t have to be a professional builder for this,
- the material offers many design finishing options - the color palette is varied and available in all construction stores. There are also panels with a printed pattern,
- plastic is an inexpensive material; people with average incomes can afford decoration from plastic panels,
- Plastic panels are easy to care for - they can be washed with plain water or with the addition of detergents. If any of the panels is damaged, it is also easy to replace it without dismantling the entire structure.
Let's talk about the disadvantages of plastic panels. Actually, everyone cares about only one thing - whether plastic really releases harmful substances into the air, and how flammable it is. The doubts are quite logical, because sunlight falls on the balcony, especially those located on the south side, every day.
But these fears were justified earlier; today they are in vain. Modern PVC, from which the panels are made, is absolutely safe in this sense. The same can be said about flammability: plastic does not burn, but slowly smolders. And for harmful substances to enter the air, a temperature of about 350⁰C is needed; sunlight is clearly not enough for this.
New panels may emit a characteristic odor that disappears over time. Another disadvantage is the relatively low strength - a strong blow can lead to the formation of chips and cracks, and sharp objects leave scratches on the surface. It is recommended to use plastic for interior decoration.
