You don’t have to worry about how to install a stove in a bathhouse if this is done by real professionals who are responsible for the results. But not everyone has the opportunity to use their services. If such specialists cannot be afforded or they simply could not be found, this work will have to be done independently or closely monitor the actions of hired workers. But some issues can only be resolved by the owner himself.
The installation of stoves is usually carried out by specialists from a company that sells heating appliances Source nadachi.ru
Basic options for installing a sauna stove
The most common:
- Placement of the entire structure in the steam room. The advantages include loading firewood directly from it. It is convenient to easily adjust the traction. But there are many disadvantages: oxygen is burned out relatively quickly in a small room, it is difficult to maintain the required humidity level, and when using it, dirt from the logs remains on the floor.
- Installing a stove in a bathhouse with an external firebox is the best option in terms of safety, cleanliness and space saving. True, its installation needs to be thought out in advance, because to bring out the fuel channel it is necessary to provide a technological hole, since if it is not made, you will have to break the wall.
- The fuel channel can even be placed outside. This option is the rarest, and is used in extreme cases, when the area of the steam room and dressing room is small, or coal, which is very dirty, is planned to be used as fuel. The main disadvantage of this design is the inconvenience of operation, especially in winter.
It is necessary to decide on the placement option at the stage of building the bathhouse. If you plan to move the furnace firebox to an adjacent room, then when constructing a dividing wall between the steam room and the dressing room, an opening is immediately installed in it. In the case of a completed reconstruction, it is quite acceptable to cut out the necessary window in the wall to remove the fire door.
Choosing a location for the oven
The most correct decision would be the initial design of the bathhouse, taking into account all the rooms and the location of the stove. If it is possible to heat all other rooms from another source, it is placed in a steam room. If not, consider the option of installing a stove in a bathhouse with a firebox from the dressing room so that it heats both it and the washing compartment. To do this, an opening is provided in the partition between these compartments, which is subsequently lined around the firebox with fireproof materials.
Project of a bathhouse with a steam room and shower Source sk-ac.ru
Both options have their positive and negative sides:
- Installation in a steam room allows you to control the operation of the stove without interrupting bath procedures. But the firebox and the space in front of it take up extra space; with this placement, the oxygen in the room burns faster, which requires the installation of a ventilation system. And most importantly, you have to organize autonomous heating of the dressing room, locker room, bathroom and other rooms of the bathhouse, or conduct it from home.
- The second option is much more effective and economical, since installing a stove in a bathhouse with a firebox in the dressing room is not much more difficult, but there are more advantages. The steam room maintains a normal microclimate and frees up useful space; all rooms are heated from one stove. But the bathing procedures have to be interrupted in order to add firewood to the firebox.
However, convenience is not the only and not the most important criterion for choosing a suitable location for a heating unit. The issue of fire safety is much more pressing.
Correct corner placement scheme Source banyabest.ru
First of all, you need to decide how and where to bring the chimney through the roof. It is best if it is connected to the stove in a straight line, without unnecessary bends or turns.
When placing it in a corner or against one wall, you need to follow the rules for installing a stove in a bathhouse with a firebox from a dressing room in a wooden log house. The distance from the metal body to walls made of flammable materials must be at least 50 cm on any side. It can be reduced by insulating the walls with fireproof shields. This can be sheets of mineralite, asbestos cardboard or basalt cardboard, as well as facing with ceramic tiles or a screen made of red ceramic brick.
Insulating walls with mineralite slabs before installing a stove Source bg.aviarydecor.com
A distance of at least 120 cm should be maintained from the firebox door to the front door. And in front of the firebox, be sure to lay a metal sheet or cover the floor with tiles.
It is easier to provide for all these points at the design stage. If this has not been done, the task will become more complicated, and there will be fewer options for convenient placement of the stove.
How to install a stove in a bathhouse, at what distance from the wall
To completely prevent the possibility of fire or less dangerous, but also negative consequences from contact with hot metal, the firebox should be located at a distance of 1 m from other objects. But in practice this is almost unrealistic, because there is simply not so much free space in the steam room or adjacent rooms. Therefore, wood and other potentially flammable surfaces are lined with heat-resistant materials (baked clay, brick). There is an alternative - laying a plot - but it does not turn out to be convenient and worth implementing in all cases. But when performing thermal insulation, the minimum distance will be reduced from one meter to 80 cm. The distance between partitions and shelves from the heat source will remain at least 110 cm.
Chimney installation
Popular material options for chimney pipes:
- stainless steel;
- fire brick;
- ceramics;
- sandwich pipes.
Sandwich pipes have a layer of heat insulator inside.
Thematic material: “How to properly assemble a chimney.”
Where to install the stove in the bathhouse
When choosing a point for installation, you must be guided by current SNiPs and take into account how and where remote tanks and external heat exchangers, connecting pipes, and mesh casings are located. The following requirements must also be met:
- the heating unit must not be placed in a niche;
- the distance to unscreened wooden interior items must exceed 1 m;
- the distance to a thermally insulated and plastered ceiling must be at least 0.8 m, to an unprotected fire-resistant coating - at least 1.2 m;
- from the firebox door to the opposite wall - at least 1.25 m, from the hot body - 0.5 m;
- the partition for the outlet of the channel-sleeve is made of fire-resistant material (not completely, but from the beginning of the floor and, continuously, up to a level of 0.25 m above the boiler).
Installing a heat exchanger for a sauna stove or boiler with your own hands
Modern models of sauna stoves and boilers are often supplemented with heat exchangers - devices for heating water. What they are, the nuances and difficulties of installation will be discussed below.
Scheme: 1 – heat exchanger; 2 – storage tank; 3 – upper outlet (min tilt 20°); 4 – lower outlet (min downward slope 1-2°); 5 – drain valve of the storage tank; 6 – drain valve of the system.
Heat exchanger device
The work is based on the physical properties of water, which when hot expands and goes to the top, cold water remains at the bottom.
Small heat exchangers are placed in the bathhouse for quick heating. One pipe goes to it from above, the other from below.
A water tank is sometimes installed in the steam room, but more often in the wash room. And at such a level that it cannot be touched.
Hot water flows through the upper pipe to the tank, and cold water is poured through the lower pipe as hot water is consumed.
Important installation details
The heat exchanger can:
- be built into the oven;
- attached to the chimney;
- fixed to the ceiling of the steam room.
The unit’s capacity of 5 liters is enough to fill a 120 liter tank with boiling water.
To ensure constant availability of hot water in the washing machine, it is necessary to maintain the combustion process in the furnace and an uninterrupted supply of water to the tank. To realize the second point, a circulation pump is often used.
You can do without it when the diameter of the pipes is 1 inch.
To reduce heat losses, the total length of pipes should not be more than 3 m.
Before installation, you should consider the following recommendations:
- A high-quality heat exchanger should not consume more than 10% of the energy generated by the furnace.
- The pipes are laid in such a way that water flows on its own with direct supply at an angle of 250 degrees, and with reverse supply at an angle of 30 degrees.
- The volume of water in the tank is selected separately for each heat exchanger model. This depends on the selected power. If there is not enough of it, it will boil frequently and scale will begin to accumulate on the walls, which can cause a fire. If the volume of water is too high, the heating process will take a long time.
- The power reserve should be enough in case of cooling after the wood burns out in the stove.
When the water tank is placed directly in the steam room, the heat exchanger is connected in the following order:
- The inlet hole into the tank is made 5 cm above the upper register fitting (at least 1.5 m from the floor). This will ensure better water circulation.
- The bottom of the tank should be at least 1.5 m above the floor or even higher.
- You need to step back another half meter from the ceiling.
Because the tank is located too high, it is difficult to control the water level in it.
Therefore, there are other connection options:
- The tank is located below.
- The fitting is equipped on the side under the underwater circuit.
The disadvantage of this method is that when the water level is less than the upper fitting, circulation will not occur. The water in the heat exchanger will stand and boil at times, but in the tank it will remain cold.
When placing the tank in a sink, the installation requirements remain the same.
It is important to note that the heat exchanger pipes that will be in contact with the hot furnace must be stainless steel to withstand the high temperature and humidity.
You can buy connecting pipes made of metal-plastic or take regular flexible hoses. Diameter - 1 inch. With a larger diameter you will have to install a circulation pump.
Seals should be made of durable tangit, fitting gaskets should be made of paronite.
A drain valve must be installed. Through it, you can remove blockages from the system and drain the water during the period of non-use of the bath.
Installation base
Any modern heating device weighs relatively little, but add to this the mass of stones in a mesh casing, water in the tank, loaded logs, and brick lining. As a result, the load constantly experienced by the floor is quite serious. If the firebox stands on four point legs, over time they can push through the wooden covering.
If the floors are non-flammable, they do not need to be additionally shielded. A screed poured over the ground will already be a sufficient solution. Although it is still better to lay a separate fire-resistant base in any case. The main thing is that the total weight of equipment and fuel does not exceed 700 kg.
Installing an iron stove: choosing a base
Nobody just puts a metal stove on the bath floor. And here's why: the thing is heavy, and therefore it would simply begin to sag on the floor over time . And it would do it unevenly. And when the stove is not level, it can crack . Therefore, either a brick foundation is made for it , or even a separate foundation with verified level horizontal lines to prevent destruction of the furnace.
To decide whether you need a lightweight or a full-fledged base, you must first calculate the mass of the stove with everything due to it. You will learn how to do this from our article - you don’t want to repeat yourself, but everything is described in detail there.
Choosing the type and size of foundation for the furnace
It is advisable to lay it out at the design stage. After all, if you act with a steam room already equipped, you will have to remove the floor, replace the damaged structure, then fix new logs or strengthen the old ones. What foundation options are there? If we are guided by current SNiPs, these are:
- Monolithic reinforced base, not combined with a bathhouse, laid below the soil freezing line.
- The pile-slab base, also separate, is useful when building on heaving soil.
- Shallow foundation (up to 0.6-0.7 m down), going in conjunction with the base of the steam room and adjacent rooms. Just reinforce it with anchoring to prevent vertical movements of the slabs during frosts.
The dimensions of any of the options depend on the dimensions of the rooms, so this is always an individual indicator. The main thing is that there is a distance of 7-10 centimeters from the edge of the perimeter to the beginning of the walls.
Installation of a hanging tank and heat exchanger
In the absence of hot water supply at the dacha, autonomous water heating becomes relevant. A boiler is not needed in a bathhouse; the stove can easily cope with the needs of washing and heating.
You can read about what options there are in the articles: about stoves with a tank and about stoves with a heat exchanger.
You can install a remote tank connected to the heat exchanger in the furnace as follows:
- Choose a place so that the tank hangs above the stove. The specific height is related to the angle of inclination of the pipes.
- Do not mount the tank directly to the wall. Make a sheathing from slats and attach it to it.
- In addition to the top fastening, you can screw brackets from below.
- The tank has three or four pipes. Two of them will connect it to the heat exchanger. Another one is needed to supply hot water to the washing or heating system.
- The latter can be replaced with a hole and serves to fill the tank with cold water. If there is one, then you need to install a non-return safety valve on it.
- The tank is connected to the heat exchanger using corrugated steel or copper pipes, which are connected using fittings.
- A tap must be provided on one of the pipes to completely drain the water.
- The heat exchanger is placed inside or outside the furnace (depending on the design), its fittings are connected by fittings to the tank pipes.
- If the heat exchanger is of the samovar type, it is placed on the monopipe of the chimney and secured with sealant and clamps.
Sometimes bathhouse owners, without further ado, make everything simpler and, oddly enough, this also works. See how a stove with a heat exchanger in one bath is made:
On a note! If it is not possible to install pipes at the desired angle, you can consider the option of forced pressure in the system.
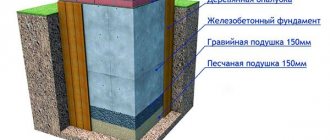
Pouring a monolithic foundation
It is carried out according to the rules for installing a stove in a bathhouse, exactly according to the diagram it is necessary:
- To carry out the main excavation work - carefully dig a small vertical pit 1.5 m deep so that on all sides of the perimeter it is 10 centimeters wider than the future foundation. To speed up the process, it is possible and even recommended to use special equipment.
- Set up a sand-crushed stone cushion - fill the bottom with river sand, compact it, watering it with water. At the same time, mix the fine-grained material in a ratio of 1 to 1, then lay it in an even layer of 15-20 cm.
- Mix the “milk”, that is, not a thick cement mortar, then gradually pour it into the pit. Allow time to harden so that the crushed stone and gravel adhere firmly.
- Waterproof the initial layers of the base using roofing felt or liquid bitumen.
- Assemble the formwork - make panels from plywood (or boards, as an option), nailing them together or fastening them with screws, and then placing them in the pit. Align vertically (the height of the structures here should rise right up to the finished floor), check the diagonals, making sure that the finished sole will be in the shape of a rectangle (square).
- Reinforce - tie the frame (10 cm less than the perimeter and height of the formwork) with wire and place it inside.
- Pour - prepare a solution (in a ratio of 1 to 2.5 to 4 from sand, cement and crushed stone, respectively), mixing thoroughly, and tie it in layers with everything that was placed in the foundation pit earlier. Don’t forget to compact it with an in-depth vibrating device or a regular rod. Allow to dry for 3 weeks, then remove the formwork and fill the resulting voids with a mixture of sand and soil.
- Waterproof the finished concrete slab, first leveling it with grout (if necessary). To do this, lay the roofing material in two layers, fastening each with liquid bitumen mastic.
Installation of a sauna stove with a remote firebox
Foundation for a sauna stove
Do you need a foundation for a metal stove model? This question arises for many owners who decide to build a bathhouse. Therefore, it should immediately be noted that if the weight of the heating device does not exceed 400 kg (naturally, taking into account the stone backing), and the floors are planned to be made of boards at least 40 mm thick, then it is quite possible to do without arranging a foundation. Stoves made of stainless steel have this weight, while cast iron and brick models are heavier.
If you purchase a steel model of a sauna stove and plan to install it directly on wooden floors, then the installation site must be carefully prepared.
Ceramic tiles are laid on the floors, or first a sheet of asbestos or mineral wool is laid, which is covered with a steel sheet.
The stove must be installed on a non-combustible base, the walls must be covered with heat-resistant material. This, for example, could be a metal screen made of stainless steel.
However, do not forget that a bathhouse is a room with high humidity and water can get under the flooring installed under the stove, which is extremely undesirable. Therefore, the slope of the floor in the steam room must be made from the heating device, that is, it must be in the highest place in the room. In addition, the laid and secured flooring for installing the stove must be waterproofed around the entire perimeter. Today, a large number of sealants are available in construction stores for this purpose.
If you are installing a homemade steel stove, which is planned to be lined with brick, or a cast-iron model is selected, then it is better to equip a concrete foundation for it.
The solid concrete foundation for the furnace should not be in contact with the foundation of the main building. The dimensions of the foundation in length and width must exceed the dimensions of the heating device by 150÷200 mm on each side.
If the wooden floor in the bathhouse is strong and it is planned to build a brick podium on top of it for the stove, then before starting its construction, it is necessary to take measurements. If it turns out that the distance between the surface of the stove and the ceiling is less than the required parameter of 1200 mm, then it is recommended to abandon this option. Instead of a podium, a metal sheet must be laid on top of a wooden floor under a steel stove, and a full-fledged, free-standing foundation must be installed under a cast-iron model.
Work on the arrangement of a concrete shallow foundation includes several stages. And they are best carried out simultaneously with the construction of the bathhouse. But sometimes circumstances force these activities to be carried out in an already erected building.
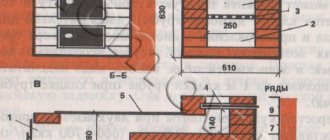
| Illustration | Brief description of the operations performed |
| If the foundation is being built in an already built bathhouse, then the first step is to mark the installation location of the stove on the floor and the hole in the wall through which the fuel channel will pass. All markings are carried out according to the dimensions taken from the stove, taking into account allowances for installing thermal insulation. Next, the required opening is cut out in the wall along the marking lines. After this, part of the wooden floor is dismantled. Then a foundation pit is dug in the underground soil. | |
| Diagram of the arrangement of materials when arranging the foundation for a metal stove in a bathhouse. The linear parameters of the foundation can be changed in accordance with the size of the selected heating device. The depth of the foundation pit for installing a metal furnace should be 500 mm. After the pit is ready, the soil at its bottom must be compacted well. Then, sand is poured onto the bottom, which also needs to be compacted - its compaction thickness should be 100 mm. The sand layer will become a good waterproofing agent for the foundation from ground moisture. Next, crushed stone is laid on top of the sand - its thickness after compaction should be 150÷200 mm. It is recommended to lay a waterproofing material on top of the crushed stone, which should also cover the walls of the pit. Dense polyethylene or roofing felt can be used as waterproofing. | |
| A reinforcement cage is mounted on top of the waterproofing material or crushed stone. For this design, a reinforcing rod with a cross-section of 7 ÷ 8 mm is suitable, which is connected to each other by a lattice using knitting steel wire. Welded reinforcing mesh, which can be purchased ready-made in the store, is also quite suitable. | |
| The concrete screed is poured flush with the surface of the underground soil or raised to the level of the bathhouse floor. If the latter option is chosen, then temporary wooden formwork is installed from the ground to the entire height of the concrete slab. A concrete solution of at least M200 grade is poured into the prepared reinforced pit. After pouring and leveling the surface of the foundation, it is left until it completely dries and gains strength - this period is at least 28-30 days. | |
| The next step is to lay two layers of waterproofing material on the concrete surface - in this case, only roofing felt is used. A brick podium is laid on top of the roofing felt, consisting of one or two rows of bricks. | |
| The result should be approximately the same design as shown in the illustration. Next, you can move on to insulating the ends of the wooden walls, that is, protecting them from the effects of high temperatures to which the furnace body can heat up during operation. |
Features of furnace installation
The installation of the stove can be done in different ways, depending on when it is installed. If the foundation is installed in a finished bathhouse structure, then an opening is cut in the wall according to the parameters mentioned above.
Asbestos prices
asbestos
Of course, it is more convenient to install the stove first, and then start building the partition. But this happens very rarely.
In another option for performing the work, which is considered more correct, the partition between two rooms is erected after erecting the foundation, installing the stove in a permanent place and lining it with bricks. However, such installation is possible only at the stages of building a bathhouse, or if a major reconstruction of premises with a large area is being carried out.
If a factory-made heating device is installed, then it is worth carefully studying the passport attached to the product, in which the manufacturer indicates the recommended parameters for the distance of flammable surfaces from the stove. As a rule, for a unit with maximum power, the distance between the wooden wall and the stove is 250 mm if the stove is equipped with thermal insulation of the body, and 400 mm if it is not.
Lining the gap between the combustion channel and the walls of the opening with bricks
The opening parameters do not depend on the length of the outlet channel, but the wall must be insulated from the metal of the furnace with thermal insulation material over its entire thickness, and then with a steel sheet secured between the brickwork and the insulation layer.
Thermal insulation of the opening and surrounding walls with mineral wool slabs. They can then be covered with steel sheet or (on the dressing room side) heat-resistant plasterboard.
There must be a gap of at least 50 mm between the main structure of the stove and the wooden wall. If the insulation of the opening is limited to a layer of asbestos or mineral wool, then the surface of the partition facing the furnace must be lined with a heat-resistant material - this can be a sheet of asbestos, special plasterboard, pressed mineral wool or other high-temperature resistant materials.
The fuel channel passing through the opening cut into the wooden wall must be lined with brickwork. It must be taken into account that the brick must be separated from the metal of the furnace by a thermal gap of at least 20÷25 mm. This distance must be maintained in order to provide the necessary “degree of freedom” for the expansion of the metal when it is heated. The gap must be filled with heat-resistant elastic material - asbestos cord or stone wool.
Thermal insulation material separating a wooden wall from the brickwork.
If the brickwork framing the combustion channel turns out to be sloppy, and it is planned to cover it with wooden lining, then between it and the stove it is necessary to leave a gap of 100 mm on each side.
If the passage for the combustion channel is made close to a wooden wall, and the stove is planned to be installed along it, then before installing the device in place, the wall should be lined with bricks.
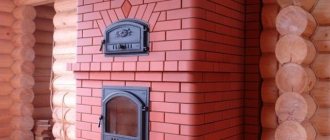
Option for installing the stove along the log wall of the bathhouse - continuous brickwork is performed
For safety reasons, the main part of the heating device, which will be located in the steam room, should be covered with brick (a protective brick screen should be built). However, so that the masonry does not block the heat coming from the walls of the furnace, it is not made continuous, leaving gaps between the bricks.
Sparse brickwork around the main part of the stove.
This type of masonry will not only freely allow the heat generated in the furnace to pass through and prevent accidental burns, but will also not weigh down the foundation as much. In addition, this protective wall will require fewer bricks and mortar.
Is it difficult to line a metal stove with bricks yourself?
It must be said that this practice is very common, the technology is well developed and tested, so this operation is not expected to cause any special problems. How to cover a metal stove with bricks with your own hands - read in a special publication on our portal.
It must be said that the removal of the firebox to the dressing room, and the use of brick, stone or ceramic cladding, including walls or floors in the steam room - all this affects to a certain extent the thermal power of the sauna stove. Therefore, you should plan this or that option for placing the heater, its thermal insulation from the walls and subsequent finishing in advance. Just so as not to then be faced with a situation where the power of a seemingly correctly initially selected stove, after completing installation work and putting it into operation, suddenly turns out to be insufficient.
Below is a calculator that will allow you to correctly estimate this parameter.
Pile-grillage foundation
How to properly install a stove in a bathhouse that will be built on unstable soil? It is on this foundation, according to the following scheme:
- Prepare the place - remove the top layer of soil and use ropes and stakes to mark the location of the future sole.
- Make pits (at the corners of the marked perimeter) - dig them to a depth of 15-20 cm, no more.
- Take the piles (section width 108 mm and length 2.5 m) and screw them strictly vertically into the holes made at the previous stage. It turns out that they are above the finished floor line - cut them with a grinder so that they go 10 cm below.
- Weld the heads, paint the protruding elements to protect them from external influences and extend their service life, and secure another “ten” channel around the perimeter with shelves inward.
- Lay sheet steel inside the resulting contour and fix it.
- Lay reinforcement (if necessary), pour concrete, give it time to dry, coat with waterproofing solution.
Video description
One of the options for how to install a stove in a bathhouse on a wooden floor, how to finish the floor and walls, is shown in the video:
Such protection should be larger than the dimensions of the heating unit by 5-10 cm on the back and sides and protrude beyond the firebox by 40-50 cm to prevent accidental fire from falling coals.
Making a concrete foundation
If calculations have shown that you need a foundation for an iron stove in a bathhouse, how to do this work yourself? This depends on whether there is already a floor at the installation site or its arrangement has not yet begun. In the first case, the flooring will have to be disassembled and re-installed after pouring the foundation. It may be necessary to rearrange the joists or lay additional ones around the perimeter of the concrete base.
It is necessary to lay logs under the ends of the flooring boards around the stove. Source pechkur.ru
- The dimensions of the foundation in plan should be 10-15 cm larger than the dimensions of the stove. And if it is covered with a brick screen, then it will protrude beyond the masonry by the same distance.
- After marking, soil is selected inside it to a depth of about half a meter, making the walls vertical. At the same time, make sure that the pit does not adjoin closely to the foundation of the bathhouse: there should be a minimum distance of 5 cm between them.
- Therefore, if the stove is located near a wall or in a corner, fifty-fifty boards are laid between the main and stove foundations to ensure the necessary clearance and independent settlement. If not left in place, uneven settlement may cause the base under the stove to crack or become deformed.
- Crushed stone or a sand-gravel mixture is poured into the bottom of the mini-pit, making a cushion 20-25 cm high.
Pit for pouring the foundation Source homerenovates.com
See also: Catalog of companies that specialize in the installation of stoves and fireplaces
- Next, the formwork is lowered into the pit, the walls of which should be of such a height as to slightly not reach the level of the finished floor. And concrete is poured into the formwork, which is prepared from 1 part cement and 3 parts sand and filler (crushed stone).
- If the base is made for a heavy structure, it needs to be reinforced, since installing the stove correctly in the bathhouse is not enough - it needs to be prevented from “moving” over time due to a weak foundation.
- The base is left to dry for at least 2-3 weeks, periodically spraying the surface with water.
- The final stage is waterproofing the surface with roofing felt and laying bricks on it. Using brickwork, the base is raised to the required height and leveled in a horizontal plane.
Ready base Source oteplicax.ru
Shallow base
Here is the answer to the question of how to properly install a stove in a bathhouse with minimal time and money. Such a foundation is made relatively quickly and simply, however, it is only suitable when building on stable and water-free soil. The sequence of work on its arrangement is as follows:
- Mark the boundaries of the pit and dig it - up to 0.5 m deep.
- Tamp the bottom, leveling it with river sand (5 cm layer), moistening it with water and compacting it.
- Make a cushion of crushed stone (15-20 cm) and fill it with liquid cement.
- Wait until it dries, waterproof the base with roofing felt, install the formwork, strengthen the structure with 20-30 cm of concrete.
- After hardening, remove the unnecessary panels and level the foundation horizontally.
Rules for installing electric furnaces
Electric stoves in a bathhouse must be powered by 220 V.
In private construction, electric stoves powered by a 220 V network are used to equip saunas and baths. When installing them, the following rules should be observed:
- Select the type and cross-section of the cable according to the power of the stove. For modifications to 3; 4.5 and 6 kW a 1.5 mm2 conductor is suitable.
- Lay the floor under the electric heater with ceramic tiles.
- Leave a gap of at least 7 cm from the stove fence to shelves and flammable objects.
- Place washed stones only on top of the heating element.
- If you have a stove, use lamps designed for a temperature limit of up to 140 degrees.
- The ventilation hole should be located behind the heater at a height of 5-10 cm from the floor.
- Apply water as carefully as possible; do not water the stones with sea water.
Do not use abrasive products to maintain the electric heater.
Preparing a wooden floor for stove installation
Since we previously agreed that we were planning installation work even before the construction of the steam room and adjacent rooms, we will consider an option in which we do not have to dismantle the ceilings.
- Mark the dimensions of the heater (strictly at the location of its future location), with a margin of 5-10 cm in each direction. Remember the distance to the walls and the protection (in the form of a metal sheet) in front of the door. Draw all this on the prepared sole.
- Cut out a shape from the mineral slab, the same shape as the one obtained in the previous step, and screw it to the floor with self-tapping screws.
- Mix the refractory mortar and use it to lay out 2 rows of bricks, preferably fireclay, but red solid brick can also be used. Check for compliance with the horizontal level and hit it with a mallet.
- Dilute heat-resistant glue and fix the porcelain tiles to the prepared base. For what? You not only need to understand how to properly install a sauna stove, but also know how to prevent the floor from catching fire during its operation. And this material, which can withstand even very high temperatures, will be an excellent fire protection.
You can simplify the procedure and put a sheet of mineralite, and on top of it another one, but this one made of steel, securing each one with self-tapping screws. But we advise you not to skimp on fire safety and to play it safe.
Preparing the walls
Above, we determined what the distance to the flammable wall should be, and there we came to the conclusion that it is much more practical to decorate them with refractory materials, so as not to waste steam room space . Now it's time to talk about how this is done.
Budget-friendly, but not the best option, a sheet of galvanized sheet nailed to the wall
So, we have three and a half options:
- We attach the refractory sheet to the wall;
- plastering the wall;
- we make a brick casing for the stove;
- replacing part of a wooden wall with brick.
Let's explain why 3.5 - often they hang the refractory on the wall and build the casing. Moreover, the latter is installed not only for the purpose of fire safety, but also simply for safety, as well as for heat redistribution. You will learn more about why it is needed and how to make it in this article.
As for refractory, you can use mineralite - these are sheets of cement with fillers, reinforced with fibers. Excellent fire resistance. You just need to attach it correctly.
If the stove is standing almost flush against the wall , then you will need two layers of minerite with an air gap between them, which you will create using 3-centimeter ceramic bushings. The first layer is directly adjacent to the wooden wall, then there are bushings and a second layer of mineralite.
If the distance is larger , you can limit yourself to one layer , but it should not touch the wall - the same bushings are used to attach it to the tree.
Note! In a new log bathhouse, the refractory cannot be rigidly attached . Due to shrinkage, which lasts for years, rigid fastening can cause the refractory material to rupture. Therefore, make grooves for the fastening to slide . Over time, the shrinkage will be completed, then secure it tightly).
You can put, for example, heat-resistant tiles (it is placed on heat-resistant mastic) or come up with another decorative design. As an option - mirror stainless steel . Its sheets perfectly reflect heat, but at the same time heat up themselves. Therefore, stainless steel is attached to a layer of any refractory - mineral wool, ceramic fiber, superisol, etc.
In principle, you can plaster a flammable wall ( a layer of at least 2.5 cm ) or use fire-resistant plasterboard.
Those who decide to bring the firebox into the dressing room either immediately put up a brick wall, or then cut out part of the log house or timber. In the brickwork, space is left for a combustion tunnel with a reserve , where a heat insulator, for example, mineral wool, is then clogged. Thermal insulator is also used in places of contact between brickwork and a wooden wall . If you don’t want to replace the entire wall, make a portal - at least a meter long.
Fire door
The features of its arrangement during installation depend on where it goes:
- If it is in an adjacent room, then the opening must be lined with bricks and insulated with fire-resistant sheet material. The gaps between the wood and the masonry will need to be foamed, and the joints will need to be sealed with heat-resistant mastic.
- When going to the steam room, the wall should be covered with a stainless screen. The thickness of the steel should be at least 3 mm, and even better 4-5 mm.
How to determine the required thermal power of a sauna stove?
The power of heating devices is measured in kilowatts. However, manufacturers of sauna stoves take a different approach - they indicate how much steam room volume this model will be guaranteed to be able to heat to a level corresponding to the required microclimate in the steam room. Naturally, subject to high-quality thermal insulation of the latter.
This is usually indicated in passports - for rooms, for example, from 10 to 16 m³.
It would seem that everything is very simple. It is not difficult to determine the volume of the steam room, and it will be just as easy to choose a model. However, the features of the arrangement of the bathhouse can make their own adjustments.
Below is a calculator that will calculate, so to speak, the conditional or reduced “volume” of your steam room, that is, taking into account all the necessary amendments. Based on this value, it will be possible to more accurately select the optimal oven.
For example, if the result is that a stove of 11 m³ is needed, then they try to choose so that this value is approximately in the middle of the range of capabilities of the purchased model. That is, say, a stove designed to heat from 8 to 14 m³.
Calculator for calculating the conditional power of a sauna stove
Go to calculations
A few explanations on the calculation.
- It is clear that first of all the actual volume of the steam room is taken into account. To do this, you need to indicate its linear dimensions: length, width, height.
- Sauna stoves are designed for operation in high-quality insulated rooms. But in practice, it happens that log or timber bathhouses are not insulated from the inside. In this case, a fairly significant part of the heat will be spent on heating the walls, which have considerable heat capacity. Therefore, an amendment is necessary.
- If the stove is located entirely in the steam room, then all the heat generated remains inside this room. But if the firebox is made external (just on the topic of this publication), then part of the thermal energy will involuntarily be wasted on warming up the dressing room and the entire created structure of the “inset” of the stove into the wall. That is, it will also be appropriate to adjust the result.
- The quality of the door leading to the steam room is of great importance. If this is a well-insulated door with a good fit, then significant heat losses through it are not expected. But ordinary panel doors are often installed, as well as glass doors that are becoming fashionable. Of course, their thermal insulation qualities are much lower, and this will also be taken into account when carrying out calculations.
- A window to the street is not a mandatory element of the steam room interior, but it is still often present. That is, another loophole appears for heat leakage. Both the quality of the window and its area matter here. If the window is taken into account, then additional fields for entering this data will appear in the calculator.
- Areas in the steam room (on its walls or floor) lined with ceramic tiles, bricks, and stones can also play a role. Warming up such heat-intensive surfaces will require additional furnace power.
- The result will be shown in standard cubic meters, which should be used as a guide when choosing the optimal sauna stove model.
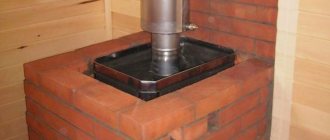
Chimney
It is important to know how to organize the exhaust gas outlet. Proceed as follows:
- Mark the location of the passageway on the ceiling.
- Saw the ceiling, treat it with fire-retardant impregnation, insert the groove (box with outlets) and secure it in the corners with self-tapping screws, lay 7.5 mm thick basalt insulation.
- A single-wall module, at least one meter deep, or a pipe heat exchanger is first installed on the sauna stove. Next, an adapter from a single-walled to a double-walled pipe, then the use of a sandwich structure is recommended.
- Connect the free end to the adapter, to which, on the other side, connect the first section of the chimney, followed by the second, and so on. Reinforce the joints with metal clamps.
- Protect the outlet pipe with a steel sheet (from the attic side), which is secured to the wooden ceiling using self-tapping screws.
- Cut a hole in the roof and bring out the pipe using a groove with an aluminum element.
- Make sure that the chimney rises 0.5-1.5 m above the roof level and install a cap.
If you purchased a ready-made unit, you must follow the instructions. On the website you can find high-quality factory-made polyurethane foam, presented in various configurations: “empty” or with additional insulation. In the first case, it is necessary to cover the base of the unit (stainless steel sheet) with basalt cardboard from the inside, and install the polyurethane foam itself in a box protected by mineralite sheets. We leave the distance between the pipe and the sheet empty. But the assembly itself must be covered with kaolin wool to a depth of 5-7 cm from the attic side; no more is needed to avoid overheating of the pipe.
Features of furnace installation depending on the material
At the bathhouse you can find not only iron stoves, but also other heating options. The bathhouse has its own peculiarities. It is worth analyzing all the details and only then installing cast iron or steel on the wooden floor of a frame or timber building.
Cast iron
A good foundation is a must. This material is very heavy, so you should expect a lot of weight.
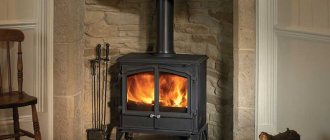
Steel iron
This is the correct approach with reliable insulation. The steam room heats up well and quickly, and the walls heat up to high temperatures, so you should take this into account and be careful.
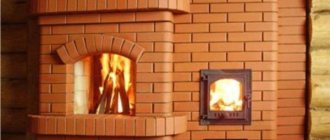
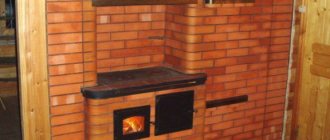
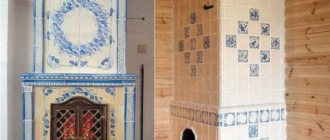
Brick
This is one of the safest options. But for a steam room this requires a long installation. In addition, such an installed structure is much more expensive than the metal version.
Firing the furnace before installation
It is carried out outdoors, as increased formation of caustic gas is possible. First you need to treat the heating unit with an anti-corrosion agent, and at the same time carefully inspect for cracks, chips and other defects on the grill, door, heat exchanger, and also make sure that there are no cracks or gaps. Then:
- Place the equipment on a flat and heat-resistant base, connect a temporary chimney (longer than 200 cm).
- Load firewood up to half the volume of the firebox and set it on fire (with the door loosely closed), maintaining the flame for an hour.
- Wait until the fire goes out (do not extinguish it).
Thanks to this, the internal coating of the heat generator will finally harden, and it will be possible to proceed to permanent operation.
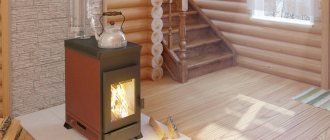
Safe placement and connection of an electric oven
A convenient solution is an electric heater. This is a great alternative to a wood stove. Doesn't take up much space. There is no chimney pipe. No need to clean or load fuel. It is enough to set the temperature correctly.
When connecting, it is important to follow the rules for connecting to the network and fire safety.
It is recommended to ground the electric heater. If this is not possible, then zeroing is carried out. To do this, on the distribution panel, the grounding wire of the electric furnace is connected to the zero terminals.
Installation of an RCD is required. This is excellent protection against short circuits during voltage surges in the network.
The wiring covering must be heat-resistant. The cross section is selected according to power and mains voltage. Read more in the article: “Electrical installation of a bathhouse.”
Frame wall construction
How to properly install a sauna stove equipped with an external firebox? Of course, with the installation of a partition between the steam room and the adjacent room. It is made from two beams with a cross section of 100 by 600 mm and a height equal to the ceiling of the room, pre-treated with an antiseptic. Place these spacers vertically, securing them at the top and bottom with self-tapping screws using perforated corners. Also fix a horizontal jumper between them to create a frame shaped like the letter H. There will be a fuel channel and brickwork on the floor, and at the top, at the floor level, there will be sheathing and insulation. Insulate the structure - fasten basalt wool slabs between the beams, install the lining with lathing, fix the foil steam protection with a construction stapler. After this, make brickwork, leaving a gap of 3-4 mm between it and the channel and wooden guides. For reliability, use corners, take care of the visual beauty of the seams. The finished portal should look aesthetically pleasing, so mount the trim, complete the finishing, level it and correctly determine the center.
Fire safety requirements
When installing any sauna stove, it is necessary to strictly comply with fire safety requirements, since the walls of the device heat up to fairly high temperatures during its operation. In order to ensure maximum safety and not have problems with regulatory organizations, it is recommended to install the stove in accordance with the provisions prescribed in SNiP 41-01-2003 (Chapter 6.6).
- The first thing that needs to be done is to equip a reliable foundation for the main structure of the stove, which will be adjacent to the wall dividing the room. The foundation should be covered with heat-resistant material and then with metal sheet. Asbestos sheets were previously used as heat-resistant insulation. Today on sale you can find panels of pressed mineral wool, which is less dangerous from an environmental point of view, sheets of foam glass or EZHKAKH (heat-resistant structural mica plastic).
- It is also necessary to provide a metal flooring in front of the combustion door, which will prevent the wooden floor from catching fire and simplify debris removal. The size of the pre-furnace sheet must be at least 400×800 mm.
- If the partition between the steam room and the dressing room is wooden, then the opening through which the fuel channel will pass must be separated from the wood by brick or stone masonry. The distance between the stove and wooden walls should be 400÷450 mm.
In the version shown, the owner chose to fill the opening with bricks
- Provided that an opening is installed along the end part of the wall through which the combustion channel will pass, a gasket made of heat-insulating material (mineral basalt wool or cement-fiber sheet) with a thickness of 40÷50 mm, the distance between the part of the wall built from combustible material and the outer wall oven can be reduced to 250 mm. If thicker thermal insulation material is installed, the safe distance can be 125 mm.
- The distance between the ceiling of the bathhouse and the surface of the stove should not be less than 1200 mm.
- The distance from the edge of the combustion door to the nearest door must be at least 1250 mm.
- If you purchased a non-factory-made stove, or the device is independently made from sheet metal, then it is best to cover it with brick. Thus, it is possible to protect the structure of the bathhouse from fire, and people taking water procedures from burns. Factory products, as a rule, are made with double walls, between which thermal insulation material is laid or convection channels pass through.
Prices for foam glass
foam glass
Ceiling
Its preparation is implied by any competent scheme for installing a stove in a bathhouse. Why? Because a significant part of fires start from above the room - due to overheating or cracks in the pipe. Therefore, when arranging the ceilings, a hole is left for the chimney - with a diameter of 90 cm. Thanks to this solution, later, when connecting the heating unit, you will not have to cut out part of the beams and invent jumpers to maintain the strength of the structure. Attention, the pre-designed passage must be square, not round, so that the cutting box can be tightly inserted. This is a channel made of tin and stainless steel, inside of which the pipe will be located. But the outside still needs to be wrapped with basalt cardboard to prevent direct contact with the wood of the walls of the room.
Preparing the floor before installation in a wooden bath
When the total weight of the furnace is less than 7 centners , the need for a foundation disappears, but a kind of “pedestal” of brick is still erected. It's good when this happens during construction. You can again calculate the position so that the base lies between the lower beams under the floor . But it happens that you have to redo the old base for a new stove in an old bathhouse. Then you can't do without opening the floors and checking their strength . We advise you to read the relevant paragraphs of this article, where you will find tips on strengthening beams and joists, and tables for calculating their “endurance”.
Safe installation standards
How to properly install a stove in a bathhouse? Naturally, so that later it can be used without threat to one’s health, without the risk of fire. To do this you need:
- Position the firebox so that it opens in the same direction as the door.
- Coordinate all aspects with the fire inspectorate, invite an electrician to check the correct connection of devices and the quality of grounding.
- Insulate and screen penetrations through ceilings.
- Maintain the recommended distances from the heating unit to flammable materials.
- Equip the rooms adjacent to the steam room with means for extinguishing fires and carefully monitor their serviceability.
Video description
The video presented here shows a competent and accurate solution to this problem:
Advice. In order not to doubt the performance characteristics and safety of the heat insulator, buy material designed for temperatures up to 800-1000 degrees.
Also, when installing the stove, you should think about the convenience of opening the firebox door. It is advisable that it opens in the other direction from the place where the firewood is stored, otherwise it will interfere with kindling, and the next time it is stacked it can cause a burn from accidentally touching the hot metal. Therefore, if possible, the door should be moved to the convenient side.
Selection and installation of a chimney
It is impossible to solve the problem of how to properly install a stove in a bathhouse without knowing the requirements for installing a chimney. But first you need to decide on its type. Chimneys are made of brick, steel, ceramic and in the form of a double pipe made of galvanized or stainless steel with a thermal insulation gasket - the so-called sandwiches.
The first option in the case of a metal stove can be immediately dismissed as too heavy and requiring the construction of a powerful foundation on which the brick structure will rest. This is very difficult and expensive, as it will require considerable expenses for materials and the services of specialists, who are also difficult to find in our time.
Brick chimney Source interistroy.ru
The remaining types are quite acceptable, and each of them has its own advantages:
- Thick-walled steel pipe is the most budget option. But when flue gases pass through it, it becomes very hot, which increases the risk of fire. However, this problem can be solved by organizing the correct penetration through the floors and roof.
- Ceramic chimneys can be considered the ideal solution: they are the most durable, as they do not corrode and withstand high temperatures without collapsing or deforming. But they are rarely used due to their very high cost and heavy weight.
Elements of a ceramic chimney Source gromasstroy.by
- Sandwich pipes are the best option in terms of price and performance characteristics. They are much lighter and cheaper than ceramic ones, and their outer surface does not heat up as much as single steel pipes do.
Most factory stoves are produced for such chimneys or even complete with them. However, the durability and performance characteristics of sandwich pipes largely depend on the quality of their assembly and the type of filler. If condensation forms in the internal space, the wet thermal insulation will cease to perform its functions. The same thing happens with mineral wool, which is not designed for heating above 800 degrees - it burns out, crumbles down, leaving the internal cavity of the chimney half empty, and therefore unable to prevent heating of the outer wall.
In addition, the sandwich pipe cannot be placed directly on the outlet pipe of the furnace. A single-wall pipe must first depart from it, which is connected to a double-wall pipe with a special adapter.
The sandwich pipe device allows you to assemble a chimney from several elements without welding Source vopros-remonta-info.ru
Adviсe
- Wooden walls can be reliably and economically protected with mineralite.
- To improve energy efficiency, install a heat exchanger and water heating tank.
- During operation, pay attention to the condition of not only the firebox, but also the chimney, as well as the stones in the mesh casing.
Now you know how and where to properly install a stove in a bathhouse - the steps are described in sufficient detail. But we recommend showing the finished result to specialists so that they can confirm that you did everything correctly.
Additionally: wood treatment with impregnations
Fire regulations require that wood be treated with special impregnations that reduce its flammability. However, we know very well that impregnation in a bathhouse is not particularly desirable, because at a high temperature inside the steam room, all the chemicals begin to be released into the air and poison a person. That's not why we go to the bathhouse.
And yet, not all rooms experience such a temperature load as a steam room, so it would be reasonable to treat at least them with fire retardants, as well as the attic, especially since a considerable proportion of fires occur due to sparks flying from the chimney (here Also install a spark arrester or a deflector with it).
IMPORTANT! You won’t be able to soak wood once and forget about it. Impregnation is resumed after checking: if a sliver catches the flame from a match, then it’s time to renew. The average frequency is once every two years.
The composition should be applied in two or three layers at least 6 hours to dry between stages . Yes, and pay attention to the presence of pigments to indicate impregnation if you do not want the wood to become, for example, a bright pink color. (That is, the color is not from chemicals, it is added specifically to distinguish treated wood from untreated wood.)
***
So, now that you have an idea of how to install a stove correctly, it’s time to put your acquired knowledge into practice. Write comments, we are interested in your opinion about what you read.
If you have not yet decided on the type of stove you need, then you should familiarize yourself with the characteristics and models of different types: gas, wood, electric. The variety of types of designs, sizes and prices provides the widest selection of stoves for baths and saunas. And which one is better, everyone has the opportunity to decide for themselves.
Oven requirements
Perhaps the most important and basic requirement for such stoves is safety. The stove must meet all safety requirements; it must not be a fire hazard or cause burns to humans.
In addition, there should be no smoke entering the room, and the temperature regime should be recorded on working devices.
Calculation of the volume of the steam room and furnace firebox
Here it is necessary to measure the dimensions of the room, and it is necessary to take into account the surface (what material it is made of).
If there are windows, a glass door, concrete surfaces, brick or tile, it is necessary to measure their area.
Therefore, for 1 m2 of such surface you can additionally add 1.5 cubic meters to the volume of the room. All these indicators will be taken into account when calculating the size of the furnace.
Oven protection for people and walls
It's time to talk about a protective screen, as well as a fence that will protect steamers from accidental burns.
Video
Watch another short video about how this is done in one bath:
https://youtu.be/OfH_e4ER6VE
Protective screen for the stove in the steam room
Only metal stoves create problems with overheating in the bathhouse . To combat this, several types of screens have been created, each of which is better or worse suited to solving the following problems:
- protection of the steam room from overheating, hard infrared radiation, converting it into softer radiation and heat accumulation;
- protection of a wall made of flammable material from overheating and fire;
- regulation of heat exchange in the steam room.
The first place in popularity will be the brick screen . This is a masonry of solid bricks on either 2, 3, or 4 sides around the stove. In this case, there must be a distance of 5-10 cm between the screen and the oven.
IMPORTANT! Masonry is most often done in half a brick - this is the middle position between masonry in a quarter of a brick and in a whole brick. The thinnest one does not prevent overheating, but it does not take so long to heat the bathhouse. The thickest masonry is closest to the parameters of a brick oven - the temperature will not be high, it will take a long time to heat, but the heat will be soft and long-lasting.
For heat exchange, holes are made at the bottom of the brick screen . They can be closed with doors, or you can simply insert bricks into them. When they are open, hot air from the stove enters the steam room and accelerates heating.
IMPORTANT! Holes are required at the bottom of the screen. In other places - at the request of the owner.
The height of the brick screen should not be lower than the height of the stove, but how much higher it will be is up to the owner to decide. With one caveat: you shouldn’t build it all the way to the ceiling, because otherwise you’ll have to invest in the foundation as well. Add the weight of bricks and mortar to the weight of the stove and chimney to calculate the total weight and stay within the weight limit for a stove without a foundation.
By the way, masonry mortar is a mixture of clay and sand, without cement .
Watch the video to see what the mortar should be like and how to lay bricks correctly:
Another type of screen is made of metal. Metal screens are available with convection and without convection.
Convection - two-layer, hollow inside. The voids between the ribs are filled with air, and it conducts heat poorly, so it acts as a heat insulator. Such a screen is enough to lower the temperature and prevent the wall from catching fire. The holes in the screen are designed to allow air to circulate.
There are other screens that are simply a polished sheet of metal. Polishing reflects some of the infrared radiation , reducing its absorption by the metal. This screen is designed to be mounted on a wall, but not directly on wood, but on a layer of refractory or on slats of thermal insulation. In the latter case, cooling occurs due to the air gap, so the rail should be several centimeters thick.
Refractories such as basalt or asbestos cardboard are attached directly to a wooden wall , and a sheet of metal is attached to them. It is good to use ceramic dowels for fastening.
Often, lining a stove with natural stone is accompanied by insulating the stove corner with the same material. This combination looks good.
A cheap version of a metal screen can be made yourself from two sheets of steel for the roof and 3/8-inch metal pipes. The tubes are attached to the wall, then the first layer of profile is placed on them. Then another layer of tubes and a second profile sheet. The structure should be 10 cm above the floor level and below the ceiling level by the same amount.
A plaster wall between the stove and a wooden wall can also be a type of screen
Stove fencing in the steam room
Fencing a sauna stove in a steam room: the “brick + tile + wood” option
For the safety of those in the steam room, a fence is usually placed around the stove to prevent them from accidentally touching the hot metal. It differs from a screen in that it is usually made of wood and is not intended to block thermal radiation.
Knowing who will visit the bathhouse in the future, it is worth making a thicker fence in advance that will prevent small children from sticking their hand to the stove. If the bathhouse is only for adults , then simple railings around the stove with supports in the corners are sufficient.
The type of wood matters: resinous ones are not suitable . Alder or linden is best .
***
Now all that remains is to apply the acquired knowledge in practice. Good luck!
A little history
Contrary to popular belief, brick kilns did not first appear in Russia. They were brought here already during the reign of Peter I, who personally brought several speeches from Holland and invited experienced craftsmen to share their experience in building such structures.
The reason for this action was not simple curiosity - the number of fires that occurred in the country due to the lighting of black baths was enormous. Since the cities were made of wood, one fire could burn out the entire city (and this often happened).
Peter I issued a decree by which he prohibited the lighting of the bathhouse in the black way. Since then, the tradition of using brick kilns began. The new product quickly gained popularity because it turned out to be relatively safe and quite simple and easy to use. Since then, brick stoves have become the basic method of heating a bathhouse, successfully competing with light metal structures.
Today, brick ovens are used on a par with any other types; they are preferred by a large number of users.
Chimney installation
A feature of stoves is the release of a large number of aggressive radical molecules immediately after kindling.
If the chimney is not well insulated, it will quickly burn out under the influence of acid dew. This applies to both brick and sandwich structures.
Particular attention is paid to the fireproof cutting of the chimney and the passage unit. The dimensions of the ceiling trim for the bath are 460x460 or 600x600 mm. For additional protection of walls located closer than 700 mm from uninsulated sections of the pipe, a low-mounted double screen made of basalt cardboard is used.
Conclusion
One of the main mistakes is installing the stove yourself without referring to the instructions provided by the manufacturer. Even if the stove was purchased without instructions, you can request it through the official website or by contacting the manufacturer using contact information.
It is possible to install a metal stove in a bathhouse with independent efforts. This process will require care and strict adherence to the manufacturer's instructions. It is important to ensure fire safety. Not only the comfort of using bathhouses, but also the lives of their visitors depends on it.
Advantages and disadvantages
The advantages of a brick sauna stove include:
- the ability to accumulate and release heat for a long time;
- uniform and stable heating of the room;
- attractive and neat appearance
- comfort and ease of use.
The disadvantages of a brick kiln are:
- stationary installation option, inability to move the oven even a few centimeters;
- large weight and size, the need to create your own base (foundation);
- heating the room takes longer than when using metal stoves;
- If used incorrectly, there is a risk of carbon monoxide poisoning.
Expert opinion
Lovkachev Boris Petrovich
Bath master who knows everything about steaming
The advantages and disadvantages of brick kilns have been known for a long time. Users prefer brick baths for uniform and stable heating, safety and ease of use.
If you accidentally touch it, it is more difficult to get a severe burn on a brick oven than when you touch it on the hot body of a metal structure. In addition, the cooling of a brick structure takes much longer - the bathhouse maintains operating mode for several hours.