Low ambient temperature significantly reduces labor productivity and living comfort. Therefore, heating domestic and industrial premises performs an important function that requires significant financial costs for the purchase of special equipment. To save money on heating appliances, you can assemble a heater yourself. Which is especially important for those rooms and locations where there is no need to care about its aesthetic appearance and design.
Halogen lamp heater
The simplest stove is assembled using just one 1 kW halogen lamp.
To do this you will need three things:
- sealed metal container or galvanized barrel, can, etc.
- brick
- 1000W halogen
Place this lamp inside the container on a brick and close it, so to speak, “the blower.”
The heating temperature of the surface of the walls with a container size of 400*400*600mm will reach up to 80 degrees. The maximum temperature of heated floors does not exceed 30C.
Eighty is definitely a bit much, so it’s better to take one 500W halogen or connect two in series at 1kW each. The heating of the stove walls will be optimal - 60 degrees.
To fix the lamp, use a special ceramic socket holder.
It's ceramic. The brick on which this “beast” lies heats up to 300 degrees!
As you understand, the wires for connection must be thermal.
If you open the “vent” of such a heater, the picture from the inside will resemble a miniature nuclear reactor, with one single fuel element - a halogen element lying on a brick.
Moreover, due to the low power, it is all connected through a regular socket with a plug. You will be shocked how much heat this design can generate.
By the way, it is very convenient to dry clothes and shoes on it.
There is just one big BUT. This is the lifespan of such a light bulb in a confined space without normal cooling conditions. I can assure you that he will greatly disappoint you.
Application options
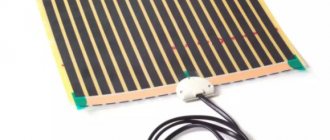
The tape heating element (12 volts) is used for the following purposes:
- Carburetor heating.
- Heating diesel fuel, which eliminates the formation of paraffin deposits.
- An increase in the temperature of the internal components of the vehicle.
Such devices are actively used in northern regions to adapt the machine to critically low temperatures.
Below are the characteristics of flexible heaters of the ENGL-1 type (the parameters of the ENGL-2 and ENGLU-400 models are indicated in brackets):
- The temperature limit of the shell is 180 (60/400) degrees Celsius.
- The minimum bending radius is 10 (20/15) mm.
- Rated power is 4.8 (1.76/5) kW.
- Shell – silicone (polyethylene/fiberglass).
How much light and heat does a light bulb provide?
Therefore, we will consider another more efficient and durable design, assembled on the basis of simple incandescent lamps.
An ordinary light bulb with an incandescent filament is the most accessible source of not only light, but also heat. Of its entire radiation spectrum, we see only a small part.
Everything else is hidden from us in the infrared region.
As an efficient light source with its efficiency of 3%, the light bulb is no good.
But if we consider it from the point of view of heat, then the efficiency is already approaching 100%.
How to increase the efficiency of the light? For example, you can increase the voltage.
However, at the same time, its lifespan will sharply decrease. She will live with you for literally a few hours.
But if you do the opposite, that is, reduce U=220V by half, this will sharply reduce the light output by five times. But at the same time, almost all the useful energy will go into the IR spectrum.
Of course, it will not increase, and its overall level will fall from its original values. However, the level of the visible spectrum will drop even more. The whole point here is that your assembly should primarily heat, not shine.
The most important and significant advantage of this is the increase in lamp life to almost 1 million. hours (over a hundred years).
That is, you buy it once and you can use it for the rest of your life! How can you reduce the voltage at home without any regulating devices, like LATR?
Heating cables
Laying a heated floor in a garage is not always advisable, but in one situation such a design will be more than justified. We are talking about starting a car in cold weather - often a lot of problems are associated with this, and the presence of a heating cable will significantly simplify the task. In addition, you can lay the cable only under the car and turn it on only if you have problems starting the engine.
The machine must first be covered with a cover that will cover it completely - this will allow the thermal energy to be concentrated in one zone. The air will not move into the garage itself, so the level of heat loss will be minimized. This technique will allow you to quickly warm up the car even in severe frost.
Serial connection of light bulbs
Very easy. Simply connect two light bulbs of the same wattage in series and the voltage across each will be cut in half.
They will of course shine dimmer.
How will the power consumption of such a combination of light sources change? Measurements can be taken with a multimeter.
Let, for example, at a constant voltage of 240V, for two 100-watt light bulbs the current is 290mA.
Based on the formula for calculating power, we find that:
P=I*U=0.29A*240V=69.6W
As you can see, consumption has dropped. But at the same time, the heat dissipated per watt of power has increased.
We make it ourselves
One of the highest quality homemade infrared heaters is a graphite-based heater. Let's first look at what we need to assemble such a device:
- As you already understood, a certain amount of graphite is needed, preferably in powder form. The quantity depends on the size of the IR heater that you want to make with your own hands.
- Plastic plates. Their size is also individual and depends on the required dimensions of the device. You need to have two of them, the same size.
- Glue mixture, it is best to buy “epoxy”.
- Wire with plug. You can buy a new one or find an old one in your garage. Select the length based on the distance from the installation site to the nearest power source.
- Voltage regulator or special controller.
- Insulation products and fasteners.
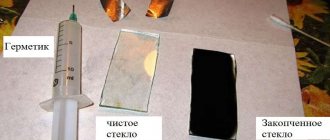
Graphite is crushed and mixed with epoxy glue - this is how a graphite conductor is obtained. To apply the glue, you will also need to have a brush. If there is graphite in the rods, prepare a tool to grind it into powder. Now, having collected everything you need, you can start assembling our device:
- We start by mixing graphite powder glue. It is worth noting that the greater the amount of graphite in the mixture, the higher the heating temperature will be. Do not add too much of it, as the plastic will melt.
- We apply the resulting substrate to the surface of plastic plates, each separately. Application should occur in uniform zigzag strokes, and skipping should absolutely not be done.
- We connect the bare ends of the wire to the graphite compound and glue two plastic plates together and wait for complete drying.
- After the glue has completely hardened and reliably connected our structure, you can connect a temperature regulator, controller or device to regulate the incoming voltage to the circuit.
- After this, we carefully isolate all joints and connections. After which the heater will be completely ready for use.
Scheme of the future heater Now you can hang the device you have assembled on the wall or install it on the floor and get the necessary warmth and comfort in the room. The average heating temperature of such a device is sixty to seventy degrees Celsius. If you add more or less graphite during assembly, you can increase or decrease the operating temperature accordingly.
Optimal heating power
To assemble a lamp heater, it is best to use 150W models. Just note that after the introduction of a law prohibiting the production of conventional incandescent lamps of more than 100W, they began to be sold under the name “heat emitters”.
With their sequential connection scheme, even two copies, you can immediately feel the radiated heat. At the same time, they do not blind the eyes.
The current in such a circuit at the same voltage will be 420mA. This means that two lamps consume about 100 W in total, and most of them are used for heating.
You can compare what power infrared heaters are sold for and what area they are designed for. The ratio for conventional models is 100W per 1m2.
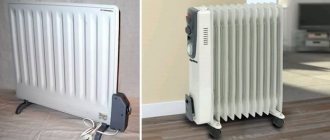
Oil radiators have almost the same indicators.
That is, in any case, watts turn into heat. Only specialized infrared models will have more directed radiation to a specific point or area, while your homemade product will have a wider angle.
By the way, these 100 W/m2 are taken from SNiP for premises insulated according to all standards. This is the optimal power for all heaters in central Russia.
For northern latitudes, including cold, uninsulated garages, the values will be higher. If, for example, the heat loss in a garage is 1000 W/hour, and you heat it at 300 W, then your temperature will never rise.
But if the ideal heat loss is close to zero, then 100 W will be enough to create a bathhouse inside.
This power also depends on the height of the ceilings (the average calculated one is up to 3 m).
Basic requirements for self-produced devices
Let's assume that you have decided to make your own electric heater. Regardless of what type of heating device is selected, it is desirable that the unit meets the following requirements:
- ergonomics, ease of assembly and transportation,
- reliability and safety,
- maximum efficiency,
- high productivity and efficiency,
- strength and durability,
- compactness and light weight,
- availability of materials, tools and structural elements during assembly and in case of repair.
Important: it is believed that electric convectors, infrared and quartz heaters best meet the above requirements. That is why these types of heaters are most popular among owners of residential and non-residential premises
Why should you pay attention to home-made electric heaters? The fact is that when buying a factory-made heating device, the consumer is not always satisfied with its technical characteristics. Homemade heaters have the following advantages:
Homemade heaters have the following advantages:
Despite all the above advantages, an electric heater cannot be called an ideal device, because it has one controversial quality - safety. Remember that any homemade household electrical appliance needs careful testing before regular use!
Assembling a homemade infrared heater
Based on all this, we need to assemble our heater from light bulbs. Let's move on to practice.
If your work area that needs to be heated is 3-4m2, then assemble a 300W heater.
This will require 6 lamps with a power of 150W. That is, three serial pairs that will produce 100W each.
They are assembled on a frame made of metal or aluminum corner.
Sources of light and heat in the frame should be placed according to the diagram below.
In this case, select the distance between adjacent bulbs such that you can easily replace a burnt-out bulb with a new one. Even after a hundred years.
A gap of 1 cm between the flasks will be enough for this. The frame parts are connected to each other with bolts or rivets.
Next, you will need to fasten two aluminum strips inside it, on which the reflector or reflector will sit. These strips will add rigidity to the entire structure.
Now the most important thing is to make the reflector correctly. The usual parabola shape is not very effective.
Models in the form of a biparabola cope much better with their responsibilities. Here the whole difference is in the reflection of the rays, which in the second case for the most part do not bounce back into the lamp, but go out.
Aluminum cans are ideal as a material for manufacturing. Cut off the bottom and top of the jar.
And you unfold the walls and bend them in the middle. At the same time, leave a margin of 1 cm on one edge for another bend. You somehow need to connect the halves of two cans together.
1 of 2
You fasten them together with rivets. To avoid tearing the thin aluminum in this process, first place washers on both sides.
As a result, you should have a one-piece reflector made of 4 cans.
Next, place the reflector on the frame and also install rivets. First in the center on the side, and then along the edges.
Well, don’t forget about the two stripes in the middle of the frame.
Now you need to insert the light bulbs themselves into this structure. At the same time, do not allow them to touch the reflector. There should be a minimum distance of 1.5-2 cm from it.
Here again aluminum will come to the rescue. Namely, thin strips nine centimeters long.
Do not make a mistake when marking the places where the cartridge is attached to the strip, otherwise you will not be able to bring the power wires inside.
Attach the strips to the frame and install the cartridges on them.
After this, you can screw in the light bulbs themselves.
All that's left is to connect the wires.
heating elements
For heaters: types you will have to buy heating elements: 220 V electrical appliances with open heaters are extremely dangerous. Here, pardon the expression, you need to think first of all about your own skin and property, whether there is a formal ban or not. It’s easier with 12-volt devices: according to statistics, the degree of danger decreases in proportion to the square of the supply voltage ratio.
If you already have an electric fireplace, but it doesn’t heat well, it makes sense to replace a simple air heating element with a smooth surface (pos. 1 in the figure) with a finned one, pos. 2. The nature of convection will then change significantly (see below) and heating will improve when the power of the finned heating element is 80-85% of the smooth one.
Types of heating elements
A cartridge heating element in a stainless steel housing (item 3) can heat both water and oil in a tank made of any structural material. If you buy one, be sure to check that the kit includes gaskets made of oil-heat-gasoline-resistant rubber or silicone.
A copper water heating element for a boiler is equipped with a tube for a temperature sensor and a magnesium protector, pos. 4, which is good. But they can only heat water and only in a stainless steel or enameled tank. The heat capacity of oil is much less than that of water, and the body of a copper heating element in oil will soon burn out. The consequences are severe and fatal. If the tank is made of aluminum or ordinary structural steel, then electrocorrosion due to the presence of a contact potential difference between the metals will very quickly eat away the protector, and then eat through the body of the heating element.
T. called. dry heating elements (item 5), like cartridge ones, are capable of heating both oil and water without additional protective measures. In addition, their heating element can be changed without opening the tank and without draining the liquid from there. There is only one drawback - they are very expensive.
Rules for proper operation
Only adult users who have carefully studied the manual and operating recommendations can turn the gas convector on and off and adjust its operating modes. It is unacceptable for the younger generation or incapacitated people to participate in these processes. If it is impossible to protect the gas convector from their interference, then it is better to refuse to install the device in advance.
The room in which the gas convector is planned to be used must be ventilated, which requires the presence of a window or at least a vent. It is advisable that the door leaf have ventilation grilles
Remember that if a specific gas smell is detected in the room, the tap at the entrance to the convector should be closed immediately. Under no circumstances should you “spark” in such a situation: strike matches, turn on the lights, use a lighter, etc. If these requirements are not followed, a seemingly small leak can cause a devastating explosion.
The room in which a leak was discovered must be immediately ventilated by opening the windows and door wide. You should immediately call the employees of the gas organization that connected your device to the centralized mains, or the emergency service. It will be possible to operate the gas heater only after the leak has been completely eliminated or the device has been repaired.
Working with pipes
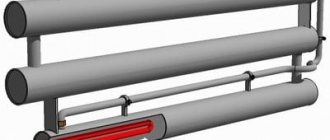
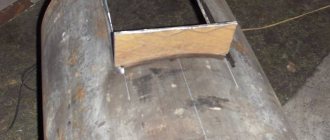
After the oil heater circuit has been selected, it is necessary to manufacture its body. We make a drawing, determine the dimensions and start working with an angle grinder. The pipes are cut to length in the required quantity. After cleaning the ends, they are carefully and thoroughly welded. The performance of the heater as a whole will depend on the quality of welding. A leaking seam is not only a nuisance, but also a possible cause of fire. When welding the ends of the pipes, leave one (on the lowest pipe) free. Subsequently, a heating element will be inserted into it. This means that the stub will be of a different configuration.
The finished pipes are tied together. The piping is done with pipes, only of a smaller diameter. On the topmost pipe it is necessary to provide a place where the filler plug will be located. Structurally, it can be made in the form of a welded short pipe with a coupling, one side of which will be welded. Using your plumbing and mechanical experience, the heater configuration can be made more aesthetically pleasing, unlike the one in the photo. By the way, the body can be not only tubular. Radiators from cars, old cast-iron radiators and other closed containers are well suited for this purpose.
OCD
Model using IR silicate glass
Since IR silicate glass is used, products of different brands experience sharp changes in thermal conductivity and transparency. For this reason, make and test one emitter. Based on the test results, it may be necessary to vary the diameter of the material.
The following arithmetic principles should be taken into account for quartz installations.
Material parameters
0.5 mm: power – 350 W, current – 1.6 A.
0.6 mm – 420 W and 1.9 A.
0.7 mm: 500 W and 2.27 A.
0.8 mm: 530 W and 2.4 A.
0.9 mm: 570 W and 2.6 A.
Thin wires have a solid radiating surface. When using thick versions, exceed the IR power that glass can transmit.
Testing
The finished product is placed vertically on a non-flammable surface. Supported with a heat-resistant object. A current of 3 A is supplied to the product. A digital tester is used to monitor the current.
We need to check the behavior of the glass. If it quickly heats up and cracks within half an hour, it is not suitable.
After 1.5 hours, the radiation power is checked. Place your palms parallel to the radiating planes. The distance from them is 15-17 cm. You need to hold it for at least 3A min. Then you will feel a soft warmth for 5-10 minutes. If your palms immediately get burned, you need to reduce the diameter of the wire. If after 20 minutes there is not even slight heat, thicker material is needed.
The old Soviet reflector is in use!
A homemade infrared heater can be made from an old Soviet-made reflector. In addition to this, you will need:
- Nichrome thread;
- Steel rod;
- Fireproof dielectric (ceramic plate is suitable).
To make an IR fireplace from these things, follow the instructions:
- Remove dirt from the reflector;
- Check the plug, cord and terminals to turn on the coil (they must be intact);
- Measure the length of the spiral that is wound around the reflex cone;
- Cut a steel rod the same length as the spiral;
- Wind a nichrome thread onto the rod so that there are 5 turns for every centimeter;
- Carefully remove the rod from the nichrome winding;
- Place the spiral on a plate (another dielectric) so that the turns do not touch each other;
- Connect the ends of the nichrome spiral to the mains;
- Now the heated spiral will easily fit into the grooves of the cone from the reflector;
- Connect the ends of the spiral to the contacts.
The nichrome filament glows better than the spiral that was in the device before our manipulations. As a result, we get a powerful emitter, the energy of which is reflected from the walls of the reflector and hits opposing bodies, which begin to absorb heat.
Autonomous heating device
This heater is designed for 12 volt current. Thanks to this, it can be connected to a battery. It can be used in rooms where there is no heating and where renovations are being carried out, as well as in the garage or any room in the house. Its power is not enough to heat the entire room. It does not create infrared rays. It only heats the air.
To make it you need to take:
- Metal can. It could be a coffee can. Its height and diameter should be 20 and 10 cm, respectively. These values may deviate upward or downward. You should not use a jar made of plastic, cardboard or any other material. This is because they are poor conductors of heat.
- Bracket. It can be a U-shaped part of a children's metal construction set.
- Bayonet cartridge.
- Car brake light lamp. It is designed for 12 volts. Its power is 25 W.
- 2 A fuse.
- Sleeve made of insulating material.
- Cable. The cross-sectional area of one wire must exceed 1 mm².
Sequence of manufacturing an autonomous heater
A 12 volt device is made as follows:
- Drill 20-30 holes in the side wall of the can. Their diameter should be 3 mm.
- Make a hole in the bottom of the jar. It is drilled in the center of the bottom. The diameter should be equal to the diameter of the bolt that will secure the bracket.
- Fix the bracket at the bottom of the can.
- A cartridge is secured to the top of the bracket. This element must be positioned so that the lamp does not touch the walls of the container.
- A hole is drilled in the side wall of the can at the level of the top of the bracket so that the bushing for the cable fits in it.
- A sleeve is inserted into this hole and an electrical wire is pushed through it, through which a current of 12 volts will flow. The cable will be connected to the socket.
- Screw in the lamp and close the jar with a lid.
- A fuse is connected to the cable break.
The 12 volt heater is ready. Now all you have to do is connect it to the battery and wait 10 minutes. During this time, the homemade garage heater will warm up. When using a device with an operating voltage of 12 volts, you need to monitor the battery voltage. It should not fall below 10 volts. Otherwise, the current source cannot be restored.
Selection of burners for different types and models of boilers
When choosing a burner, you should pay attention to its various characteristics - the fuel supply model, the option of mixing gas with air, compatibility with various categories of devices. We will tell you about the most interesting models
KChM burner. It is used in boiler units converted from conventional fuel to LNG or conventional gas. It usually has automation and has three nozzles. It is used in boiler units of the “Contour” model or similar options.
- Burner "Hearth". It is a pneumomechanical type device with an automatic operating mode. It turns off on its own if:
- the fire went out;
- gas supply stopped;
- there is no necessary traction.
This model has a gas pressure controller. This makes it possible to achieve equal burning of the fire, even if any malfunction occurs in the mechanism. Such solutions are easy to maintain due to the fact that soot does not accumulate in the convective part.
- Another burner that I would like to talk about is the “Kupper” model. This option is universal and is suitable for combined boilers, solid fuel designs from Kiturami or Russian-made models of the Conord brand. The advantage of this burner will also be the ability to install it without plumbing or welding.
- Another fairly popular solution is the DKVR burner. This block device is used where there is forced air supply. This solution is used for steam boilers for industrial use and having the appropriate power. Their efficiency is about 94-95 percent. A similar design works either in a diffusion or in an inflatable version. To increase its efficiency, powerful Italian fans are often used.
Another category is burners for KVS. They are used for domestic needs and are solid fuel. Considering that there is no need to use overly powerful equipment to heat rooms, atmospheric or injection solutions are used
When selecting a burner element, you should pay attention to power and safety in use
This is interesting: How to make a gas boiler with your own hands?
Advantages of using a cable heater
At first glance, a homemade product made from a heating cable and porcelain tiles looks quite primitive and unconvincing. In fact, such a solution is very convenient for those who are primarily concerned with the reliability and efficiency of heating. The advantages of a homemade cable heater include the following:
- Ease of manufacture; you can assemble the simplest heaters at home, as they say, on your knees;
- High heating efficiency. One tile is able to produce at least 200 W of thermal energy, which is comparable to the heat output of industrial ceramic, wall and ceiling heaters;
- Easy repair and maintenance. In order to repair a cable heater, you just need to determine the location of the damage, cut and splice the contacts.
But the most important advantage can be considered the very high reliability of the heating cable. The absence of contact of the heating surface with air oxygen and water ensures a long service life of the heater. And even in the event of an emergency, for example, a tile is dropped or broken, nothing catastrophic will happen.
It will be possible to simply transfer the heating cable to a new ceramic base.
Standards for the location of gas convectors
Gas convectors are installed inside heated residential, utility and industrial premises. They can be used in warehouses, garages and other explosive facilities, subject to the rules of use.
The number of devices is calculated based on the cubic capacity of the room to be processed. It is believed that on average 1 kW generated by a device can provide heat to 20 m³. Of course, averaged values are not enough for an accurate selection; besides, the calculations are influenced by climatic conditions and the actual heat loss of the building, but you can get an idea of the approximate number of required convectors.
Either a home-made or a factory-made gas convector is mounted on a permanent wall. It is recommended to place it directly under the window, but not in a niche that impedes the movement of air flow. It is necessary to install the device so that nothing interferes with operation and maintenance.
Most manufacturers of gas convection appliances recommend maintaining the following distances from building structures:
- At least 150 mm from the plane of the floor with a flammable coating.
- From the plane of the floor with a non-flammable coating, 100 mm.
- From a window sill or other similar structure rising above the convector, at least 100 mm.
- 150 mm from structures and objects located on the left/right/behind.
- From the front wall of the gas convector to the nearest obstacle from 500 mm.
It is imperative that the gas convector be equipped with a coaxial chimney, led out into the street through a main wall or through a roofing system. The thickness of the wall crossed by the chimney can be 600... 800 mm.
It is recommended to equip the coaxial pipe connected to the gas convector with a deflector on the outside.
It will prevent the penetration of birds, leaves, branches into the device, and will prevent blowing by gusty winds. When exiting through the wall, there cannot be less than 300 mm between the coaxial pipe and the ground surface. If it comes out at a height of more than 2000 mm from the ground surface, protection should be provided against atmospheric negativity and unauthorized entry.
Are you here
A gas convector for heating a garage is the most economical heating method compared to electrical appliances. For one reason or another, it is not always possible to heat a garage with electrical appliances (insufficient electricity, interruptions, high cost). Yes, initially the cost of a gas convector is higher than the cost of electric heaters, but its payback (due to the difference in the cost of gas in relation to electricity) is only one month. The clean operation of the device consists in the intake of air and the removal of combustion products from the street through a coaxial pipe; only the heat exchanger is in direct contact with the room. The only main disadvantage of a gas convector in comparison with electrical appliances is the complexity of its installation and the installation of a coaxial pipe.
Advantages of gas convectors
Durability, cast iron heat exchanger, service life more than 20 years. A wide range of models, divided by power, from 2 to 10 kW, is easy and convenient to select for any area. The device is easy to use, does not take up much space, and is silent. In order to calculate your benefit, simply compare the cost of gas and electricity.

