Low ambient temperature significantly reduces labor productivity and living comfort. Therefore, heating domestic and industrial premises performs an important function that requires significant financial costs for the purchase of special equipment. To save money on heating appliances, you can assemble a heater yourself. Which is especially important for those rooms and locations where there is no need to care about its aesthetic appearance and design.
Idea N1: Making a local mini-heater
For this design, you will need two rectangular pieces of glass, metal foil, a paraffin or stearin candle, a wooden block (or a block of other dielectric material), an electrical cord with a plug, and sheet metal for contacts.
The manufacturing procedure for such a mini heater is as follows:
- Take two identical pieces of rectangular glass, in this example the dimensions are 4x6 cm, but this is not critical, you can take a different ratio, the main thing is that the area is about 25 cm2. Clean and degrease their surface.
- Using a lit candle, carefully apply a layer of soot to one surface of the glass. Make sure that the carbon black is evenly coated and distributed, as it will act as a conductive material.
Figure 1: elements for making a heater - Using cotton wool or an ear stick, clean the edge of the smoked glass, approximately 5 mm.
- Cut a piece of foil the same width as the soot-covered glass surface. In length it should protrude 3–4 cm beyond the edge of the glass. Place the foil on the glass.
- Coat the edge of the glass with sealant and align the two halves together with the foil in between.
Rice. 2: Combine two glasses
Fold the edges of the foil under the glass to one side.
- Attach metal contacts to a wooden block and solder the ends of the electrical wires with a plug to them. Place the glass on the block - the heater is ready.
Rice. 3: Fix the contacts on a wooden block
It should be noted that the maximum temperature of such a heater should be about 40ºC. Naturally, you won’t be able to heat a house, cottage, or garage with such a homemade heater; it is suitable for heating tents, a work area in front of a workbench, or other space directly in front of the work surface. If the device gets too hot, you will need to reduce the resistance of the conductive elements; for this you can use thicker foil or increase the thickness of the soot.
Operating principle of the heating cable
The operating principle is that electrical energy is converted into thermal energy. The peculiarity of such a heating system is that, without the use of an oxidizer or fuel, it receives energy and converts it into heat. The heating system heats up from the electricity passing through it and prevents freezing of communications. Therefore, it is necessary to purchase a heating cable ; it will help to avoid failures in the operation of water supply networks during the cold season.
To heat the external pipeline, wires are used with a seamless, sealed and damage-resistant sheath that is not afraid of temperature changes. The heating element is located inside the outer layer. When the air temperature drops, the heating cable is connected to electricity. The heating element starts working and heats the entire system. If the air temperature rises, the wire is disconnected from the power supply and the pipeline operates as usual.
Idea N2: Infrared heater
To make an infrared heater with your own hands, you can use several device options. Let's look at the two simplest to implement, for one of them we will use IR film used in a heated floor system, and for the second we will make a heating panel from improvised means. If you still have a film IR heater from the floor or have the opportunity to get it, then this will greatly simplify your task.
Film IR heater
To make such an infrared model, you will need a piece of rolled foil thermal insulation, a heating film, a power cable for connecting to the electrical network, terminals for connecting the wire to the film, a thermostat or other devices for changing the temperature of the heater.
The manufacturing process consists of the following stages:
- Choose a location, since the film heater cannot stand on its own on the floor or table; it must be attached to a wall, ceiling, frame or other hard surface.
- Cut the thermal insulation to the size of the infrared film and prepare the foil surface for gluing the film.
Rice. 4: Cut the thermal insulation to the required size - Glue the film to the prepared roll, ensuring a tight fit along the entire length. To fasten surfaces, you can use both adhesives and double-sided tape. But the adhesive application points should not be located on the infrared emitters.
Rice. 5: places for applying adhesive composition - Attach the terminals along the edges of the film; first solder a wire to the terminals to supply electrical energy.
Rice. 6: Solder the terminal to the copper bus bar - Insulate electrical connections using electrical tape, heat shrink, or bitumen tape. This is necessary in order to eliminate the risk of electric shock from the heater when connecting the heating device to the network and to isolate live parts from walls and other structural elements of buildings.
Rice. 7: Insulate electrical contact points - Include a thermostat in the design of the electric heater; the most convenient switching point is the power wire. Since the control element can be placed in the most convenient and accessible place. This will allow you to control the heat output of the heater to heat your garage.
- Mount the IR heater on a wall or other structural element. If you want to install it on the floor, you can make a wooden frame.
Panel IR heater
The working element of an infrared heater can be made independently. We take the design of a ceramic heater as a sample; for it you will need two identical panels of heat-resistant plastic (about 1 m2 in area), graphite flour, epoxy glue, and a power cord for an electric heater. Graphite flour will act as a conductive medium; it can be purchased separately, taken from used electric batteries, or made from a construction pencil.
The whole process is divided into the following stages:
- Prepare the surface of the plastic, first clean and degrease the side on which the conductive mixture will be applied.
- Mix graphite powder with epoxy glue in a ratio of 1:1 or 1:1.5, it should be noted that with an increase in the amount of epoxy glue, the resistance of the heater will increase and the power of the device will decrease. With a larger amount of graphite, the conductivity of the heater circuit will increase, the flowing current and power will increase.
Rice. 8: production of conductive composition - Using a putty knife, apply a mixture of graphite and epoxy glue to the cleaned plastic surface, as shown in the assembly diagram below:
Rice. 9: diagram of applying a graphite track - Wait for the graphite-epoxy mixture to dry and glue a second sheet of plastic on top. Install the terminals where the conductive path breaks.
- Connect an electrical cord to the terminals to subsequently connect the device to the power supply.
The finished heater should be tested using a multimeter - install the probes on the plug terminals and measure the electrical resistance. After this, the allocated power should be calculated using the following formula: P = U2 / R
Where P is the power of the device, U is the supply voltage, R is the resistance of the heater circuit.
The advantage of such a heating device is infrared radiation, which will heat all objects, and from them the room is already heated. Due to this, specific objects and people located in the radiation zone are immediately heated. Therefore, it is beneficial to use an IR heater for heating garages, terraces, gazebos, verandas and such premises where there is no need to spend resources on constantly maintaining the air temperature.
Rice. 10: advantages of an IR heater over a convection heater
If the design of the heater does not seem strong enough for use in any room, it can easily be improved with a wooden frame around the perimeter.
Purpose and types of electric heaters
The purpose of household appliances is clear from the name - heating residential and other utility premises using electricity. Equipment of this type is used to organize general and local heating of various buildings and structures. The operating principle is the same for all types of heaters - the conversion of electrical energy into thermal energy with an efficiency (efficiency) of about 98-99%.
Local heating is the directed heating of part of a room in a certain area. Example: a car service technician is working in an inspection ditch located in a large hangar. Raising the temperature to 20°C in the entire building is uneconomical; to create normal conditions for the worker, it is enough to install an electric heater in the pit.
Infrared heating is used at service stations to dry cars
All heaters are divided into 2 groups according to the method of heat transfer:
- Convection. They give off heat directly to the air in the room, causing the appearance of convective currents. The colder and heavier air mass displaces the heated light air upward, causing circular circulation from the ceiling to the floor and back.
- Infrared. Thermal energy is transferred to surrounding surfaces through infrared radiation. The air is heated last, receiving heat from objects.
Due to their design features, most heaters are mixed - they give off heat in a convective and radiant way, but in different ratios. Devices that transmit 70-80% of energy by radiation are considered infrared, the rest are convection heaters.
Direct heating of air by a household appliance causes convective circulation in the room
Infrared heating devices
The group of infrared heaters includes the following household electrical appliances:
- with a tubular heating element made in the form of a lamp;
- ceramic panels;
- quartz;
- long-wave wall and ceiling;
- micathermic.
Each type implements radiant heat release in one way or another - through a hot nichrome thread, a carbon element, metal plates or artificial stone panels. In micathermic heaters, manufacturers use mica and oxides of various metals, which significantly increases the cost of the design.
An infrared heater transfers heat to the surfaces of objects
A generally recognized novelty that has recently joined the range of electric heaters is infrared film of different widths. Generates radiant heat using thin carbon elements applied to a polymer base. It is used for floor, wall and ceiling heating.
In carbon film, carbon heating elements are applied to a flexible polymer base
Convection heaters
For air heating of premises, the following types of household appliances are used:
- wall and floor convectors;
- portable fan heaters;
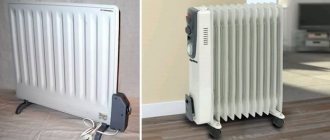
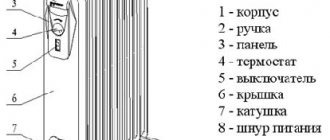
- oil radiators;
- modular heaters - so-called electric batteries.
The fan heater has a simple design, small size and weight
The first two varieties are purely convective heaters, releasing approximately 80% of the heat directly to the air. The principle of heat exchange is simple: a heating element made of chromium-nickel wire is blown by an air flow created by a fan impeller or due to natural circulation.
The surface of oil radiators and electric batteries heats up considerably (sometimes up to 60 °C), so a significant portion of the heat is transferred into the room by radiation - up to 40%. The rest of the energy is taken up by the air washing the numerous heat exchange fins of the unit.
Externally, electric batteries are similar to water heating devices, only they are heated by an electric heating element
Video: types of electric heaters
Idea N3: Oil heater
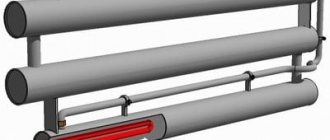
Since technical oil has good heat transfer functions, it is widely used in heaters. You can assemble this oil heater yourself at home. To do this, you will need an old heating radiator (cast iron or bimetallic battery, register or other tubular structure), a tubular heating element, the oil itself as a coolant, sealed plugs for placing the heating element.
Rice. 11: Example of using a register control unit
To maximize the safety of the oil device, it can be supplemented with a heating sensor, the open contacts of which are connected to the power circuit.
The manufacturing process of an oil cooler is as follows:
- Take the old radiator, it is important that it is replaced due to the modernization of the system, and not due to a violation of the integrity of the case. It is advisable to verify this yourself by adding liquid or at least through an external inspection.
Rice. 12: Take an old radiator - Prepare two holes in the heater - for the heating element and for filling the oil. The first hole must be equipped with a thread and located in the lower part so that the heated masses rise upward. It is more convenient to place the second hole in the upper part; when putting the heater into operation, it will also have to be sealed. In addition, holes can be made for draining the oil and for the emergency pressure relief valve.
Rice. 13. Prepare two holes - Screw the heating element into the hole on the radiator. When choosing a specific heating element model, it is important to make sure that the thread diameter matches the hole diameter, and that the kit includes oil-resistant rubber gaskets.
Rice. 14: screw the heating element into the bottom hole
Another important point is that the diameter of the heating element must be such that it never touches the walls of the radiator. For sealing, linings, special compounds and tow are used.
- If you left necks for oil drainage and for installing sensors, install the appropriate equipment in them. Seal all holes that will not be used in the future, leaving only the neck for filling the oil.
- Fill the heater with technical oil approximately 85% of the total volume. A margin of 15% is necessary for the free space that the liquid will occupy after heating and thermal expansion. Never fill oil too close. Close the oil filler neck.
Rice. 15: Close the oil filler neck - Ground the heater to a ground loop.
It should be noted that to increase the service life of such a device, the heating element should be selected in accordance with the housing material. Otherwise, due to the large difference in the output voltage of the particles of these metals, destruction of the elements will occur. Also note that the heater will have a decent weight, so it is advisable to ensure it is securely fixed in space or make a structure for ease of movement.
Rice. 16: Wheeled design
Why should you use a heating cable?
The main advantages of using cable heaters:
- Safety. Excellent insulation system. Reliable protection from external chemical, mechanical and thermal influences.
- Versatility. The heating cable can be equipped with a pipeline located both underground and outside.
- Easy to use.
- Saving. After connecting the cable heater, it is possible to adjust the heating power when the air temperature changes.
Idea N4: Heater with a spiral
The classic version of a spiral-type heater involves connecting heating coils to the network. Heat-resistant dielectrics were used as the basis for installing the spiral in such models. But these are quite simple options, so in this article we will look at the principle of manufacturing a device whose characteristics are not inferior to a gas heater. It uses the same principle as a heat gun, but with less heat output.
To make it, you will need a heating coil, an electric fan, a metal pipe or box for the housing, a dielectric heat-resistant frame, and a power cord. The heater manufacturing process includes the following steps:
- Cut the asbestos cement pipe to the required length (in this example it will be used to make the supporting frame).
Rice. 17: Cut the pipe to the required length - Drill several holes in the pipe from different sides so that you can insert a nichrome spiral into them.
- Insert a spiral into the holes, in this example they are made in the form of a lattice, but this is not important, it is important that the heating elements have a different angle of inclination.
Rice. 18: position of the spiral in the pipe
If you are assembling several pieces of spiral, connect them together on the outside of the pipe.
- Place a fan on one side of the pipe to force air flow. The direction of the blades should ensure the movement of air towards the spirals stretched in the pipe. The distance from the fan to the heating element must ensure safe operation so that the blades do not melt. For additional cooling, the fan and asbestos pipe can be separated in the housing.
Rice. 19: separation of fan and pipe with heater - Insulate the electrical connections both from the fan to the power cord and from the nichrome spiral. To insulate the spiral joints, you can use micanite tape, which is wound directly onto the asbestos surface.
- Place the finished heater in the most suitable housing. In this example, to protect against accidental contact with the spiral, an additional grill is installed in front of the pipe.
It should be noted that the fan power should not be too high so that the coils have time to warm up. In practice, you should achieve a blowing effect, and the heating performance can be adjusted by the length of the spiral. It is also advisable to coat the inside of the asbestos pipe with heat-resistant varnish to prevent asbestos particles from entering the air. It would be a good idea to ground the heater body to a ground loop.
Operating principle of the heating cable
The operating principle is that electrical energy is converted into thermal energy. The peculiarity of such a heating system is that, without the use of an oxidizer or fuel, it receives energy and converts it into heat. The heating system heats up from the electricity passing through it and prevents freezing of communications. Therefore, it is necessary to purchase a heating cable ; it will help to avoid failures in the operation of water supply networks during the cold season.
Read also: License plate light bulb for Octavia A5
To heat the external pipeline, wires are used with a seamless, sealed and damage-resistant sheath that is not afraid of temperature changes. The heating element is located inside the outer layer. When the air temperature drops, the heating cable is connected to electricity. The heating element starts working and heats the entire system. If the air temperature rises, the wire is disconnected from the power supply and the pipeline operates as usual.
Why should you use a heating cable?
The main advantages of using cable heaters:
- Safety. Excellent insulation system. Reliable protection from external chemical, mechanical and thermal influences.
- Versatility. The heating cable can be equipped with a pipeline located both underground and outside.
- Easy to use.
- Saving. After connecting the cable heater, it is possible to adjust the heating power when the air temperature changes.

