Mulwatt
5591 0 0
Mullvatt September 5, 2016Specialization: Capital construction work (laying a foundation, erecting walls, constructing a roof, etc.). Internal construction work (laying internal communications, rough and fine finishing). Hobbies: mobile communications, high technology, computer equipment, programming.
Thanks to insulation, even tropical plants can grow on the balcony.
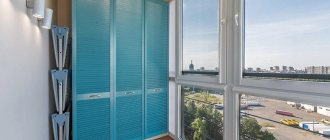
Today I will tell you how to insulate a balcony with foam plastic with your own hands. The fact is that one of my neighbors decided to turn her loggia littered with garbage into a greenhouse with rare species of ornamental plants. That is, one might say, she imagined herself to be the wife of the great king Nebuchadnezzar II. And for this, since we live far from Babylon, we need to perform high-quality thermal insulation of this room.
I am sure that many people want to expand their apartment by turning a balcony or loggia into a living room. Therefore, the instructions for insulating a balcony, presented to your attention today, are unlikely to be superfluous.
The difference between polystyrene foam and polystyrene foam
Polystyrene foam is less dense than expanded polystyrene.
The materials are similar to each other in that expanded polystyrene and polystyrene foam have a polystyrene foam base and are made from polystyrene, but using different technologies.
To make polystyrene foam, polystyrene is steamed under water steam in special molds, and the polystyrene granules are baked to each other, increasing in size. Polystyrene foam has a lower density than polystyrene foam and tends to crumble when the bond between the granules weakens.
Expanded polystyrene is made by extruding polystyrene, it is melted, a foaming composition (soft, hard freon or a freon-free hydrogen-based composition) is introduced into it under pressure, and passed through an extrusion machine.
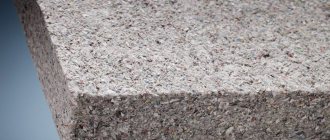
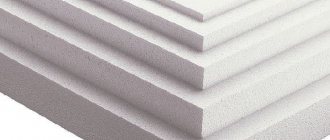
The output is strong polystyrene foam, consisting of dense cells filled with air. Available with a smooth and stepped edge with a regular and foil surface.
The most environmentally friendly are hydrogen-based foaming compounds without the addition of freon, which tends to destroy the ozone layer.
First priority
Before you start insulating the balcony, you should glaze it
Why is glazing important? Old or low-quality windows will produce colossal heat losses, so it makes no sense to insulate the balcony if the windows will blow out. It is better to entrust the installation of windows to professionals who will carry out the installation using modern technologies.
After installing the windows, you should decide where it is best to install insulation. Of course, it is recommended to insulate the outer walls of the balcony, which will prevent the development of problems such as moisture settling on the walls and the appearance of fungal mold. But insulating a balcony if it is at a high altitude is not easy. To do this, you will need to call steeplejacks-builders, who will ask for a considerable amount of money for the services. And one more important point - in order to insulate a balcony from the outside, you will need approval from the authorities, since by your actions you plan to change the design of the facade of a residential building.
As a result, the last option remains - to insulate the balcony from the inside. Moreover, such work can be done independently if you have the necessary tools. Many apartment owners do not want to pay a lot of money for balcony insulation, so in order to save money, they decide to insulate the balcony themselves. This article will tell you how to insulate a balcony yourself, what material to choose for this, and what are the main steps to complete the work.
Advantages of expanded polystyrene
Extruded polystyrene foam is the best option for insulating a balcony and has a number of advantages:
- durable, sufficiently resistant to mechanical stress material;
- has a solid structure and does not crumble;
- does not collapse due to temperature changes, can be used in the range from -50 to + 75 degrees;
- ecologically pure;
- does not lose its qualities when exposed to high humidity;
- the material is not subject to rotting processes;
- has high thermal insulation and sound insulation properties;
- It is light in weight, which is important when insulating a balcony;
- durability 50 years;
- quite low cost.
Installing insulation on the floor
When insulating a loggia with penoplex, it is better to assume that a cement screed is installed on the floor. All cracks must be sealed; polyurethane foam can be used. Chips and reinforcement should not be visible; it is better to cover them with cement. The floor must be cleaned of dust and debris, then treated with an antiseptic solution.
It is important to know that during final processing the level of the floor surface should not exceed the level of the apartment.
Many craftsmen use foam blocks to insulate the balcony with penoplex. This is a fairly light material, so it does not put much stress on the balcony. The material must be calculated taking into account the floor area. The insulation is laid on the prepared surface, the joints are filled with foam. Then the insulation is attached to the floor.
Next, waterproofing made of penofol is applied. There should be a foil part on top. It is better not to skimp on insulation, because in addition to water resistance, it also has heat-retaining properties. The joints are connected with tape. The bars are secured to the penofol with self-tapping screws, on which the final finishing of the floor will subsequently be laid.
Insulation with expanded polystyrene for plank floors
Flaws
Expanded polystyrene is a flammable material.
The disadvantages are flammability, but with the property of self-extinguishing (the material can catch fire, but does not support combustion).
The surface of expanded polystyrene is destroyed when exposed to ultraviolet radiation, contact with coal resin, paint thinners, and polyvinyl chloride.
When insulating a balcony or loggia with polystyrene foam, it is necessary to cover it on top with finishing material: clapboard, MDF panels, etc. We use glue suitable for working with this material.
Installation of vapor barrier
Vapor barrier serves to eliminate the occurrence of condensation and ensure optimal parameters for the moisture content of the insulation. For these purposes, foil film is used, the thickness of which is 200 microns. It is glued with the reflective side to the polystyrene foam board. Foil tape is glued along the joints.
Balcony insulation with extruded polystyrene foam
What to look for when choosing a material
The heat-saving characteristics are affected by the density of the material. The thicker the sheet we choose, the more area it will take up. With a sheet density of 25 kg per cubic meter, a sheet 80 mm thick will be sufficient.
If the density of the extruded material is higher, then a sheet with a thickness of 50 mm can be used.
When choosing a material, pay attention to:
- all slabs are of the same thickness, width, length;
- granules of the same size, evenly distributed;
- no foreign odor;
- packages are marked;
When using polyurethane foam, we take into account that toluene, which is sometimes included in its composition, dissolves polystyrene foam.
Let's sum it up
Insulating a balcony with polystyrene foam is not a difficult task, however, you cannot do without detailed instructions. This article will help a beginner cope with the task without any problems. As for the second method of insulating a balcony with polystyrene foam, it involves creating a frame on the wall where the foam plastic will be installed. The stages of work are similar: first, the walls of the balcony are prepared, after which a frame is created, into which polystyrene foam is laid, all of which is lined with hydro- and vapor barrier material. The wiring is hidden under the frame. In the end, all that remains is to cover it with plasterboard, clapboard or plastic panels. You will learn more about how to implement the second insulation method in this video.
Recommended Posts
How to equip a small balcony + photo
Do-it-yourself insulation of a loggia + video
Balcony sofa with drawer + photo
Curtains for the balcony
Project of a house with an attic and a balcony + photo
How to increase the balcony in Khrushchev
Methods for insulating a balcony
Insulation is carried out using the adhesive and frame method.
Glue method
Even an inexperienced craftsman can glue polystyrene foam.
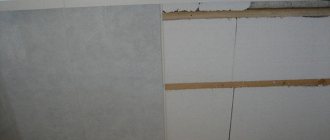
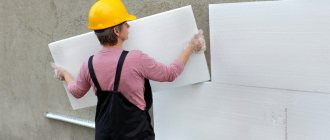
Even a person without construction skills can cope with such work. We treat the surface with adhesive suitable for working with polystyrene foam, glue the insulation, and additionally fix it with self-tapping screws.
A fiberglass reinforcing mesh is attached to the glue on top, then plastered or covered with the selected finishing material.
Frame method
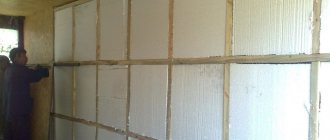
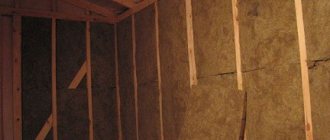
Installation is more complex than insulation using the adhesive method. Preliminary installation of a frame made of wooden beams or metal profiles is required.
The insulation is fixed between the frame so that there is no space left between the frame elements and the polystyrene foam.
We choose insulation of the same thickness as that of the frame slats.
Sheathing with plasterboard or plastering
The finishing stage, which completes the insulation of the loggia with polystyrene foam, may include both leveling the walls with plaster and covering them with plasterboard (also called “dry plaster”). In the first case, a fiberglass reinforcing mesh with 5 mm cells is attached to the top of the film with a 10 cm overlap on plastic dowels and a metal profile (in the corners). Apply plaster or a 2 mm leveling layer of glue on top.
Often, insulation materials are sheathed with plasterboard. To do this, using a rule and a water level, mark and install a sheathing of wooden blocks on the insulation. The contact points between wood and extruded polystyrene foam are treated with polyurethane foam. The bars are attached almost horizontally to the floor and ceiling in 2-4 rows using screws and dowels. Then sheets of moisture-resistant plasterboard are installed on the sheathing, the joints between which are sealed with putty.
Materials and tools for insulating a balcony
Before starting work on insulating the ceiling and walls, it is necessary to prepare tools and prepare materials. We calculate the area of the room, purchase the material with a reserve of 10-20%.
You will need:
- Extruded polystyrene foam, preferably with a stepped edge, so that the sheets fit better together;
- Vapor barrier material (foiled polyethylene foam penofol or dense polyethylene film);
- Special adhesive for polystyrene foam;
- Polyurethane foam that does not contain toluene;
- Wood beams or metal profiles for installation of sheathing;
- Plastic dowels with disc head;
- Scotch;
- Construction level, stationery knife;
- Drill, hammer drill, screwdriver, stapler, electric jigsaw, grinder.
How to choose the right insulation
On the building materials market, the choice of insulation materials is constantly expanding, replenished with new, more advanced modifications, so a person without experience can easily get confused. Most often, to insulate the ceiling of a balcony or loggia, four types of heat-insulating materials are used:
- mineral wool;
- Styrofoam;
- foil polystyrene foam;
- penoplex, or extruded polystyrene foam.
Advice. Previously, balcony ceilings were insulated with expanded clay or sawdust, which were mixed with clay, but these methods are no longer used due to the labor-intensive nature of the process. There are also modern, highly efficient liquid insulation materials, which are also not without their drawbacks, including the need for special equipment, certain skills, and high cost. So, the optimal choice is one from the list of materials listed above.
Whatever material is preferred, in any case the final result will be positive. All of the listed materials are in great demand in the construction industry, so the building materials market offers a huge selection of varieties of such popular insulation materials.
Do-it-yourself insulation of a balcony with polystyrene foam
Insulation of a loggia or balcony with polystyrene foam can be easily done with your own hands. Before starting work on insulating the loggia, we install the balcony frame and prepare the surfaces that will be insulated.
Surface preparation
Adhesive for expanded polystyrene
Before insulating a balcony or loggia with expanded polystyrene, it is necessary to repair and prepare all surfaces. Only after this should we begin insulating the loggia with polystyrene foam.
Preparation stages:
- We carefully inspect all surfaces for smudges and yellow-brown spots.
- We remove the swollen, peeling layer of building materials.
- We treat the surface with an antifungal compound and prime it to increase its strength.
- If the balcony is leaking, we find even the most microscopic cracks and fill them with polyurethane sealant.
- If the cracks are large, we widen them with a grinder, look at the condition of the reinforcement, remove rust from it, and cover it with an anti-corrosion compound. We wet the cracks (for better adhesion with foam), fill them with polyurethane foam, when the foam dries, cover them with sealant.
- If desired, you can align the walls and ceiling. If the surface is not leveled, the finishing will hide all defects.
For insulation, you can use types of polystyrene foam:
- Styrofoam;
- penoplex;
- foil polystyrene foam.
Sheathing the ceiling
We begin insulation work from the ceiling. The optimal thickness of the insulation sheet for finishing with clapboard or plastic is 50 mm with a density of 15 kg per square centimeter. Under the putty, insulation with a density of 25 kg per square centimeter is used. On the top floor, you can perform external insulation of the top slab and insert insulation under the roofing material.
Stages of indoor work:
- We mark the locations of the fasteners, install hangers for fastening metal profiles (when installing wooden sheathing, mark the installation locations of the sheathing).
- We treat the surface with a special glue, in a dotted manner, and apply a strip of glue along the edges of the sheet. We glue the insulation, pressing it tightly, hold it for several minutes, and strengthen it with self-tapping screws.
- If plaster is to be applied on top, after the glue has hardened under the polystyrene foam, glue the reinforcing mesh onto it.
- If the finishing is done with wooden lining, plastic or MDF panels, we attach a vapor barrier layer to the foam plastic.
Materials with a foil surface have good quality characteristics; they simultaneously have thermal insulation and vapor barrier properties, and are attached with the foil side facing out.
Wall insulation
Following the ceiling, we insulate the walls. The internal wall that adjoins the room does not need to be insulated. But if you insulate, then the room will be warmer, and if you do not insulate, then the heat from the radiator in the room will pass to the balcony, and it will be warmer on the balcony. For more information about insulating walls with polystyrene foam, see this video:
We insulate the walls according to the same scheme as the ceiling; we begin to attach the sheets from the bottom level. These works are performed easier and faster due to the fact that the work is not done at height.
We lay the insulation tightly to each other; if a gap has formed between the sheets, blow it out with foam. We cut the outer slabs to the required size with a stationery knife. If the sheets do not fit together in the corners, fill the gap with foam. The last step is to insulate the window slope.
The best option for a vapor barrier material is penofol on an adhesive base, with a top foil layer. The edges of the penofol are glued end to end and insulated with foil tape. If penofol does not have an adhesive base, it is secured with special glue.
We attach the outer trim at a distance of 20 mm from the foam foam to form an air gap between the materials. This distance is optimal for the foil layer to reflect heat into the room.
Floor insulation
We lay expanded polystyrene on a concrete screed or between wooden joists, polystyrene foam only between wooden joists. Before insulation, it is necessary to repair the balcony slab; it can be preventive or major, depending on the degree of its destruction. For more information about floor insulation, watch this useful video:
The floor of the balcony should be either at the same level as the floor of the room, or lower.
Stages of work:
- We remove the old covering from the floor, remove all loose, swollen building materials, and remove dust using a vacuum cleaner.
- We inspect the slab. After treating all the cracks (with cement mortar, tile adhesive, sealant), we prime the surface to increase its strength and proceed to insulation.
Insulation using concrete screed
We level the floor using a screed, wait until the screed is completely dry, this can take up to several weeks, depending on the temperature and humidity in the room. On the screed that has dried to the ground, we cover it with a waterproofing layer, lay polystyrene foam on top of it, and a vapor barrier layer.
Then fill the thin screed with a self-leveling mixture or lay an OSB board. We lay the finishing coating on top. This can be laminate (you need to lay a backing underneath), linoleum, parquet, ceramic tiles. For more information about concrete screed, watch this video:
Floor insulation using joists
Wooden logs are attached strictly level to the prepared surface of the slab, and polystyrene foam is laid between them so that there is no gap left at the edges.
All gaps between the floor elements are filled with foam, without toluene in the composition, vapor barrier material, OSB board, floor covering are laid: floorboard, laminate, parquet, linoleum.
Using wooden joists you can raise the floor to the required height.
By insulating the floor, ceiling and walls on the balcony, you can turn it into a full-fledged living space and get a cozy corner for relaxation.
Preparing for work
Immediately before the insulation process itself, it is necessary to clear the balcony of unnecessary objects, inspect the surface of the walls and parapet, and, if necessary, carry out related work. It is necessary to get rid of the old coating, strengthen the cracked areas of the walls and floor, and also cover up all the holes and other surface defects remaining after dismantling.
After the walls have been repaired and the glazing has been checked for tightness (on an unglazed balcony the need for insulation disappears by itself), you can proceed directly to the surface preparation itself.
