Greetings, comrades! Do you know which heating systems are suitable for aluminum radiators? How to dismantle an old cast iron battery and install an aluminum radiator? Today I will answer these questions.
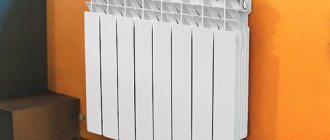
Aluminum batteries are a popular solution for private houses with autonomous heating.
Dismantling cast iron heating radiators
Disassembling cast iron radiators sometimes becomes a very labor-intensive process, but necessary.
Scheme for disassembling cast iron heating radiators: a - gripping thread sections with nipples for 2-3 threads; b - additional turning of nipples and joining of sections; c — connection of the third section; d - grouping of two radiators; 1 - section; 2 - nipple; 3 - gasket; 4 - short radiator key; 5 - crowbar; 6 - long radiator key.
The new or old radiator is placed on a level place. At least on one side you need to remove the usual footers or blind plugs. On different sections of radiators they can be with left-handed or right-handed threads. Typically, cast iron fittings have a right-hand thread, and plugs have a left-hand thread. If there are no disassembly skills and there is a free section, it is better to find out, before applying force, what type of thread this is and in which direction the key should be turned. If the thread is left-handed, when disassembling cast-iron batteries you need to turn the key clockwise.
As when unscrewing any nuts, you first need to “tear” the fittings out of place, i.e. Turn them a quarter turn on both sides of the battery. Then the footers are unscrewed so that a gap of several millimeters is formed between the sections. If you release the feet more, the entire structure will begin to bend under its own weight and due to the applied efforts. In this case, the thread may jam. To prevent this from happening, an assistant must stand on the battery being disassembled, who will prevent bending with his weight.
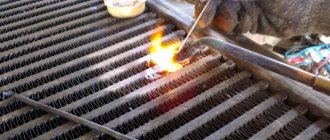
Usually, disassembling old heating radiators is difficult because the fittings and sections are “stuck.” In order to disassemble such a battery, you will have to use an autogen or a blowtorch. The junction is heated in a circular motion. As soon as it is warm enough, the futorki is unscrewed. If you fail to unscrew it the first time, the steps are repeated.
If you do not have enough strength to disassemble the battery, you need to increase the length of the key. An ordinary pipe is used, which serves as a handle.
The built-in nipples for venting cast iron radiators are unscrewed in the same way.
If it was not possible to disassemble a cast iron battery using the methods considered, all that remains is to cut it with a grinder or autogenous gun, or break it in a lying position with a sledgehammer. You need to carefully break or cut one section. After this operation, the adhesion between the sections may weaken, the battery can be disassembled, and the remaining sections can be saved.
The use of a “liquid key” or WD fluid has no effect, since in old cast-iron batteries the fittings were sealed with flax and paint, and liquids will not get on the threads.
Electric boilers
It must be said that electric heating is the most efficient of all existing ones.
Not only are the efficiency of boilers about 99%, but in addition they do not require chimneys or ventilation. There is practically no maintenance of the units as such, except for cleaning once every 2-3 years. And most importantly: equipment and installation are very cheap, and the degree of automation can be any. The boiler simply does not need your attention. No matter how pleasant the advantages of an electric boiler are, the main disadvantage is just as significant - the price of electricity. Even if you use a multi-tariff electricity meter, you will not be able to beat a wood-burning heat generator in terms of this indicator. This is the price to pay for comfort, reliability and high efficiency. Well, the second disadvantage is the lack of the necessary electrical power on the supply networks. Such an annoying nuisance can immediately cancel out all thoughts about electric heating.
Installing heating radiators with your own hands in an apartment
First, you should familiarize yourself with the list of necessary tools. You need to stock up on a drill with a pobedit bit. The list of tools includes torque wrenches, a screwdriver, pliers, a tape measure, a level, and a pencil and ruler. In general, the typical composition of a tool box.
Installation stages:
To begin with, the heating system is turned off and the liquid is drained. In private buildings, a pump is used for these purposes, but in apartments you will need to contact the housing and communal services. Then the old structures are disconnected. Next, markings are made for the brackets. For correct and level installation, you will have to use a building level. Horizontal installation will eliminate gas contamination of the system and allow water to be completely drained. Then the brackets are installed
It is important to test the devices for strength by pressing them with your weight. For cast iron and aluminum radiators, only 2 fasteners are used
Plastic will require more elements. The walls must be clean, smooth, and plastered. Then the shut-off valves are installed. All connections are reliably sealed. Then the pipes are connected. To connect the structure to the pipeline, you will need to make threads on the pipes. Nowadays metal-plastic pipes are used for heating.
You can install batteries in an apartment yourself
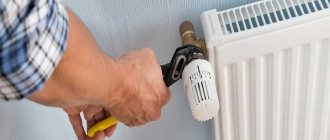
To eliminate leaks, use a torque wrench. This is a mandatory element when installing aluminum pipes, which necessarily involves installing an air valve. In this case, the force on the tool should not exceed 12 kg.
To seal the joints, tow or any other sealant is used. After installation, crimping will be required. This work should be entrusted to a professional. He has a special tool and the necessary skills. If a leak is detected, the nipple will need to be adjusted.
Installation of aluminum heating radiators
Assembling and adjusting a heating system is a responsible task, and it is best handled by professionals. But if you wish, you can install aluminum radiators yourself.
First you need to assemble the device:
- Screw in the supplied plugs and plugs.
- Assemble thermostats and connect shut-off valves at the inlet and outlet of the device.
- Check the nipples and secure the air valves.
A diagram for assembling and disassembling the device is included in the kit. It is better if the assembly is carried out by a specialist, then there will be a guarantee that all the taps are installed correctly. It is not allowed to clean aluminum with abrasives when installing adapters or extending sections - coolant may leak.
Attention! The air valves must be screwed in such a way that at the end of the process their outlet heads point upward. Having marked the installation location of the battery under the window in accordance with the indicated indentations, brackets are attached to the wall
To do this, you need to drill holes with a hammer drill and insert plastic dowels, and screw the brackets into them. When screwing in the fasteners, from time to time you need to hang the radiator on them to maintain a distance of 5 cm from the wall
Having marked the installation location of the battery under the window in accordance with the indicated indentations, brackets are attached to the wall. To do this, you need to drill holes with a hammer drill and insert plastic dowels, and screw the brackets into them. When screwing in the fasteners, from time to time you need to hang the radiator on them to maintain a distance of 5 cm from the wall.
Battery connection diagrams
The device can be connected in several ways:
Diagonal. Experts consider it the most energy efficient. The supply pipe is connected to the upper pipe, and the outlet pipe to the lower pipe, but on the opposite side of the radiator. With this scheme, the battery releases into space the maximum thermal energy received from hot water. The disadvantage of this method is that the pipes running on top do not fit well into the design of the room.
Side. The pipe supplying the coolant is connected to the side fitting (right or left), the return – to the parallel bottom one. If the pipes are installed in the reverse order, the heat output of the device will drop by 50%. This scheme for connecting aluminum heating radiators does not work effectively if the sections have a non-standard size or their number exceeds 15.
From a design point of view, aluminum radiators with bottom connections win. With such a layout, the pipes are not visible; they are hidden in the floor or wall. The batteries are connected to the system through pipes located at the bottom of the devices. Typically, bottom-connected radiators are installed on floor brackets. The battery is attached to the wall with one hook, only to maintain balance.
Connection diagrams for heating radiators made of aluminum
Important! Aluminum batteries have standard parameters for the pipes, so there is no need to buy any additional adapters from the radiator to the pipes. The device is also supplied with a Mayevsky valve designed for bleeding air
Connection and commissioning
Before installing aluminum appliances, the autonomous system is washed with water. Alkaline solutions cannot be used.
Important! Aluminum is easily dented and scratched by tools, so it is better to mount the battery in the original plastic packaging. Once connected, the polyethylene can be removed
In an effort to connect aluminum heating radiators without high costs, some homeowners use blind, non-separable connections between pipes and radiators. But heating a home in the northern hemisphere is not something you skimp on. It would be wiser to install “American” ones - quick-release threaded units, when the pipes are connected and disconnected using one union nut.
The procedure for connecting radiators to the heating system:
- Make sure that there is no water in the system or that it is shut off at the installation points.
- Hang the radiator and connect it to the pipeline using fittings.
- Seal all threaded connections using plumber's tape. 4-5 turns in the thread direction are enough.
- Carry out a pressure test of the system.
Aluminum battery connected to the heating system
You can install an aluminum heating radiator yourself, but it would be wiser to entrust the job to specialists who have all the necessary permits to carry out such work. The slightest inaccuracy in installation can lead to leaks and inefficient functioning of the heating system.
Features of radiators for side connection
There is a concept called “sectional radiator piping”.
This is a kit for making a lateral connection of a radiator in order to adapt the latter to the heating system. In addition to the radiator itself, this includes adapters, plugs, manual air vents with plastic keys, and adapters. In addition, the set includes shut-off or control valves. As a rule, the package includes paranit or silicone gaskets, so you do not need additional sealing products.
When installing a sectional radiator, there is one feature. Before screwing on the fitting, you should make sure that a thin layer of paint is applied to the threads, or none at all. Excess paint can be sanded off with sandpaper, but many people prefer to use flax.
Sectional radiator
Panel radiators made of steel material do not require an additional installation kit. Everything necessary is already installed on them; all that remains is to screw in the taps and connect the pipes.
Some people mistakenly believe that nothing is installed on such a radiator at all. What if I have to dismantle it? In order not to drain water from the system, it is enough to provide the supply and return pipes with ball valves. This will allow the entire system to remain operational during repairs.
As a rule, an experienced craftsman uses the following fittings to strap a radiator:
- a pair of ball valves - with their help, the heating device is completely shut off from the entire system;
- throttle with ball valve - in addition to stopping, it helps to manually adjust the thermal output;
- a pair of chokes - with their help, basic balancing of a two-pipe heating system and subsequent adjustment of heat transfer are performed;
- thermal head with throttle - allows you to regulate the temperature in the room automatically.
There is another important feature - a bypass is installed in front of the shut-off or throttling device, which allows adjustment only on a specific radiator.
Whatever type of radiator you choose, whatever circuit you use to connect it, you must perform calculations and install it correctly. For each specific case, one or another system is more optimal. If the houses have a large area, it is recommended to take advice from specialists who will assist in drawing up the project.
If the room is small, then it is possible to select a heating system and carry out installation work on your own. You just need to take into account all the features of your home, study the rules for installing radiators, and understand the feasibility of using a specific system.
During installation work, one should not forget that the types of materials for pipes and radiators must be the same. A plastic pipe connected to a cast iron battery will cause you a lot of trouble.
The correct choice of radiator connection option directly determines the operating effect of the entire heating system. With the optimal option, heat losses are minimized. This creates the opportunity to obtain maximum effect with minimal consumption of fuel resources.
You can carry out installation work yourself. You just need to provide everything so that the cold system does not disturb the comfort of your cozy home.
Methods for installing heating radiators
Anyone can attach radiators, because the system is quite simple
But it is important to follow building rules and regulations. According to them, there are several installation methods
Battery installation methods:
Lateral connection is much more common. The pipe inlet and outlet are mounted on one side of the radiator. True, the connection to the fittings is different, so the input is connected to the top, and the output to the bottom.
This option provides for a certain interval between fittings. Otherwise, the battery will not fully warm up. If the radiator itself has many sections, then you will have to use an extension cord.
Heating radiator installation process
Sometimes both fittings are located at the bottom. In this case, the bottom connection is mounted. But this option reduces heat transfer.
The diagonal option is considered the best. The inlet pipe is connected to the fitting from above, and the outlet pipe from below. There, heat loss is minimized as much as possible.
The connection is divided into serial and parallel. The first option involves the output of one pipe as the entrance to another. This is a closed system that requires the installation of a bypass. This is a special tube connecting the inlet and outlet pipes. Parallel connection implies a different outlet for each pipe.
Main options
There are several different heating systems and several options for connecting them. In particular, heating can be single-pipe or double-pipe, forced or natural circulation.
Single-pipe heating network options imply a connection in which the coolant moves from radiator to radiator in one line, passing them sequentially. As a rule, this is the scheme that is used everywhere in apartment buildings of old buildings, while at the same time, in new city apartments, a two-pipe connection option is already being made.
The second pipe serves to remove coolant from the radiator after it has been supplied there through the first. This allows the coolant to have the same temperature in all parts of the heating circuit and regulate its movement, therefore, the temperature in each specific heating device. The connection diagram for heating batteries in an apartment depends on the underwater piping. It is impossible to convert a one-pipe scheme to a two-pipe one if the rest of the apartments use a one-pipe system.
Now let's look at the question of how to connect a heating radiator, depending on the needs and capabilities of each of these systems.
Enter exit
Strictly speaking, each of the presented options for how to properly connect heating batteries has its own advantages and disadvantages. For example, the simplest method is a single-pipe connection, from one side of the radiator the coolant is introduced into the upper part, and from the lower part it is discharged further.
The most common connection option, it is also called standard. There is virtually no loss of thermal energy. It is best to supplement this connection with a bypass to allow adjustment and repair of the radiator.
As a rule, serial connection of heating batteries is carried out according to the described or the following schemes.
The simplest method is a single-pipe connection, from one side of the radiator the coolant is introduced into the upper part, and from the lower part it is discharged further.
Diagonal
Despite its high efficiency, it is quite rare, apparently due to the complexity of strapping and the consumption of additional materials. This is done as follows: the coolant is introduced into the upper part of the radiator and its outlet is made from the lower part on the opposite side.
Leningradka
The most correct connection of the heating battery when it comes to horizontal installation of the riser. The input is made from the side closest to the coolant current, the output is from the opposite side, and both connections are located at the bottom of the battery.
Leningradka is often supplemented with a bypass in order to be able to control the flow of coolant and regulate the temperature in the radiators. It is named so because it was developed and first used in Leningrad.
However, despite all the originality and controllability of the considered system, it has a significant drawback, namely heat loss, which will amount to up to 15% of the total figure. Which, you see, is not very good when you heat your house with gas at your own expense.
We discussed above the main methods of connecting heating batteries used for single-pipe networks. It is impossible to connect heating batteries in parallel in a one-pipe system, since it is not possible to supply coolant separately to each heating element.
For a two-pipe system, there is no need to build tricky series connection schemes; usually in such networks radiators are connected in a standard way, less often diagonally.
If the coolant circulates without a pump, naturally, the connection is always made in a diagonal way, since it provides the least resistance in the path of the coolant.
How to place batteries
First of all, recommendations concern the installation location. Most often, heating devices are installed where heat loss is the most significant. And first of all these are windows. Even with modern energy-saving double-glazed windows, it is in these places that the most heat is lost. What can we say about old wooden frames?
It is important to place the radiator correctly and not make a mistake in choosing its size: not only power is important
If there is no radiator under the window, then the cold air descends along the wall and spreads along the floor. The situation is changed by installing a battery: warm air, rising upward, prevents cold air from “draining” onto the floor. It must be remembered that in order for such protection to be effective, the radiator must occupy at least 70% of the width of the window. This norm is prescribed in SNiP. Therefore, when choosing radiators, keep in mind that a small radiator under the window will not provide the required level of comfort. In this case, there will be zones on the sides where the cold air will go down, and there will be cold zones on the floor. In this case, the window may often “sweat”, condensation will form on the walls in the place where warm and cold air collide, and dampness will appear.
For this reason, do not try to find the model with the highest heat output. This is justified only for regions with a very harsh climate. But in the north, even the most powerful sections have large radiators. For central Russia, average heat transfer is required, for southern regions, low radiators are generally needed (with a small center distance). This is the only way you can fulfill the key rule for installing batteries: blocking most of the window opening.
A battery installed near the doors will work effectively
In cold climates, it makes sense to install a thermal curtain near the front door. This is the second problem area, but it is more typical for private houses. This problem may occur in ground floor apartments. The rules here are simple: you need to place the radiator as close to the door as possible. Choose a location depending on the layout, also taking into account the possibilities of piping.
How to place a bimetallic device
To minimize heat loss, the device must be located:
- 8-12 cm from the floor. If it is less, there will be difficulties with cleaning, and the floor will also become very hot. If it is too high, zones with cold air will form near the floor.
- 10-12 cm from the windowsill. If this distance is reduced, convection will worsen. This will result in a drop in the thermal power of the bimetallic radiator.
- 3-5 cm from the wall or a heat-reflecting shield placed on it. A shorter distance will worsen convection. It will also cause dust to accumulate on the wall.
- In the center of the window opening. The center of the radiator and the center of the window should be on the same line. There may be a deviation if it does not exceed 20 mm.
The length of the battery is also important. It should be more than 70-75% of the width of the window opening. Thanks to this, the heated air that will rise from the radiator will be able to create the thermal curtain necessary to stop the cold air. If the length of the radiator is 50% of the width of the window opening, then in addition to warm air, cold air will also enter the room. This will create cold zones in certain parts of the room.
To avoid mistakes, you should always read the recommendations of the company that produced the heating device. They indicate exactly how to install a bimetallic radiator correctly.
Preparing for disassembly
At this stage, you need to prepare all the necessary tools and remove the battery from its mounting location. For work, depending on the type and condition of the radiator, you may need the following tools:
- radiator (nipple) key;
- an adjustable wrench or a set of wrenches with different head sizes;
- autogen or grinder;
- construction hair dryer;
- hammer, sledgehammer;
- chisel.
Tools for disassembling radiators
A nipple wrench is an iron rod with a spade-shaped head at one end, and a hole or bent “ear” at the other. A tool purchased in a store has serifs, the distance between which is equal to the width of the heating radiator sections. They will help you find the location of the required nipple nut.
After preparing the tools, it is necessary to arrange a place for disassembling the radiator. A floor or a sturdy table will do. It is necessary to take into account that dirty water will flow out of the battery, and do not forget to place a waterproof cloth under it.
General rules for installing radiators
The battery is attached to the wall with special brackets. It can be installed openly, which is most optimal, recessed into a niche or covered with decorative finishing elements. When deciding how to properly install an aluminum heating radiator, you need to take into account that when closing the heat source, a loss of up to 30% of power is possible. Having made this choice, it is better to lengthen the heating devices through additional sections.
Any connection method will use three of the four radiator holes. Close the unused channel with a plug.
The two connection points to the system will act as input and output. On the third, always the top one, you need to connect the Mayevsky valve, through which air is removed after filling the system with coolant.
According to the design standards establishing how to correctly determine the connection location of an aluminum heating radiator, the following dimensions must be maintained:
- There should be a free space of at least 10 cm between the top of the radiator and the window sill. If the distance is made smaller, the rising warm air will heat the window sill rather than heat the room.
- The gap between the floor and the heater should not exceed 12 cm. As this gap increases, the heating of the lower part of the room deteriorates.
- You need to retreat from the wall to a distance exceeding 2 cm. At a shorter distance, the free upward flow of warm air masses behind the sections is impossible, as a result, thermal energy will go into the wall.
Often people, without thinking about where and how to properly connect a heating radiator in an apartment or other room, reduce the efficiency of this device. In this case, losses will account for a considerable part of the precious heat.
- Installation under an element protruding from the wall by 3 - 5 cm - about 4%.
- Placement in an open niche - up to 7%.
- Partially closing with a grill - up to 15%.
- By installing the grill over the entire area of the heated parts - up to 30%.
For lateral and diagonal connections, it is better to arrange the entrance through the top channel. When the coolant is supplied from below, the heating efficiency decreases by up to 15%.
The top plane of the battery must be in a horizontal position.
Trying to follow the conditions for how to most correctly and conveniently connect heating radiators, do not forget to use a supply tap that has a digital or dot scale on the adjustment handle. The presence of this option will allow you to easily set the amount of incoming liquid.
When assembling the connections of the coolant supply and discharge pipelines with outlets to the radiator and at the connection points of heating kits, taps should be used that allow you to disconnect the battery from the system if it is necessary to repair or replace it. This mechanism is called “American”.
The laying of pipes connecting the radiator to the system is carried out after installing the sections.
When choosing how to properly connect heating radiators, we will consider each combination of the type of system and method of connecting the heaters.
Materials and fittings for installation
To install heating radiators with your own hands you will need:
- special brackets;
- shut-off valves;
- Mayevsky crane;
- stub;
- sealing materials, dowels.
Brackets
Often they are already included in the radiator package. If they are not available, you can purchase fasteners of suitable length, diameter and profile in the store. When selecting, take into account the type of wall (for wall mounting), load, collector shape, and radiator depth.
Types of brackets:
- anchor with immersion in the base;
- invoices.
For concrete or brick walls, short anchor brackets up to 20 cm long are used; for aerated concrete or ceramic block, longer ones are needed - up to 30 cm. Overhead fastenings are applicable to all walls, including wood or plasterboard.
Types of wall and floor brackets
Some manufacturers produce brackets that are adjustable in length. This is a universal option that you can buy without fear of getting the wrong size.
Mayevsky crane for air release
Any coolant contains air in dissolved form. When passing through pipes, it accumulates in those places where the speed of movement or pressure is lower than in the main channel. Air pockets form, preventing the normal operation of the heating system. Where there is water contact with aluminum, hydrogen is mixed into the air, which poses a risk of explosion.
Installing the Mayevsky crane
For timely removal of gas bubbles, a Mayevsky valve is built into the system. This is a needle valve that can be operated manually or automatically. To release the gas, turn the valve handle until a hiss appears, and close it after liquid is released from the valve.
Photo of the air vent
You can determine the presence of air pockets by simply feeling the battery. If it heats unevenly and there are cold spots, you need to bleed the air using an air vent.
Stub
Used to block the flow of coolant in the dead-end hole of the radiator. Depending on the direction of the thread, it can be left or right. So that the part does not stand out against the general background, it is made painted in the color of the radiator.
Installing a plug depending on the connection method
The contour of the plug is wrapped with sealing materials. When installing, tighten it with a wrench for greater compaction.
Shut-off valves
Serves to open the heating system when any part of it ceases to be used, as well as to regulate the temperature of the radiator. Shut-off valves are represented by taps of various designs:
- ball - used only in the on-off position;
- rod ones - more technologically advanced, they can change the water flow to regulate the temperature;
- check valves - prevent the outflow of coolant from a certain area of the system.
Shut-off valves increase the safety of the heating system, and, if adjustable, reduce the overall energy costs to maintain a comfortable temperature.
Rules for battery location and connection diagrams
In addition to the characteristics of the radiator itself and the correctness of its connection, one of the most important factors affecting the efficiency of the heating system is the choice of the right location for the product. True, in most cases it is predetermined in advance - the new battery will most likely stand in place of the old cast-iron one, which has been there since the building was built. But still, here are some recommendations for proper placement of the radiator.
How to install a radiator yourself
Firstly, it is advisable to place the battery under a window. The fact is that it is a “bridge” through which the cold from the street enters the apartment or cottage. The presence of a radiator under the window forms a kind of “thermal curtain” that interferes with the process described above. In this case, the battery should be placed strictly in the middle of the window, and, preferably, occupy up to 70-80% of its width.
Secondly, there should be at least 80-120 mm from the floor to the radiator. If it is less, it will be inconvenient to clean under the battery; a huge amount of dust and debris will accumulate there. And if the radiator is located higher, a certain amount of cold air will collect under it, which requires heating and, as a result, worsens the operation of the heating system. In addition, too short a distance to the windowsill negatively affects the battery efficiency.
Thirdly, a distance of 2.5-3 cm is allowed between the back of the radiator and the wall. If it is smaller, the processes of convection and movement of warm air flows are disrupted, and, as a result, the battery works less efficiently and wastes some of the heat.
All of the above principles for placing a heating battery are presented in the diagram above
Table. Standard connection diagrams for heating batteries.
Electric heating convector: how to choose a good unit Electric convectors are often used as main or additional heating devices, especially in...
Liquid fuel boilers - review of models and selection of the best For comfortable living in a private house in a temperate or northern climate, it is necessary to equip.
How to choose a convector heater At any time of the year, additional heating of the room and a convector heater may be required.
Double-circuit wall-mounted gas boiler The specifics of the construction of country houses involve autonomous heating and hot water supply - installation.
Requirements and markup
Almost every owner of a city apartment or private house may face the issue of replacing or installing radiators. Such work can be entrusted to professionals, or you can do it yourself.
In any case, the installation of the radiator will be preceded by the purchase of the product and the choice of the method of its location, on which the type of fastening element required will depend. In most cases, brackets are used as such a part, allowing you to fix the heating structure in the right place. They are fasteners made of various materials, which are attached to the wall, or they act as parts that ensure the floor location of the heating device.
There is a list of rules for performing installation work of any kind, and the installation of radiators is no exception. The technical passport of each clamp, manufactured in accordance with GOST, contains instructions and recommendations regarding the operation of the bracket.
The main norms should be highlighted:
- It is necessary to hang a wall-mounted heating radiator, taking into account that the central axial vertical of the window will coincide with the center of the structure. The maximum level of deviation from the value can be 20 mm.
- Based on existing standards, the horizontal size of the radiator should be equal to 50-75% of the window dimensions. Such information is advisory in nature, however, mounting a small device will contribute to a small heat transfer.
- The minimum distance from the floor to the heating radiator should be 60 mm. This refers to the gap between the finish coating and the bottom edge of the radiator.
It is recommended to leave a gap between the wall and the battery of 30-50 mm. The distance from the window sill to the radiator should not be less than 50 mm. The fundamental factor during installation is the number of fasteners used for installation
They must be calculated taking into account the number of sections of the device. For an 8-section unit, it is worth purchasing 2 brackets for installation at the top, and one to place at the bottom
By increasing the number of sections, you should increase the number of fasteners. When installing floor heating devices, you should adhere to the following calculations: for a 6-section device, two support points are needed; when adding sections, the number of fasteners increases.
To hang or install a radiator without errors, you need to pre-mark the locations of the future location of fasteners for the device. A vertical line is drawn on the wall with a reference point to the middle of the window opening.
Next, you can resort to two options for performing the work:
- If there is a bottom wiring, then a horizontal line is drawn that will correspond to the top edge of the device.
- If a device is installed with a side pipe connection, a horizontal strip is drawn from the upper supply pipe.
Heating installation diagram and rules
Each connection option can be used in one-pipe and two-pipe designs. The first option involves installing radiators in one system, where the liquid flows from top to bottom. In a private house, such a system is unprofitable, since the lower radiators do not heat up well.
The two-pipe scheme has more advantages. Hot liquid enters one riser and is discharged into another. This kind of wiring is often found in houses, as it can heat all rooms.
The installation process of heating radiators consists of several stages
Rules for self-installation of batteries:
- The radiator must be placed horizontally, without distortion;
- There should be a distance of 5-10 cm between the top part and the window sill;
- An interval of 8-12 cm is provided from the floor to the battery;
- A gap of 2-5 cm is provided from the radiator equipment to the wall;
- The valve should be tightened with a maximum force of 12 kg; the work is best done with a torque wrench.
The installation process consists of several steps. First you will need to remove the old radiator. Then they decide on the location, fix the brackets and hang the batteries. Next, shut-off valves are installed and pipes are connected. In theory, everything is simple, but in practice there are many nuances.
Types of radiators by material of manufacture
Various batteries are suitable for installation in the private sector. Let's look at the features of each type.
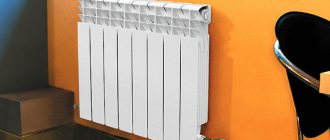
Aluminum
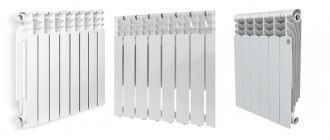
They are widely used in private homes. They have a stylish modern design, as well as good thermal power. They heat up quickly when connected and cool down quickly when disconnected. The price range varies and depends on the manufacturer. The most expensive and high-quality ones are made by companies in Italy. Russian analogues are slightly inferior in operation. Their cost is much lower.
Aluminum sectional radiators
Cast iron
Such radiators are resistant to wear and corrosion, since the inner surface from contact with water is coated with a composition that prevents the destruction of the batteries. Can withstand high temperatures and pressure surges in the system. They take a long time to heat up and give off heat for a long time when switched off. Such devices require annual cleaning.
Cast iron radiators
Bimetallic
They successfully combine such qualities as: the strength of cast iron and the effective heat transfer of aluminum. They have good resistance to pressure surges and are not subject to corrosion. Like aluminum analogues, they are in demand for their characteristics, but the high price often scares off buyers.
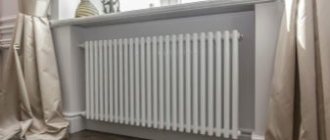
Steel
Such radiators are characterized by high heat transfer and original design. Stainless steel models are expensive. Cheaper designs are susceptible to corrosion.
Steel radiators
Disassembling an aluminum and bimetallic radiator
Before disassembling the heating battery, prepare the necessary tools.
The main tool is a nipple wrench (can be rented at a specialized store for little money). It is a rod about 700 mm long. On one side, a key head with a size of 24x40 mm is welded to it, and on the other, a through hole is made. You can insert a metal rod into it. It will make it easier to turn the nut.
This is the main tool used when assembling/disassembling heating radiators
There are several notches on the surface of the key. The distance between them corresponds to the width of the radiator section. By inserting the key inside the battery and counting the number of notches, you can easily find the nipple for the desired section.
Before disassembling the heating battery, you need to be aware of the direction of rotation of the key. Place the radiator on a flat horizontal surface with the front side up. On the right there will be a right-hand thread, and on the left side there will be a left-hand thread. In order not to get confused, you can do it simpler: take the nut and tighten it alternately on the right and left, and then decide in which direction to turn the key
This is important because the threads can easily be stripped and then you need to buy two new sections. Imported manufacturers make the following designations for threads on the plugs and fittings on the front side of the section: D-right, S-left
The thread on the nipple nut can be right-handed or left-handed, so before disassembling the radiator, we determine which direction to turn
Let's say you need to unscrew one section on the right. To do this, insert the key with a “spatula” into the upper hole to the desired location, secure it in the groove of the nipple nut and forcefully turn the key counterclockwise and “rip it off” from its place. This is where you may need a rod inserted into the ring on the key: a decent amount of force is required.
We make two full turns and move the key to the lower part of the radiator. We repeat the operation, rotating the key in the same direction. Unscrew the nipple 2 turns here too. We take out the key again and repeat the procedure for the upper part. So, one by one, unscrew the section completely. This is done to ensure that there are no distortions.
Choosing a location for installing heating batteries in a private house
To hang the device with your own hands, it is worth remembering that the supply pipes to the batteries are mounted with a slight slope towards the coolant. When skewed and placed strictly vertically, air may accumulate in the batteries.
Small deviations of a couple of centimeters are allowed. Visually everything should be smooth. But this is not a necessary condition to install a radiator.
To increase the heat transfer of the device, you can carry out some manipulations before installation
Recommendations for determining location:
- The slope of the supply pipes should be 0.005-0.01. This means that each linear meter of the pipeline tilts half a centimeter.
- An interval of 6-10 cm is maintained from the floor to the radiator, 5-10 cm from the window sill, and 2-5 cm from the wall.
- Horizontal and vertical directions must be observed.
To increase the heat transfer of the device, you can carry out some manipulations before installation. This is how a shield made of heat-reflecting material is installed. Or coat it with a product with similar properties.
Variety of heating radiators
The most traditional are cast iron models of heating radiators, which are familiar to everyone. Today, these units are used extremely rarely due to their large weight and the impossibility of installation in heating systems that operate automatically. However, these devices also have their own advantages, which distinguish them from batteries made from other materials.
First of all, the design of the heating radiator made of cast iron allows it to withstand severe pressure drops
In addition, such batteries are resistant to the appearance of corrosive deposits on them and withstand the effects of harmful impurities in the coolant, which is also important
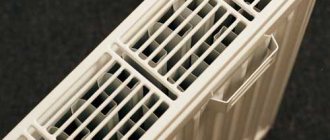
The design of a panel-type heating radiator is somewhat different. First of all, these devices are significantly lighter than cast iron batteries. In addition, their walls are less thick, which reduces their inertia. The operating principle of a panel-type steel heating radiator is based on greater heat transfer compared to other models. In addition, the appearance of these devices is much more modern. Many consumers appreciate aluminum heating radiators. These radiators are also very light in weight, their heat dissipation is quite acceptable, and the design can be very different.
Sometimes you can find heating devices where aluminum is not the only material included in the product. In inexpensive devices, silicon is added as an addition, preventing rupture of the structure in the event of serious changes in pressure and temperature.
And those devices that are more expensive may contain zinc and titanium, since these substances are designed to provide the structure with increased resistance to various types of mechanical damage and protection against corrosion.
Segmentation
To properly disassemble an aluminum radiator, you will need a special tool - a nipple wrench, which is made specifically for this job. As a rule, it is not available in stores, since it is a product of the mind and labor of plumbing workers. You can get it in two ways.
The first is to try your luck at the local market (if there is one), where various used tools and other useful household items are sold. It is likely that you will find what you are looking for there, and at an affordable price. The second option is to contact any plumbing workshop and ask them to rent a nipple key.
When your search is successfully completed, you can proceed directly to disassembling the equipment. There is a specific order for this procedure.
- The first thing to do is turn off the water in the riser to which the radiator is connected and drain the coolant from the system. If you own a private home, you can do it yourself. If you are dealing with a centralized heating system, then such issues can only be resolved through the organization that manages the building. To do this, you need to write an application and then wait for a specialist to arrive. By the way, if you live in an apartment building, you can carry out such work only during the period when the heating season is already over. Otherwise, you simply will not be able to obtain permission, since stopping the centralized heating system will bring cold not only to yours, but also to your neighbors’ apartments.
- After you have dealt with turning off the water in the system, place containers under the junction of the radiator and the main lines to collect the remaining coolant that will flow out during the separation of the equipment.
- Unscrew the fittings connecting the battery to the main line. At the same time, check their condition. If you notice any defects - cracks or “smoothed” threads - then it is better to replace these elements with new ones. Just keep in mind that not all metals are compatible with aluminum radiators. For example, fittings made of brass or copper should absolutely not be used, as this may cause an electrochemical reaction, which will lead to the onset of corrosion processes.
- After disconnecting, remove the radiator from the brackets holding it.
- Now it’s time to use the very tool that you worked hard to obtain. The nipple key must be inserted into the battery exactly to the place you are going to dismantle. Then you need to get the end of the tool into the hole intended for this on the connecting element. Once you have succeeded, turn the nut half a turn in the desired direction. In general, for this stage it is advisable to invite an assistant who will fix the radiator in one place while you fiddle with the connections. So, turn the nut half a turn, go to the one located on the opposite side, and repeat the same operation there. Thus, by gradually unscrewing each element in turn, you can completely separate one section from the other. Be careful and patient - each nut needs to be turned little by little, about 5-7 mm. Otherwise, the section may become severely skewed, resulting in damage to the radiator elements and the need to replace them.
- After unscrewing the necessary nuts, remove the segment, and then check all the gaskets included with it. The quality and condition of rubber seals plays an important role. Deformed gaskets can cause leakage. Therefore, if there is the slightest doubt about their suitability, it is better to replace these elements with new ones. Moreover, it is advisable to purchase gaskets made of paronite, since this material has proven itself best. If this is not possible, then try to find at least silicone seals. It is not recommended to install rubber ones, as they quickly fail.
Let's summarize the above
And so, let's summarize the above. Disassembling and assembling an aluminum radiator with your own hands (on your own) is quite realistic and possible. Will you be able to carry out all the required repairs and plumbing operations in a high-quality and professional manner? It depends only on you and on the quality of assembly and crimping of the heating battery. You must understand that an unforeseen, sudden breakdown may entail unforeseen, large expenses.
Therefore, it will not be superfluous, before disassembling and assembling an aluminum radiator yourself, to thoroughly weigh the pros and cons. And, if there is even the slightest doubt, then it is better not to take on such repairs yourself, but to order aluminum radiator repairs from a real professional. So, be sure to call a plumber to your home.
Types of systems
- Single-pipe system - one pipeline is installed through which the heat source is supplied and the waste liquid is discharged. It is better to use in cases where a small number of batteries are installed. This is usually done when heating apartments where the riser runs in all rooms. With this scheme, each subsequent radiator will be colder than the previous one, but the number of pipes running through the room is reduced.
- A two-pipe system is the best method of design, making it possible to maintain a uniform temperature of the heating fluid throughout the entire circuit. When installing such systems, the supply line is usually located under the window sill level, and the return line above the baseboard.
We will consider below how best to connect heating radiators in one case or another, after we analyze each connection method separately.
- Lateral - with this method, the supply and return flow are supplied from one side. Works well with heating structures with up to 15 sections;
- Diagonal - best used on long heating elements. Communications are connected to the top hole on one side and the diagonally opposite outlet.
- The lower one is the least effective option; it requires high pressure in the coolant along the entire length of the heating structures. To maintain heat transfer, heaters with an increased number of sections are used. To ensure normal temperature in private homes, it is used only if there is a sufficient power pump in the heating system.
Boiler connection
It should be noted that the wiring of gas, diesel and electric heat generators is almost the same. Here we must take into account that the vast majority of wall-mounted boilers are equipped with a built-in circulation pump, and many models are equipped with an expansion tank. First, let's look at the connection diagram for a simple gas or diesel unit:
The figure shows a diagram of a closed system with a membrane expansion tank and forced circulation. This tying method is the most common. The pump with a bypass line and a sump tank is located on the return line, and there is also an expansion tank there. The pressure is controlled using pressure gauges, and air is removed from the boiler circuit through an automatic air vent.
When the heat generator is equipped with its own pump, as well as a circuit for heating water for domestic hot water needs, the pipe layout and installation of elements is as follows:
Shown here is a wall-mounted boiler with forced air injection into a closed combustion chamber. To remove flue gases, a double-walled coaxial flue is used, which is led out horizontally through the wall. If the firebox of the unit is open, then you need a traditional chimney with good natural draft. How to properly install a chimney pipe made of sandwich modules is shown in the figure:
In country houses with a large area, it is often necessary to connect a boiler with several heating circuits - a radiator, heated floors and an indirect heating boiler for DHW needs. In such a situation, the optimal solution would be to use a hydraulic separator. It will allow you to organize independent circulation of coolant in the boiler circuit and at the same time serve as a distribution comb for the remaining branches. Then the basic heating diagram for a two-story house will look like this:
According to this scheme, each heating circuit has its own pump, thanks to which it operates independently of the others. Since coolant with a temperature of no more than 45 ° C should be supplied to heated floors, three-way valves are used on these branches. They add hot water from the main line when the temperature of the coolant in the heated floor circuits drops.
With solid fuel heat generators the situation is more complicated. Their strapping should take into account 2 points:
- possible overheating due to the inertia of the unit; the firewood cannot be extinguished quickly;
- formation of condensation when cold water enters the boiler tank from the network.
To avoid overheating and possible boiling, the circulation pump is always placed on the return side, and on the supply side there should be a safety group located immediately behind the heat generator. It consists of three elements: a pressure gauge, an automatic air vent and a safety valve. The presence of the latter is crucial; it is the valve that will relieve excess pressure when the coolant overheats. If you decide to heat your house with wood, then the following wiring diagram is required:
Here, a bypass and a three-way valve protect the furnace of the unit from condensation. The valve will not allow water from the system into the small circuit until the temperature in it reaches 55 °C. Detailed information on this issue can be obtained by watching the video:
Many homeowners install two different heat sources in the furnace room. They must be properly tied and connected to the system. For this case, we offer 2 schemes, one of them is for a solid fuel and an electric boiler working together with radiator heating.
The second scheme combines a gas and wood heat generator, supplying heat to heat the house and prepare water for hot water supply:
Radiator selection
You should start by choosing a radiator, and the main criterion for choosing will be the operating pressure for which the radiator is designed. For a private house with its own heating system, a radiator with a working pressure of 6-7 atmospheres will be sufficient, but if you need to connect a radiator to the central heating system of an apartment building, it must withstand a pressure of at least 10 atmospheres.
Currently, the consumer is offered two options for aluminum radiators - standard or European and reinforced. The latter can operate under pressure reaching 12 atmospheres. When connecting to a central heating system, you must choose among reinforced radiators.
The number of sections plays a big role
Next you need to decide on the required number of sections. To do this, we determine the amount of heat. Necessary for heating the room and divide by the heat transfer of one section of the selected radiator.
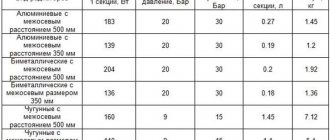
The amount of heat required for a standard room can be taken equal to 1 kW per 10 m 2 of room area. For non-standard premises and more accurate calculations, we will use a ready-made table:
Radiator power table
It should be remembered that the connection diagram for a battery of more than 12 sections must be double-sided, diagonal or saddle. With a one-sided battery connection scheme consisting of a large number of sections, a “pocket” of cold water will form on the side of the radiator opposite the pipes. “Extra” sections simply won’t work; we end up with harmful ballast.
Using forced injection, the battery can be expanded to 24 sections, even with one-way supply, but the radiator in this case must be reinforced.
It should be remembered that coolant must be supplied to reinforced radiators under high pressure only through metal pipes. Metal-plastic may not withstand such pressure, and the consequences will be the most dire.
It should also be taken into account that the heat transfer of the radiator indicated in the documentation is relevant only for one-sided or diagonal supply of coolant to the radiator. When using bottom feed, feel free to subtract 10-15 percent.
If the heating system is installed in a private house, then it is possible to choose the general heating arrangement yourself - one- or two-pipe.
Why aluminum
Why are aluminum radiators attractive?
They have two advantages:
- High heat transfer (up to 210 watts per section);
Manufacturers indicate heat flow values for a coolant temperature of 90 °C at +20 °C in a heated room. If the temperature difference between the battery and the air is smaller, the heat transfer decreases proportionally.
- Low price . A standard size section (500 mm along the nipple axes) can be purchased for less than 200 rubles.
The ten-section Monlan 500/70 radiator is sold in online stores at prices starting from 1,960 rubles.
In terms of the ratio of cost and heat transfer, only a steel register can compete with aluminum batteries. But its appearance is more appropriate in a workshop or garage than in a living room.