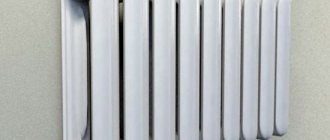
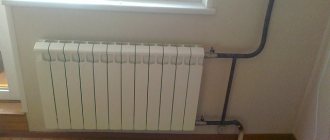
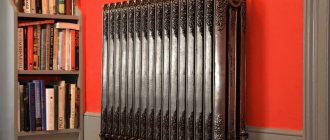
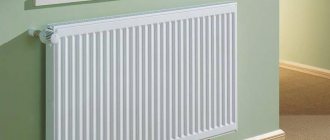
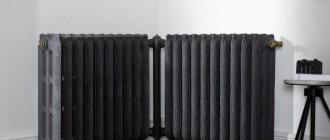
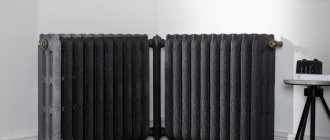
Advantages and disadvantages of cast iron radiators
Masters give batteries a considerable number of advantages:
- Long service life. Batteries can be used for 50 years or more.
- Corrosion resistance. Cast iron almost never rusts, and corrosion marks that appear on the outside can be easily removed by grinding.
- Durability, accumulation of large volumes of heat. Thick-walled heating devices are not deformed by accidental impacts, but due to the thickness of the walls, they are able to accumulate heat and release it slowly. Thanks to this property, the house remains warm even after the boiler is turned off.
- Relatively low cost of devices, simple installation.
- Reduced requirements for coolant quality.
On a note! Cast iron batteries rarely leak. Leakage occurs only when the pressure in the system increases or when the joints are poorly sealed. If the batteries have been standing for a long time, the coolant has not been changed, then due to natural clogging, the small gap closes itself.
Disadvantages include:
- batteries last a long time, so the risk of rust and sediment accumulation increases - the devices will have to be washed;
- small heat transfer area, which makes it necessary to increase the number of sections;
- heavy weight of batteries - to install a cast iron radiator, you need strong walls, weak structures will have to be strengthened;
- low rate of heat transfer, which is why the room takes longer to warm up than when using steel or other units.
On a note! In order for the room to warm up faster, there should be 7-10 sections in the battery.
Results
The main factors when choosing a mounting option for heating radiators are reliability and long service life.
Therefore, if the walls do not meet strength standards or an unusual design project , floor brackets are the most reliable option.
Floor fastenings are indispensable if radiators are installed along plasterboard or MDF partitions, next to panoramic windows or far from the wall.
To ensure that the operation of heating radiators does not cause trouble, approach the issue of fastenings with all responsibility and attention. If you are in doubt about the correct choice, it is better to contact specialized services.
Source
Preparing cast iron batteries for installation
Before fixing the radiators, you need to prepare the wall. The installation area must be solid; if the walls are finished with plasterboard or other cladding on the frame, you should either dismantle the sheathing or prepare a strong support.
Advice! To avoid the risk of wall collapse, it is better to buy a strong plank or stand for wooden structures, and for brick walls, prepare a niche and buy long brackets.
Attaching heating radiators to the wall begins with determining the installation area.
The easiest way is to take as a basis the requirements for the placement of units in relation to the window sill, walls and floor:
- Find the middle of the window opening. From the found point to the right and left, set aside half the length of the radiator - determine the fastening area.
- There should be 8-14 cm between the floor and the lower border of the radiator.
- From the top of the radiator to the window sill you need to leave a space of 10-12 cm.
- The battery should be 3-5 cm away from the wall.
Preparation for installation involves leveling the wall, including repairing chips and potholes. After this, treat the panel with liquid glass and protect it with a heat-reflecting foil screen. This measure will reduce heat loss to a minimum.
After preparation, the necessary fasteners and components that are needed to install and put the batteries into operation are purchased.
Advice! Installation of cast iron heating radiators is carried out with an inclination towards the coolant flow. This way you can avoid airing the heating line.
Technique for connecting sections of cast iron batteries
Do-it-yourself assembly of cast iron heating radiators is carried out using a special 5/4-inch wrench for already used radiators and 1-inch for new ones. You will also need a footer.
There is nothing complicated about joining the sections:
- to measure the depth, insert the key into the battery;
- mark the depth with chalk;
- inspect the key case, which can be right/left and indicates the convergence and divergence of the sections;
- if the fitting moves clockwise, the thread is right-handed, you should screw it in clockwise, if counterclockwise, the thread is left-handed, you will have to twist it exactly this way;
- align the sections so that they press the gasket with the key;
- counting complete turns, turn the key - all sections are connected by the same number of turns of the key;
- Grab the joints, evaluate the evenness of the alignment and then screw all the connections.
On a note! For a strong connection, 3-4 full turns of the key are enough.
Materials and tools for performing work
To complete the work, you will need the entire set of consumables for installing radiators and some additional materials:
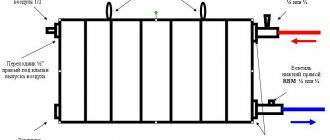
- Plugs. They are counted by the number of outputs from the battery and the type of connection. With the side connection type there will be 4 outlets, of which 2 are for pipelines, 1 is for the Mayevsky tap, and a plug is needed for 1 outlet. For 2 radiators with a side connection - 2 plugs and so on.
- Brackets. A cast iron battery requires 4 brackets - 2 for the upper collector and 2 for the lower.
- Mayevsky crane. This is an air bleed fitting that is installed on the upper outlet of the radiator.
- Adapters. The elements are sold complete with the battery; if they are not available, then you need to select the parts according to the diameter of the pipeline to which the radiator is connected.
- Shut-off valves. These are ball valves.
On a note! If a Mayevsky tap is already installed on the battery in the apartment, then shut-off valves are not needed.
Supporting materials include:
- fum tape;
- plumbing paste for sealing joints;
- linen winding;
- drill or hammer drill;
- dowels with plastic caps;
- connecting fittings for joining with a pipeline and fittings - fittings are selected according to the type of pipeline.
Fasteners for steel heating devices
There are two different types in this group: tubular and panel radiators. They have different designs and, accordingly, different fastenings.
In panel radiators, brackets are welded on the rear wall, with the help of which they are hung on brackets. The shape of this type of fastener is different: it is designed specifically for staples.
In panel radiators, brackets are welded on the rear wall
When installing panel radiators, it is necessary to strictly monitor the vertical position of the brackets. High precision is required: four or six staples must fit exactly onto the hooks. It is also important that the wall is perfectly flat and smooth. In general, using conventional brackets, panel radiators are quite difficult to hang. It is easier to work with other types of holders.
Standard bracket for panel radiator
Since the mass of the heating device is small, it is quite enough to fix it on the upper brackets and install stops at the bottom that will give it direction in the horizontal plane. They are not attached to the wall, but are hooked onto a bracket and simply rest against the wall. For reliability, the part that faces the wall is expanded.
This is what a set of brackets for tubular steel batteries looks like: the upper collector is hung on the hooks, and plastic stops are placed below
There are also special mounting strips for easy installation. They are a strip of metal with plastic clips at the top and bottom. When using this fastener, there is no need for brackets on the rear panel. The slats are fixed to the wall, a radiator is inserted into them, which is held in place by plastic hooks.
Rail for quick installation of panel batteries
Fasteners for tubular radiators are similar to sectional ones: the same hooks, only of a different size, often equipped with plastic covers.
There is also a special fastener with SMB tube grips. This is a strip of steel with plastic clips and a shelf at the bottom that serves as a support for the radiator. This mounting plate can be used if the weight of the device filled with water does not exceed 100 kg. Installation is simple: place the battery on the shelf, bring the top edge closer to the latches. They grab the nearest tube and a click is heard. The radiator is installed, the supply pipes can be connected.
Bar for quick installation of a tubular radiator with shelf and clamps
There is a second option for quick installation: SVD fasteners. It consists of two parts. One is attached to the radiator, the second to the wall. Then they are connected to each other and secured with a steel loop.
Another type of holder for tubular models: two parts, one is attached to the wall, the second is attached to the pipe. They are held together with a wire fastener.
Floor mounting for tubular radiators can be of several types: tubular supports that are welded at the factory, or stands with hooks. Radiators are hung on such racks, and the racks themselves are attached to the floor.
Cleaning a cast iron radiator when a blockage is detected
You need to remove the battery, wash it and put it back in place. The work is carried out with an assistant, since the weight of the product is quite large. The procedure should be carried out in the summer, when the coolant does not circulate through the system. To remove internal blockages, you need to dissolve soda ash in hot water, then pour the solution into the battery and shake the device a little. The main thing is to close the plugs on both sides so that the liquid does not leak out.
Leave the battery for 1.5-2 hours with the soda solution inside, then tap the radiator with a hammer or stick, but not too hard, so rust and impurities will fall off the inner walls. Now all that remains is to open the plugs, insert a hose into one of the holes and rinse the inside of the radiator with good water pressure. After washing, the battery is installed in place.
Areas of use
In what cases each type of fastener is used is not difficult to figure out.
However, the scope of application of floor fasteners is not limited to this.
However: such an installation implies a hidden installation of the lines to the radiator. It is performed in a screed or under a subfloor.
A cast iron battery on racks will organically fit into the loft style.
How much does it cost to install a cast iron radiator?
If for some reason you cannot install the battery yourself, specialists will come to the rescue. When finding out how much it costs to install a heating radiator, it would be useful to clarify the scope of work. If the master only hangs the battery, then the work is estimated from $15 (1000 rubles), and when purchasing consumables, joining sections and leveling the wall, the estimate will increase significantly.
The section costs from $25 (1,600 rubles), together with components and taps, the radiator will cost $300 (21,000 rubles) - do it yourself. The same work in the company is estimated from $500-550 (35,000 rubles).
Modern fastenings are characterized by increased strength, ergonomics, reliability and practicality .
Certified materials used in the production of products comply with international standards and have a dense structure that can withstand the weight of equipment and coolant.
How to fix cast iron radiators
Depending on the individual characteristics of the room, you should select an option for installing products that will ensure uniform distribution of the load and prevent destruction of the wall of the home.
To Wall
Installing wall mounting systems is the most popular method used when installing heating in a home.
Photo 1. Quick wall mounting of radiators using a special strip with clamps. Maximum load 100 kg.
The fasteners are designed to withstand increased loads from equipment and can provide durable service even under adverse operating conditions. Most systems are used for installation on brick, concrete and wooden walls . Wall mounting of cast iron radiators is not suitable for equipping houses made of plasterboard and lightweight foam blocks .
Floor installation
In cases where the walls are not intended for the installation of cast iron batteries, floor fasteners are an excellent solution. The fasteners transfer the entire mass of the radiators to the floor and relieve the load from the walls. Despite the fact that floor fasteners are quite reliable and stable , sometimes it is necessary to install additional wall clamps to hold the batteries in a certain position.
General recommendations
Recommendations for installation of heating devices:
- Cast iron batteries should be placed at a distance of 3-5 cm from the wall, 6-12 cm from the floor and 5-10 cm from the windowsill . This position will provide the best heat transfer.
- The center of the radiator should coincide with the middle of the window opening to create warm flows that prevent cold air from entering the home.
- Before installing the fasteners, you should mark the points where they will be mounted.
- to securely fix the fasteners . Dowels, plugs and cement mortar can be used for this .
- After the fasteners are installed, the batteries are mounted according to the intended diagram .
- Radiators must be correctly assembled and nipples must be tightened . plugs on all free collectors .
- Manual or automatic air vents are mounted on the batteries , helping to increase the efficiency of the system.
- Shut-off valves , which are installed on the inlet and outlet openings, will make the process of heating the house most comfortable. Ball valves allow you to remove the radiator without stopping the entire heating system.
- When connecting the circuit, it is important to choose the correct fitting size that matches the diameter of the heating pipe .
- The last stage of installation is pressure testing of the equipment.
Operating Parameters
Based on the fact that heating radiators are increasingly made from a variety of materials such as aluminum, steel or bimetal, the production of cast iron radiators has not sunk into oblivion, but continues to develop, expressed in various original interior design solutions.
Achievements of modern science and technology make it possible to improve the operating parameters of cast iron radiators and reduce the frequency of their repairs. Their front part is made almost flat, increasing the effect of heat transfer, and retro-style designs are in greatest demand, adding “zest” and laconicism to any type of interior.
One way or another, the relatively low price and excellent heat transfer of cast iron radiators are not the most significant advantages. The main factor is the ability of the system to perform excellently, regardless of the quality or quantity of the coolant inside. Thus, cast iron batteries made according to European standards imply the use of heating coolant of the appropriate quality, which is not always suitable for a particular area. Poor-quality coolant can damage European-made heating devices.
Correct selection of fastening systems is the key to heating reliability
Installation of heating systems is usually carried out once every 20-30 years . Such a long service life requires the use of high-quality materials and reliable fastening of system elements. Fasteners of different types will perfectly cope with the task and add individuality to the interior.
For high-quality operation of the radiator, you need to choose the right brackets. There are many fasteners. They all differ in type of design, installation method, and functionality. Some are made specifically for a specific design.
Types of battery mounting
Designs for fixing heating sections are usually divided into two types. Each of them performs its own function and is used in individual conditions.
Wall mounts for heating radiators are considered quite reliable, provided that the partition is of normal strength. The list of such fasteners includes:
- Anchor brackets. They come in long and short depending on the size and weight of the heater you need to install.
- Special elements with the ability to adjust the height of the battery. The design includes a special plate and a moving mechanism.
- Anti-noise holders. The design is standard in appearance and has rubberized parts. With their help, noise and vibration emanating from radiators and walls are absorbed.
- Corner fasteners. These are small metal structures designed to mount small-sized batteries with a low mass index.
Floor brackets for heating radiators are used in individual cases. For example, if it is not possible to fix the battery on the wall due to the structural features of the room. Among these details are:
- Stands with soles. They are designed for heavy radiators and are screwed directly to the floor with long dowels.
- Additional floor mounts, which are used in case the wall mounts are not enough to hold the battery.
- Racks with and without regulator. Their design provides hooks that are fixed not only to the floor, but also to the wall.
- Details in the form of an ordinary stand with a wide sole. They are not fixed to the floor. Used for small heaters.
- Tripod holders. Convenient, stable floor bracket. This is often used if the radiator needs to be installed away from the partition.
Floor structures are also used if the room has panoramic windows or the walls are made of plasterboard. Such elements are not able to withstand radiators.
Design
Floor brackets consist of three main elements: stands, holders, and soles.
According to the method of attaching the radiator to the holder, they are divided into four groups:
The number and presence of other parts (adjusting screws, decorative trims, etc.) may vary depending on the type of product.
Installation Features
Brackets are selected taking into account the type and weight of radiators filled with coolant.
It is desirable that the supports are made of the same material as the heating devices. The number of reference points is determined depending on the size of the battery.
The type and number of floor brackets are indicated in the instructions for heating devices.
Attention! When placing a heating device for marking, follow the following rules: the distance from the edge of the window sill to the radiator is from 8 to 10 cm, from the bottom to the floor - 10-12 cm , the distance between the radiator and the wall is from 2 to 5 cm.
Instructions for installing the sole
Necessary tools : marking pencil, measuring tape, electric drill or hammer drill, hammer, screwdriver or screwdriver.
Sequence of work (if the floor is concrete):
Photo 2. Drill, screwdrivers, hammer and other tools necessary for installing fasteners and a heating radiator.
Installation of the bracket base on a wooden floor is carried out without the use of dowels.
When fixing the support, play and distortion are unacceptable. To prevent this from happening, the floor surface must be leveled, cleared of construction debris, sand particles, and dirt. In addition, it is important not to overtighten the threaded connections.
How to hang a radiator on a bracket
The mounting methods for radiators vary depending on the type of battery selected. Each option has its own step-by-step instructions.
Often, cast iron radiators are installed under the window. This makes it possible to achieve proper air circulation throughout the room.
- First of all, the points where the fastenings should be installed are determined. The bracket for the cast iron radiator should be located exactly in the place where the sections of the cast iron radiator are connected to each other.
- Fix the bracket for cast iron batteries 2-3 mm above the center of the section of the heating inlet pipe into the battery. All fasteners are installed in the same way.
- The lower holders are installed using the same technology.
- In order for the brackets to have a tight adhesion to the wall, it is necessary to first drill a hole of the required length with a diameter 1-1.5 mm less than the diameter of the thread of the fastener.
- Dowels are inserted into the prepared holes, into which threaded brackets are subsequently screwed.
- After making sure that the installed elements are reliable, hang the cast iron radiator. After it is securely seated in the grooves, you can begin soldering the heating communications.
Steel batteries are mounted on wall and floor brackets. This work is carried out in stages.
- The holes are prepared and self-tapping screws are screwed into them. The gap between the cap and the wall should be 3-5 mm.
- Next, the brackets are hung on the wall, after which the screws are screwed in until they stop.
- The radiator is hung on wall fasteners.
- The floor clamp is installed and adjusted to the battery.
After installing the battery, solder the pipes and additional radiator elements - thermostats, regulators.
In private homes, it is customary to install steel heating radiators on long metal brackets. They are intended for both lower and upper fixation. Installed on the wall using self-tapping screws.
Aluminum batteries have a special holder directly on the case. Brackets are often included. To hang a radiator on the wall, you must:
- Measure the center of the window and correlate it with the axial part of the heating device.
- Place boundaries with a simple pencil on the wall in accordance with the dimensions of the structure.
- Step back two sections from the edges of the battery, mark the distance taken and transfer it to the wall from the drawn border of the radiator.
- Drill holes in the indicated places, and then fix the brackets in them.
- After this, the batteries are hung and connected to the general heating system.
Before installing a bimetallic radiator on the wall, be sure to install brackets that will support the weight of the heating structure. It is important to follow the following rules here.
- The distance from the radiator to the wall must be at least 50 mm.
- The structure is hung with a slight slope forward; accordingly, the fastenings are installed in a similar way.
- The plugs must be located exactly at the same level as the system pipes.
The slope is made to prevent airing in bimetallic radiators. In this case, the installation principle remains the same as for other batteries.
General information
Structurally, floor radiators are no different from their counterparts – wall-mounted units.
The difference lies only in the method of their installation, as well as in the design, which includes some innovations. However, the need to change the method of installation and fastening of radiators arose not only because of the desire of manufacturers to create something new. As you know, there is nothing more eternal than cast iron, and this statement is still relevant. Just imagine how much a battery from it will weigh, especially a working one?
In the photo - hidden floor heating radiators
The wall on which such a load will be attached must be concrete. At the same time, people are now increasingly moving outside the city to private houses, where partitions are often made of plasterboard.
Considering the height and weight of only one section of a cast iron radiator, which is at least 20 kg, it is recommended to install it only on the floor, since the walls may not withstand such a load.
Floor mount for aluminum radiators with chain
The lineup
In the manufacture of radiators, both wall-mounted and floor-mounted, the same materials are used:
In the production of such batteries, two materials are used - aluminum and steel. Moreover, the latter is used in the manufacture of pipes through which the coolant passes, and the body is made of the same aluminum.
Thanks to the internal structure of such a radiator, it is able to withstand very high pressure in the system.
These batteries also have a longer service life.
Option for installing a floor cast iron radiator
Positive and negative qualities
The main advantage of a floor radiator is the simplest installation process, which does not require drilling into the wall. In addition, a reliable heating device of sufficiently heavy weight can be installed on the floor.
There will be no load on the wall, which will ensure its long service life. The legs designed for installing such batteries are also very reliable and can easily support the weight of the device throughout its entire service life.
Reliable floor stand for bimetallic and aluminum batteries
Tip: use a floor radiator to create thermal curtains in places where wall mounting is not possible.
To ensure greater reliability, the floor radiator can be mounted on the floor, for which special brackets are purchased; installation instructions are usually included. The wiring for such devices is hidden and laid under the floor, which significantly improves the appearance of residential premises.
Advice: remember that this process requires deliberate actions and the creation of the necessary conditions to avoid equipment failure.
Steel adjustable floor mount for cast iron radiators
What could be an alternative?
Although the design of modern floor radiators allows them to become an interior decoration, installing them yourself requires free space.
If there is none, and you don’t want to spoil the wall, you should pay attention to other types of heating devices.
Legs for installing cast iron radiators on the floor
Source
