Heater made of battery and heating element
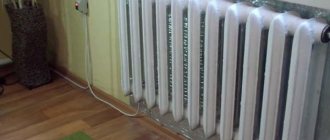
When it comes to deciding how to heat a room: electricity or solid/liquid fuel, consumers are confused by both options because of their high cost. Therefore, many are interested in the question of how to make a heater from a cast iron battery so that it is cheap and does not require special care.
Craftsmen have long been using the advantages provided by installing a heating element. Its main merit is that, with proper connection, it can easily heat small rooms, for example, a greenhouse, garage, workshop or chicken coop, without additional heat sources.
A cast iron battery with a heating element is, in fact, an effective way to autonomously heat a small room or use it as an additional heat source in an apartment in a city heating network.
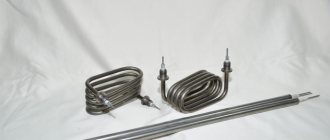
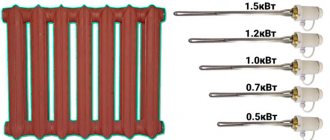
A heating element is a metal cylinder with a spiral installed inside. The walls of the tube do not come into contact with the spiral due to insulation with a special filler. Installed in a heating device, such a homemade heater made of a cast iron battery has the following advantages:
- This is a reliable design, completely safe for human life.
- This device has high efficiency.
- They are simple and durable to use.
- Heating elements are almost invisible, as they are installed directly into the heating system.
- Since they are equipped with a thermostat, they help save energy resources.
- The amount of electricity it consumes is significantly lower than that of conventional electric heaters, boilers or underfloor heating systems.
- To make such a heater from a cast iron battery with your own hands, you do not need any permits. The heating element is simply mounted into the heating network pipe.
Even a person far from electrical work can install and connect the heating element. As a rule, they are sold complete with parts for installation and protection, control devices and elements for connecting to the electrical network. The heating element is simply screwed into the radiator socket and plugged into the outlet.
It should be remembered that the heating element must be installed in a horizontal position. You can turn on the device for heating the room when there is coolant in the system.
To control safety, the heating elements are equipped with double overheating protection. Control sensors are located both inside the device and outside.
Modern heating elements for connecting to cast iron radiators are equipped with two operating modes, which allows them to be used as the main source of heating, and then they are turned on at full power, or as an emergency or periodic one. In the latter case, it is beneficial to use such technology, for example, in dachas where people do not live permanently, but care must be taken to ensure that pipes and radiators do not freeze.
To make efficient heating from cast iron radiators with your own hands, you need to choose a heating element of suitable power. To do this, a calculation is made taking into account the required heating of the coolant and its quantity in the battery.
Types of heaters
A home craftsman who wants to acquire a homemade “hot water bottle” can choose from several options:
Oil
It is a container equipped with a tubular electric heater (TEH) and filled with oil.
The main element of the heating element is a spiral made of nichrome or other material with high electrical resistance, which begins to heat up when an electric current is passed through it. The spiral is placed in a copper tube filled with sand.
The oil removes heat from the heating element, distributes it over the surface of the body and, in addition, serves as a heat accumulator (after a power outage, the device continues to heat the surrounding air for some time).
Steam-drip
In its design, a vapor-drip heater is very similar to an oil heater, only water vapor is used as a medium that distributes heat. It is formed from a small amount of water, which is poured into the body.
This solution provides two significant advantages:
- When freezing, the vapor-drip heater will not burst, since water occupies only a small part of its volume.
- Steam is an extremely capacious heat accumulator. More precisely, not so much steam as the evaporation process: it is during the transition from liquid to gaseous state that water accumulates a large amount of thermal energy, which is returned when steam condenses on the walls of the heater.
Having transferred heat to the body of the device, the condensed steam in the form of water flows to the lower part, where the heating element is installed. The power of the heating element and the volume of water are selected in such a way that rupture of the heater by steam pressure is excluded.
Due to the fact that the device body is hermetically sealed, its internal walls do not rust due to high humidity.
Candlestick
A candle flame is known to emit not only light, but also some heat.
Only it usually evaporates to the ceiling in the form of convective air currents and is “smeared” over the entire area of the room.
Why not place a heat trap above the candle? We will tell you what it is in the next section.
Infrared (IR)
Any substance with a temperature different from absolute zero emits “thermal” electromagnetic waves, which are called infrared.
The intensity of this radiation is directly dependent on the temperature of the substance. Water and oil radiators also emit IR waves, but in very small quantities because their surface is relatively cold.
To turn a metal object into an IR emitter, it is enough to heat it to a red glow temperature. If you use special materials, for example, graphite, then quite noticeable “heat” waves can be achieved at relatively low temperatures.
Knowledge of these subtleties will help us make our own IR heater, which will give us heat directly, that is, without the participation of air as an intermediary.
Other types
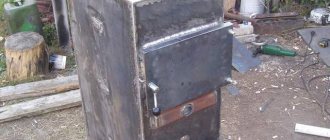
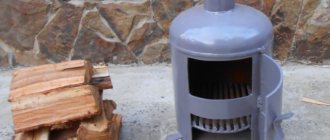
Since electricity is not available everywhere, structures running on gas or solid fuel have the right to life. The latter include potbelly stoves.
Oil radiator from MS-140 battery
As a rule, oil heaters are used as additional heat sources if the central heating “cannot cope” in full. Sometimes they are used to heat small rooms where heating is not installed.
In this case, knowing how to make an oil radiator from a cast iron battery, you can save a lot on both the purchase of a new device and its operation.
Depending on the power required from the heater, its manufacture may require from 1 to 4 heating elements. As a rule, one or two heating elements are enough to use such an oil radiator in everyday life. To work you will need:
- Classic cast iron battery, for example, brand MS-140.
- Heating element of suitable power.
- Technical oil, but according to craftsmen, the best option would be to use electrical oil, which is poured into transformers. It is resistant to high temperatures and therefore safer. The only drawback of transformer oil is its high cost.
The modern market of thermal technologies offers heating elements specially adapted to work in the MS-140 cast iron radiator. It is better to look for and buy a ready-made device than to try to calculate on your own what power, shape and size of the device will be required.
It is very easy to make an oil cooler by following the steps in the right sequence:
- The heating element is installed in the lower manifold of the cast iron battery from the end part.
- The rear wall of the structure is grounded.
- Move the oil drain hose and ball valve downwards. This is important because if the media drains, the heavy battery case filled with oil may be difficult to tilt.
- A plug is placed on the upper end hole above the heating element, and the hole above the tap is closed with a plug with a Mayevsky tap.
When heated, oil expands greatly and will require space inside the cast iron radiator, so fill the container only 80-85%.
Size calculation
Making your own pipe heating device is not very difficult. But there is one important point here - to correctly calculate the dimensions of the device. After all, such an indicator as heat transfer will depend on them.
Required indicators
The calculation is not easy, because it requires some criteria for the premises itself. For example: glazing area, number of entrance doors, what windows are installed, whether the floor, walls and ceiling are thermally insulated.
It’s difficult to take all this into account, so there is a simpler option that takes into account only two indicators:
- area of the room.
- ceiling height.
How can this help when assembling a homemade heating device? To do this, you will have to make a comparison with the usual MS-140-500 brand. The heat output of one section is 160 W, volume is 1.45 liters. What does this give us?
You can determine exactly how many sections will be needed if you use a cast iron device. The total volume of coolant that will fit in one battery is determined from the number of sections. And knowing this number, you can approximately determine the volume of the pipe radiator.
The thing is that the thermal conductivity of steel is 54 W/m*K, and that of cast iron is 46 W/m*K. That is, a small downward error will not have any effect on the quality of heat transfer.
Calculation example
Conventionally, we will assume that an eight-section cast-iron heating device corresponds to the above-described ratio. Its volume is 8x1.45=11.6 liters.
Now we can calculate the length of a pipe with a diameter of 100 mm, which we will use to assemble a homemade battery. The standard cross-sectional area of the pipes is 708.5 mm². We divide the volume by the cross-section, we get the length (we convert liters to mm³): 116000:708.5= 1640 mm. Or 1.64 m.
A slight deviation in both directions will not greatly affect the heat transfer. Therefore, you can choose either 1.6 or 1.7 m.
Heat exchanger for a boiler made of cast iron battery
Many craftsmen, in order to save money on heating in autonomous heating systems, install heat exchangers in furnaces or boilers. Their main task is the transfer of heat that is generated during the combustion of solid fuel.
For a design to be truly effective, it must have the following characteristics:
- The larger the heated surface area, the more heat it can transfer.
- The material from which the heat exchanger is made must have high heat transfer.
- The device must be resistant to temperature changes.
As practice shows, the best and cheapest option is to assemble a heat exchanger from a cast iron battery. It is suitable for the following reasons:
- From the radiator sections you can assemble a device with the required heating area. If you use old cast-iron batteries, you first need to disassemble and wash them, and then, knowing how to assemble a cast-iron battery, make a structure of the required length from it.
- Cast iron has sufficient thermal conductivity and is at the same time resistant to the aggressive environment that forms inside the furnace.
- Sufficiently wide channels of the cast iron battery are able to freely pass water from the heating circuit, which requires high movement speed to effectively heat the house. To ensure such circulation, it is necessary to create a significant temperature difference between the incoming and outgoing water. The larger it is, the faster the coolant flows through the network.
When assembling cast iron heating radiators with your own hands to mount a heat exchanger from them, you need to replace the gaskets with special asbestos threads, pre-impregnated with graphite lubricant.
Depending on the size of the stove, you can use several sections of cast iron radiators or even arrange them in two rows. Assembly is carried out in the same way as for connecting to the city heating network. For this, adapters, bends and corners are used, and after connecting all sections, the structure must be checked for leaks. To do this, water is supplied to it under pressure.
You cannot install a heat exchanger in a furnace without checking its reliability and tightness.
The best place for such a device would be a chimney. There the cast iron will be protected from open flames, which will ensure its safety. If you place a heat exchanger in a firebox, then the flame on one side and the cold water that enters it through a pipe on the other can cause strong temperature changes that it cannot withstand.
There is no difficulty in how to turn cast iron batteries into a heat exchanger or oil radiator with your own hands. If you have the necessary tools and heating elements, you can make effective heaters from old Soviet “accordions”, thus giving them a second life.
Criteria for selecting the required materials
Since a homemade device is assembled from units that have already been used, first of all it is necessary to assess the condition of the pipes
Particular attention will need to be paid to their walls. Their thickness should be several millimeters
If corrosion occurs, it is undesirable to use such pipes or be sure to eliminate all defects before use. All rust will need to be thoroughly removed from the metal with a brush, and then covered with an anti-corrosion compound so that the problem does not arise in the future during operation.
For production, pipes with a diameter of approximately 12 cm are usually used. Sheet metal of the appropriate size is used to plug the ends.
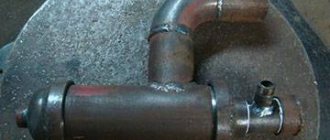
To make bypass channels and fittings, you will need to use pipes of a smaller diameter, which can eventually be connected to the heating system. The threads on the fittings are pre-cut, for this reason the appropriate equipment is required - a “drill” (for creating external threads) and a tap (for cutting internal threads).
A DIY oil radiator can be made portable. In this case, small pipes will be used, and oil will be used as the coolant. Heating elements are used instead of heating elements. The choice of this component depends on the area of the room that needs to be heated. Home craftsmen often install an additional thermostat on such a device, which periodically turns the heating element on and off.
For good fastening to the wall, you will also need strong hooks that can support the weight of the resulting unit. To create a more aesthetic appearance, they can be purchased in the store. But if you don’t want to spend additional money, then strong reinforcement bars that need to be fixed in the wall are also suitable. It is advisable to first paint the hooks in the same color that was used to paint the heating device - this way the fittings will become invisible.
Distinctive features
Floor-standing cast iron gas boilers, unlike steel units, have a prefabricated sectional design. It is worth noting that the units are assembled only by hand.
Features of cast iron heat exchangers:
- Cast iron, once heated, retains and releases thermal energy for a very long time. This material also resists aggressive environments and acids well.
- Since the design of the cast iron heat exchanger is prefabricated and it consists of separate sections, in case of any damage, all parts can be replaced individually.
- The heat exchanger is not afraid of high temperatures and can withstand heating up to 300°C.
- The service life is quite long - 25 years or more.
Cast iron heat exchangers can be found in both domestic and industrial boilers.
You can read about the types of heat exchangers for gas boilers.
Operating principle
Cast iron gas heating boilers are similar in operating principle to conventional units. They contain the same elements: circulation pump, gas burner, heat exchanger, combustion chamber. The operating process of the device is based on burning fuel in a combustion chamber; it transfers thermal energy to a coil with water. The coil, made of cast iron, is the main key element of the boiler; its purpose is to gradually and evenly heat the coolant.
There are many positive aspects in the operation of such units:
- Firstly, they are not susceptible to corrosion.
- Secondly, heat is distributed evenly.
- They withstand thermal loads well.
- With proper care they can last for decades.
As a disadvantage of a gas boiler with a cast iron heat exchanger, it can be noted that such devices are prone to mechanical damage and also weigh a lot. Another drawback is that cast iron is very sensitive to the temperature difference between the supply and return coolant. In the event of a strong drop, cracks appear on the heat exchanger, as a result you will have to resort to repairs, which will be expensive.
Choosing a floor-standing gas boiler with a cast iron heat exchanger
Such units are classified based on the number of circuits:
- Floor-standing single-circuit gas cast iron boilers. There is no provision for heating hot water. However, if an indirect heating boiler is connected to the boiler, then such units can also be used for hot water supply. If you install a storage tank, the internal structure will be provided with additional protection. This container will be used as a thermos and mixing unit.
- Floor-standing cast iron double-circuit gas boilers have in their design a coil made of copper, which is responsible for heating the water. Also, such equipment may include a built-in buffer tank, which is responsible for uniform supply of hot water to users.
The main criterion for choosing a gas boiler with a cast iron heat exchanger should not be its cost, but its technical characteristics. In order to select good equipment, you need to find out the quality of the cast iron from which it is made, find out the operating temperature range, and the maximum operating pressure.
When choosing cast iron gas boilers for heating a private home, you should pay attention to the power, and also, based on your wishes, check whether or not there is a circuit and a built-in DHW buffer tank.
Where are heating elements used for cast iron and aluminum radiators and are they any use?
Many copies have been broken in disputes about the effectiveness of various types of electric heating. Those of us who listened carefully to the teacher in school physics lessons know that when electrical energy is converted into heat, the efficiency of electric heating devices is approximately the same and is 98%, approaching the maximum possible.
Even in an incandescent lamp, which is not intended for heating, up to 94% of the electricity is converted into heat and only a small fraction into light. Nevertheless, sellers, managers and marketers continue to talk about unusually economical electric heating devices, including heating elements for heating radiators.
filled with videos filmed on behalf of the supposed owners of such heating devices, who supposedly, by installing heating elements in the battery, significantly reduced heating costs, simultaneously increasing comfort. We suggest you figure out where the grain is in advertising and where the chaff is.
Application of heating elements for radiators ↑
A tubular electric heater (TEH) can be installed in any heating device that has an internal cavity filled with liquid. Everyone is well aware of heating elements for oil radiators. In those private houses and apartments where there is no hot water circulation line for a heated towel rail, a tubular electric heater is often installed in a coil filled with water, but not connected to the water supply.
The heater is located only in the lower zone of the radiator
Heaters for heating radiators can be used in systems of various levels, as the main or additional heat source:
Main heat source ↑
- A garage, workshop or other utility room that has a limited area and is used only periodically during the cold season. In this case, the operation of the heating device is autonomous, there is no central system, the coolant circulates only within the radiator, the heating element is the only heat source. The battery is filled with low-viscosity technical oil, so the heating is not afraid of freezing. In fact, this is an analogue of an oil radiator.
The heating element can be inserted into any heating device filled with liquid, including a homemade garage register
- A periodically heated cottage where there is no central heat source. The principle of use is the same as in the previous case, only the number of devices is larger.
Bottom left - heating element, top right - expansion tank. You don’t have to install it, just don’t add a little liquid to the top, the remaining air will be enough to compensate for thermal expansion
- A constantly heated house, cottage, office or industrial building, where there is also no central heat generator, but each room has an autonomous heating source - a radiator with a heating element. If the building is constantly maintained at a positive temperature, it can be filled with water.
The design of the heating element allows it to be installed instead of a standard radiator plug
Additional heat source in a private house ↑
In a building with a local central heating system with a heat generator and a water circuit through which the coolant circulates, electric radiator heaters can be used as an additional heating source.
If the boiler is gas (receives fuel through a central natural gas pipeline), such a solution makes no sense, gas is much cheaper than electricity, and the level of automation of the boiler is quite high. Additional heating of radiators with heating elements can be useful when the boiler is solid fuel and the owners do not have the opportunity to constantly “throw firewood” into it.
Electric heating will help smooth out the uneven heat generation of the main boiler. Another case when the installation of heating elements can be justified is the use of expensive types of fuel for the main boiler: diesel or liquefied gas.
Electricity costs about the same money, but if you turn on additional heating only from the evening until early morning, when the night tariff is in effect (it is about half the daily rate, the exact figures depend on the region), it can be profitable. A prerequisite for saving: the presence of a two-tariff meter.
Manufacturers
Currently, on the Russian market you can find a large number of different models of cast iron gas boilers, which are produced by different manufacturing companies. Let's look at the most popular of them.
Ariston (Italy)
Gas boiler with cast iron heat exchanger Ariston Unobloc
The Ariston company produces atmospheric gas cast iron boilers of the Unobloc series. They are well suited for domestic operating conditions, are reliable and have a long service life. The efficiency of the devices is high, reaching up to 90%. The model range is represented by devices with power from 24 to 64 kW.
The cast iron heat exchanger is not subject to corrosion processes and various thermal stresses. The atmospheric burner includes electric ignition and ionization flame control. Ariston boilers, whose power varies from 24 to 31 kW, include a circulation pump, an expansion tank, a safety valve and a minimum pressure switch.
Thanks to the large variety of units made in a variety of design solutions, everyone can choose a heating device that will not only become a source of heat, but will also fit perfectly into the interior.
Baxi (Italy)
Models of floor-standing gas boilers with a cast iron heat exchanger Slim from Baxi got their name due to their small dimensions (width is only 35 cm). In this regard, they can be placed in any room, even the smallest. The manufacturer offers units with atmospheric and inflatable burners. Power ratings range from 15 to 62 kW.
During the operation of boiler equipment, continuous electronic modulation of the flame occurs both in heating mode and in hot water supply mode. These Baxi cast iron boilers are highly safe; they are equipped with an electronic self-diagnosis system, ionization flame control, a protective thermostat against overheating of the liquid in the primary heat exchanger, as well as a draft sensor to control the removal of combustion products.
If your boiler room is quite large and you need a more powerful boiler, then Baxi offer a range of units with an atmospheric burner, the power of which ranges from 83 to 116 kW. The boilers are very well adapted for operation in Russian conditions.
Gas floor-standing boiler Baxi SLIM
Electrolux (Sweden)
Floor-standing gas boiler Electrolux FSB 50 Mi
Electrolux cast iron heating boilers are represented by the FSB series, which includes both single-circuit and double-circuit devices with natural removal of combustion products.
Due to the fact that production is carried out using the most modern technologies, the devices have a long service life and are very economical in fuel consumption.
It is worth noting that Russian cast iron gas boilers are not much inferior to their European counterparts in their technical and operational characteristics and are also very popular among users.
Thanks to a sectional cast iron heat exchanger made using Drop Stop technology, an Electrolux gas boiler can operate successfully for 25-30 years.
Lemax (Russia)
The Russian gas floor-standing boiler with a cast iron heat exchanger Lemax can operate in heating systems with pressure up to 4 Atm.
The wall thickness of the heat exchanger is 4 mm, so it is very durable. There are two types of units in this category - Leader and Wise.
Gas boiler Lemax Leader
The Lemax Leader gas boiler has the following technical characteristics:
- it is non-volatile;
- power 16-50 kW;
- high productivity, efficiency reaches up to 90%;
- the package includes: overheating protection, traction sensor;
- the maximum water temperature is 80°.
The temperature control is located on the front part, there is a pressure gauge nearby, and it is also possible to connect a room thermostat. Thanks to this, you can set the desired temperature in the room, which will be maintained at the same level.
Gas boilers of the Wise series are connected to the electrical network and consume 7 W/hour. They have an uninterruptible power supply installed, so voltage drops will not affect the operation of the units in any way.
Gas boiler with cast iron heat exchanger LEMAKS WISE
User reviews of cast iron gas boilers indicate that these heating devices cope well with their main task - heating, and a wide range of models allows everyone to choose the device that will be the best option.
Using radiators
Selection by heat transfer
So that the radiators cope with their task, i.e. provided a comfortable microclimate, we need to purchase a sufficient number of such devices for one room.
And here you can’t do without calculations, instructions for which are given below:
The number of heating points must correspond to the volume of the room
- Power consumption depends on how much volume needs to be heated. Therefore, we need to multiply the area of the room by its height (in meters). So, for a room with an area of 25 m2 with 3 m ceilings, the required value will be 75 m3.
- Next, we multiply the volume by the standard value of 41 W/m3. This value determines the heat consumption per cubic meter of living space for central Russia. In our case, the total volume of heat will be equal to 75 * 41 = 3075 W.
For cast iron models, heat transfer is calculated per section
System installation
Installing heating radiators with your own hands is a rather complicated process, but this task is still feasible for most craftsmen.
We begin the description of the algorithms with instructions for installing electrical models:
Electric radiator under the window sill
As a rule, stationary electric heaters are mounted on the wall. In this case, for connection, either a socket located in the immediate vicinity of the device or hidden wiring for a permanent connection is used.
- In order for heat flows to be distributed evenly in the room, the battery must be positioned according to certain rules. It is extremely important to maintain the size of the gaps: from the floor - about 100 mm, from the window sill - 80 - 100 mm, from the wall to the back surface of the battery - 30 - 60 mm.
- If the radiator is completely covered by a window sill board, then it is advisable to make holes in it for the release of warm air, covered with plastic grilles. Otherwise, the bottom of the window glass will constantly accumulate condensation as the coldest area in the room.
- The installation of an electric radiator itself is not difficult. All we need to do is install the mounting brackets on the wall and hang the battery on them.
Water heating systems
With water heating it is much more difficult:
First you need to select a connection scheme. This determines how efficiently heat redistribution will take place. Possible schemes are presented in the images in our article, so during installation you must keep this information in mind.
Connection diagrams and heat losses during their implementation
- Secondly, we need to lay heating pipes. As a rule, steel or polymer products with good heat resistance are used for this purpose.
- After this, we install the radiator itself on wall or floor brackets. The heaviest batteries are made of cast iron, so the most powerful fasteners are used to secure them.
- Finally, you need to connect the radiator to the pipes. Most often, threaded connections are used here, which must be as reliable and tight as possible.
Connection fittings
After completing the installation work, it is worth testing the system
If you have not done this, then it is important to follow the announcements about the beginning of the heating season: only the first launch of a test portion of the coolant will finally demonstrate how high-quality the installation was
Features of the boiler structure
The requirements for boilers by owners of private houses are simple:
- He must be economical.
- Possess a very high level of heat transfer.
- It's inexpensive.
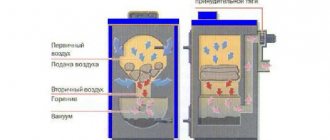
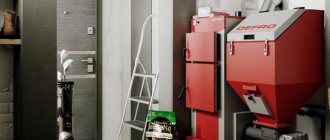
Taking into account the fact that gas boilers and gas pipeline connections to the house cost a lot of money, and subsequent payments for gas will not bring any savings, many private houses are installed with wood-burning devices. The most effective type of heater is a water boiler, which can not only heat a small country house or cottage, but also supply it with hot water.
A homemade boiler made from cast iron batteries is an excellent alternative to industrial units, which are expensive but save little.
Its structure is such that a water boiler is built into a conventional stove, which increases its heat output many times, thereby reducing the cost of firewood and heating the room almost instantly.
Technical characteristics of homemade heaters
In most cases, home-made heat generators are a copy of those devices that are commercially produced by official companies. They may be inferior in quality to the original in terms of technical characteristics, but for a number of reasons, apartment owners still want to assemble such a unit on their own.
The fact is that when making it yourself, the equipment is several times cheaper, since improvised means are used during assembly. It will also be possible to assemble the unit of the required size and dimensions, and independently select a housing with the desired strength. This means that the master chooses all the technical characteristics himself, based on the size of the room that needs to be heated. For example, if heating elements are used to assemble the apparatus, then only two samples will be suitable for heating one room. More than 4 heating elements per room are usually not used.
A DIY battery heater may violate operating conditions
But it should immediately be noted that a self-made heater may violate the operating conditions drawn up by official manufacturers. A homemade product is not as safe as a purchased unit. The heating device will be unpredictable and may result in unpleasant consequences for others. This is due to many factors:
- Homemade heating devices often cause fires.
- There are also no legitimate manufacturer warranties.
- The technical characteristics of a homemade device are unclear, and if assembled inappropriately, the result will be an unaesthetic design.
But if all these shortcomings do not frighten the master, and there is no desire to purchase a heating device in a store, then you can proceed to assembling the heater yourself.
Preparatory work
Finding old Soviet cast iron batteries is not a problem today. Dozens of them are demolished when residents of apartment buildings change their heating to more modern models, or when old buildings are demolished. The best option for manufacturing the structure would be cast iron radiators M-140.
One battery section holds up to 1.5 liters of water. The number of sections directly depends on the area the heating boiler made from a cast iron battery must heat. For example, for a house with an area of 100 m2, 12 sections with a total capacity of 18 liters and a size of 3 m2 will be required.
Before starting to manufacture the boiler, all sections of the radiator must be thoroughly washed to remove scale and dirt accumulated over many years of operation. To do this, you can pour a 6% solution of hydrochloric acid inside and hold it there for a while until it eats away all the deposits. After this, the solution is drained and each section is thoroughly washed with water.
This procedure should be carried out slowly, taking all precautions. You must wear protective gloves on your hands and a respirator on your face. After all sections have gone through the cleaning process, you can begin to assemble the boiler from a cast iron battery with your own hands.
Electric spiral heater
*
A small homemade garage heater can be made in almost a couple of hours.
To do this you will need the following materials and tools:
- fireproof (fireclay) brick – 2 pcs.;
- nichrome spiral – 1.2-1.5 m;
- steel or aluminum corner 35x35 or 40x40 mm - 1.5 m;
- small grinder with discs: for stone and cutting for metal;
- drill with drills: for metal – Ø 3 mm, pobedit – Ø 6-8 mm;
- narrow chisel with hammer;
- rivets with a key.
The device to be manufactured will be an insulating base made of two bricks with a spiral recessed into them, located on a frame made of angle steel.
Homemade electric heater based on a nichrome spiral
A square of 250x250 mm (the length of a brick) is drawn on a sheet of paper, in which a spiral layout is arranged - a labyrinth of strips 1 cm wide, directed from the edges of the square to the center.
Bricks that are selected with good geometry and without chips are cleaned, washed, dried and placed on a flat surface next to each other to form a square. The outline of the labyrinth drawn on the sheet is transferred to this square.
An example of marking a furrow for a spiral
Using a grinder with a stone disc (a dry cutter), a furrow is formed on the bricks. Along the boundaries of the groove, even cuts are made to a depth of 1 cm, and then the core between them is selected using the side edge of the same disk - this way the bottom of the groove is smooth.
Using a grinder to make straight sections of a groove for a spiral
If you cut out the middle between the cuts with a chisel, then there is a risk of splitting the brick; moreover, if the outcome is successful, you will still have to level the bottom of the furrow with a grinder.
By forming straight sections of the groove on the bricks with a disk, at turns there is no need to go beyond the boundaries of the contour in order to create the required depth of the groove - this is carefully done with a small chisel, which can be made from an M10 tap or a Ø10 mm drill.
Finishing the corner sections of the furrow with a chisel
After the groove is formed, a spiral is placed into it.
Important! In order to be able to place containers on the heater to heat the contents, the spiral placed in the furrow must be 3-5 mm below the plane of the bricks.
In the grooves at the beginning of the “labyrinth,” two through holes with a diameter of 6-8 mm are made using a drill with a Pobedit tip for subsequent connection of the ends of the spiral to the power cable.
Places for making holes in the brick for bringing the spiral down
Then they begin to make a tripod from angle steel for installing bricks into it.
Using a grinder with a cutting disc for metal, cut a corner to size - 4 elements for the frame and 4 support legs. Corner pieces can be connected in two ways:
- electric welding, having previously cut the ends of the fragments for the frame at an angle of 45°;
- using blind rivets, drilling holes in elements placed on top of each other.
Assembled metal stand for a brick insulator
The thickness of the brick is 5.5-6.5 cm, so at both ends of the spiral we straighten several turns to even sections approximately 10 cm long. The straightened ends of the spiral are passed down through the holes in the brick and connected to the ends of the power cable .
Connecting the spiral to the electrical cable after exiting down through the holes in the brick
The heater is installed in the working position, the spiral is distributed in the groove until it is evenly tensioned along its entire length.
Perform a test connection of the device to the network. Electrical wiring and automatic line shutdown must be designed for a power of at least 3 kW.
After the device enters operating mode, its spiral should not be bright red, but brown-crimson in color.
If the coil is overheated, it is necessary to reduce the current, which is done by adding a 20-40 A diode to the circuit.
Diagram of parallel connection of two heat-reducing diodes and normal color of the spiral in operating mode
The electricity consumption of such a homemade heater cannot be called economical, but it is quite acceptable for short-term activations - minor car repairs in the garage, for a small greenhouse as an emergency means of heating, heating food, etc.
Assembly of the structure
Assembling the radiators together is not difficult, but you should first purchase new intersection gaskets or use instead an asbestos cord impregnated with graphite powder, previously diluted in drying oil.
Since the temperature inside the boiler can exceed +600 degrees, it is worth taking care of the gaskets in advance. The tightness of the entire structure depends on their quality and strength.
The radiator assembly sequence is as follows:
- Nipples equipped with right and left threads are screwed into each section.
- Asbestos cords are wound around them.
- The sections are connected in pairs by alternately tightening the nipples. It is important to make the same number of turns with the key so as not to cause distortion.
- All sections of the cast iron radiator are connected in the same way.
- The return and supply pipes should be connected diagonally, closing unused holes with plugs.
On one side of the riser there should be a right-hand thread, and on the other, a left-hand thread. If this does not work out, then you need to screw on the nipple and the coupling with the drive on it.
Location of the boiler in the furnace
It is important not only how the radiators are assembled and connected to the heating system, but also their place in the stove. In order for the device to work for a long time and efficiently, the boiler made from a cast iron radiator (the video shows how to do this) should be installed not in the firebox where wood or coal is burning, which means there is an open fire, but behind it in the smoke duct.
This will protect the device and extend its service life, and heating with gases that are formed during fuel combustion is no worse than with an open fire.
Cast iron is a fairly fragile metal, so it will not withstand impacts, excess pressure, or too high a temperature. When installing the boiler from the radiator into the furnace, you need to ensure that the pipe at the outlet runs perpendicular to the floor, and the return runs under the floor and the foundation of the structure.
After the boiler is installed, you can begin laying the walls of the stove, having first checked it for leaks. To do this, you need to run water through the system under pressure.
Selection of materials
As is clear from the above, to obtain a homemade heater you will need to get the following components somewhere:
- frame;
- oil;
- heating element;
- mobile stand;
- control and automation devices.
As a housing, you can borrow an old radiator from a central heating system, sheet or sectional. A car, or any similar product, the design of which will allow fluid to circulate inside naturally or artificially (using an electric motor), is also quite suitable. You can also make a closed loop from steel pipes with your own hands.
The main thing is not to forget that an indispensable condition for the normal functioning of the system will be to ensure the tightness of the housing. If the liquid begins to leak, then it is unlikely that such a homemade device will bring more benefit than it will cause trouble.
As for the oil, firstly, its quantity should be based on the calculation
85% of the body volume. The rest of the cavity is filled with air. This 15% area is maintained so that during operation the oil does not crush the housing due to thermal expansion.
Secondly, the quality characteristics of the liquid must satisfy at least two criteria: purity and heat resistance. Dirt and impurities will shorten the life of the heating element by causing scale to settle on it. A decent temperature of the heating element indicates that you should select technical oil of the appropriate brand. A suitable option would be, for example, a transformer.
The number and characteristics of heating elements are selected depending on the required power of the heater (and taking into account the overall dimensions of the housing). Conventionally, we can assume that to create a comfortable atmosphere in a room with normal ceiling heights, you need
1 kW per 10 sq. m. For rooms with high ceilings, poorly insulated, located in cold areas, etc., several times more powerful products are needed.
Of course, the capabilities of the power supply network in the place where you plan to use the hand-made device must also be taken into account.
In terms of durability, it is also important to consider possible combinations of metals of the heating element and the body. For example, it is not recommended to use heaters with a magnesium anode
combine aluminum and regular steel (not stainless steel) with copper.
Installing a heating element into the heater body
Since the structure, in all likelihood, will have an impressive mass, a mobile platform on wheels, if one is planned to be included in a home-made device, must withstand the load placed on it. It can be made, for example, from rolled steel - angles, channels, etc. materials.
Switches or a rheostat are selected in accordance with the total power load of the device.
A bimetal plate (taken, for example, from an old iron) should be used as a thermostat. When choosing a setting for it with optimal temperature characteristics, you need to proceed not only from considerations of energy savings, but also from the fact that excessive heating can cause the pressure inside the case to increase to too high a level.
To better guarantee safety, an additional thermal fuse can be provided. Or a similar switch that triggers at a certain pressure.
Furnace laying
You can build a stove yourself, following the sequence of actions.
- The first step is to lay the foundation of the structure, made of reinforced concrete.
- For masonry, the best solution would be a mixture of two portions of sand and a portion of clay. To mix them better, experienced builders recommend soaking the materials in water and leaving them overnight. During this period, they will mix well without additional effort on the part of the owner.
- When the foundation is ready, it should be covered with waterproofing, for which you can use roofing felt.
- A layer of mortar is placed on top of the waterproofing, the uniformity of which is best checked with a plumb line.
- The first masonry should form a ash pit, above which a grate is installed, separating it from the firebox. The grate is attached through 2-3 masonry above the ash pit.
- In the process of forming the firebox, a place is immediately prepared for the boiler from cast iron batteries, taking into account the gaps between it and the outer wall of the stove. To do this, a side of bricks is laid around the perimeter, onto which the corners are attached. It is on them that the boiler will be installed.
- When carrying out masonry, you need to take care in advance of the places where the supply and return pipes will exit.
- The next stage is laying the chimney. During this work, special channels are formed to discharge burning and combustion waste through them.
After finishing the chimney laying, the entire stove must be checked for quality of work, for which it is flooded.
You should never fire a stove if there is no coolant in the boiler. This may damage the system. You can think through and build a structure that will work both as a heating system and as a stove for cooking.
After completing all the steps step by step, it is quite possible to build a stove with a water boiler from cast iron batteries with your own hands.
Making your own infrared heater
Modern IR emitters for heating homes are reliable, practical and have good efficiency. Such devices emit infrared radiation, which, without interacting with air, contributes to the rapid heating of various surfaces in the room. Thus, they effectively convert electricity into thermal energy.
The most affordable option for home assembly is an economical film heater, the basis of which is a heating film.
To work, you will need to prepare the following materials and tools:
- two identical pieces of glass,
- aluminum foil,
- sealant,
- paraffin candle,
- epoxy resin glue,
- electrical cord with plug,
- candle holder,
- soot cleaning sticks,
- sponge for cleaning glass surfaces.
The infrared heater is assembled with your own hands according to the following scheme:
- The glass is thoroughly cleaned of dirt and degreased.
- A conductive base for the heater is assembled. Using a candle, soot is applied to the back side of the glass blanks, acting as a kind of current conductor. Before starting the procedure, the workpieces are slightly cooled.
- Along the perimeter of the workpieces, the surface is cleared of soot using chopsticks to obtain an even edge 0.5 cm wide.
- Strips of width equal to the area of the conductive glass base are cut out of foil. They will be used as conductive electrodes.
- One workpiece is placed on a flat surface with the smoked side up, and a thin layer of glue is applied around the perimeter. Foil strips are applied to the glued surface with a slight shift beyond the edges of the workpiece.
- It is covered with a second piece on top and, accordingly, the smoked side down is pressed to set the glue. All joints are carefully treated with sealant.
- Checking the power of the finished structure. If the power indicator does not exceed 100 W per 1 sq. m of room, then the heater is connected to the network using a conductive wire and plug.
A multimeter measures the resistance of the heater's conductive base. To calculate power, use a simple formula: N = U×U/R, where
N – power, U – mains voltage (220 volts), R – resistance.
For example, R – 20 Ohm, then N = 220×220/20. The result is 2420 W. This power is enough to heat a room of 25 square meters. m.
