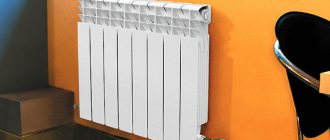
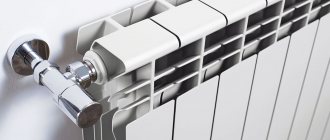
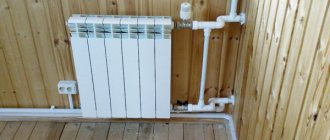
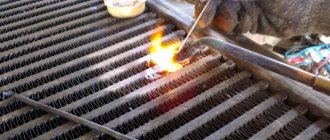
Heating systems in private houses, apartment buildings and other facilities are in most cases created using new types of radiators. They are an integral part of the thermal circuit, which is increasingly being installed from polymer pipe products.
The efficiency and reliability of a modern heating network will only be ensured if heating radiators are correctly connected to polypropylene pipes. To do this, it is useful to know the installation features. Understand the types of batteries and wiring.
What kind of piping can be made from polypropylene pipes
There are many schemes for piping radiators of a water heating system.
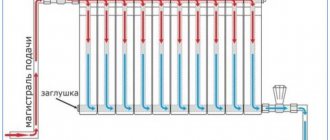
From the existing methods, the consumer always chooses the one that, under the existing conditions, requires minimal material consumption with maximum efficiency in the location of radiators. Examples of diagrams for one-pipe and two-pipe methods of piping water heating convectors
In fact, the situation is such that, unlike expensive metal pipes, polypropylene consumables are much cheaper and easier to install, so saving on the length of the pipeline at the expense of efficiency is not worth it. You should choose the type of strapping that will be most effective in a particular case.
Choosing a harness involves deciding on the following issues:
- what kind of heating system scheme will be used (one-pipe or two-pipe);
- what type of radiator connection will be used (diagonal, side or bottom).
As a rule, when using any heating scheme - single-pipe or two-pipe, you can use all types of battery connections.
Schematic illustration of methods for connecting (piping) water heating radiators
Installation of heating systems using polypropylene pipes, depending on the design, is carried out in compliance with certain rules.
- Typically, such a system uses a series connection of radiators;
- A bypass is always installed in front of the battery, connecting the supply pipe and the return pipe - during normal operation of the heating system, the bypass is not used, but during maintenance or in an emergency, the water supply to the radiator is stopped, and the coolant circulates freely through the bypass.
Scheme of serial connection of radiators with a single-pipe piping method
- Both parallel and serial connections of batteries are used;
- The radiator pipes are connected to different pipes - the upper one to the supply pipe, the lower one to the return pipe.
Typically, in two-pipe systems, radiators are connected in parallel, so installing bypasses is not required.
Schematic representation in plan of a two-pipe method for piping radiators of an autonomous heating system
Tying radiators with polypropylene pipes is done in two ways: soldering and using fittings. Depending on the chosen method, the batteries are connected using a special soldering iron or American plumbing wrenches.
Good article: Which is better, a two-pipe or one-pipe system?
Heating wiring
The simplest and most reliable heating wiring diagram is “Leningradka”, or single-pipe system wiring. Such a system is structurally a looped circuit running along the entire perimeter of the building. Radiators are connected to the pipeline in parallel. The main disadvantage of the Leningradka is the uneven heating of the radiators connected in the circuit.
A much more effective option for how to properly install heating, especially in multi-storey buildings, is a two-pipe heating system. There are two varieties of such a system, one of which is called a dead-end system. This scheme must be balanced, i.e. limit the flow of radiators located close to the boiler - otherwise heating of heating devices located far away will be insufficient.
In a passing circuit, there are several parallel circuits of the same length. There is no need to balance the associated wiring, since in it the heat transfer of all batteries is initially almost at the same level. If no obstacles prevent you from creating a circular passing circuit, then it needs to be done, but otherwise a dead-end two-pipe wiring is quite suitable. In any case, in order to know exactly how to properly install heating in a house, you need to think through all the known nuances in advance.
Options for piping heating radiators
Installation of heating radiators involves connecting them to pipelines. There are three main connection methods:
If you install radiators with a bottom connection, you have no choice. Each manufacturer strictly binds the supply and return, and its recommendations must be strictly followed, since otherwise you simply will not get heat. There are more options with a side connection (more about them is written here).
Strapping with one-sided connection
One-way connection is most often used in apartments. It can be double-pipe or single-pipe (the most common option). Metal pipes are still used in apartments, so we’ll consider the option of tying the radiator with steel pipes on pipes. In addition to pipes of a suitable diameter, you need two ball valves, two tees and two bends - parts with external threads at both ends.
Lateral connection with bypass (one-pipe system)
All this is connected as shown in the photo. With a one-pipe system, a bypass is required - it allows you to turn off the radiator without stopping or draining the system. You cannot put the tap on the bypass - you will block the flow of coolant through the riser, which is unlikely to make your neighbors happy and, most likely, you will be fined.
All threaded connections are sealed with fum tape or linen winding, over which packaging paste is applied. When screwing the valve into the radiator manifold, much winding is not required. Too much of it can lead to the appearance of microcracks and subsequent destruction. This is true for almost all types of heating devices, except cast iron. When installing all the others, please do not be fanatical.
Welding option
If you have the skills/opportunity to use welding, you can weld the bypass. This is what the piping of radiators in apartments usually looks like.
With a two-pipe system, a bypass is not needed. The supply is connected to the upper entrance, the return is connected to the lower entrance, taps, of course, are needed.
One-way piping with a two-pipe system
With bottom wiring (pipes laid on the floor), this type of connection is made very rarely - it turns out inconvenient and ugly; in this case, it is much better to use a diagonal connection.
Strapping with diagonal connection
Installing heating radiators with diagonal connections is the best option in terms of heat transfer. In this case it is the highest. With bottom wiring, this type of connection is easy to implement (example in the photo) - the supply on this side is at the top, the return on the other is at the bottom.
With two-pipe bottom wiring
With a single-pipe system with vertical risers (in apartments), everything does not look so good, but people put up with it because of the higher efficiency.
Coolant supply from above
Please note that with a one-pipe system, a bypass is again required
Coolant supply from below
Strapping with saddle connection
With bottom wiring or hidden pipes, installing heating radiators in this way is the most convenient and least noticeable.
With a two-pipe system
With a saddle connection and lower single-pipe wiring, there are two options - with and without bypass. Without a bypass, the taps are still installed; if necessary, you can remove the radiator and install a temporary jumper between the taps - a squeegee (a piece of pipe of the required length with threads at the ends).
Saddle connection for one-pipe system
With vertical wiring (risers in high-rise buildings), this type of connection can be seen rarely - the heat losses are too large (12-15%).
Useful connection tips
There are some recommendations on how to connect a battery to a plastic pipe efficiently. Before attaching the fitting, the pipe must be freed from the outer chamfer. This will free the pipe from burrs that could cause the connection to become loose.
When installing brackets for mounting the radiator, you should equip every three sections with separate fasteners. To ensure that the threaded connections of the system are as tight as possible, it is practiced to use flax with paint or a polymer sealing thread. Without paint, flax will quickly fade, and FUM tape usually begins to leak in the case of minimal thread reverse.
What kind of piping can be made from polypropylene pipes
There are many schemes for piping radiators of a water heating system. From the existing methods, the consumer always chooses the one that, under the existing conditions, requires minimal material consumption with maximum efficiency in the location of radiators.
Examples of diagrams for one-pipe and two-pipe methods of piping water heating convectors
In fact, the situation is such that, unlike expensive metal pipes, polypropylene consumables are much cheaper and easier to install, so saving on the length of the pipeline at the expense of efficiency is not worth it. You should choose the type of strapping that will be most effective in a particular case.
Choosing a harness involves deciding on the following issues:
- what kind of heating system scheme will be used (one-pipe or two-pipe);
- what type of radiator connection will be used (diagonal, side or bottom).
As a rule, when using any heating scheme - single-pipe or two-pipe, you can use all types of battery connections.
Schematic illustration of methods for connecting (piping) water heating radiators
Installation of heating systems using polypropylene pipes, depending on the design, is carried out in compliance with certain rules.
- Typically, such a system uses a series connection of radiators;
- A bypass is always installed in front of the battery, connecting the supply pipe and the return pipe - during normal operation of the heating system, the bypass is not used, but during maintenance or in an emergency, the water supply to the radiator is stopped, and the coolant circulates freely through the bypass.
Scheme of serial connection of radiators with a single-pipe piping method
- Both parallel and serial connections of batteries are used;
- The radiator pipes are connected to different pipes - the upper one to the supply pipe, the lower one to the return pipe.
Typically, in two-pipe systems, radiators are connected in parallel, so installing bypasses is not required.
Schematic representation in plan of a two-pipe method for piping radiators of an autonomous heating system
Tying radiators with polypropylene pipes is done in two ways: soldering and using fittings. Depending on the chosen method, the batteries are connected using a special soldering iron or American plumbing wrenches.
Good article: Which is better, a two-pipe or one-pipe system?
Selection of materials
The popularity that polypropylene pipes have gained. associated with a number of their positive qualities:
- Their price is significantly lower than their metal counterparts.
- High durability due to the fact that the plastic does not rust, and there is practically no sediment deposited on it.
- Does not need painting.
However, it should be taken into account that not all types of polypropylene pipes are suitable for heating systems. The fact is that they must have a reinforcing layer that prevents significant thermal expansion of the pipeline.
Reinforced polypropylene pipe
Moreover, it is desirable that the reinforcement layer be aluminum, since fiberglass reinforcement leads to saturation of the coolant with oxygen. This in turn causes rusting of the metal surfaces of boilers and other heating supply elements. Pipes that have aluminum reinforcement and are suitable for heat supply systems are marked PN25.
Note! When choosing pipes, you should pay attention to the uniformity of their wall thickness. To do this you need to look at their cut. As for the diameter, the optimal parameter is 25 mm
As for the diameter, the optimal parameter is 25 mm.
In this case, it is also necessary to purchase fittings, which include:
Single-pipe and two-pipe radiator connection diagram
Choosing a location and method of installing a radiator
Options for connecting heating radiators depend on the general heating scheme in the house, the design features of heating devices and the method of laying pipes. The following methods of connecting heating radiators are common:
- Lateral (unilateral). The inlet and outlet pipes are connected on one side, with the supply located at the top. The standard method for multi-storey buildings, when the supply is made from a riser pipe. In terms of efficiency, this method is not inferior to the diagonal one.
- Lower. In this way, bimetallic radiators with a bottom connection or a steel radiator with a bottom connection are connected. The supply and return pipes are supplied from below on the left or right side of the device and are connected through the lower radiator connection unit with union nuts and shut-off valves. The union nut is screwed onto the lower radiator pipe. The advantage of this method is that the main pipes are hidden in the floor, and heating radiators with bottom connections fit harmoniously into the interior and can be installed in narrow niches.
- Diagonal. The coolant enters through the upper inlet, and the return is connected from the opposite side to the lower outlet. The optimal type of connection ensures uniform heating of the entire battery area. In this way, correctly connect a heating battery whose length exceeds 1 meter. Heat loss does not exceed 2%.
- Saddle. The supply and return are connected to the lower holes located on opposite sides. It is used primarily in single-pipe systems when no other method is possible. Heat loss as a result of poor coolant circulation in the upper part of the device reaches 15%.
https://youtube.com/watch?v=olrD9qxCAhM
WATCH THE VIDEO
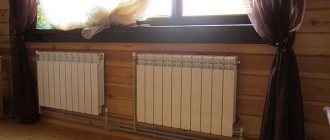
When choosing a location for installation, several factors are taken into account to ensure the correct operation of heating devices. Installation is carried out in places least protected from the penetration of cold air, under window openings. It is recommended to install a battery under each window. The minimum distance from the wall is 3-5 cm, from the floor and window sill - 10-15 cm. With smaller gaps, convection worsens and the battery power drops.
Typical mistakes when choosing an installation location:
- The place for installing control valves has not been taken into account.
- A small distance to the floor and window sill prevents full air circulation, as a result of which heat transfer is reduced and the room is not heated to the set temperature.
- Instead of several batteries located under each window and creating a thermal curtain, one long radiator is chosen.
- Installation of decorative grilles and panels that prevent the normal spread of heat.
Coolant circulation methods
Coolant circulation through pipelines occurs naturally or forcedly. The natural (gravity) method does not involve the use of additional equipment. The coolant moves due to changes in the characteristics of the liquid as a result of heating. The hot coolant entering the battery, cooling, acquires greater density and mass, after which it sinks down, and a hotter coolant takes its place. Cold water from the return flow flows by gravity into the boiler and displaces the already heated liquid. For normal operation, the pipeline is installed at a slope of at least 0.5 cm per linear meter.
Scheme of coolant circulation in the system using pumping equipment
For forced supply of coolant, the installation of one or more circulation pumps is required. The pump is installed on the return pipe in front of the boiler. The heating operation in this case depends on electrical power, but has significant advantages:
- The use of small diameter pipes is allowed.
- The line can be installed in any position, vertically or horizontally.
- Requires less coolant volume.
How to piping a boiler correctly
The next component of the heating system is the boiler piping. The first step is to look for a circulation pump with good performance. If it can produce a pressure of 2 meters, then such a device is quite suitable even for heating in multi-storey buildings.
The power of the circulation pump is calculated using a formula of the form:
- Q = 0.86R/Dt, where
- Q – pump performance (measured in cubic meters per hour);
- R – power of the heating boiler or circuit into which the circulation pump will be built;
- Dt is the temperature difference in the supply and return circuits (usually about 20 degrees).
When choosing a safety valve, you need to start from the maximum pressure that can arise in the system (as a rule, this value is 2.5 kgf/cm2). The volume of the expansion tank should be 1/10 of the volume of coolant in the circuit. It is advisable to take a tank with a small reserve. In standard heating systems, 1 kW of boiler power requires about 15 liters of coolant.
As a rule, the tank begins to operate at a pressure of 1.5 kgf/cm2 - i.e. when the operating pressure in a balanced heating system is exceeded. To increase the pressure, you need to use a tap connecting the heating and cold water supply, or simply pump the expansion tank with air.
Installation
Due to the fact that this material is very light and affordable, you can organize the heating of a private house, cottage or apartment using polypropylene pipes with your own hands. Before starting work, you need to make a project. It is necessary to indicate the dimensions and joint locations, connection features and installation method. With its help, it is easier to calculate the required materials. You can draw it yourself or by using a special program such as AutoCAD or SolitWorks.
Heating scheme made of polypropylene pipes
Pipe routing can be done according to two principles: with one pipe and with two. The first option is when only one pipe is used to supply water from the boiler and return it. The second is the classic way of organizing heating. Naturally, it is easier to connect the system with this pipe yourself, but in this case you will not be able to heat your home evenly.
Types of pipe connections
The design of the heating system when installing only plastic pipes or when connecting them with metal ones is practically no different. You just need to choose the right diameter when combining different materials. To do this, consult a specialist in the store.
Installation of polypropylene pipes into the heating system is carried out using a special welding machine for plastic, but in addition to it you will also need connecting fittings.
How to solder heating with polypropylene pipes:
Pipes need to be cut to the required size
It is very important that the joints are level and at right angles to the floor; Afterwards, you need to treat the sections with degreasing compounds and remove chips from their surface; Install the pipes into the centralizer. This is a special device that will help achieve maximum geometric accuracy of the connection.
Then put fittings on the joints; Welding is carried out only according to the instructions. Read the user manual for your inverter carefully. Afterwards, heat the device and solder. It is also possible to use electric welding couplings, in which case the installation is carried out directly in them.
The assortment of modern online and simple plumbing equipment stores allows you to choose everything for a heating system made of polypropylene pipes. In addition to fittings, special turn signals, American connections and other connections are often used. The technology for their installation is similar.
If it is necessary to connect polypropylene pipes to a metal heating system, then you need to use flanges; they have a different installation scheme. They have a thread on one side - for cutting into steel pipes, and on the second - a smooth valve for installation on plastic.
To make central heating from polypropylene pipes, you need to buy all the components, the price of which depends on the manufacturer and type of reinforcement; below is a small rating:
| Brand | Diameter | Price, rubles |
| Kalde | PN20 D20 Kalde | 65 |
| Valtec | VALTEC PPR PN 20 | 80 |
Naturally, the dimensions directly affect the cost of polypropylene heating pipes. For example, Kalde with a diameter of 75 mm costs about 800 rubles/meter. This equipment is sold in company stores.
Do-it-yourself heating system installation
Before heating a private home, you need to stock up on the following tools for soldering polypropylene pipes:
- A shaver that allows you to remove reinforcement from the soldering area and chamfer the pipe;
- Pipe cutter;
- Soldering iron for polypropylene pipes with a set of nozzles of the required diameter.
The pipe connection technology is as follows:
- First you need to put the shaver on the pipe and turn it several times to remove the aluminum layer. If this is not done, the metal will gradually become damaged upon contact with the liquid, thereby having a negative impact on the entire heating system.
- The soldering iron nozzle is heated to the required temperature, then a pipe is inserted into the socket, and a fitting is put on the opposite side of the nozzle.
- When the parts melt a little, they need to be combined with some force and held in this position for a few seconds. After the plastic has hardened, you can begin soldering the next section.
A safety group is installed near the boiler outlet pipe. The installation location is determined by the fact that it is in this section of the system that the pressure rises when the system malfunctions. The expansion tank can be mounted anywhere, but there is one caveat: when installing the tank in front of the pump, the distance between them should be more than two filling diameters, and if the tank is attached behind the pump, then the distance increases to ten filling diameters. Failure to comply with this rule leads to premature failure of the membrane - and it is unlikely that it will be possible to determine the problem immediately, so you will also have to think about how to check the heating in a private house.
Sometimes the question arises whether a gravity system can be converted into heating with forced circulation. The answer to this question is affirmative - if necessary, the pump can be installed in any circuit, which allows you to completely remake the heating in a private house.
- The diameters and wiring configuration are selected so that the system can operate with natural circulation;
- Parallel to the wiring, two connections are installed in front of the boiler, to which the circulation pump is connected;
- The taps are separated from each other by a check ball valve.
When the pump is running, the valve closes and completely closes the passage in the bypass, thereby ensuring forced circulation of the coolant. When the pump is turned off, the heating automatically switches to natural circulation - the valve opens and the coolant continues to move. Of course, the check valve can be replaced with a gate or ball valve - but in this case, you will have to switch the operating mode of the system manually.
Conclusion
This article gives a superficial idea of how to install heating in a private house with your own hands. Each design element can be examined in more detail, so if there is such a need, you can look for the relevant article for a deeper understanding of a specific issue. In general, it can be noted that the heating system has a fairly simple design, and with due attention it is quite possible to assemble it yourself.
Requirements for paintwork
It is not always possible financially, and in many cases even technically, to install a new radiator. It is easier to refresh the outside of the heating device if it is still capable of serving. If the battery has already had to be repaired or it does not heat well, then it is better to replace it with a new one.
The painting process as such is not particularly difficult, but this does not mean that you can buy any composition and immediately begin restoring the attractiveness of the radiator.
The paint must be selected according to certain parameters, and the battery must be carefully prepared. If this is not done, the new coating will not last long, and you will soon have to repeat the process again.
An old cast iron battery with peeling paint looks very unaesthetic. In addition, the material of its body is subject to oxidation and rusts.
When choosing a composition, it is best to focus on options specifically designed for heating devices. But if there is no such inscription on the label, you should carefully study the instructions and find data on its heat resistance.
To obtain a high-quality, durable and beautiful coating, you must use paint that has the inscription “For radiators” on the label.
Requirements for paint coating:
Heat resistance. The composition applied to the radiator body must withstand temperatures up to 80-90 degrees and be flawless for the time promised by the manufacturer.
Adhesion. It is necessary that the composition has good adhesion to the surface to be painted. Did not peel off when heated and alternating heating/cooling.
Corrosion protection. The composition must contain anti-corrosion substances so that the coating in direct contact with the body does not cause its destruction.
Color fastness. Unconditional condition, because Radiators are painted for aesthetic purposes, among other reasons.
Abrasion resistance. From direct contact with various furnishings, drying items, etc. the coating should not become thin.
Safety
It is very important that the composition does not contain any components harmful to health.
Good paint for radiators must meet all the requirements, and not individual items.
Classification and design parameters
Existing GOST standards (ISO10508) establish a classification of polypropylene hoses, based on which this material can be used under certain operating conditions.
Marking of PP pipes clearly indicates operational parameters
Taking this designation into account, it is easy and simple to select a material for a specific heating system configuration. Long polypropylene products are divided into 4 classes (1.2, 4.5) according to typical areas of application and operating pressure values (4,6,8,10 ATI):
Long polypropylene products are divided into 4 classes (1.2, 4.5) according to typical areas of application and operating pressure values (4,6,8,10 ATI):
- class 1 (hot water systems up to 60°);
- class 2 (hot water systems up to 70°C);
- class 4 (underfloor heating and radiator systems up to 70°C);
- class 5 (radiator systems up to 90°C).
For example, polypropylene pipes are required to make a low-temperature heating system. Then, by the designation on the outer surface of the pipes, you can determine the appropriate material.
For this case, hoses with the designation Class 4/10 are quite suitable, which corresponds to the limiting temperature parameter of 70ºС and the permissible operating pressure limit of 10 ATI.
Industry, as a rule, produces products for universal use. The manufactured products support an extensive classification. In the documentation for such material, the marking of PP pipes is indicated by a standard listing of acceptable parameters (Class 1/10, 2/10, 4/10, 5/8 bar).
Each branded product has an application class designation on its external surface, which actually determines the operational parameters of the future home heating design
Thus, when planning to make heating in a polypropylene house with your own hands, the main material is usually chosen by the master in direct proportion to:
- from planned operating parameters;
- on methods of heating the coolant;
- on the applied regulatory system.
It is also advisable to calculate the service life of the future heating system using the following parameters:
- upper values Trab and Prab;
- pipe wall thickness;
- outside diameter;
- safety factor;
- duration of the heating season.
On average, the service life of polypropylene should be at least 40 years.
Types of radiators
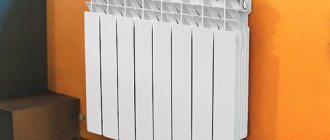
Radiators for the manufacture of heating pipelines are popularly called batteries. New models are made from different metals, which are superior in technical characteristics and aesthetics to cast iron products. Types of radiators:
- Aluminum batteries are efficient batteries that are installed in new multi-story buildings. They quickly fail if the coolant contains alkalis and acids.
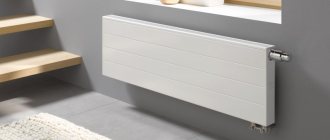
- Steel - there are sectional and tubular. The level of heat transfer does not depend on the shape of the battery.
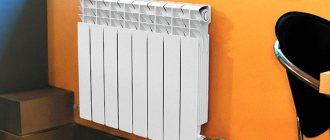
- Bimetallic ones are the most effective in heating rooms. Made from a mixture of aluminum and steel.
Any of the presented types is relevant when assembling a heating circuit with polypropylene pipes.
Materials and tools for work
When starting to piping a gas-fired heating boiler, you need to have a design and executive diagrams. Without these documents, the owner will not be able to put the heating boiler into operation.
Each project has an equipment specification section, which contains a detailed list of all elements of the thermal circuit by standard sizes, assortments and quantities.
Therefore, using the specifications, even a non-professional will not have much difficulty purchasing spare parts and components in the retail chain.
The key components of the intra-house heating network are:
- Coolant circulation pump.
- Expansion tank to compensate for the expansion of water in the circuit.
- Vents for removing air from the heating circuit.
- Mud trap for cleaning the water of the internal heating circuit from suspended particles.
- Hydraulic arrow or manifold on the supply and return for distributing coolant through the heating circuits.
- PPR pipes PN 25, for the heating circuit, reinforced with foil for systems with a working pressure of 2.5 atm and temperatures up to +95 C.
- PN 20 for piping a double-circuit boiler unit with temperatures up to +80 C and pressure up to 2 atm.
- PN 10 - thin-walled PPR - products, used if the unit supplies water to the “warm floor” system. Working temperature no more than +45 C and pressure up to 1 atm.
- Fittings for connecting PPR pipes in quantities according to the design diagram.
- Soldering kit for welding PPR pipes.
Features of piping with polypropylene pipes
A clear advantage of polypropylene pipes is that they allow you to create a heating circuit of any complexity. That is, if you are a beginner and have come up with a rather complex pipeline diagram, it is quite acceptable to use pipes of this type for it. However, one feature should be taken into account - a complex long-lasting pipeline has a higher heat loss. Therefore, think carefully about everything again - perhaps there is a chance to make the system simpler, thereby increasing the quality of heating.
Heating radiator wiring diagram
Connecting polypropylene pipes can be done in two ways. First of all, the pipes can be soldered. This is a more reliable method, which, if performed well, eliminates leakage. The second connection method is the use of fittings. It is less reliable, because if even a slight displacement occurs, coolant will begin to leak
It is important to pay attention - if there is an opportunity to avoid connection, it is better to use it
In addition, the use of modern technologies in creating the material has made it quite durable - the pipe can easily withstand an internal pressure of 25 Bar. Another feature is that even prolonged exposure to highly heated coolant (up to 95 degrees) does not cause deformation of the pipes.
Polypropylene pipes and fittings
However, there are some restrictions regarding the use of polypropylene pipes in the immediate vicinity of the boiler, which should be known before placing them in the system and before starting the heating battery. Thus, the gas supply pipe to the heating boiler must have an extremely rigid connection. As the standards for installing heating radiators say, the connection to the boiler must be made through a metal pipe (or American) with paronite gaskets. The use of fum tape or tow is unacceptable. The fact is that rubber gaskets can significantly decrease in size when heated - and can even block the passage for the gas supply. But fum tape and tow can simply catch fire from high temperatures - and this can lead to dire consequences.
Another important point is how to turn off the radiator. This must be done if you need to perform such an operation as turning off the heating battery or dismantling it. This step, how to properly shut off the heating radiator, is required in the case of piping using shut-off valves.
Shut-off valve on the heating radiator
Heating boilers
The choice of heat source is a key factor on which the further selection of heating elements and the operating efficiency of the assembled system will depend. The cheapest fuel today is gas, therefore, if a gas main is connected to the site, a gas-fired boiler will be the best solution.
Condensing gas boilers with electric ignition, which have a couple of features, have proven to be the most economical:
- When the coolant is heated to too high a temperature, gas is simply not consumed, which reduces its costs by about 25%;
- The heat given off to water vapor is also used for heating, which saves another 10-12% of energy resources.
If we arrange heating equipment operating on other types of fuel in order of decreasing efficiency, we will get a list of the following type:
- Wood boilers;
- Pellet boilers;
- Coal boilers;
- Diesel boilers;
- Electric heating devices.
When choosing a heat source before heating a private home, you need to pay attention to a number of nuances:
- For gas boilers, you can use not only main gas, but also bottled gas. True, the cost of heating in this case increases several times.
- Before purchasing a heating device that runs on a certain type of fuel, it is worth at least approximately studying the dynamics of rising prices for different types of fuel, and when studying, you need to tie fuel prices to geography.
- Coal boilers use firewood for heating. This must be taken into account - firstly, kindling and warming up the system will take longer, and secondly, purchasing firewood will require additional costs.
- Gas, diesel and electric boilers operate uninterruptedly if fuel is available. Pellet boilers with an automatic feeding system can operate for a week. Solid fuel boilers must be heated and cleaned at least (and often more often) once a day. A long-burning boiler can operate on one burner for several hours longer, and the most expensive and modern devices operate without problems throughout the day.
- The waste can be used as fuel for diesel boilers - this will reduce heating costs several times. The disadvantage of such savings is the shortage of used oil, which is very difficult to purchase in sufficient quantities and on an ongoing basis.
Electricity in such devices is required only for the operation of the compressor. Such schemes turn out to be quite profitable - the cost of heating can ultimately compete on equal terms with the savings when using solid fuel boilers and gas.
Of course, you have to pay for the savings somewhere - the cost of heat pumps is very high, and the installation of such equipment costs a tidy sum. It is enough to give a simple example: to install a geothermal pump, you need to drill a well several tens of meters deep, or dig a pit, the area of which will be three times larger than the area of the heated building.
There is a solution to this problem - you can use a type of heat pump in which the coolant is air outside the house. Thermal energy is pumped out of it, which is subsequently used to heat the building. In essence, this scheme represents the operation of a conventional air conditioner set to heating mode.
Single pipe system
Its operation is based on a one-time supply of coolant to the entire building: the cooled liquid flows down inside the pipes from top to bottom. Most often, apartment buildings are equipped in this way.
The disadvantages of a single-pipe scheme include the following factors:
- There is no way to regulate the temperature of heating devices.
- Different apartments are heated unevenly. The upper floors receive the hottest coolant, which gradually cools as it flows down.
- To disconnect from central heating and switch to autonomous heating, you have to overcome a lot of difficulties.
Installation of heating batteries: what, how and why
Installing heating radiators with your own hands is a completely feasible operation at home. By replacing heating appliances with newer ones, you can achieve better heating of the premises. The efficiency of the entire heating system depends on the quality of the batteries.
In this article we will look at how to properly install heating batteries in your home quickly and reliably.
What is needed to carry out the work
To install heating devices ourselves, we need:
- Assemble a set of tools;
- Make measurements and calculations;
- Study the possibilities and rules of connection;
- Have the desire and time.
If you have the desire, then nothing will be impossible for you. If you have experience in such work, then it will be useful to you.
Options for wiring heating devices
The installation diagram for heating batteries can be as follows:
- Diagonal. In most cases, it is used when connecting multi-section heating devices. A distinctive feature is the connection of pipelines. So the supply is connected to the upper fitting on one side of the radiator, and the return is connected to the lower fitting on the other side. In the case of a series connection, the coolant moves under the pressure of the heating system. To remove air, Mayevsky taps are installed. The disadvantage of such a system is revealed when it is necessary to repair the battery, since installing central heating batteries in this way does not imply the possibility of removing the batteries without turning off the system;
- Bottom. This type of wiring is used when the pipelines are located in the floor or under the baseboard. This method is the most acceptable from an aesthetic point of view. The return and supply pipes are located at the bottom and are directed vertically to the floor;
Correct connection
The rules for installing heating radiators are the same for all types of heating elements, be they cast iron, bimetallic or aluminum radiators.
To ensure normal air circulation and heat exchange, strict adherence to the permissible distances is required:
- For the necessary circulation of air masses, you need to make a distance of about five to ten centimeters from the top of the radiator to the window sill;
- The gap between the bottom of the battery and the floor covering should be at least ten centimeters;
- The distance between the wall and the heating device should be at least two centimeters and no more than five. If the wall is equipped with reflective thermal insulation, then the standard brackets will be short. To install the battery, you need to buy special mounts of the required length.
Counting radiator sections
Before installing heating radiators, you need to decide on the required number of sections. This information can be found out when purchasing in a store, or you can take note of the rule: with a room height of no more than 2.7 meters, one section is capable of heating two meters of square area. When calculating, rounding is done upward.
Aluminum radiator design
Of course, heating an insulated cottage or a corner room of a panel house are different tasks. Therefore, you must understand that counting sections is an individual process, which is based on the characteristics of the room and heating elements, and the price of heating devices in these two cases will be different.
Tool for the job
Installing a heating battery yourself is possible if you have the necessary tools.
The tool set consists of:
Important! Do not use a file or emery to clean the surfaces that will be joined. This may result in poor sealing
Battery Installation
You can install the heating battery by following these steps:
- If you are replacing old heating devices with new ones, then first you need to dismantle the old ones. To do this, you need to drain the water from the heating system; if you live in an apartment building, then you need to contact the housing office;
- Markings are being made for mounting new radiators;
- The bracket is installed and the battery with the regulator is hung. After installing the bracket, make sure that it is securely fastened and will support the weight of the battery, to do this, press on it with all your weight;
- Installation of shut-off valves and connection of heating pipelines. When installing shut-off valves, pay maximum attention to ensure that the threaded connections are secure.
What kind of binding could it be?
The main stage of installing a heating system in a house is tying the heating radiator with polypropylene. During this process, you need to install parts that allow you to regulate heat transfer.
Shut-off valves
There are several types of shut-off valves that are suitable for piping heating radiators:
- Chokes with thermal control capability. To adjust heat transfer, you need to set the parameters. After this, the mechanism will work automatically. Regardless of what temperature changes occur outside, the same temperature regime will be maintained in the room. Throttle is a valve designed for manual adjustment of heat transfer. The temperature begins to change two hours after changing the valve position.
- Valves are a part that is installed in front of the battery. Designed to shut off the coolant supply.
Fitting
To connect the battery to the pipeline, you need to use the following fittings:
- American couplings with which shut-off valves are connected. If there is a union nut, you can quickly dismantle the heat exchanger.
- Triple couplings - suitable for connecting pipes for supplying coolant simultaneously with control valves.
- Tees that have vias.
The choice of connecting part depends on the complexity of the water supply system.
Connection fittings
Tools
To assemble a polypropylene heating system you will need a set of tools:
- special soldering iron for welding plastic;
- a tool for removing the reinforcing layer from tubes - a shaver;
- key with hooks for installing shut-off valves;
- scissors for cutting polypropylene.
Additionally, you will need measuring and marking tools.
Stages of connecting heating radiators
Installation of radiators with polypropylene pipes is carried out in several stages:
- Marking the laying of tubes and battery installation locations.
- Fastening heat exchangers to the wall. For small models, two brackets are enough, for large ones - one per section.
- Installation of shut-off valves.
- Pipe connection.
- Installation of jumpers, compensators.
The last stage is connecting the pipeline to the battery. To make the joints more airtight, you can use sealants that are resistant to prolonged exposure to high temperatures.
What shut-off valves can be used
The owner always has a choice between:
- Ball valves.
- Shut-off valves.
- Valves.
The first ones only allow you to block the pipe. It is impossible to regulate the coolant supply and heat transfer of the radiator with them. Its installation means that the harness can either be closed or completely open.
Shut-off valves are most often installed on the outlet fitting. They allow you to change the cross-sectional area of the outlet pipe. This is not very convenient to do, since you need to remove the cover and tighten the spindle with the spool with your own hands. The reliability of this valve is better than the one described above. It is usually mounted together with the valve.
The valve allows you to limit/increase the coolant supply. Many of his models are handmade. However, there are those that can be either manual or automatic. To automate, the valve handle is unscrewed and the thermostatic head is fixed in its place. It analyzes the temperature in the room and changes the operating mode of the radiator. Often such a head may have an external thermostat.
In residential buildings of the old stock, both in the private sector and in apartment buildings, work is currently underway to re-equip heating systems. Physically and morally worn-out heating equipment (steel and cast iron radiators, pipelines, shut-off valves) are replaced with new heating systems. Outdated devices have been replaced by more advanced heating units, for example, bimetallic heating radiators with improved characteristics. Steel pipes, a familiar and durable material, are still in demand when installing heating circuits, but worn-out steel pipelines are increasingly being replaced with new materials, in particular, polypropylene, a polymer widely used in the production of pipe products.
Polypropylene pipes with connecting fittings of various configurations
Despite the fact that polymer pipes have been used in construction for decades, many homeowners who still use steel pipelines and are planning to modernize their heating circuits have questions about the technology for the upcoming installation - how to install polypropylene lines in their homes conditions, what does it look like to connect a heating system radiator to polypropylene reinforced pipes? To partially answer them, let’s take a closer look at how polypropylene pipe materials are connected to heating radiators.
Types and types of connection fittings
The English word "fit" means to gather. It is thanks to him that the fitting got its name. With the help of such connecting elements, pipes are joined in the same and different planes.
They allow you to create branched systems and avoid obstacles. When using fittings, pipes of the same or different diameters are joined.
Manufacturers produce threaded and soldered connecting elements. The first type allows you to connect polypropylene communications with steel pipes and fittings in the form of taps and valves.
The second type is intended for connecting polymer elements to each other by soldering. First of all, when using special welding equipment. It heats the parts, so their structure softens. Only after this the fitting can be put on the pipe.
Couplings and adapters
The simplest fitting for polypropylene pipes is a coupling. It is made in the form of a barrel, the internal diameter of which corresponds to the cross-sectional size of the pipe along the outer edge.
PP coupling
The couplings have thicker walls. They are used to connect pipes of the same diameter, inserted into the so-called barrel on both sides if it is made entirely of polypropylene. When the coupling is threaded, soldering is performed on one edge only.
Combined coupling PP
An adapter is an element that allows you to connect pipes of different diameters. Used in branched systems with several consumers.
Adapter PP
Using adapters, it is possible to narrow the diameter of the communication and create excess pressure in the circuit.
Angle, tee and cross
In most cases, utility lines have a branched structure. Angles are used to rotate the system 90° and 45°. They form a system of the required configuration. After all, polypropylene is a hard and elastic material that bends only after heating.
However, this method is not used when laying communications. As a result, when bending, the cross-sectional size and wall thickness of the pipes change. This reduces the strength characteristics of the system. Consequently, it often leads to the appearance of a leak when the pressure and temperature of the moving medium increases.
Corner pp
Angles are also available with a 3/4 female thread on one end. They are used during installation of mixers.
Tee pp
Tees and crosses are used to branch utility lines. They allow you to connect two or three taps together. The sizes of fittings for polyethylene pipes are selected depending on the design.
Crosspiece pp
Tees and crosses allow you to create bends at right or acute angles. This type of fitting is also available with threads on one end. In this case, they are used when installing shut-off valves.
Bypass and compensators
Bypasses are used to bypass obstacles on the way of laying systems. With their help, a more round bend is created than when using corners. Contours allow you to smoothly change the direction of pipelines. Therefore, it is possible to lay communications that have a more attractive and neat appearance.
PP bypass
Compensators are parts of engineering systems that can “absorb” pressure and temperature changes in hot water supply and heating pipelines. They increase reliability and maintain the integrity of networks. Several ready-made solutions are available. Polypropylene expansion joints are made in the form of a loop.
American fitting
The installation process of PP systems is made easier by the American. This is an element made of metal and plastic with a rubber insert. The parts are used for detachable sealed connections.
American pp
Such fittings with internal or external threads on one side are used when installing shut-off valves, hydraulic accumulators, circulation pumps, heating radiators, and so on.
Taps, valves and plugs
During the operation of utilities, it is often necessary to shut off the water. This is achieved by installing taps and valves. They can be made of polypropylene or brass.
Valve PP
In the first case, parts are soldered into systems. In the second, adapters are additionally used. Consequently, they allow threaded connections of network parts made of different materials.
Crane pp
Plugs are used in places where polypropylene pipelines end.
Plug PP
Such parts can be soldered to permanently block the outlet or temporarily installed using a threaded connection.
Pipe types
Products are always selected for certain parameters of the pipeline or system. There is no need to install an expensive reinforced pipe into a water supply system with cold water and low pressure. An ordinary single-layer pipe, for the production of which only polypropylene is used, is quite suitable here.
The technological process for manufacturing multilayer options is more complex, which ultimately affects their price. A multilayer pipe consists of 3–5 alternating layers of polypropylene, reinforcement (fiberglass, aluminum foil) and hot-melt adhesive designed to connect them.
Types of single-layer products
Depending on the structure of polypropylene molecules, its physical and mechanical properties also change.
Depending on the type of polymer used, polypropylene products are divided into several groups:
- PPH. Pipes made on the basis of homopolypropylene and capable of operating in the temperature range from 0 to 100 ºС, have good abrasive resistance and high resistance to chemically aggressive liquids. The main disadvantage is poor resistance to low temperatures.
- PPB. Products made from polypropylene block copolymer, which have good flexibility and resistance to low temperatures. They have high thermal expansion.
- PPR. In the production of these pipes, random copolymers consisting of ethylene and polypropylene molecules are used. The result is durable and versatile pipes that can operate in a wide temperature range while maintaining their original linear dimensions. Pipes marked PPR are the most popular and frequently used in water supply and heating systems.
- P.P.S. A special type of product made from polyphenylene sulfide, the special structure of its molecules allows us to achieve the best performance in terms of resistance to various types of loads.
