The question of how to hide pipes in the bathroom without installing them into the wall worries almost every property owner who has encountered the “delights” of old-style domestic apartment construction. Yes, in most new modern apartment buildings this problem has been largely solved by pre-planned closed installation. In this case, the appearance of the bathroom is not spoiled by ugly pipes, the overall aesthetics of the room is preserved, you can make beautiful and expensive renovations - and it is quite reasonable to count on an impressive result. But what about the opposite case? Don’t throw ashes on your head - the task is much easier to solve than you think, and you won’t need to rearrange the family budget or learn any new skills.
- What you need to know before installation;
- All methods of masking pipes;
- Features of installation of a plasterboard box;
- Conclusion.
Required knowledge
Taking into account the constant improvement of building materials, to hide bathroom pipes with your own hands, you do not have to be a master of engineering sciences; it is enough to have basic knowledge and all the necessary tools at hand.
Qualification comes with experience, but if you are doing repairs for yourself, the information you read will be quite enough to understand the principle of carrying out all the necessary work.
Installation features
Before starting work, check the condition of the pipes. The main attention is paid to connections, especially if they are threaded; detected defects are eliminated.
Then the dimensions of the future structure are measured, taking into account that the distance between the pipes and the walls of the box cannot be made less than 3 cm. The pipe box is installed in the following sequence:
- A metal profile (wooden slats) is fixed to the walls. If wooden blocks are used, they are treated with a moisture-repellent compound.
- The front face stand is mounted.
- The metal structure is attached to the floor and ceiling. If the frame is high (exceeds 1.5 m), additional horizontal lintels are provided.
- The selected material is cut to size. The parts are secured to the frame with small self-tapping screws.
- It is highly desirable that the box has a technical hole for a hatch. If a leak occurs, you can easily fix it.
- If necessary, finishing work is carried out. Drywall, MDF and plywood can be painted or tiled. Plastic panels are beautiful in themselves and do not need additional finishing.
Making the frame Source design-homes.ru
Preparatory procedures
Before hiding pipes in the bathroom, you should draw a project plan in order to understand the approximate location of all the elements and how much space the box will “eat up”.
You also need to take into account the placement of the door for access to the water supply taps, to the boiler adjustment (if there is one), and drains.
A detailed plan should reflect the possibility of opening furniture, a washing machine, and the ergonomic location of units, allowing a person to use the room comfortably.
When ordering materials, not only an accurate calculation is important, but also the ability to take more than required. It is better to overpay for an extra square meter of tiles than to discover there is a shortage after cutting them. The same applies to bulk mixtures, paint, profiles and bolts.
What you need to know before installation
Each part in any mechanism has its own purpose. In this regard, pipes can also be perceived as elements of a single and well-functioning system. A system that sooner or later may fail, which means that prompt access to pipes is not a wish, but a necessity. There are a number of comments from specialists that you should listen to carefully if you want to handle the operation correctly:
- if there are any threaded connections, taps, etc. on the pipes, then with any chosen type of masking of communications, quick access to them should be provided;
- when installing a mandatory decorative box or covering pipes with plastic panels, provide for the creation of an inspection hatch;
- communications made of metal-plastic have connections - so-called fittings - that are regulated by keys; these areas require constant monitoring on your part and the possibility of prompt intervention in case of leakage;
- do not place pipe inspection hatches in places where there are no connections - the chance of a leak in these areas is so minimal that it should not even be taken into account;
- immediately before installation, you should carefully check all communications - and correct any noticed defects before installing a false wall or box;
- To prevent condensation, it is recommended to insulate water and sewer pipes.
Remember that the functionality of well-established engineering communications in the bathroom should not be sacrificed for decorativeness. A reasonable balance is always somewhere in the middle, and following the simple rules outlined above will help you not only deal with the problem of visible pipes beautifully, but also maintain confidence in their reliable functioning.
Ease
If you decide to do the repairs yourself, it is worth considering that the materials should be lightweight. This will eliminate the need to use additional labor and assemble formwork from heavy raw materials.
For example, strong steel frames are necessary for attaching mirror or marble panels.
Disguise with furniture
The method differs in functionality. The fenced-off space for pipes does not remain empty. They are most often used for organizing storage. For example, household chemicals, cosmetics and hygiene items, towels and other things needed in the bathroom.
This can be a built-in cabinet - horizontal and vertical, a cabinet, a shelf-rack. All you need to do is remove the back wall of the furniture and drill holes for the pipes if necessary. The risers, as the largest section of the pipeline, are hidden in a high pencil case; the pipes under the sink will be hidden by a cabinet.
Such furniture can be made independently or made to order. But the cost of furniture and its quality do not always allow you to handle it so freely. Violation of integrity can lead to deformation and destruction of furniture from the humid microclimate of the bathroom.
Resistance to moisture and temperature changes
When it comes to the bathroom, moisture resistance is the main indicator of the viability of a material. It is better to avoid chipboard-based coatings that are not marked “moisture resistant.”
Note!
- IKEA bathroom: TOP-140 photos and videos of IKEA bathroom design options. Manufacturer's advantages. Features of the collections
- PVC panels for the bathroom: TOP-180 photos and video reviews. Advantages and disadvantages of the material. Varieties of PVC panel models. Mounting methods
Bathroom faucet: types of faucets and coating materials. Shower switch mechanism. Built-in and external mixers (photo + video)
other methods
One of the simplest methods of camouflage is painting pipes to match the color of the interior. You can paint structures made of plastic and metal, it is only important to choose them correctly. For this purpose, the following compositions are used:
- acrylic;
- alkyd;
- water-dispersed.
Before painting, the structure must be cleaned and coated with a primer so that the mixture adheres better. For hot water pipes, it is necessary to use special heat-resistant compounds. Before starting work, you need to make sure that condensation does not accumulate on the pipes, otherwise the paint may not adhere well to the surface.
A screen made of plastic panels is considered a fairly popular way to disguise communications. This material is one of the most practical. It withstands high humidity well and does not deform under prolonged exposure to adverse conditions. PVC panels are easy to care for; they can be easily cleaned from dirt using any detergent.
view album in new window
Plastic screens are practical and functional. With their help you can close horizontal and vertical structures. They are suitable for hiding risers. The advantage of this method is the variety of colors and textures of the panels. Thanks to this, you can choose the finish to suit any interior style.
To disguise communications, a frame made of tiles can be used. This is a collapsible design, which is distinguished by both an aesthetically attractive appearance and the ability to reach the pipes at any time at any time.
Possibility of using cleaning agents
To prevent fungus and other pathogenic microorganisms from growing in the bathroom, compounds based on alcohol, bleach or acids are often used for cleaning.
It is worth understanding that the selected finishing material must be resistant to detergents and cleaning agents.
Pros and cons of pipe sealing
A clear advantage is the decorative design of the room, aesthetics, the absence of unnecessary details in the interior, the appearance of additional space for placing household items on it or inside it. However, there are also disadvantages: there is no direct access to the pipeline, so in the event of a breakthrough it is necessary to completely or partially dismantle the camouflage.
It is not entirely correct to choose products based on aesthetic components, since they must also have other properties.
Possibility of replacement
It’s nice to use exclusive materials, textures and colors to decorate a bathroom, but you should take care in advance about the possibility of replacing one or a couple of segments if they become deformed during installation or further use.
Before you hide the pipes in the bathroom in the wall, you should make sure that they are reliable. According to experts, there is no point in making a spectacular box if the communications themselves may soon require repairs.
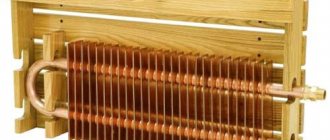
Types of materials for water supply and sewerage communications
Pipes can be made of various materials: metal, plastic, metal-plastic. The type and quality of the material affects the wear resistance of the pipeline, its strength, durability, thermal conductivity, and health safety.
You need to choose products that are not prone to deformation.
Important! The desire to save money can lead to the threat of emergency situations, so the price must correspond to the quality.
Metal
Metal pipes are made of copper or steel. Copper ones are characterized by high cost, so they are not used as often as steel ones. Durable steel pipes are widely used. They are resistant to temperature and pressure changes, and stainless steel is safe for human health.
Copper ones are durable, reliable, and do not contain toxic substances.
Plastic
Polypropylene is characterized by durability (service life reaches 50 years), resistance to temperature changes, and good thermal conductivity. Polyethylene is characterized by elasticity, resistance to expansion and contraction. Suitable for cold water only. PVC is a harmful material, suitable only for technological needs.
Water supply and sewer lines can be made of plastic: polypropylene, polyethylene, polyvinyl chloride.
Metal-plastic
Metal-polymer pipes contain polyethylene and aluminum. They combine the advantages of both types, are durable, have a long service life, and are low in price. Well suited for use in a residential building. The best choice in terms of price-quality ratio.
Disadvantages include the lack of resistance to mechanical stress and direct sunlight.
Popular methods of masking communications
Speaking about the most practical ways of covering a bathroom, the leaders are the following:
Note!
- Self-leveling floor in the bathroom - TOP 170 photo and video options. Advantages of self-leveling flooring in the bathroom. DIY pouring instructions
- Chest of drawers in the bathroom: 165 photos of stylish models and videos of current options for placing chests of drawers
- Sliding curtains for the bathroom - 165 photos + video instructions on how to choose and install sliding curtains correctly
- Finishing with plasterboard (the material allows you to choose a wide range of additional coatings and their textures, ranging from moisture-resistant wallpaper to tiles);
- Use of tiles;
- PVC panels;
- Sliding structures (shutters, blinds, blinds);
- Recessed communications wiring;
- Decorative materials.
Hiding the pipeline in the floor
Speaking about methods of placing communications, it is worth remembering another interesting method. You can close it in the floor.
This solution to the problem is attractive because it does not require gating. The pipes are laid on the floor slab and secured. After this, the screed is poured.
The disadvantage of this method is that sewer pipelines cannot be hidden in the floor. They will have to be laid using the usual old method - in grooves.
Masking with plasterboard
Most photos of interiors showing how to hide pipes in the bathroom are based on a simple method of installing a box made of moisture-resistant plasterboard, and after decorating it with various materials, be it pasting with mosaics or textured wallpaper, painting or applying decorative plaster.
Assembly steps:
- Wall markings indicating the location of the profiles.
- The distance between the slats (aluminum profile) and the pipe must be at least 3 cm.
- The frame is attached to the wall and floor with dowels; at the corner joints, the slats are secured with metal corners to impart rigidity to the structure.
- If space allows, try to ensure that the frame is not located close to the tubes. If such areas exist, they need to be lined with reinforcing tape.
- Next, the sheet of drywall is cut into pieces corresponding in size to the edges of the box.
- The sheathing occurs using self-tapping screws, and the caps should be driven a couple of mm deep.
- One edge should be left for a technical hatch (later it can be designed as a cover, a ventilation duct, or a door, sliding or hinged).
- In the case of hot pipes, it is desirable to have a cutout for the ventilation grille so that heated air can freely enter the room.
Using the same principle, a plasterboard box can be used to hide the space under the bathroom.
Masking horizontally laid pipes
The easiest way to close horizontal communications in a toilet or bathroom is to build a box lined with chipboard, plywood or plastic. To create such a structure, markings are made on opposite sections of the wall.
When determining the length of the indentation, they are guided by the most protruding points along the entire length of the pipeline, including its farthest sections
A guide profile is attached along the marking line using self-tapping screws. Jumpers are inserted into it, maintaining an equidistant distance of 60 cm. Pre-cut blanks are attached to the assembled frame.
If desired, you can build a removable structure. To do this, according to the height and width of the pipes, boards are cut to create a vertical and horizontal plane. They are fastened together with a perpendicular “corner”. The assembled structure is simply placed above the pipe location.
In addition to the above options for masking pipes in bathrooms, there are original options:
Image gallery
Photo from
Use of harnesses and cords
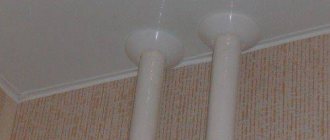
Design of risers in the form of a tree trunk
A non-trivial option for masking a pipeline
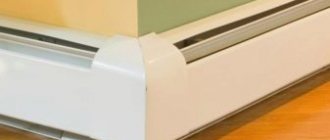
Installing a decorative casing
Tile
Since ceramics is one of the most practical materials for use in conditions of high humidity and temperature changes, the question of how to hide pipes in the bathroom under tiles is quite popular.
The step-by-step instructions for this process are as follows:
- As in the case of drywall, formwork should be made.
- Sew up the resulting frame with moisture-resistant plywood, chipboard (leaving a window under the technical hatch);
- A reinforcing mesh is glued to the chipboard;
- Next, you can lay the tiles.
- The last step is to grout the joints with anti-fungal putty.
Note!
- Bathroom design 3 sq. m. - 115 photos and video description of how to decorate a bathroom in a stylish and original way
Bathroom 6 sq. m.: 175 photos of practical ideas for applying bathroom design and video description of styling
- Bathroom lamps: 140 photos and video description of how to install beautiful and stylish lamps
The best ways to make pipes invisible
are quite options . Starting from the simplest ones, which require a minimum of time and financial costs, to more serious projects. We will list them in order of increasing complexity of the work.
No. 1. We paint or decorate
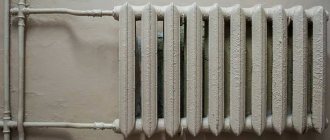
The simplest and economical way to make communications less noticeable, and in some cases, even turn them into an integral part of the interior. By the way, plastic pipes can also be painted. The very first question is which paint to choose. If we are talking about a white composition, then there is a special variety for painting heating radiators. Its peculiarity is that under the influence of heat it does not turn yellow or acquire other shades for many years. Its color will remain snowy white.
If we are talking about more interesting colors, then alkyd, acrylic or water-dispersion paints are suitable for painting metal pipes Please note that before painting, they must be cleaned, dust removed and coated with a primer, which will create a protective layer, protect the surface from premature corrosion and promote better adhesion to the paint. Primer GF-012 is perfect, which, moreover, has a ridiculous price - about 50 rubles. Before applying paint, make sure there is no condensation. For pipes through which hot water passes, it is necessary to choose heat-resistant paints. For plastic pipes, it is necessary to choose more gentle compounds that do not contain acetone. For example, acrylic or pentaphthalic based on white spirit, water-based for mineral surfaces or water-soluble compounds for carpentry. In this case, it is not necessary to prime the surface. The paint will adhere well and stick to the plastic surface.
Before applying paint, be sure to protect walls behind pipes and floors from unintentional brushstrokes or drips. If you are painting for the first time, then start working with cold pipes, because on hot pipes the paint will dry very quickly and the end result may be unsatisfactory. If you choose the paint exactly to match the color of the walls, you can “dissolve” the pipes against their background.
A very interesting option is
to decorate with polyurethane tubes and decorative stucco elements. You will get mini-columns that will complement the sophisticated aristocratic or classic style of the bathroom. But this is only suitable for vertically located elements. They can also be hidden with artificial vines or painted on the surface with a pattern that already exists in the interior, for example on tiles.
No. 2. Disguise with furniture
Not the most complicated, but at the same time functional way. It lies in the ability to choose the right set for the bathroom, which will help hide imperfections. And if, moreover, you position the plumbing correctly, you can achieve almost absolute invisibility of the pipes.
Vertical pipes, for example, risers, which are the largest in size, will help hide a tall pencil case. To do this, you need to remove its back wall, and make recesses on the back of the shelves that match the dimensions of the pipes. If it is not possible to choose the best option among ready-made ones, you can always make it to order, which will be even better. In addition to a neat appearance, you will get a lot of additional space for storing household chemicals or other bathroom accessories.
The place where the pipes are supplied to the washbasin can easily be hidden by a cabinet, with the back wall of which you need to do similar actions. Many people use a water heater, the pipe supply to which is most often carried out from below. If the next bedside table in the bathroom is clearly superfluous, you can put a beautiful laundry basket under it. Fortunately, the variety of their appearance allows you to choose the most suitable model for any interior.
No. 3. Screen made of plastic panels
This is probably the most successful option in terms of material selection. After all, even in a too humid room with PVC panels, no changes will occur. In addition, they are very easy to install, and if necessary, the structure can always be quickly disassembled with the possibility of reassembly. Plastic is very easy to clean and does not deform over time. And the variety of color options and even textures today is simply amazing. With such screens you can hide large vertical pipes, horizontal pipes passing above the floor, or make a screen under the bathtub .
In order to cover the plastic, it is necessary to make a base frame. The materials you can use are wooden planks, metal profiles or plastic U-shaped corners. The process is very similar to the technology for installing a plastic ceiling. Before attaching the frame, be sure to make markings using a level or plumb line. Now fasten all the planks around the perimeter of the selected area. If the area is large, be sure to add a few pieces in the middle to add rigidity. Now cut the plastic panels into pieces of the required sizes. The first panel will be attached to the profile with self-tapping screws. They should be screwed into the locking part. Next, simply connect the panels to each other using special latches. The last element is also secured with a mounting screw. For reliability, you can screw in a self-tapping screw in the middle of the first and last panels, top and bottom. But not on every one, otherwise it will be difficult to disassemble the structure if necessary. Now, to give the screen a neater look and hide all the fasteners, use decorative corners.
Installing a screen under the bathtub will have a similar technology. The lower plank is attached directly to the floor, and the upper one is attached at one end to the wall, and then supported with the help of spacers, which must be placed at a distance of no more than 40 cm from each other. Plastic sheathing is done in a similar way. Using the screen, you can also hide communications that go to the bathtub itself and to the sink, if it is nearby. And if you equip it with a small window, you can also store household chemicals there. And a bathroom decorated in this way looks more aesthetically pleasing. same way , pipes passing above the floor and even are hidden . Such a step will be narrow and neat. It can even be used as a small shelf.
No. 4. Plasterboard box or false wall
These are more complex methods of camouflage, which require large financial costs and time to implement. Using a plasterboard box, you can hide pipes that are oriented both vertically and horizontally. And just like with plastic, you can line a bathtub with it. The only difference is that drywall needs subsequent additional cladding. Remember that in rooms with high humidity you should use only moisture-resistant materials!
The steps will be similar to those described above. A frame of the required size is mounted from metal profiles in the desired location. Naturally, before this, the straightness of all edges must be checked using a level. After this, fragments of drywall are cut to the required sizes, and using self-tapping screws suitable for installing this particular material, they are attached to the frame. When the frame is assembled, it is necessary to prime the surface, glue a special mesh to the joints and apply a layer of putty. After this, you can perform finishing cladding with suitable materials. Such frames decorated with tiled mosaics look very good. Due to their small size , they do not spoil, but, on the contrary, complement the interior of the room and create additional accents in it. This way, even imperfections can be turned into something beautiful and useful.
As for
the false wall. It is most appropriate to erect it in front of the location of the risers, especially if a toilet is installed in front of them, as is the case in most cases. There is no need to move it. After all, modern models require installation close to the wall, in which we will hide the lower volumetric corrugation. The only drawback of such an element is the use of usable area of the room. Here you have to choose – aesthetics or dimensions. At most, such a protrusion will have a width of 30 cm. But behind the false wall you can hide both filters and counters. It is not recommended to make her deaf. You can make a cutout above the toilet, equip it with hinges and hang a beautiful door. A box is made from metal profiles, which will fence off the pipes from the general space of the room, and is lined with plasterboard. Further finishing is strictly according to your taste.
No. 5. Frame covered with tiles
This means not just a plasterboard surface covered with tiles, but a collapsible tile structure. The good thing about it is that at any time you will have access to problem areas without having to tear down walls. Dismantling can be done using a regular screwdriver, and then everything can be reassembled as it was. In addition, if you tiling with the same tiles as on the walls, then no one will understand that there is something hidden there.
To build the frame you will need: a drill, a tile cutter or a hacksaw, metal profiles, plastic corners, self-tapping screws and the tile itself. A frame is installed from the profiles, which is attached to the floor, the ceiling, and adjacent walls. There are special metal brackets for this. After the frame is ready, it is necessary to take measurements of its edges on which the tiles will be attached, and cut the tiles. Don't forget to take into account the thickness of the tile if you want one edge to overlap another. Now, using a drill and feather drills, you need to drill two holes for self-tapping screws along the edges of the tile. Then place the tiles on the frame and make marks with a marker on the profile in the center of these holes. This way you will definitely get to the right place and complete the installation without distortion. But keep in mind that the holes in the tiles should already be such that the self-tapping screw fits freely into them. While in the profile, they should be smaller. Otherwise you just won't screw them in. When all the tiles are in place, the corners and fastening points are covered with decorative plastic corners. In the right place, you can make a gap between the tiles and install a neat plastic door there, in case there are water meters there.
When working with tiles, do not forget about your own safety. When cutting, the tiles have very sharp edges, so it is recommended to wear gloves. A quick tip - if you wet them before cutting, you'll reduce the chance of them chipping or cracking at the edges. Don't forget about safety glasses. If destroyed, the glazed top layer crumbles into small sharp pieces and scatters over a long distance. If they come into contact with the eyes, they can cause irreparable harm.
No. 6. Plumbing roller shutters
Blinds or roller blinds are a very unusual method of camouflage, which is rarely seen in apartments. However, it is very convenient and original. This design can provide the most complete and easy access to pipes along almost their entire length in a matter of seconds. There is a special variety of them - plumbing roller shutters . They will perfectly complement the interior of a bathroom made in high-tech, modern or loft style. The color range is also quite varied and allows you to choose the most suitable option.
When installing them,
two options for raising/lowering - electrical and mechanical. The choice should be based on the size of the canvas. When the width of the overlapped opening is up to 52 cm inclusive, a manual control system with a cord mechanism is sufficient. If the surface area is larger, then such systems are equipped with a spring mechanism. The only condition that must be met if there is an automated lift is that the motor housing must be located in a sealed housing that does not allow moisture and dust to enter. The frame be a plasterboard structure, a plastic box or a false wall. To ensure stable operation of roller shutters, it is necessary that the sides of the frame structure are strictly parallel to each other.
Otherwise, jamming is inevitable, since a misalignment, even a slight one, will not allow the rollers to slide freely along the grooves. There are two installation options - when the roller shutters are located on top of the box or when the box is located around the canvas. The first option is suitable if the risers are located in a natural niche. Then a profile is simply installed along its perimeter, onto which the blinds are attached and form a single plane with the wall. The second option involves protruding structures, the side parts of which are covered with plasterboard and lined with appropriate materials, and the front part is covered with shutters. When installing a canvas with a cord mechanism, it is first completely assembled according to the instructions, and then installed .
No. 7. Installation of pipes into the wall
This is the most radical and labor-intensive process. It is actively used in case of renovation from scratch or during redevelopment. A significant advantage of this method is maintaining the size of the room. Remember that according to generally accepted building codes, it is not allowed to cut brick and thin-walled partitions in panel houses. The main disadvantage of this method is the limited access to pipes in the event of an accident. Therefore, before giving preference to this type of disguise, carefully read paragraph 2 of this article again and strictly adhere to it. And be sure to draw on paper before starting work . When you have precisely determined the location of all the plumbing elements, you can begin gating the walls.
To avoid distortions and other irregularities, draw preliminary lines on the walls and try to adhere to them.
Depending on the material of the walls, you can get by with a punch drill; in extreme cases, you will have to use a hammer drill. There will be a lot of dust, so use a respirator and safety glasses. When all the grooves are ready, remove debris from them, open them with a primer and lay pipes in them. Wait a few days to make sure all connections are tight. After this, fix their position with cement mortar. Only after complete drying is it possible to begin facing work.
Plastic panels (PVC)
The essence of finishing a bathroom with plastic panels is no different from the same work with drywall.
It is also necessary to construct formwork; the panels are attached with self-tapping screws along the edge, which are then covered with a decorative corner (it is usually glued with silicone).
Basic requirements for sealing materials
The material must meet the following criteria:
- Resistance to humidity and temperature changes
- Lightness, so as not to overload the space of the room
- Easy to install
- Resistance to household chemicals used during cleaning
- Affordable price
- Long service life
The material with which the water pipes will be closed must be resistant to moisture.
Box of blinds
One of the interesting ways to hide communications. First you need to build a support for installation. The box should look like a unique version of a window.
To do this, a corresponding frame is built, which is sewn up with plastic, plywood for painting or plasterboard.
Next, the blinds are installed according to the instructions that come with them.
Use of plastic panels
This method has become popular due to its simple installation. The work pattern is similar to how we did plasterboard sheathing. In this case, a frame is also constructed from metal profiles, and then it is sheathed with plastic.
It is not recommended to lay sewer or water pipes inside the rack profile. Here they can be damaged by self-tapping screws.
Radical methods
If the question of hiding pipes in the bathroom is raised at the construction stage, it is possible to recess the pipes in the walls. The disadvantage of this method is the subsequent inability to quickly access communications.
Which pipe elements should not be masked?
This paragraph concerns the camouflage option, in which the pipes are laid in a groove in the wall and tightly walled up in it under a layer of a special solution, and then under facing materials. In this case, you need to be extremely careful. After all, if any damage occurs, in order to eliminate it, you will need to irreversibly damage the walls. It is not recommended to immediately hide the newly completed installation under cement mortar. Yes, plastic, steel or copper pipes have a very long service life, but if the soldering is done poorly, you may not see it right away. Sometimes a seam may be too thin in one place and leak, and this is not visible immediately, but only the next day. Therefore, give the pipes and their joints the opportunity to experience water pressure and stand free for a couple of days . And only after you are convinced of their tightness, you can seal the grooves.
So, you can sew into the walls:
- Welded steel or copper pipes without threaded connections;
- Brazed plastic pipes without threaded connections.
It is not recommended to mask the following elements without quick access:
- Metal connection fittings having an L-, T- or X-shape. These areas have an increased risk of leakage.
- Connections made using threaded elements;
- Installation locations counters or filters.
Decoration
A creative approach to decorating communications is the most financially accessible method of hiding them.
- Winding with jute (the end of the thread must be fixed or secured with silicone).
- Cover the pipe with a cardboard tube, and then cover it with moisture-resistant self-adhesive film “like wood” or another texture.
As can be seen from the above methods, the process of upgrading a bathroom and hiding pipes and other unsightly elements is not work that requires large financial or labor costs.
By following these simple instructions, you can make your interior modern and attractive, without the help of expensive construction teams.
False walls
This design hides not only pipes, but also possible defects in the main wall. This technique does not spoil, but rather greatly enlivens the bathroom interior, creating three-dimensionality and a constructive accent. The only thing you have to put up with is that the false wall will take up at least 30 cm of free space.
Inside the device you can install shelves for storage, niches for a toilet adjacent to the wall, viewing windows for meters, doors for functional units. The decoration of the false wall will match the overall tone of the room.