Today, it is not a problem to enjoy a vegetable salad in the middle of winter: there is a rich assortment of plant products in stores all year round. But, besides the fact that the price for it is not the most affordable, and the taste leaves much to be desired, the benefits are also minimal, but it is quite possible to “enrich” the body with various chemicals. Therefore, despite the abundance in stores, winter greenhouses, which provide the opportunity to grow environmentally friendly and tasty vegetables or herbs for your family, have not lost their relevance. However, compared to summer greenhouses, winter greenhouses are more complex both in terms of construction and in terms of operation of the structure, and are more demanding in terms of materials. The participants of our portal are mainly engaged in seasonal greenhouses, but they also have experience in the construction and use of year-round greenhouses.
Consider:
- Structural features of winter greenhouses.
- Arrangement of winter greenhouses.
- What to grow in winter.
Most energy efficient design
An excellent solution is a “thermos”. She is endowed with a huge number of positive qualities. The main thing is significant savings and heat conservation.
It operates 12 months a year. It is not afraid of frosts and northern winds, and is capable of supplying not only food, but also becoming a source of income. She has the following positive qualities:
- Fresh vegetables will delight you all year round.
- Works in any climate.
- Excellently transmits sunlight, distributing it evenly over the entire area.
- When high-quality insulation is used in construction, the sun's energy is converted into heat and can be retained for a fairly long period of time.
- Savings on utility bills.
- Thanks to its design, you can grow vegetables, perennials and exotic fruits, grape bushes.
Important! “Thermos” - almost everything is in the ground, but there is no shortage of lighting in it. Thanks to the huge window openings there is always a lot of light inside.
Energy saving materials
To preserve heat in the thermos design, the following materials are used:
- foil with a reflective surface;
- natural wood;
- polycarbonate sheets;
- expanded polystyrene.
A metal or wooden frame is used for the main structure. When building a greenhouse of this type, gardeners use gable or single-pitch models. In order for the lighting to be excellent, it is necessary to make the northern wing of the roof higher than the southern one.
A more detailed description of the materials is in the table.
| Construction Materials | General characteristics |
| Wooden slats, metal profiles | For the construction of a roof frame. It is easier to make a frame from slats than from a profile. When using a metal profile, you will need to weld the elements together. But unlike wood, the strength is much higher. |
| Expanded polystyrene, mineral wool | The thermos is insulated with these materials. Here only you can decide which material is best to use. |
| Sand, cement, crushed stone, metal reinforcement | For the construction of greenhouse foundations and walls |
| Thermal blocks | They are light weight and have a cavity inside. They retain heat excellently. Concrete is poured into the void. They act as formwork. They are used to build walls. |
| Film with reflective light and thermal insulation effect | Helps increase light intake and additionally protects against heat loss. |
| Polycarbonate | Covering material. |
| Fastening materials | Nails, screws, washers and bolts. |
Construction of a gable greenhouse
With your own hands you can build a gable structure , which will be glazed or fenced with greenhouse frames. Construction begins with the construction of a foundation, which should have a cross-section of 40x40 cm. The following materials will be needed for the work:
- concrete, 8 mm reinforcement and EPS for the foundation;
- greenhouse frames;
- bricks for building walls 25 cm (one brick);
- beams with a section of 15x15 cm and with grooves for greenhouse frames - are placed on a brick wall;
- bars with a section of 10x10 cm for the manufacture of the rafter part;
- ridge beam 12x12 cm for connecting the rafters;
- slats to cover gaps between frames;
- galvanized profile for the visor;
- Styrofoam;
- heating cable for heating the room.
Installation steps:
- For the foundation, a trench is dug into which the reinforcement is laid.
- About 5 cm of extruded polystyrene foam should be placed on the inside of the dug recess.
- The structure frame is installed on the foundation and concrete is poured.
- The floor of the greenhouse is covered with foam plastic and equipped with drainage to remove excess moisture.
- The frame of the building is being painted.
- The first layer of the floor is poured, on which the heating cable is laid according to the instructions.
- Everything is tied together with a road net to prevent cracks on the floor in winter. After this you can make the final screed.
All that remains is to fix the polycarbonate on the frame and you can bring soil into the greenhouse to grow vegetables and herbs in it.
Automatic window opener for greenhouse
Thermos project – greenhouses
When building this greenhouse with your own hands, you need to go through several stages step by step.
- Perform preliminary design. That is, they draw up a drawing and design of a winter greenhouse with their own hands. They calculate how many building materials and fittings will be needed for its construction.
- Construction of a pit, which must be at least two meters deep. At the same time, its bottom and walls are leveled. Afterwards the foundation is poured. For this purpose, concrete or concrete blocks are used. This stage is considered very important, since it is the foundation that is responsible for the thermal insulation of the greenhouse. In order to pour concrete, it is necessary to install wooden formwork.
- Construction of walls from thermal blocks. The load-bearing part is reinforced concrete. An expanded polystyrene layer and thermal insulation blocks are placed inside. Fixing with each other occurs with cement mortar.
Read also: How to make a greenhouse from plastic pipes with your own hands You can find any ready-made greenhouse in gardening stores, but it does not always meet people’s wishes. By this…
Important! It is worth especially carefully choosing the location on the site where the greenhouse will be installed. The water inside the soil should be far from the surface.
Scheme for the construction of a “thermos” greenhouse:
- Foil is installed on the inner surface of the walls, which serves as a light reflector. It is best to lay it out in a couple of layers or use polystyrene foam with a reflective surface for this.
- At this stage, the required number of holes is drilled in metal profiles or wooden beams and beams. They begin to build her skeleton.
- Installation of polycarbonate leaves or polyethylene. For the construction of the outer side of the roof, only polycarbonate sheets are used, otherwise it may simply collapse.
- We install a convenient passage inside the winter greenhouse, which is best built in the form of a vestibule.
- Sealing from the inside. To do this, use plaster or polyurethane foam.
| Process | How many materials are needed? |
| Formwork. Install stakes, the distance between them is 30 centimeters. | Along the perimeter of the pit |
| Making a “pillow”, a mixture of sand and crushed stone | 1*1, such as a bag of sand and a bag of crushed stone |
| Making a frame from reinforcement | 4–6 rods around the perimeter |
| Foundation mortar | Crushed stone, sand, cement (3*5*1) |
| Greenhouse wall | Must exceed ground level by at least 0.5 meters. |
Types of buildings
Before you start designing a winter greenhouse, you should consider the types of its classification:
- By location: wall-mounted (house-side) or detached building.
- Relative to the ground: on the surface or deep into the ground, on the platform (roof) of any structure.
- By building material: frame, wood, brick, with a film coating of glass or polycarbonate.
- According to the architectural principle: horizontal, arched, single-, double- or triple-sloped, combined.
- According to the method of growing plants: containers, racks, beds or anything else.
- By type of heating: biofuel, technical heating (stove, water, electric) or solar panels.
Greenhouse insulation
The main thing in the construction of a winter greenhouse with heating is to follow the sequence. We have already talked about the construction of a pit and the construction of a foundation and walls. Now let's move on to more complex processes.
Insulation
The main thing is to install a thermal insulation film on the walls inside. If the climate in your region is particularly harsh, then you can use foil thermal film. Laying is done in 2 layers.
Installation of heating equipment
An excellent solution to fully heating a greenhouse would be to install a “warm floors” system. It can be installed directly into the ground, but in order to avoid damage it is poured and reinforced. Warm soil is not enough for good plant growth.
Heating a greenhouse using solar panels
The greenhouse can also be heated with devices that absorb solar rays. To create such a heating system:
- first they dig a hole about 15 centimeters deep;
- then a layer of polystyrene or any other heat-insulating material is laid on the ground;
- a plastic film is placed on top to provide waterproofing;
- Wet sand and soil are poured onto the film on top.
This system is very simple and does not require financial costs, but at the same time it is quite suitable for maintaining the temperature in the greenhouse that is optimal for plant growth. In this case, there must be special devices on the roof that will absorb solar energy and thereby help heat the greenhouse. It is worth considering that in winter such a system will be ineffective - on cloudy days the greenhouse will not be able to warm up (pro
The best heating system
To create an optimal temperature regime for plant growth, it is necessary not only to heat the soil, but also the air inside the greenhouse. When choosing a heating system, pay attention to:
- What size is the greenhouse?
- How much money can you spend?
- Regional climate.
- Growth conditions.
For heating a winter greenhouse “thermos”, a stove is an excellent option. An ordinary “potbelly stove” is used as a heating device. It is very simple to construct it with your own hands. For this you will need:
- metal sheets made of heat-resistant material;
- cast iron, steel and ceramic pipes of equal diameter;
- metal rods and corners;
- plumb line with tape measure;
- device for cutting metal products;
- welding machine;
- bolts, couplings;
- calcined brick;
- limestone or clay solution.
Important! One stove – a “potbelly stove” – heats an area of about fifteen square meters. A gap of at least 30–40 centimeters is left between the stove and the walls. For polycarbonate greenhouses, the distance is at least 60–80 centimeters.
Sheathing
The era of multilayer PVC film is becoming a thing of the past and has been replaced by polycarbonate, from which the best winter greenhouses are made. The material has many advantages:
- Aesthetic appearance;
- resistance to external damage;
- ease of processing and installation of sheets;
- a light weight;
- polycarbonate can withstand increased loads;
- does not deform under the influence of ultraviolet rays.
The listed characteristics make polycarbonate an excellent material when deciding how to make a winter greenhouse. It ideally protects plantings from precipitation in the form of rain and snow. Helps maintain the desired microclimate. The photo of a winter greenhouse shows a version of a polycarbonate greenhouse.
Glass also continues to be used as cladding. It is inferior to a winter greenhouse made of polycarbonate in terms of thermal conductivity, but with careful handling it wins in terms of long service life and light transmission.
In regions with cold climates, the best option is a greenhouse - a thermos. Its essence lies in double sheet cladding like a double-glazed window. The characteristics of the outer layer are 6 mm, and the inner layer is 4 mm.
The process of assembling or installing a heating system
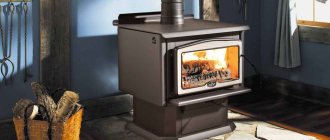
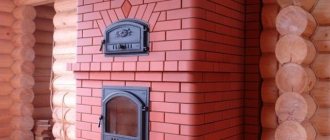
The stove - “potbelly stove” - is one of the oldest and well-known heating systems. It includes a firebox, chimney, and chimney in its design.
Installation of the furnace begins with the foundation. It makes its operation less fire hazardous and increases its service life.
Foundation
The construction of the foundation begins with the construction of a pit. Its depth should be at least half a meter. Its depth directly depends on the dimensions of the furnace. For pouring, a concrete mixture with sand, small crushed stone and brick fragments is used. Its thickness is from 15 to 20 centimeters. Afterwards the formwork is installed and cement is poured. The gaps are filled with sand and covered with roofing felt. This provides additional moisture resistance. The last stage of foundation construction is laying the bricks. It is laid in a double layer.
Installation of a "potbelly stove"
There are quite a lot of types of “bourgeois” stoves. The simplest design is a rectangular oven. For more convenient operation, the firebox should go to the surface.
- Make a drawing of the future furnace.
- Any heat-resistant metal is used to construct the firebox.
- Markings are applied to the metal sheets and the bottom, walls and roof are cut out.
- Three walls and a bottom are welded together.
- Metal corners are welded at a distance of about 15 centimeters from the bottom. A grille is installed on top of them. You can make it yourself from rods. The distance between them should be from 1 to 4 cm.
- Oven cover. A round hole with a radius of 6.5–7.5 cm is cut in it. Afterwards it is welded to the walls.
Important! In order to place the chimney under the soil, the hole for the chimney can be mounted not only in the roof, but in one of the walls and even in the bottom of the stove.
- A hole is made in the front of the stove for storing fuel and a hole for the vent. The doors are attached using hinges and welding. Also, don't forget about the handles.
- The facade of the furnace is welded to the rest of the structure.
- There is a round hole in the roof, to which a narrow metal ring is welded. A chimney pipe will be attached to it later.
- Attach the legs to the stove.
- If there is a need to line the stove with bricks.
Chimney
During installation, you can use both whole pipes and their pieces. If the greenhouse is small, it can be laid under the soil layer.
- All pieces of the chimney are fastened to each other.
- Then attached to the base.
- In the case of laying a chimney under a layer of soil, dig holes in the ground 0.25 - 0.4 meters high. Pipes are laid in them. The distance between them is at least 0.6 m. Cover everything with expanded clay. The end is brought out.
- When constructing a ground chimney, supports are installed. The end of the pipe should rise. The outside of the pipes is covered with lime.
Chimney
She is responsible for removing smoke from the room. It must be covered with thermal insulation material and attached to the chimney.
- A spark arrestor is placed on the end of this pipe.
- A damper is installed to adjust the draft, which is controlled by two wires brought out.
Boiler for a greenhouse from a gas cylinder
To work, you will need an empty gas cylinder, a coil (a tube in the shape of the letter U with threads at the ends), a metal grill, a shut-off valve, hinges and two metal handles for the doors. You should also prepare a chimney pipe taking into account the length of the greenhouse, a welding machine with electrodes, a drill and an angle grinder, pipes and a radiator for the heating circuit. For the front wall of the furnace you will need a small sheet of steel.
These simple devices are used to assemble a boiler with a water circuit for heating a country greenhouse.
We cut the balloon in two
We cut the balloon in two
Step 1
After making sure that the cylinder is empty, we saw it in half with a grinder. One of the parts will serve as the furnace body, and from the second we will make an ash box.
Step 2
We make a grate
We make a grate
We make a grate.
We take the grate, take measurements and cut it so that the resulting segment fits inside the cylinder. We secure the grate by welding. Now the stove is divided into a fuel combustion chamber (2/3 volume) and an ash pan (1/3 volume).
Step 3
Front wall
Front wall
Place the cylinder on a sheet of steel, outline it with chalk, and cut out the front wall according to the markings. Cut off 1/3 of the circle. From this piece we make the ash pan door, welding the handle and cutting out a semicircular piece for the bottom of the drawer from the second part of the cylinder.
We cut a rectangular hole in a larger piece of wall. We weld hinges, a handle and a latch (latch) to the cut-out rectangle. The door should close the firebox tightly.
Door
Firebox and ash pan door
Step 4
We install a coil (water circuit) inside the oven. We make markings for the coil, drill two holes in the upper part of the furnace to bring out the ends of the threaded pipe. We weld the coil to the metal plate and the top of the stove.
Trying on a coil
Cutting holes
We fasten the coil
We fasten the coil
The coil is fixed
Step 5
We will install a chimney. Cut a hole for the pipe in the upper back of the stove. We weld the pipe to connect the chimney. We monitor the quality of the welds, otherwise the draft and operation of the boiler will be disrupted.
We weld the chimney pipe in such a way that it will pass at an angle of about 20 degrees through the entire greenhouse. The chimney will exit through the back wall of the greenhouse, rising 1 meter above the roof. Be sure to consider thermal insulation at the point of contact between the greenhouse wall and the chimney so that a fire does not occur.
We connect the chimney pipe to the stove pipe using sheet asbestos and a coupling, tightening it with wire.
Chimney hole
Chimney connected
Step 6
We connect metal pipes for the water circuit to the ends of the coil brought out. The piping must contain an expansion tank and a pump that will pump water through the pipes.
Thus, the water heated in the coil will flow into the radiator, and when cooled, it will again enter the boiler. The chimney pipe will serve as an additional source of heat. Also, a long chimney will reduce heat loss, increasing the efficiency of the boiler.
Boiler piping
Installing a pump in a greenhouse heating system
Greenhouse heating scheme
Example of chimney outlets through the wall of a greenhouse
Step 7
We install the stove in the greenhouse, having previously built a brick or concrete base and laid out a brick screen on three sides of the firebox. For stability, the furnace can be equipped with legs made from any reinforcement or rolled steel.
We load fuel into the stove, light it, adjust the draft by opening or closing the firebox/ash pan door.
Oven in action
Now the greenhouse can be used all year round
Alternative heating
If you don’t want to bother with stove heating, you can use the following types of alternative heating systems:
- Sunny. This is the most natural heating. That is, the greenhouse must be installed in the brightest place on the site.
- Electric. It is recognized as an excellent option for heating small areas.
- Air. The most complex installation of all known heating systems.
- Warm floor. It only warms the soil.
- Biological. Manure is used. During its decomposition, gases are released that heat the greenhouse.
DIY water heating of a greenhouse
The most profitable way to heat greenhouses is water heating. You can make this greenhouse heating yourself, or rather the electric water heater itself, in stages:
- Cut off the top of the old fire extinguisher;
- Inside at the bottom we install a heating element with the required power of 1 kW. Alternatively, it could be a heating element from a samovar;
- It is necessary to make a removable lid for further filling of water;
- We attach 2 tubes to the unit body, which are connected directly to the radiator. When working with pipes, it is imperative to use gaskets, no matter what leaks occur. If you want the unit to work automatically, you need to use an AC relay and a voltage of 220 V.
When carrying out work on installing a greenhouse heating system, the main thing is to comply with the rules and regulations, instructions and safety precautions.
More on this topic on our website:
- Correct calculation of heating in an apartment building and in an apartment Although ordinary people believe that they have no need to know exactly what heating scheme is used in an apartment building, situations in life can indeed be different. Eg,…
- Well, what can I say, the water heating system has always been very widespread in various regions for heating buildings - the reason for this is its availability and simplicity in terms of...
- A gravity heating system for a two-story house is the only solution in conditions where there is no gas or electricity. Naturally, such problems simply do not exist in the modern world. However…
- Before you start building a private house, you need to decide on the heating system. A detailed heating project for a two-story house will ensure good heat distribution throughout…
Lighting in a winter greenhouse
Lighting for winter greenhouses, and especially in the “thermos” design, needs to be given special attention. All light ranges are important in plant development. For example, seedlings require blue lighting, while fruit development requires red lighting.
If you exclude any range in plant development, you will get a tasteless harvest. That is why all winter greenhouses have light with different spectral data.
Types of light modes
When arranging light in a winter greenhouse, you can find two types of lighting.
- Daytime. Light passes in the amount necessary for plants. Range from 400 to 1,000 nm. Used as constant, automatic lighting. But it is better to use it infrequently.
- Night lighting. Used when you need to extend daylight hours. It is used periodically.
Important! Plants require a period of rest from light.
Types of lamps
For good growth and fruiting of plants, all lamps installed in the greenhouse must have an inclination angle of more than 90 degrees. But only if they hang low. Also, the lamps should be light in weight and miniature in size.
The following types of lamps are available:
- Incandescent. Not suitable for greenhouses.
- Luminescent. When installing such lamps, you need to pay attention to the original color of the lighting.
- Energy saving. Used in tandem with a reflector that reflects light.
- Metal halide. They mostly have a blue sector. When using these lamps, spring lighting is simulated. Used for seedling growth and green growth during the growing season.
- High pressure mercury. Has high radiation in the ultraviolet sector. It is used only when the seedlings begin to stretch.
- High pressure sodium. They emit red light. Excellent for growing exotic plants.
- LED. Close to sunlight to the maximum.
As a result, it is clear that LED lamps will be an excellent solution for greenhouse lighting. They can also provide additional lighting and do not require additional equipment, such as phytolamps.
Greenhouse electrification
For a detailed calculation of the number of lighting fixtures:
- Draw up a plan indicating the locations of lighting sources, electrical wires and switches.
- Calculate the amount of material needed.
- At this stage, the wiring in the greenhouse is installed.
- Install lamps.
Main types of winter greenhouses
Main types
A modern winter greenhouse can be built from various materials. Today, the construction market is filled with innovative materials. They are distinguished by increased strength, lightness and affordable price. This allows you to choose everything you need within even a small planned budget. At the preparatory stage it is necessary to plan the design. Her choice will depend solely on the plants that are planned to be grown.
The types of winter greenhouses are distinguished not only by the materials used, but also by their external forms.
- Single-pitched - wall-mounted and with an earthen fill.
- Gable - with main walls and a glazed roof.
- Polycarbonate arched.
Watering the greenhouse
In order to enjoy a fresh harvest all year round, you should also pay attention to the greenhouse’s watering system.
Scientists have proven that it is best to use a drip irrigation system. To install it, you need to contact a professional. They will provide your property with moisture in a few hours. Its final cost will directly depend on the size of the greenhouse and the number of plants growing in it. So, to water one bush, one drip irrigation horn is required. Its cost is from 50 to 300 rubles.
A greenhouse - “thermos” is a good option for growing plants in winter. It gives excellent yields. It can be built either independently or with the help of professionals. Study! Build! Use the results obtained.
How to choose the best boiler?
When choosing a boiler with which you plan to heat the greenhouse, it is necessary to take into account the footage and cubic capacity of the room, as well as material costs associated with purchase, installation, etc. Preferable is equipment that uses long-burning technology - in this case, two boilers are produced per day. fuel bookmarks.
However, the cost of such boilers is high. The larger the area of the heated room, the sooner the payback period will occur. In small greenhouses (about 20 sq. m.), the payback period for technical equipment can last up to 10 years. In these circumstances, it is recommended to install solid fuel or gas devices, which, for greater efficiency, are equipped with a system for pumping water through pipes, which will allow the room to be evenly heated.
An electric boiler is not economical, consuming a large amount of electricity. When using it, the upper part of the greenhouse room warms up, but the lower part does not receive full heating, which causes the plants to freeze. Combined long-burning models are industrial and operate on gas or liquid fuel.
Did you know? The cauldron is depicted on the coat of arms of the city of Kronstadt. This is due to the fact that the mentioned city is located on the island of Kotlin.
The cost of such equipment is high and economically justified for large greenhouses when growing plants that are extremely demanding on temperature changes (strawberries, raspberries, eggplants). A long-burning pyrolysis solid fuel boiler has high heat transfer, is economical and at the same time highly productive.
However, it is large in size: due to the high heat transfer, plants must be planted at a distance of more than half a meter from the boiler. Therefore, it cannot be installed in small greenhouses. In case of unforeseen circumstances, a stationary wood stove or a mobile pellet boiler will come to the rescue, which, if necessary, is heated with any solid fuel (wood, corn cobs, etc.).


