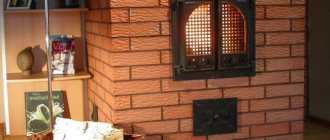
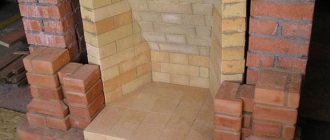
08/30/2017 12772 Stove maker (Moscow) In order to assemble a fireplace with your own hands, the order (corner) of which may differ, there is no need to resort to the help of a professional. To do this, it is enough to follow the sequence of work and use a well-designed and suitable scheme for a particular case.
A do-it-yourself corner fireplace, the arrangement of which is also presented in this article, has a simple structure and optimal dimensions for placement in rooms with a footage of 20 or more square meters.
To familiarize yourself with the diagrams of corner stoves, examples and rules for calculating materials, dimensions and other information useful in the construction and construction of heating brick installations, we recommend reading the materials presented below and watching the supporting videos in this article.
Interesting facts from the master
- The history of the fireplace dates back to Ancient Rome.
- This attribute was “moved” to the wall in the 15-16th century, at the same time it began to be decorated.
- The fireplace has always been considered a symbol of family and home.
- The first place when building a new house was given to the location of the fireplace.
- The Irish still treat Clurikon, the little fireplace spirit, with tenderness.
- In the 18th century, fireplaces began to be used in noble estates in Russia, but mainly for the purpose of ambience. Until today, we consider it a status item.
Stocking up on materials
If you have chosen the type of stove (“mini” or “maxi”), a firm decision has been made to build a Dutch oven - it’s time to stock up on materials and select tools.
The following materials are required
- standard size refractory kiln bricks;
- clay;
- crushed stone;
- sand;
- water;
- roofing felt;
- thin steel wire.
In addition, you should take care of the facing materials. The furnace heats up to a very high temperature; accordingly, a number of requirements are imposed on the facing materials:
- high strength and heat resistance
- resistance to mechanical stress
- low porosity structure
- thickness from 6 mm.
The volume of materials used in construction is taken structurally. In this case, it is necessary to calculate how many bricks are needed to build a Dutch oven.
During construction you will need the following tools:
- level;
- Master OK;
- roulette;
- container for building materials;
- shovel.
In addition, you will need stove dampers that regulate the draft and burning rate of fuel, and a combustion door.
Let's move on to calculating the number of bricks required to build a Dutch oven.
Types of corner fireplaces
This amazing decorative element allows you to turn an ordinary room into a respectable room. The home equipment market presents a wide range of these products. Therefore, choosing the most suitable sample will not be difficult.
There are four types of fireplace structures based on the method of their installation:
- Wall products;
- Corner structures;
- Island species;
- Built-in fireplaces.
Today we will talk about the corner fireplace.
Corner placement
The main types of corner fireplaces are symmetrical and asymmetrical structures.
Symmetrical fireplaces
These corner models are attractive for their excellent space heating capabilities. A wood-burning, symmetrical corner fireplace is quite often chosen for a summer residence. For the living room, preference is given to brick devices.
This fireplace is the credo of an interior in a classic style. Today this type is most often found in two forms.
Asymmetrical placement of the fireplace
Most often, these designs are used to zone a certain space or install a corner “fake” fireplace. The unusualness and elegance of the models look extremely harmonious in a modern interior. Wood-burning models of sufficiently large sizes are able to heat a room.
Fireplace technology
Any stoves and fireplaces are laid out in compliance with certain requirements that differ from the technology for constructing conventional brick walls. The rules are as follows:
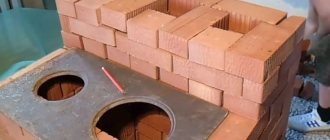
- First fold each row of a corner fireplace like a construction set, without using mortar. Carefully trim and fit the bricks together to dry.
- Before applying the solution, immerse the ceramic brick in a container of water for 2-3 minutes, allowing air bubbles to escape from the pores. There is no need to soak the refractory stone, just wipe the surfaces from dust.
- To fasten ceramic bricks, use clay-sand mortar; place fireclay stones on the “Mertel MSh-28”. Do not exceed the seam thickness of 5 mm and do not combine fireclay masonry with regular masonry.
- After installation, the brick can be tapped, but moving it in a horizontal plane is highly undesirable. Remove the solution squeezed out on the sides with a trowel.
- Strictly maintain the horizontal line when laying each row. To do this, use a cord and a building level.
- Avoid deviations from the vertical, constantly checking the walls using a plumb line and the same level.
Advice. Experienced stove makers can correctly and quickly chop bricks at various angles. It is recommended that you cut stones with a grinder along the lines marked with a pencil.
To ensure that less soot settles on the inner walls of the corner fireplace, the surfaces should be leveled as much as possible. The craftsmen use a simple technique: having laid 3-4 rows, they wipe the inside walls with a damp cloth and thus cover the seams. The basic techniques for masonry work are demonstrated in the video: The first kindling is carried out after 2-3 days, when the mortar has completely dried. Due to dampness in the chimney, an air lock may form, which can be removed by heating the vertical channel.
Advantages of fireplaces in the house
Unlike traditional buildings, corner structures have their advantages.
These include:
- Excellent visibility from anywhere in the room;
- Significant savings in space where the fireplace is installed;
- Compact design layout;
- Ideal solution for small rooms;
- Heating of adjacent rooms thanks to heating of two walls;
- Types of fireboxes;
- Variety of designs;
- Decent level of security.
This is why corner fireplaces are a fairly common home improvement today. In addition, they attract with a variety of options. Each of them has positive characteristics.
How to calculate how much materials are needed?
Bricks for building a corner fireplace
The dimensions of the fireplace and the masonry diagram at the initial stage make it possible to understand approximately how many materials and what type are needed for the work. In places where temperatures are maximum, a brick fireplace is laid from reliable fire-resistant raw materials. Otherwise, the walls will crack during the first fire. Almost the entire rest is based on ordinary red clay brick. If there is an arch in the structure, then for this purpose they finish the fireclay bricks themselves and purchase wedge material.
Sand for mortars
Fireplace designs involve the use of sand as the main material for mixing masonry mortar. There may be several options; most often, quarry sand is used in the combustion area, roof and lower area of the chimney. For all remaining elements it is permissible to use lake and river material
Before use, it is important to sift the sand through a sieve to remove excess stones
Variety of products
When choosing any project, you should focus on the overall interior of the room, finishing materials, and color variations.
- Corner fireplaces (stoves). For such products, brick or metal is used, and they do not require additional cladding. This type is installed in the house from a practical point of view - for heating the room and cooking. Solid fuel or electricity is required.
- Electric fireplaces are angular in shape. The function of such devices is purely decorative, but can also play the role of a heating device. The model is mobile, easy to move, equipped with a heater and power regulator. The electric corner fireplace can be successfully classified as a budget version.
- Biofireplace. The design functions without additional installation of a chimney, since water with carbon dioxide is released during operation. Such models are convenient in the space of an apartment, while being able to satisfy various design ideas.
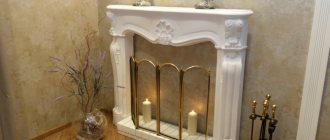
- Fake fireplaces. Brick, tile, and drywall are suitable for the device. The design is a fire imitation design. Such attributes are installed in different rooms.
How to make a decorative fireplace correctly
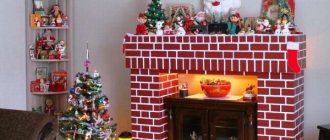
Decorative fireplaces are popular among residents of apartment buildings. The design is a dummy of a traditional portal, which can be made of any material: boxes, cardboard, plywood, foam plastic and drywall. Imitation fire creates a cozy and warm atmosphere.
To create a false fireplace, you will need to create a full-size sketch, which is then transferred to the material. The drawing should contain a detailed description of the details of the fireplace.
If you have a cardboard box on hand from household appliances, such as a TV, this item is suitable for creating a future portal. Remove any excess parts that remain after transferring the design onto the cardboard and secure the box with a stapler.
Construction tape will help you seal all joints. A utility knife will be needed to cut out the firebox itself. You can cut out only the top and side sides by bending the cardboard deep into the firebox. This action helps create a mantelpiece, which is also secured with tape.
Then you can attach the future fireplace to the wall. You can decorate the portal with ordinary wallpaper or self-adhesive film. The upper part of the structure is decorated using foam plastic or cardboard.
Most manufacturing methods are similar. Initially, a drawing is drawn, then the image should be transferred to the material and proceed to the manufacture of the base.
Such a fireplace does not require a foundation, because it only performs a decorative function and does not heat the room.
In addition, false carmine is light in weight.
As a decoration, you can use a screen on which there is an image of a flame. Some people purchase special expensive devices that allow them to simulate flames and the sound of crackling firewood.
Some people decide to make a fireplace from an ordinary box of household appliances and cover the structure with wallpaper, while others prefer to use cardboard-based foam and decorate their creation with shelves and battery-powered candles.
Such designs can be decorated in any way, depending on your imagination. With this option, you can create an exclusive version of the portal in your home, remembering labor lessons at school. Use a ready-made option to create a decorative fireplace with your own hands or come up with your own method.
Metal fireplaces
Firewood is the main type of fuel. No additional effort is required during installation. Installation takes a minimum of time, effort, and expense. Thanks to the presence of a transparent door, they look good in various interiors.
- Such fireplaces can be purchased because the market provides a wide range of similar products.
- Products can be manufactured in specialized workshops, and you can provide your own design for ordering.
- But a do-it-yourself corner fireplace will bring more satisfaction.
- This is not entirely simple, but you can easily cope with the difficulties if you have a minimum of experience in the field of construction.
This design will require small financial costs. And the construction of a fireplace should begin by determining its place in the room.
Types of models
By purpose:
- stoves - combine a fireplace and stove, can be used separately, have a chimney;
- decorative - emphasize the desired appearance of the room design;
Style classification:
- classic - made in a U-shape, has a powerful façade, and is an indicator of good taste and prosperity;
- country - a characteristic feature of such structures is negligence, rough shapes, the presence of a wooden beam;
- modern - a competent combination of classical forms and modern materials;
- high-tech - the presence of unusual forms of design and appearance using inexpensive materials and technical innovations;
Choosing a location for the fireplace in the room
According to the recommendations of professionals, a corner fireplace should be placed against a load-bearing wall opposite the door and somewhat away from the windows. This placement is ideal for effective heating.
The choice of installation location and installation method for a corner fireplace depends entirely on the availability of free space. The interior also plays an important role.
How to build a brick structure
It is advisable to place this structure between 2 walls inside the house.
A stable draft is created in the walls of the fireplace located near the window, thanks to small drafts in the room.
Design like this:
- First, choose the room and corner in which the structure will be located;
- A general sketch is prepared on paper, allowing you to visually assess whether the structure fits the design of the room;
- Taking into account the location of the floors and parts of the rafter system, a working draft drawing is prepared.
Drawing of a corner fireplace
The firebox comes in different shapes, each model uses its own version. When choosing a fireplace design, they first decide what it will be like, since it will not be possible to remake it later. The corner one is made with a firebox made of cast iron or made of fireclay bricks.
Calculation of dimensions
Accurate calculation of the size of the firebox directly affects the efficiency of heating the room.
The calculation is made taking into account the total area of the room. In a simplified calculation, the area of the room is divided by 50 - this value will give the approximate dimensions of the firebox window. For example, in a small room, a fireplace with a firebox with an area of 0.32-0.54 m² will be enough.
Installation of a corner fireplace can be done after designing the house
The fireplace window should be made in a 3:2 ratio, and the width of the hearth should be greater than its height. The depth of the firebox is important - it directly affects the efficiency of the structure; it needs to be 1/2-2/3 of the height of the firebox. With a large firebox, heat transfer decreases - a lot of heat will fly directly into the chimney. If it is not deep enough, smoke will begin to enter the room and soot will appear on the ceiling and walls.
Chimney
For high-quality smoke removal, the characteristics of the chimney are important; they affect the combustion of wood and the draft in the chimney. It is necessary to correctly calculate the height of the pipe and the cross-section of the chimney. According to safety rules, the diameter of the chimney cannot be made less than 15-17 cm, the optimal proportion of the cross-section of the chimney duct is 1/10 of the firebox area.
The length of the chimney must be made at least 5 meters; if the residential building is high, then its length must be increased (the pipe must be higher than the roof of the building).
The chimney is also located in the corner of the room, without occupying the entire wall
Materials and tools
Having calculated and prepared the project, they prepare building materials and tools. First you need to decide whether the structure will be finished, or whether you will fold the fireplace under the jointing. This affects the choice of brick. Work and procurement of materials begin with preparing the foundation for the structure.
Foundation
The fireplace weighs less than a full-fledged stove, and it does not require a large base. If the house is built on a slab foundation, then it is suitable for a corner structure. If there is a strip foundation under the house, then additional work will be required.
It is necessary to prepare a waterproofing material to protect the foundation from moisture - use dense polyethylene or roofing felt.
Next they make the formwork, you will need inch boards. Sometimes steel sheets are used instead of boards for formwork; it is more convenient if you have a complex or semicircular foundation. A reinforcement frame made of metal rods 8-10 mm in diameter is assembled in the formwork. They are tied together with steel wire to form a mesh. To create a cushion under the base and mix the solution, you will need clean sand and medium-fraction crushed stone.
The base of the fireplace must be laid out in any case, regardless of what type of foundation the house has
Fireplace and chimney laying
The construction of the walls and chimney for the fireplace is made from the following materials:
- You will need to buy 2 types of bricks – fireclay and red solid;
- When decorating a fireplace with jointing, buy high-quality ceramic bricks. If there is external finishing, use ordinary ordinary red brick;
- Fireclay bricks can withstand high temperatures well; they are used to build the firebox and the bottom of the chimney.
The amount of brick depends on the order; it differs for each fireplace model.
For a small corner fireplace you need to buy 350-650 bricks. When purchasing material for masonry, they buy 10-12% more - it will be needed if defective specimens are discovered or in case of unexpected damage.
The solution is prepared from clay and sand; with insufficient experience, it is difficult to select clay of the appropriate fat content and mix the solution in the required proportion. Therefore, it is better for beginners in the baking business to use ready-made compositions, which only need to be mixed according to the instructions indicated on the package. These mixtures are sold in specialized stores.
To make a masonry of tools you will need:
- A pickaxe hammer is required to split bricks.
- Trowels of different sizes.
- Large trowel.
- Level.
- Plumb.
- Cord for even laying of rows.
- Mallet for leveling bricks.
- Rule.
- Dishes for preparing the solution.
- Joint for cutting seams.
Required Tools
Laying a fireplace (step by step)
To remain satisfied with the result of making a corner fireplace with your own hands, you need to strictly follow the step-by-step instructions. You need to start with preparatory activities.
Tool
Equipment required for work:
- Tape measure, you can use a meter or a long ruler;
- Corner;
- Hammer with rubber end;
- Shovels (bayonet and shovel);
- Small spatula and trowel;
- Plumb;
- For perfect alignment of the foundation screed - the rule is;
- Containers for the production of mixtures and solutions;
- Sander.
Having prepared the tools, you can start importing building materials.
Materials
What you need to buy:
- Burnt red brick;
- Solid brick made of fireclay material;
- Cement and clay in equal parts;
- Sand is three times more than cement;
- Bulk materials or, as an alternative, a special composition for laying a furnace;
- Plywood sheet;
- Wooden blocks;
- Metal corners according to the size of the fireplace;
- Asbestos sheet;
- Pipe for chimney installation;
- Ready-made fireboxes;
- Facing material.
An important part of the preparatory stage is calculations for the purchase of everything necessary for construction.
Preparatory stage
Before we begin construction, we will need to arrange the corner fireplace and a number of additional steps:
| Preparatory stage | Detailed description |
| Creating a Sketch | Arranging a corner fireplace requires careful preparation. At the first stage, you will need to prepare a high-quality and most detailed drawing diagram, which will display all the measurements, dimensions and other design features of your heating unit. If you have no experience in drawing up a plan, it is recommended to seek the help of a professional or take a ready-made project from this article or other online sources. |
| Choosing a location | The instructions or the so-called diagram should be drawn up based on the dimensions and features of the location chosen for installation and placement. Choose the largest and most spacious room, with good lighting, several windows and good ventilation. Please ensure that the selected viewing angle is as complete and advantageous as possible from the point of view of observing the fireplace and its operation. |
| Preparation and purchase of materials | After the stove diagram is fully approved, it is necessary to apply the main marks responsible for the width, height and depth of the structure on the walls and flooring. Then, if necessary, make certain adjustments. Next, all materials, mixtures, parts and fittings necessary for installation and construction are calculated. Since the work will be done with your own hands, purchase bricks and adhesive mixture with a small supply. |
It is interesting to know: a corner fireplace stove, which is made individually, despite the uniform operating principle of all wood-burning installations, may have visual and design features and differences. For example, the hearth can be either open or closed. It can be laid out with bricks or purchased already assembled. Such structures are made of steel and cast iron and are often equipped with fire-resistant transparent glass. For additional convenience, you can equip your stove in the lower part with a capacious firewood or ash chamber, in which all combustion products will accumulate, which are much easier to remove if this element is present. Niches and various shelves forming the shape of the structure form both a standard rectangular and elongated shape, and are made in the shape of a triangle, polygon or trapezoid.
Fireplace foundation
It is advisable to lay the foundation simultaneously with the construction of the house.
A pit is being dug, the bottom of which should be level. A layer of sand is poured onto it, then a layer of crushed stone and large stone. The entire layer is filled with cement mortar.
Stages of laying the foundation:
- Recess under the base (600 mm deep, with a width 150 mm greater than the width of the fireplace).
- Crushed stone is placed in the pit, followed by careful compaction and leveling.
- Formwork is prepared from boards (the boards are pre-treated with resin and covered with roofing felt).
- The height of the formwork is identical to the height of the foundation itself.
- The box is filled with a mixture of cement and sand (1:3).
- The top layer must be carefully leveled.
- Cover with polyethylene and leave for a week until completely dry.
Brickwork of the stove base
stove base masonry
At the end of all calculations, exactly twenty rows are obtained and now this figure must be multiplied by twenty-four (the result is four hundred and eighty). Also, we must not forget that an additional fifty bricks will be needed, which will then additionally need to be added to the general cutting.
During laying, we also must not forget that the required number of bricks to build a chimney must be calculated separately. And a novice builder will wonder how many bricks are in a linear meter. In order to build one linear meter of a standard pipe, you will need fourteen rows of bricks (each row has approximately six bricks). It follows from this that there are approximately eighty-four bricks in one linear meter.
A similar formula for calculating building material is distinguished by its simplicity and convenience.
But, it is important to remember that such a formula is conditional and you can easily make mistakes when making calculations (so double-check the resulting numbers several times)
You can also read about the features of stove construction here.
Small nuances
By listening to the advice of experts, you can avoid some mistakes that can subsequently negatively affect the masonry.
What experienced professionals recommend:
- Firstly, carefully approach the calculation of the required number of bricks (it is better to make a small supply).
- Secondly, when building the foundation, also provide a place for firewood (if there is one in the project).
- Thirdly, you need to check each row with a level and plumb line. Necessarily.
- Fourthly, the numbers of the rows should be marked with a pencil on the adjacent wall, this will help to avoid confusion in the order of laying the rows.
- Fifthly, a sheet of roofing steel is laid on the floor at the base of the firebox.
Design and dimensions of the hearth
These fireplaces are similar in design to wall-mounted products.
The hearth has a firebox, a cone-shaped smoke receiver and a straight chimney. Triangular structures differ only in their triangular cross-section, which complicates the masonry process.
The principle of its operation is no different from the usual one - dry wood burns in an open firebox, and the resulting smoke escapes through the chimney. Some of the heat is reflected into the room by the fireplace tooth (about 20%), and the rest is lost along with the escaping smoke.
If the draft is bad, smoke will penetrate into the room, and too strong a draft will cause large heat losses. For this reason, it is necessary to select the optimal cross-section of the smoke channel, taking into account the size of the combustion niche and the area of the room.
Burning wood sometimes shoots bits of heat through the front opening.
To prevent fire, place a metal sheet on the floor in front of the firebox.
A fireplace located close to wooden walls must be insulated with galvanized metal.
Corner fireplace saves space in the room
Calculations of the required dimensions will be simplified by the table, which shows the cross-section of the chimney and the dimensions of the portal, taking into account the volume and area of the room.
| Room | Portal | Firebox | Smoke channel cross section cm | ||||
| Area, m2 | Volume, m3 | Width cm | Height cm | Depth cm | Neck cm | Back wall width cm | |
| 12 | 42 | 50 | 45 | 30 | 12 | 30 | 14x14 |
| 16 | 50 | 60 | 50 | 32 | 12 | 40 | 14x27 |
| 22 | 60 | 70 | 56 | 35 | 12 | 45 | 14x27 |
| 30 | 80 | 80 | 60 | 38 | 13 | 50 | 27x27 |
| 35 | 100 | 90 | 70 | 42 | 13 | 60 | 27x27 |
| 40 | 120 | 100 | 75 | 45 | 14 | 70 | 27x27 |
It will not be possible to make a massive brick fireplace in an apartment.
Often in private houses they use a simplified method of laying a brick hearth with a cast-iron firebox built into it.
Chimney equipment
Typically the channel resembles the shape of a cap. Ceramic blocks or a pipe are placed inside it. It is worth focusing on the location of the rear wall of the structure (always vertical and perpendicular to the base).
- The side elements are inclined at an angle of 45° - 60°. Thus, the narrowing of the chimney occurs evenly.
- The walls of the channel are made thick enough to avoid heat loss.
- The height of the pipe should not be less than 5 m and depends on the height of the building itself.
- A smoke valve is attached to the firebox; it is installed two meters above the base.
The pipe must be insulated in both thermal and thermal forms.
Such measures should not be neglected, since condensation may accumulate in the pipe, and a fire may also occur. A spark catcher and deflector are installed outside the pipe at the edge.
Construction of a classic brick fireplace
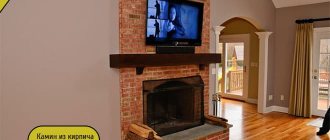
Strictly speaking, open hearths are not suitable for heating private cottages due to the low efficiency of burning wood, the efficiency is only 20-30%. While the fire is burning in the firebox, heat spreads throughout the room through infrared radiation. After attenuation, the heating intensity decreases and stops after 2-3 hours, when the brickwork has cooled.
Despite their low heat transfer rates, fireplaces remain attractive to homeowners because they create a unique homely atmosphere. The structure of a classic English hearth is shown in the diagram and includes the following elements:
- underground part - foundation;
- base of 2-3 rows of bricks;
- bottom part with a protruding pre-furnace platform;
- portal - brick frame of an open firebox;
- smoke collector - an umbrella-shaped channel tapering upward above the combustion chamber;
- the fireplace tooth at the beginning of the smoke collector serves for better heat extraction from hot gases;
- chimney pipe leading to the roof;
- the traction force is regulated by a valve.
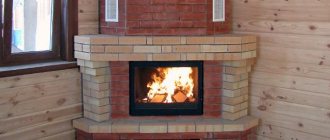
If the construction budget allows, then the outside walls are tiled, as was done above in the photo. It is not necessary to decorate the walls of the structure - the correct brickwork looks quite neat.
Mantel
The finishing process should also be planned in advance. And that's why.
- If the fireplace pediment is not planned to be subjected to decorative procedures, then when laying bricks you should try not to lay the mortar literally a few mm to the outer edge. The appearance of the design will only benefit from this. Only perfectly flat surfaces are suitable for cladding.
- Decorative materials can be stones (natural and artificial), drywall, tiled tiles, and plaster. It is advisable to varnish any stones. If you choose the plastering option, you will have to wait a while.
- The final shrinkage of the fireplace masonry must occur. This method perfectly combines an inexpensive budget and enormous possibilities for decorative design.
A decorative corner fireplace is a highlight in the interior of a small, pleasant living room in a country house, cottage, or dacha.
Construction of a fireplace according to the order
To prevent the brick walls of the future hearth from becoming damp, absorbing moisture from the foundation, the base area must be covered with roofing felt in 2 layers. Without waterproofing, the structure will soon begin to crack and begin to smoke into the room.
This is what the corner hearth “Annushka” looks like
The laying of a corner fireplace made of brick is carried out according to the order in the following sequence:
- Prepare a clay-sand mortar from the dry masonry mixture, following the instructions on the bag. Lay out the first continuous row of bricks measuring 1020 x 1020 mm, shaped like a square area. This design makes it possible not to place a pre-furnace sheet of metal in front of the portal.
- Lay the second tier of bricks, starting from the far corner of the site, to form a triangular hearth base 890 x 890 x 1260 mm. To cut and chip away stones, use a grinder equipped with a concrete wheel.
- In rows 3-4 there is a niche for storing and drying firewood. From above it is covered with a sheet of metal laid on a jumper from the corner. The next 5th tier is solid and plays the role of a permanent ceiling.
- On the 6th row, the bottom part of the firebox is formed, consisting of fireclay stone and framed on the outside with red brick. Further, up to the 13th tier, the side and rear walls of the fuel chamber are placed. From the 12th row, a fireplace tooth is formed, for which the fireproof stones of the rear wall are cut obliquely and moved forward (30 mm on each row).
- On the 13th tier, a horizontal portal lintel is installed from two steel corners, with shelves facing each other. From the 14th to the 16th row, the firebox overlap and the fireplace tooth are simultaneously formed.
- Rows 17-21 make up the walls of the smoke collector, which gradually turns into a rectangular channel, and the 18th tier is made with a protrusion of the bricks of the front part. The remaining rows 22-30 form a chimney with shaped side walls. Install a valve on the 28th tier.
Note. When laying stones on corners and metal sheets of floors, you do not need to use mortar; it is enough to fill the side gaps between the bricks.
The procedure for constructing a corner-type fireplace with the romantic name “Annushka” is shown in the following video:
The chimney duct crossing the wooden floor and roof structure must be laid with a fireproof cut (thickening of the pipe at the passage point). The top of the chimney is removed from the leeward zone and rises to a height that ensures normal draft, which is reflected in the diagram.
Photo of a corner fireplace
Positive sides
Illustrators often turn to scenes with wall-mounted fireplaces that touch one wall in the room. In fact, it is much more profitable to install a corner fireplace, since it is more ergonomic and fits into the interior of any room.
So, among the advantages of a corner fireplace, the following are noted:
- Serves as a reliable source of heat. It has superior heating properties to stoves and heaters.
- It occupies a smaller area, although in terms of appearance it is not inferior to the wall one and looks just as massive and solid.
- Suitable for installation both in a residential building and in a country house.
- In one hour of operation, a corner fireplace can heat a room with a volume of up to 120 cubic meters. m from 0 to 20 °C.
- It not only decorates the interior and warms the room, but is also suitable for cooking.
- This type of fireplace is considered safer than a direct wall-mounted one, since the flame inside the unit can be observed from anywhere in the room, and it has a smaller front wall area.
Selection of oven
When producing fireplaces, manufacturers made sure that buyers had options during installation. So, for example, frontal stoves , located along one of the walls, contain both protruding parts and built-in ones, installed in a niche and having a front surface that continues this line.
The choice of electric fireplaces, which are good for both apartments and country houses, with a natural appearance that imitates flames, with electric heating and a fan that distributes heat, and even with control panels, is currently huge. Aesthetes build such fireplaces into false fireplaces made from a wide variety of materials - from brick to cinder block, lined with marble, natural stone, granite, sandstone.
You can even purchase a fairly exotic bio-fireplace that does not produce smoke as a result of using special fuel. Unfortunately, today it is very expensive and has a significant consumption (about one liter for two hours of combustion).
At the same time, those who want to have a fireplace that uses wood are faced with the problem of finding specialists with experience in building such a miracle, which forces enthusiastic owners to provide their own comfort with their own hands. The materials presented will help pioneers figure out how this can be done.
A closed wood-burning fireplace should be built immediately, along with the house, located in a wall that already has a built-in chimney and firebox. If the decision to “start” a wood-burning fireplace has matured after the construction of the house has been completed, then it is best to opt for a semi-open fireplace, and not place it in a corner, since the heat transfer will sharply decrease.
The main difference between corner fireplaces, which can have both symmetrical and asymmetrical shapes, is that they, taking up much less space than all the others, can begin to be built before the construction of the house itself is completed. Another advantage of a corner fireplace is a larger range of heat transfer , and the viewing angle of the blazing fire is visually wider.
In any case, the area of the room where it is planned to build a fireplace intended to be heated with wood should not be less than twenty square meters, the requirement of which is dictated by fire safety rules.
Several fireplace options
Fuel compartment and portal
Corner fireplaces, photos of which you can find in this article, consist of two integral elements - a portal and a firebox.
The firebox must be made of fireproof, heat-resistant materials, since it is in this compartment that the wood is burned and the highest heating temperature is generated. Since the heating will be quite strong, red brick is not suitable for masonry; it must be replaced with fireclay. The thickness of the seams between the bricks will be 3-4 millimeters. Such seams are also called warm seams.
For safety reasons and to improve heating efficiency. The combustion chamber can be laid out as thick as two bricks. The inner layer is made of fireclay bricks, and the outer layer is made of simple bricks. Thus, the warm seam prevents the structure from collapsing, and the second layer ensures safe use and protects you from burns on the surface.
The fireplace portal, in turn, performs a decorative function. That is why its appearance and cladding must be thought out before construction begins. To do this, a detailed drawing is created on which all the structural elements of the portal and their dimensions are calculated and indicated.
To give the portal stability, at the stage of masonry and construction, a steel ceiling is laid in its lower part. However, it should not interfere with the passage of smoke masses into the chimney.
