The stove has long been a reliable, and sometimes the only, source of heat and energy. In the modern world, it has not lost its significance: many people strive to settle outside the cities in a cozy and warm home. If it is impossible to use the services of a professional stove maker, don’t worry!
In this article we will tell you in detail how and what is the best way to bring your good old “heater” into proper shape, after which you can try yourself as a stove maker and restore your stove.
Advice from professionals
To ensure quality work when plastering a stove, professionals recommend:
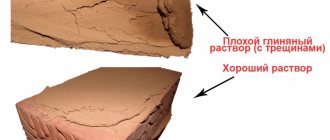
- Proper mixing of the solution. To do this, you can take a small amount of the mixture and roll it into a ball in your palm. If cracks form on it, you need to add a little water.
- The mixture should be viscous so that it can be easily applied.
- Before starting work, all cracks must be repaired.
- To strengthen the plaster, use reinforcing mesh.
- After plastering, you cannot immediately heat the stove, otherwise the coating may crack. You need to wait until it dries completely.
For high-quality plastering of the stove, the main thing is to mix the solution correctly - it should not be too liquid or thick. Following the instructions will allow you to avoid common mistakes and get a durable and aesthetic lining for your home stove.
Tile installation:
- Surface preparation is standard - if the stove has old plaster or finishing, it is knocked down with a chisel and cleaned with metal brushes, and then dusted.
- Then the joints are grouted - if it is decided to install the tiles on a grid with grouting
- Prepare the adhesive composition according to the instructions. Pour the dry mixtures into the water, portionwise, with constant stirring. The speed of the drill or mixer is adjusted so that the glue does not foam; air is not needed in the structure. Leave the glue for as many minutes as indicated in the preparation instructions - usually up to 15 minutes.
- Start facing from the bottom. Apply glue or primer (if cladding is done using jointing) for four tiles horizontally. Fix the reinforcing mesh. Along cut seams - on wire staples, without cutting - on dowels.
- The adhesive is applied with a notched trowel, the first tile is pressed and slightly rotated to secure it tightly. Crosses are used to calibrate seams, but not all craftsmen recommend crosses, and some designs involve the illusion of unevenness of the seams - to imitate ancient masonry.
- Verify the horizontality of the tiles using a level, then the vertical. The first row is the most responsible. Deviations are corrected carefully by moving the tiles with light blows with a rubber hammer. Seams for different types of tiles can be from 8 to 12 mm, except for clinker ones, the thermal expansion of which is so insignificant that a neat seam of only 3 mm is possible. All tiles of the first grip are verified with a level and plumb line.
- The first three rows of tiles after laying should be left until the adhesive composition sets. Plastic adhesive may not hold heavy tiles, and the trim will slide off from its own weight. Furnace linings do not require high speeds. Pauses between grips are about three hours, depending on the properties of the glue or solution used.
- For fitting and trimming, use tile cutters or a grinder. They usually try to hide the cut tiles adjacent to the wall or in other inconspicuous areas.
- After the glue has completely set - after 24 hours, remove the crosses and clean the seams from glue deposits.
Grout the seams only after the glue has completely cured, according to the instructions for the composition, otherwise you may end up with microcracks in the grout or the tiles peeling off. Mineral grouting is done manually - with a spatula, or with a mounting gun if the seam is made convex. Grouting with silicone compounds is very sticky and is only possible with the use of mounting guns.
The first fire is possible only after the glue has completely cured, from a week to a month, depending on the composition used.
Surface preparation process
It is important to start work by treating the surface of the oven. If there is old plaster on it, it must be removed
Exposed brickwork must be perfectly clean. You can use a spatula to clean it. The surface must be cleaned carefully, avoiding sudden movements that could damage the masonry.
If cracks are found on the surface, they should be treated with special oven glue.
To treat cracks, the glue is brought to a thick sour cream state, after which the surface must be cleaned of dust using a brush
Then, it is important to moisten the same brush with water and treat the holes. Next, this defect must be treated with glue using a spatula
After all defects have been eliminated, it is necessary to apply a primer mixture to the working surface. An acrylate mixture is suitable, which is capable of penetrating deeply into the material, filling all the pores, and forming a film on the surface.
This will ensure a stronger connection between the primer and putty. The mixture should be applied with a brush and rubbed in. After this, you need to dry the oven, leaving it on for a day.
How to plaster a stove: instructions
Before starting work, carefully prepare the base, because the quality and service life of the plaster layer will depend on this. The walls of the stove or fireplace are freed from the old coating - knock it down with a chisel and hammer. The seams are well cleaned with a brush to remove pieces of plaster and sweep away dust. If the masonry is fresh, remove any adhering and escaped drops of mortar, which can lead to detachment of the new plaster.
The old paint is completely removed. Irregularities and cracks in the bricks are covered up, masonry joints, on the contrary, are deepened by 5-10 mm. If the base is too smooth, small notches are made on it. The walls of the stove or fireplace are primed 2-3 times. The seams are especially well coated with primer.
Reinforcement
If the oven walls are uneven, you will have to apply several layers of plaster. In this case, the frame must be reinforced, otherwise the solution may peel off and crack. Purchase a mesh made of metal or fiberglass with medium-sized cells (1.5-2 cm). The metal material is secured using nails with wide heads, driving them directly between the bricks.
Reinforcing mesh for oven
Fiberglass is attached to a mortar or heat-resistant tile adhesive. To ensure perfect alignment, steel or aluminum corners with perforations are glued to the corners of the stove. In case of sharp unevenness of the walls, plaster is carried out along beacons, which are placed on top of the reinforcing mesh on small piles of gypsum mixture. Beacons are installed according to the level, having previously determined the point of greatest deviation of the plane.
Spray
To properly level the walls, it is necessary that the plaster layer be at least 8-10 mm - this is the only way to get rid of significant distortions. After the mesh is fixed to the surface and the beacons are placed, the oven is heated to a warm state.
Then spray the walls of the oven with water using a wide brush and make a spray. This is the first layer of plaster, up to 4-5 mm thick, which is literally thrown onto the wall. The spray solution has the consistency of medium thick sour cream. After filling the entire area, the plaster is leveled without much effort, but paying attention to the high-quality filling of masonry joints. Allow the composition to dry thoroughly.
Leveling and covering
After the first layer has dried, further work begins. Apply the solution with a spatula or trowel between the beacons, starting from the bottom of each wall, and immediately level it using a small rule. After treating one area, proceed to the next until the entire surface is covered with the solution. Allow the leveling layer to dry, then proceed to covering.
The covering layer is only 1.5-2 mm thick, so the solution for it is made more liquid. It is needed to perfectly level the surface before painting. If you plan to glue tiles, covering is not necessary. As this stage of work is completed, the beacons are removed and the holes are sealed with plaster mixture. The corners are carefully treated with an angle spatula, rounded for your own safety.
Grout
While the surface has not yet completely dried, they begin grouting work. Grinding is carried out with a construction float or matting, not forgetting to regularly moisten the device with water. Move the tool in a circular motion, increasing the pressure in the depressions and decreasing it in the pits. To reduce the risk of cracking of the layer, experienced craftsmen, after finishing plastering work, cover the oven with damp burlap. As a result, it dries more evenly, which improves the quality of the result.
General rules for carrying out work
Before directly plastering the stove onto the work surface, the following work must be completed.
- The plaster must be stirred to achieve a homogeneous mass and the consistency of thick sour cream.
It is important to remove all contaminants from the working surface of the stove (dust, remnants of the previous plaster that were used when laying the stove). To improve the “grip of the mortar”, you need to clear the masonry seams to a depth of about fifty millimeters
Before application, it is important to heat the oven a little in order to achieve 20–25 degrees of heat; On warm walls, the plaster will lie more evenly, and an excellent level of quality will be achieved.
After all the preparatory procedures, you need to proceed to the main part:
- Additional surface cleaning.
- Treatment of cracks.
- Surface primer.
- Installation of reinforcing mesh.
- Plastering the stove
Plastering stoves with your own hands
When building a stove or creating a fireplace, you will need to decide not only on their design, but also on the facing material, mortar for fireplaces and stoves, chimney, and backing brick. A direct component of the process of creating a fireplace or stove is the solution for lining the stove or fireplace. The appearance of unlined stoves, as a rule, is not aesthetically pleasing; in addition, dust accumulates in the masonry seams, which, when the stove is heated, becomes a source of unpleasant odors. You can avoid such unpleasant consequences by plastering the stoves yourself or by covering them with decorative ceramics, tiles, glazed tiles, etc.
Composition of solutions for plastering ovens
The composition of mixtures for stoves and fireplaces may be different. To plaster the stove, you can use simple clay or complex mortars: lime-clay-sand, lime-gypsum, cement-clay-sand. The mortar for plastering the stove can be prepared either independently or purchased ready-made. Which dry mixes for the oven should you prefer in your case?
Plastering stoves with clay is the most common application. Plastering of the front surfaces of the structure begins after the brickwork has completely hardened, when the possibility of its further shrinkage is excluded. As a rule, this requires at least a month. Properly prepared composition of the mortar for plastering the stove is a guarantee of a long service life.
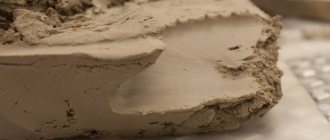
To prepare a clay solution, the clay must be soaked the day before work begins so that it absorbs water. The sand is pre-sifted. A mixture consisting of soaked clay, sand and water is stirred with a hammer drill with a mixing attachment until a homogeneous mass is obtained.
The amount of sand required for mixing into the clay is determined by its fat content. At a high value of this indicator, the proportion of the constituent components of the mixture is either 1/3 or 1/4. The strength of the plaster is increased by adding crushed glass fiber or asbestos fiber (0.1/0.2 share) to the clay solution.
PLEASE ATTENTION: a high-quality solution for plastering a stove should lie relatively easily on its surface and at the same time be smoothed out well
How to properly lay plaster on the surface of the stove?
The start of work is preceded by cleaning the front surface of the structure from dirt, dust and remnants of masonry mortar. To improve the adhesion of the mortar to the brickwork surface, first clear the seams to a depth of about 0.5 cm. Before lining, the oven is heated so that the mortar is applied to the warm walls.
How to prepare plaster for a stove? Below are the proportions of the most common types of plaster mixtures for plastering stoves:
Some subtleties of plastering a stove with a mixture of sand and clay
When plastering stoves with your own hands, it is important to take into account several main points, on which the quality of the work largely depends:
- It is not recommended to plaster a newly erected stove. The structure must go through the drying and shrinking stage. For this purpose, the stove must be heated regularly for 2-3 months, after which finishing work can begin.
- It is best to paint plastered stove walls with water-based paints. The use of other formulations may cause the release of harmful substances and unpleasant odors.
- All materials used to decorate stove walls must have a natural base so as not to pose a danger to human health.
All the methods described for plastering a stove cannot be called simple for independent use. Therefore, in the absence of initial knowledge and experience, it is better to entrust the plastering of a brick stove to professional craftsmen. In this case, you can get a high-quality result and avoid unnecessary consumption of materials.
Necessary tool
When carrying out work on plastering the stove on your own, you should prepare in advance the appropriate tools and containers for the solution:
- trowel or plaster spatula;
- falcon;
- grater and grater;
- rule;
- metal brush;
- brush or brush for wetting the surface;
- construction mixer;
- corner rail.
When preparing the solution, you will need a shovel, scoop, measuring containers, sieve, scales, and a container for mixing ingredients. It is better to control the leveling of the surface using a building level. A chisel and hammer may be useful for removing old plaster. A vacuum cleaner will help get rid of dust.
Set of tools and materials for plastering
To plaster a heating stove in a private house or bathhouse, you need to prepare the following set of tools and materials:
- Spatulas of various widths for taking out plaster composition and treating surfaces.
- Trowel (trowel) for distributing the composition on brick and stone walls.
- Grater (grater) for leveling treated surfaces.
- Hammer for driving nails. Nails are used to secure the mesh.
- Wire mesh with cells measuring 10×10 mm to strengthen the treated surface.
- Scissors for cutting mesh.
- Hammer (fist) for use together with a trojan, gear and chisel.
- A trowel for leveling the surface after plastering.
- Chisel for applying notches that increase the adhesion of the composition to the surface.
- Brushes of various sizes.
- An electric drill with a mixing attachment for preparing the plaster mixture.
- Volume container for kneading.
- A wire brush for cleaning surfaces and joints.
- Dry mixtures for mixing plaster.
- Deep penetration antifungal primer.
- Asbestos to increase the stability of the composition.
- Lime for whitewashing.
- Level, rule and staff for leveling corners.
- Personal protective equipment – rubber gloves, goggles.
Choosing the composition of the plaster
The question of how to plaster brick stove walls is the most important one when planning such an event. It should be said right away that the usual cement-sand mortar used for plastering the walls of a building is not suitable for stoves. It will simply crack in a very short time. For plaster, you can use a ready-made mixture intended specifically for this purpose, or prepare it yourself, but according to a special recipe.
To solve the question of what to plaster with, simple 2-3-component mixtures and complex compositions with the addition of various ingredients (fiberglass, asbestos, salts, plasticizers, etc.) can be used. The composition of the mortar also depends on the type of brick used for the construction of the stoves (fireclay, red brick, silicate varieties, etc.). Certain components added to the plaster increase its adhesion to the material.
If you decide to use ready-made materials, then you need to purchase a stove or fireplace plaster mixture. All the necessary ingredients have already been added to it, and preparation for application consists of diluting it with water in the proportion specified in the instructions. When using them, one caveat should be taken into account: their long-term storage is undesirable, since atmospheric moisture can lead to premature hardening of the mixture in the form of poorly soluble lumps.
Most often, homemade solutions for plastering stoves are prepared of the following types:
- clay;
- lime-clay;
- calcareous-sandy-clayey,
- lime-gypsum;
- cement-sand-clay.
The practice of furnace construction shows that it is precisely such compositions that are least susceptible to cracking when heated. Other additives are also introduced to improve properties.
When preparing the solution, it is important to choose the correct proportions of ingredients. Precisely selected composition allows you to easily and evenly apply a thin layer to the stove wall
In particular, a certain consistency of the composition is used as grout. The viscosity of the solution is regulated by the proportions of water, the plasticity largely depends on the amount of sand, and the more sand there is, the less elasticity of the mass.
Algorithm of actions when applying plaster
Good finishing of furnace equipment is within the power of inexperienced craftsmen. It is important to understand the process and use quality products. Then the stove structure will retain its original appearance for a long time.
Required Tools
You should figure out how to plaster a stove and prepare all the required tools and raw materials in advance.
For the workflow you need to acquire:
- trowel, trowel;
- grater;
- hammer;
- spatula, chisel;
- pliers;
- spray bottle for wetting walls;
- scissors for cutting fabric, metal;
- a coarse type of sieve to sift raw materials;
- container for material, liquid;
- scoop for composition;
- with a broom.
The list of tools also includes finishing for the furnace structure, reinforcing mesh with 10x10 mm cells, lime, and cement raw materials.
Mixing mortar and do-it-yourself beacons
There are different types of plasters for mixing yourself, which can be used to plaster the walls of furnace equipment.
- Made from clay.
- Made from fireclay clay.
- With the introduction of cement.
To mix a clay solution, the raw material is initially soaked in warm water until it swells. No stirring is required; straining before adding sand is enough. The material is prepared from 1 part clay and 2-2.5 measures of sand. The readiness of the mixture is determined by the appearance of clots that stick to the stick. An increase in adhesive properties and surface hardening are achieved by introducing 10% asbestos and fiberglass into the composition.
The ready-made clay mortar for plastering the stove has the following features:
- easy to apply;
- has great flexibility;
- the material is endowed with high strength when dry.
Fireclay clay (kaloin) is a cracking raw material, since fireclay loses its elasticity when exposed to elevated temperatures. Elimination of the defect is carried out by introducing quartz sand into the composition - a special adhesive with fiberglass crumbs for strengthening.
There are different recipes for preparing a mixture of fireclay clay.
- Fireclay clay 1 part + 2-4 measures of fireclay sand, crushed stone.
- Fireclay clay 1 part + 3-5 measures of quartz sand.
The volume of liquid is taken according to the instructions from the fireclay manufacturer. After mixing all the ingredients, the container is closed to prevent excessive evaporation of the liquid and left for 3 days. The paste is then mixed and can be used.
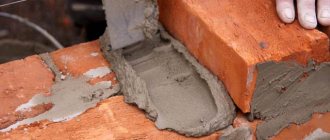
Using a clay mixture, it is possible to mix a cement composition for furnace equipment. Clay with sand and cement are taken in a ratio of 1:2:1. The main volume of the solution is combined in small volumes, determined by the speed of drying of the plastic composition. After an hour, this mixture will harden and will be unusable. No need to skimp on strength. Cement grade 400 or more is used as the base.
Beacons for plastering are taken at a lower height relative to the size of the ground cover. They are pressed into the stamps. The ridge of the beacon should become level with the flat tops of the marks. The set marks are smeared on the sides with a spatula. Beacons are placed one by one, up to 3 pieces.
Stripping and pinning
Finishing of new furnace equipment is permitted no earlier than 30 days after installation. During this period, the stove will dry completely and the shrinkage procedure of the building will end.
Before the plastering procedure, the external walls are cleaned of remaining material using a spatula or chisel. Sandpaper is used to smooth out minor irregularities. Dust is removed with a dry cloth.
The seam areas are deepened to 10 mm to improve the adhesion of the masonry to the material. The pinning and chipping is carried out by making blows using the blade of a hatchet. The holes are made up to 3 mm deep, with an interval of 2-3 cm. Then the walls of the stove are cleaned of dust with a stiff brush.
Before plastering begins, the oven is heated well, then cooled halfway and immediately moistened. To moisten the surface, use a spray bottle with liquid or liquid lime milk.
It is recommended to cover a brick or stone wall with a reinforcing mesh, which will increase the strength of the plaster coating, impart adhesion, and prevent the appearance of cracks. The mesh is necessary if the plans later cover the structure with tiles.
Applying plaster
The finishing procedure is carried out in stages, during each stage 1 layer of the composition is applied.
- Spray - is a primary thin coating, involves throwing without leveling. The spray mixture is diluted with liquid to thick sour cream. The purpose of the coating is to fill uneven areas and prepare the walls for the main coatings.
- Soil is the second coating. Place it after the spray has adhered, not allowing it to dry out. The thick composition is placed on the plane with a trowel and leveled with a grater. The soil is applied at a thickness of 3-4 mm.
- The final stage is the application of a small layer of very liquid plaster composition. The thin composition eliminates defects. The last layer, the covering, is placed in a thickness of no more than 2 mm.
The covering is replaced using decorative plastering as painting or cladding. Then the finishing coating involves the use of compounds made of stone, terrazite, lime and sand with the introduction of heat-resistant pigments.
Features of the problem
Why is it recommended to plaster a brick oven? In terms of increasing the reliability of the entire structure, it is necessary to note the fact that the plastered brick is protected from the direct influence of aggressive bath factors (temperature changes, moisture, steam). The brickwork itself increases the strength and tightness of the seams. The bonding material is less susceptible to cracking. 2 important reason - improved appearance. After plastering, the stove has a smooth wall surface, which gives it neatness and makes it possible to create a specific interior.
//www.youtube.com/watch?v=kXcpeiwD3dw
Brick oven plaster has its own specific characteristics. First of all, this is due to the high temperature on the walls during its operation. The plastered layer must withstand the following influences: prolonged heating and open flame, temperature changes, mechanical influences, smoke and steam, oil splashes during cooking. As the oven heats up, the brickwork tends to expand significantly, and therefore the plaster solution for ovens must have increased elasticity in order to withstand such loads without cracking.
One of the functions of the stove is to heat the room. This condition dictates one more requirement for stove plaster - good thermal conductivity. If additional significant energy is required to heat this layer, then the efficiency of the entire structure will significantly decrease. In addition, when heated, the material used for plaster should not release substances harmful to the human body.
Purchased heat-resistant mixtures
Ready-made stove plaster can also be used for finishing. There are many varieties of such mixtures. But the most popular are “Pechnik” and “Terracotta”. The advantage of such plasters in comparison with those prepared by hand is a high degree of heat resistance. “Pechnik” and “Terracotta” are able to withstand temperatures up to 200 degrees.
Whatever mixture is used for plastering the stove, purchased or homemade, there is no need to prepare a large amount of it at once. The volume of a single serving should not exceed 8-10 liters. In any case, the solution needs to be developed in a maximum of 2-2.5 hours.
Finishing stoves and fireplaces after plastering
How to paint a plastered stove?
In the future, the plastered surface can simply be whitewashed with water-based emulsion, lime, chalk, painted with heat-resistant paint, colored varnish and decorated with stucco. Since oil solutions darken faster when exposed to temperature, it is better to use pentaphthalic paint or nitro enamel.
Please note that all heat-resistant compounds have a very strong odor and release toxic substances when dry, so it is better to work with them in a respirator. Such compositions take longer to dry than conventional ones.
Decorative plaster
As decorative materials, you can use mineral compositions such as Bayramix, Misan, Ortner, etc. The surface of a stove or fireplace, finished with stucco or a rough decorative primer, and then treated with latex water-dispersed dyes, looks very original.
Another interesting option is to add brick flour to the water-based emulsion and then coat it with colorless heat-resistant varnish. For decoration, special plastic stamps for plaster are also used, with the help of which all kinds of embossing are made on the surface. Material costs with this method are minimal, and a stove or fireplace finished in this way looks simply great.
Tiles and tiles
As mentioned above, ceramic tiles can only be glued to those walls of fireplaces and stoves that do not heat up very much, for example, to a fireplace chimney. Even heat-resistant tile adhesive will not last long on hot surfaces.
Tiles have been used for hot stove walls for centuries. This is a special ceramic tile with a rumpa - a frame on the back side, which is filled with clay or sand. In the walls of the pump there are holes for attaching the tile to the stove masonry with wire or pins.
This type of finishing has many advantages:
- The thermal cushion of the pump allows you to retain heat longer without additional heating;
- protection from burns and fire at home;
- reliable mechanical fastening will not allow the tiles to fall off;
- a beautiful front side will turn the stove from a heating device into a home decoration;
- The surface covered with enamel or glaze is easy to clean.
Tiles are not only a functional solution for cladding, but also a way to create a unique interior for your home.
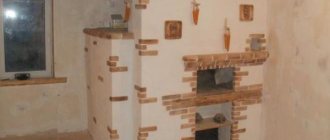
So, finishing stoves and fireplaces with your own hands is not such a difficult process. If the sequence of work is followed and the correct choice of mixture for plastering and final finishing, such a structure can be turned into an original and unusual part of the interior.
Decorative finishing
The decorative design of the stove walls is carried out in accordance with the taste preferences of the owner. An evenly plastered surface can simply be whitewashed; by the way, whitewashing is a traditional finishing method that has been used since ancient times. The whitewashed surface was often painted with imported paints, giving the room originality and emphasizing national traditions. In most cases, the ornament was selected according to local traditions.
Modern technologies and materials make it possible to create an imitation of natural stone or a uniform relief structure on the surface of the stove wall.
Quite often, craftsmen with a wide imagination decorate stoves with elements of three-dimensional designs, using various available means for this purpose. In particular, we are talking about plastic film, brushes, brushes and other materials and objects.
Creative people create relief compositions from decorative plaster, allowing them to protrude slightly beyond the stove walls. Subsequently, all this is covered with paints. Moreover, applying the coloring composition to wet decorative plaster promotes deeper penetration and increases the service life of the decorative finish.
In some cases, the dried surface is additionally painted, which allows for a brighter design.
Terracotta or ceramic tiles can be used as decorative finishing for stove walls. The additional purchase of corner finishing elements makes the installation of tiles and decoration simpler and more convenient, allowing you to obtain neat and aesthetic corners. The tiles are installed using a special cement-based adhesive composition, which is resistant to temperature changes.
Furnace painting
So, now you know how to plaster a stove so it doesn’t crack. Of course, after the applied solution has dried, its surface must also be whitened. It is best to use a milk-chalk mixture for this purpose. This whitewash tolerates temperature changes well and also does not get dirty. In order to prepare it, you just need to mix 1 kg of crushed chalk with 2 liters of milk. You can also paint the stove with regular lime. This finish will also not deteriorate due to high temperatures. In order for the lime to stick better to a hot surface, you can add a little table salt (35 g per 1 kg).
You cannot paint stoves and fireplaces using oil paint. The drying oil contained in such paints will begin to evaporate at high temperatures, and an unpleasant odor will appear in the room.
Types of tile layout can be different:
- Vertical seams match. This layout is for tiles of the same size. If rectangular tiles are installed, then the layout can be both vertical and horizontal, while you can lay out colored contrasting zones and insert panels - it looks linear and neat
- Bandaging, or displacement along vertical seams. Used in geometrically complex areas so that trimmed fragments are not noticeable
- Diagonally. Artistic and complex layout, allowing for rare designs. Very original, but you will need about 10-15% more tiles, a lot of trimming and waste
- Tiles of different sizes are laid out in checkers, carpets, highlighting fragments and contrasting zones, panels and decorative elements are possible
Preparation of the solution
If you want to save money, make your own mortar for plastering stoves: the proportions and preparation technology are below.
Simple solution
Prepare a simple mixture like this: sift the sand, mix it with clay, pour it into a container, add water and stir with a mixer until creamy.
The proportions of clay and sand for plastering stoves depend on the fat content of the clay. If it is oily, add 3-4 parts of sand to one part. To determine the fat content of clay, put it in a bucket, pour in water and at the same time stir until creamy. Then scoop up a little with a board. If the clay covers it by 1 mm, it means it is not greasy. If it’s in a thick layer, it’s oily.
How to cover up cracks?
You can cover the stove with a purchased mixture or a solution you prepare yourself. Further about the features of the options.
Sand-clay mixture
Putty made of clay and sand is the most accessible and inexpensive option. Scheme for preparing the mixture:
- you need to take clay and fill it with water in a ratio of 1:3; after this you need to leave the mixture for at least a day;
- The clay should be thoroughly mixed, adding liquid from time to time; after kneading, strain with a fine-mesh sieve and tincture again (several hours);
- after the next infusion, you need to drain the water and make sure that the mass has a creamy consistency;
- you need to mix clay and sand - first in equal proportions.
Readiness is determined using an object used to mix the solution. If too much clay sticks to it, add a little sand. As a result, the ratio of components can be from 1:1 to 1:2.5. The composition can be considered ready when a small amount of the viscous component remains on the stick.
This recipe is approximate as clays can vary greatly. It is best to rely not on a stick with stuck clay, but on the result of experiments. Experienced craftsmen make grout with different compositions. After this, several different types of cakes are dried in a place free from sun and wind. Those pieces that are not cracked are dropped from a meter height. “Surviving” flatbreads demonstrate the optimal ratio of components.
Fireclay putty
Bag of fireclay clay
A slightly more expensive, but also more effective option. Fireclay clay is very heat-resistant and durable. Most often, fireclay is used for stove repairs. The material is sold by construction stores. Before sealing the structure, purchased clay is infused in water for a couple of days.
Oven adhesive
If you need the best option, use a special mixture for ovens. The solution consists of fire-resistant cement and fireclay powder. There are two main types of glue you can buy in supermarkets - viscous and hard. If you are looking for something to cover up small cracks on the stove, purchase the first type. Solid mixtures are used for plastering.
The main advantage of factory materials is the optimal ratio of components and very thorough mixing. It is impossible to achieve such quality at home. In addition, there is no need to waste time preparing grout. Another advantage of ready-made compositions is quick setting.
An alternative option is oven grout.
Factory solutions are good for everyone, except for the price. There is another opportunity to save money - use putty prepared according to the following recipe:
- the clay is broken into small lumps and infused in water for about 12 hours;
- sand is added to the mixture of water and clay, after which the components are thoroughly mixed;
- during the mixing process, crushed straw is added to the composition from time to time, which reinforces the solution;
- After the mixture becomes homogeneous, salt is added to it (about a pack).
The ratio of sand and clay is 1:4. You need about 10-15 kg of straw per bucket of clay. It is easy to see that this is a modified version of the sand-clay mixture described above.
Covering
The last layer of plaster is necessary in order to completely level the surface of the stove. The primer needs to be moistened quite generously before applying it. The solution in this case should be used even less thick than for the first two layers. The mixture should fill absolutely all cracks and irregularities remaining on the surface. The thickness of the covering layer can be from 2 to 5 mm. It is impossible to level the stove in planes with plaster. Ultimately, the total thickness of the finishing layer should be no more than 1-1.5 cm. When laying out brick stoves for your home with your own hands, this should be kept in mind. When performing this work, you should initially try to make the walls as even as possible.
