My experience
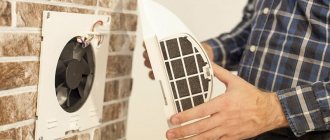
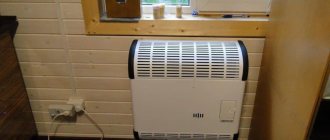
When I lived in an apartment in the city, we had a recuperator. It was Ukrainian Prana. They installed it because the road was nearby and it was difficult to ventilate due to the noise.
This is what she looked like
Since then I know that a recuperator is a thing. Always fresh air, no problems with humidity. Always a fresh mind, great sleep.
Of the minuses: such a recuperator worked on a small area - 40 m2 is the ceiling. And the noise you get used to, but still.
By the way, there is a Prana model for country houses. She's bigger. And the air intake is carried out through a separate hose from the opposite part of the house.
Rules for choosing a recuperator
Devices are selected by power in order to cope with sub-zero temperatures in winter.
When considering a model for purchase, you need to evaluate how well its characteristics correspond to the data of the room in which you plan to install the device (height, area, required exchange rate). To calculate these parameters, it is advisable to contact a professional, since this procedure requires good knowledge of building codes and the laws of air flow, and replacing the device if there is an error in the calculations will be expensive.
It is important to determine how much air in cubic meters should enter the room in 1 hour. According to sanitary standards, the minimum value is 30 m2 per person. In reality, this indicator, associated with the performance of the device, will be higher due to a large number of costs: air duct resistance, size of the room served, etc.
When choosing, attention is also paid to the sensitivity and reliability of the automation unit. Many modern appliances are equipped with one or another additional functions: regulation of the power of ventilation devices, air flow pressure (the amount of carbon dioxide in the hood is estimated), etc.
The degree of noise generation of the device should be assessed.
Some devices are wall-mounted, others are floor-mounted. There are horizontal models. A suitable design is selected depending on the installation location and system parameters.
Homemade option number 1
In my opinion this is one of the best solutions.
From the comments to the video:
The recuperator is awesome! The efficiency is excellent. The total heat exchange area is 2 m2. The condensate was drained correctly. Easy to clean by rinsing. There is nothing to rust. The budget is cheap. And I think, due to the fact that the thermal conductivity of plastic is lower than steel, the dew point is distributed over a greater length and the falling condensate will freeze more distributed along the length in winter. It will be easier for the air flow to blow away the frost. Some advantages... It will freeze in winter, reinforced concrete. This is not a question for the recuperator, this is physics... I myself have 2 of these. To solve the freezing problem, it is necessary to take in air through the ground. To shift the dew point into the ground channel of the pipe. Or simply turn off the supply fan for a while, warming up the recuperator. Or radically, use a hairdryer for 5 minutes... but these are all crutches. Frost grows quickly. There are indeed processes that blow away frost crystals, but they are only in theory... in practice they don’t work at all, maybe because it’s metal. Only soil will solve the problem, or reheating the incoming one. The point must be made.
The formula for the area of a circle S=πR² will help you. So you need to divide the area of a 160-diameter pipe by the sum of the areas of all your 40k pipes. And this figure should ideally be equal to 2. Fans must be for supply and return and must have the same flow rate by cubic capacity. And each hour must pump a volume equal to the volume of your entire house. Both the entrance and exit of the recuperator, both in the house and on the street, must be spaced as far as possible from each other. In a house, it is generally advisable to go to different corners diagonally. Otherwise, the whole undertaking will almost be in vain. So that’s what I wanted to point you at, it looks like you have an overabundance of tubes, there should be fewer of them
Everything is fine, but I’ll add my 5 cents. The main resistance in your version is on the filters, and it will increase, especially on the exhaust filter. Larger area, bag-type filters are needed; they provide less resistance and require less maintenance. The main thing I concluded is that it is necessary to replace external 90-degree turns on the street with smooth 2*45)).
Making a recuperator with your own hands
Homemade recuperator from a plastic pipe
An air recuperator for a private home can be made with your own hands from different materials. Sometimes enthusiasts assemble devices using sewer pipes as a basis. You can make a recuperator out of foil. Plate devices are distinguished by their simplicity of execution and at the same time efficiency. Blanks for flat elements can be aluminum or made of polycarbonate.
When making a recuperator for an apartment with your own hands using sheet aluminum, it is preferable to use thin raw materials - in this case, heat exchange is more efficient. In addition to sheets of metal, a homemade recuperator requires the preparation of materials and tools:
- mineral wool 2-3 cm;
- wooden slats 2 mm thick and 10 mm wide;
- plywood sheets for the body;
- sealing and adhesive compositions;
- fan;
- 2 pairs of flange elements (for the tube section);
- hardware.
The height is adjusted according to the total number of plates and their thickness when fastened to the slatted elements. The diagonal parameter is made identical to the width of the heat exchange element.
Schemes and drawings
Drawing of a recuperator for self-production
Drawings for a do-it-yourself recuperator also include a blank for the plate. The side of the square is usually made 0.2-0.3 m. The total number of plates should be at least 80. For them, slats are also prepared according to the dimensions of the sides of the square. They are coated with drying oil and connected to the inside of each plate using glue. Only one metal square is left without a rail.
The components are connected to each other. It is advisable to alternate horizontally and vertically located plates so that each is at right angles to its neighbors. This increases the efficiency of the device. A square without a frame is placed on top. The cracks must be filled with a sealing compound.
Flange fasteners are made and the structure is placed in a pre-fabricated housing. The heat exchange element should rest against the side walls with its corners, like a diamond. Holes are made in the device for flange parts, and in the lower part there is a hole for removing condensed moisture through a hose. Then the homemade air recuperator is covered with mineral wool. Connect the device.
Synchronous switching option
Pros and cons of this solution:
- No condensation
- There is no channel from the heat exchanger to another corner of the apartment. This is a big plus. There is no need to run an air duct under the ceiling.
As an idea: 220 fans with a Chinese receiver (car lock). The central unit has a remote control for the auto lock and simply sends a signal, and fans throughout the house receive it and switch. No transformers.
Weak spots
- There is no clarity on the characteristics: degrees, heat capacity and cubic meters. Perhaps with an increase in air exchange, the indicators will not be so beautiful.
- Electronics, although simple, is still a complication
- There are concerns that ice may disrupt the operation of the device in winter. In Pran, this issue was solved simply: a slight tilt towards the street + heating of the incoming air with a power of 60 W. According to the instructions, this heating should work when the outside temperature is below zero. And yet, once he froze some ice and a trickle of condensation ran down the wall inside the apartment.
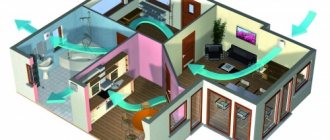
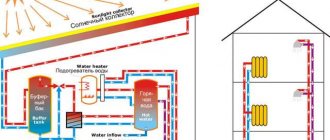
What is a recuperator
A recuperator is a device built into ventilation to heat air.
The devices transfer heat from already heated air masses to cold ones coming from the external environment.
Heat exchangers for recuperators come in several types of designs. The most common are plate and tubular recuperators.
The economic effect of using the device is determined by the investment in its installation and maintenance, as well as the planned duration of operation.
Option 5. Pipe in a pipe, but more compact
The walls are made of EPS, the pipe is a regular ventilation pipe 100mm.
The author has not done any tests yet. I just assembled a box with pipes without a fan:
I assume that the key issue will be with the removal of condensate, which will form in 1-2-3 cavities.
However, the idea is brilliant due to its cheap cost, ease of maintenance and replacement of its parts. After all, the accumulation of dust and bacteria will need to be removed periodically. This can be done simply by replacing the corrugation.
How to increase efficiency
Careful assembly and attention to detail when creating a homemade heat exchanger will allow you to achieve good efficiency indicators. However, the assembled air recuperator with your own hands can be significantly improved and its efficiency increased. To do this, when calculating the design and its implementation, it is necessary to provide for the following nuances:
- Maximum sealing of the device;
- Use of high-quality heat-insulating materials;
- Increase the size of the recuperator and the area of the heat exchange surface. This will reduce the speed of air passing through the device, and accordingly allow it to warm up or cool down better;
- The use of corrugated plates or plates with stampings, which will significantly increase the heat transfer surface area while maintaining the total volume of the device;
- Increasing the exhaust volume compared to the inflow. Thus, a larger volume of outgoing air will better transfer heat to a smaller volume of incoming air.
A do-it-yourself air recuperator is a simple, affordable, cheap and effective way to save expensive thermal energy and effectively use irreplaceable natural resources.
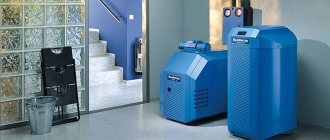
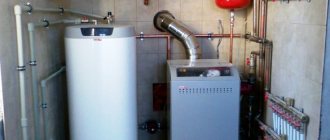
Duct
The recuperator is a pipe structure that is installed in a channel laid in the wall. Some models have a “reheat” function.
- A completely autonomous device that only requires an electrical connection.
- Easy to install.
- Simplicity of calculations (selection of power according to the volume of the room).
- Compact - does not require additional space (located inside the wall).
- Serviced only in workshops.
- Laying a channel in the wall (diameter from 150 mm).
- Serves only one room.
- Relatively high noise level.
The common factor for both types is that they can use different types of heat exchangers. They also provide for the optional installation of various filters.
A more important feature of a recuperator is the type of heat exchanger that is installed in it. This parameter often becomes decisive when choosing a unit. Please take time to consider this issue as there may be significant differences in performance and functionality. Let's consider the options for installing a heat exchanger. When assessing the advantages and disadvantages, we will take into account that each of the systems requires air supply fans. Also a common symptom will be the formation of condensation (to varying degrees).
Frame.
I’ll tell you right away to make a housing for the recuperator from several heat exchangers or larger ones, preferably from plywood covered with insulation. But my heat exchanger is not very large and not heavy, and the most important thing is that good thermal insulation is required, because... be in a cold attic.
In general, the body was made from two sheets of XPS (extruded polystyrene foam), glued and tightened with self-tapping screws while the glue was tacked.
The lid is pressed using self-tapping screws screwed into these dowels
The xps case with a wall thickness of 5 cm is quite durable and lightweight.
The housing has 4 holes for air ducts with a diameter of 100 mm, two filters are installed for the exhaust and supply, filtek class G4 on the mesh
https://www.wesmir.com/filters
All joints are sealed with sealant based on MS-polymer (Leroy-Merlin is full)
Temperature and humidity sensors are also installed (but more on that later)
On the side (in the photo), in reality it will be at the bottom, there is a pipe glued in for condensate drainage.