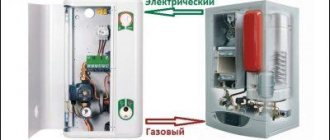
Buying expensive equipment for organizing heating in a rarely visited country house, bathhouse or small house is not always advisable. It is especially unreasonable if the country property is not constantly supervised and a security alarm is not installed. What to do if heating is still required from time to time?
A homemade gas boiler, assembled from scrap materials or used household units, can handle heating quite successfully. A device made with your own hands can become the pride of the owner. Building a gas-powered structure will show off your craftsmanship.
The article we have proposed describes in detail the steps for assembling and modernizing gas units that can adequately heat private buildings. We have given as examples the most popular, practice-tested homemade options. Our advice will ensure home craftsmen success in a difficult task.
The manufacturing process of an atmospheric gas burner
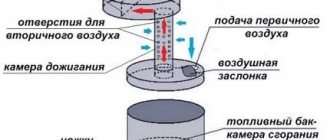
An atmospheric burner is easier to build, since it is structurally much simpler than its fan counterpart. The most typical example known to most Russians is the burner block in old-style geysers. There are no energy-dependent elements in its design that force gas and air to mix in the required proportions.
Air is drawn into the chamber with the atmospheric burner module spontaneously as needed. Blue fuel processing products are discharged naturally through a standard chimney due to the presence of draft. All the work consists of constructing a manifold with gas nozzles through which gas will flow at the required speed.
If you want to build a gas burner with your own hands, it is better to take a factory-made product as a basis, or rather, the drawing available in its technical passport with the dimensions and designation of structural elements
To make a burner with your own hands to equip a gas heating boiler, you will need:
- Valve series VK-74. Typically used on oxygen cylinders, designed for a maximum pressure of 20 mPa. The package should include a 3/4″ union nut, with which you can tightly connect to the gas supply pipe or hose. The valve will serve as a support base for fixing the nozzle.
- Nozzle cap. The device will hold the gas supply dispenser and form a narrowly directed jet. A hole is drilled at the top of the cap into which the nozzle is to be placed. The base screws onto the valve.
- Nozzle. It is better to buy it ready-made with the expectation of supplying main gas or a liquefied gas mixture. The injectors have different outlet diameters. Instead of nozzles for boilers, you can use a jet from a gas burner.
- Homemade injector. It is constructed from a steel tube with a wall thickness of up to 2 mm. You will need a piece of pipe approximately 10 cm long.
- Piezo element. It is installed at will, although you can do without it. Homemade products can be set on fire with matches.
All of the above elements are assembled mainly by welding. Therefore, skills and minimal knowledge in welding will be very useful for an enterprising “do-it-yourselfer”. However, where it is possible to use threads, it should remain a priority.
The gas supply channel must be impeccable and sealed, because safety depends on its condition. A distance of 10 cm must be maintained between the gas inlet into the device and the nozzle, which is necessary for mixing fuel with air.
Image gallery
Photo from
Large gas burner
Gas burner combustion process
Ignition of the atmospheric burner block
Burning oxygen indoors
The home craftsman just has to figure out how to secure a homemade gas burner in the combustion chamber of a used water heater or in the firebox of a former wood-burning boiler. Please note that you need to leave room for air flow. Air must be regularly supplied to the chamber, for which round or longitudinal holes must be cut in the door.
Do not forget that the above option can hardly be called a safe gas supply device. The design does not have automatic equipment that interrupts the operation of the boiler in case of blowing out or unstable flame. Owners will not have the opportunity to adjust the pressure and gas flow, so there can be no talk of either convenience or savings.
Types of water heaters
Popular models of gas water heaters that you can make yourself will help you choose the ideal option for specific purposes. Currently, such structures can be of several types:
The last version of heating devices is the most popular among consumers. It is a boiler powered by a gas stove. Such designs guarantee their owners an uninterrupted supply of water, efficiency and durability of operation.
It’s not difficult to make a good heater from a gas stove with your own hands. Creating it requires a number of useful skills and tools. In addition to such devices, many craftsmen make excellent water heaters from gas cylinders. The design of these models standardly includes a heating element, a regulator, a nut and some additional elements.
A homemade balloon heater in these cases is a stationary container for heating and storing water. The devices operate on electricity. Their only drawback is the limited amount of heated liquid. Therefore, many owners of private housing construction prefer to make a gas water heater with their own hands from a stove.
Installing a gas burner in a solid fuel boiler
After sound reflection and a real assessment of their capabilities, most home craftsmen still give preference to the modernization of solid fuel boilers that previously processed firewood or coal. A factory-made gas burner is simply placed in their firebox.
To equip your country property, you can purchase a solid fuel unit, which can be converted into a gas one. For example, a Teplodar stove in which a gas burner is mounted
Let's consider the stages of installing a Teplodar AGG burner device:
- Dismantling the firebox door, the ashpan damper (or the ashpan itself, if it is made in the form of a drawer with a solid door), the bumper and the grate. In short, you need to remove all structural parts located within the firebox and ash pan.
- Fixing the burner device. A burner block is mounted in the firebox channel freed from the above elements. If the Teplodar stove is designed for changing fuel, then the burner module is fixed in the channel through standard ears with screws and nuts threaded into them.
- Connecting automation to the remote control. The devices included in the design of the burner block that ensure automatic operation of the boiler are connected to the control panel.
- Thermostat sensor mount. It is installed on the supply pipe, wrapped in insulation to protect against external mechanical and temperature influences, and on top with ties.
- Putting it into operation. It is carried out after checking the draft and burst ventilation of the room with a modernized boiler. Using a simple handle, you select the most suitable mode.
We remind you that in accordance with the requirements outlined in the “Safety Rules for Gas Distribution and Gas Consumption Systems”, all work on installing equipment, replacing burners, servicing equipment and connecting to the network supplying blue fuel must be carried out by gas workers.
The technical documentation attached to the Teplodar stove contains a detailed description of the process of installing a gas burner for converting a solid fuel unit into a gas one
In accordance with federal regulations and standards, it is necessary to conclude an agreement with representatives of gas services for the supply of gas and related services. It is clear that not all remote settlements will be able to be served by employees of gas organizations. However, it is advisable to adhere to the requirements in order to avoid catastrophic consequences.
When it decreases and suddenly goes out, the current coming from the electrical element is weakened, as a result of which the gas supply channel is blocked. Overheating of water in the boiler is detected by a temperature sensor, which transmits a signal to open the contact pair blocking the burner
Should you take risks or value and protect your health with the well-being of your loved ones? It's up to you to decide. It is wiser to refuse threatening measures, but knowing about the process of their implementation is very useful in order to monitor how efficiently and honestly the gas workers work.
Installation methods and types of fastenings
Currently, manufacturers produce two main types of gas boilers: instantaneous and storage. Products from Electrolux and Vector are especially popular among consumers. The device of this line can be located on the floor or on the wall. In the second case, various types of fastenings are used:
- dowels with fixation;
- metal hooks.
These elements are suitable for a reliable base of concrete or stone. For looser and thinner surfaces, other fastenings and installation methods should be used.
For example, on a wall made of plasterboard, it is better to install a reinforced boiler. For these purposes, you can use various materials:
- wood reinforcement;
- metal reinforcement;
- fastening with chemical anchors.
The choice of installation option directly depends on the experience of the technician, available tools and materials, as well as the size of the boiler.
Water heater made from polyethylene bottles
You can make a DIY water heater from ordinary plastic bottles in one day. They form the basis of the storage tank. The number of bottles depends on the desired capacity.
For installation you will need:
- sealant;
- PVC pipes;
- drill;
- two valves or taps with a ball design.
First of all, the bottles are prepared. A hole is drilled in the bottom of each, the diameter of which is equal to the diameter of the neck. The neck of another is inserted into the hole in the bottom of the bottle. This is how they connect. Each battery consists of 10 bottles. The number of batteries is unlimited. All joints are treated with sealant.
The finished modules are located on the south side of the roof on the internal waves of the slate covering. The output of each section is connected to a PVC pipe, which is located perpendicular to them. The cutting of each section is carried out in the same way as connecting bottles into a battery, followed by treating all joints with glue.
How to make a coil?
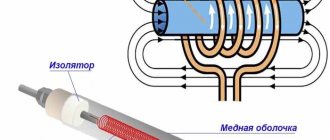
The coil is an important part of the device. It can be based on a metal or metal-plastic pipe with a small diameter. As a rule, copper or brass are used, as they have a high level of heat transfer. The manufacturer can choose the diameter of the coil at his discretion. The main condition is that its contact with water is maximum.
The serpentine tube is wound in a spiral onto a cylinder-shaped mandrel. For this purpose, a log or pipe with a large diameter is used. When winding the coil, it is necessary to monitor the turns. They shouldn't touch each other.
Do not make the winding tight, as it will be very difficult to remove the coil from the mandrel.
The number of turns on the coil is directly dependent on the volume and height of the tank. Typically, for every 10 liters, 1.5 kW of coil heating power is used.
Indirect heating boiler design
An indirect heating boiler is a storage tank that is not dependent on energy resources (gas, electricity, etc.). Inside the container, made of stainless steel, there is a heating element 1 in the shape of a spiral.
Cold water enters the tank through an inlet tube located at the bottom of the device. The water in the unit is heated using the moving coolant of the heating system. The hot water outlet pipe is located at the top. To make using the tank convenient, it is equipped with taps with a ball design. The outer part of the device is covered with heat-insulating material.
The water heater diagram is shown below.
The advantages of the unit include:
- possibility of connecting to a central heating system;
- installation near a heating boiler;
- low cash costs when installing the circuit;
- economical use of energy resources;
- water supply at a constant temperature.


