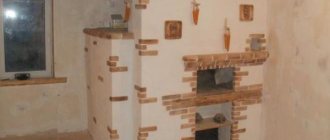
Why do you need to plaster a stove?
Any oven is based on a frame made of metal, bricks or clay. Fireplaces, unlike stoves, are also made of stone or concrete. All of these materials have different thermal conductivity and coefficient of thermal expansion, unequal service life, and differ in aesthetic properties. If the structure is not covered with a layer of finishing material on top, it can quickly lose its strength and attractiveness.
Without plastering or another type of finishing, over time the masonry joints will begin to crack. The same thing happens with the clay walls of the oven - a network of cracks appears on them, which will have to be covered regularly. The absence of a plaster layer leads to the penetration of smoke and soot through cracks and their settling on the walls of the house and furniture, which spoils the environment and pollutes the air.
Other purposes for which it is recommended to use stove plaster:
- increasing the strength of the entire structure and its resistance to destruction;
- optimization of heat transfer and improvement of thermal insulation;
- increasing the safety of using the stove;
- ensuring the tightness and durability of the masonry;
- giving the structure a neat, neat appearance or changing the design of the stove to suit the new interior.
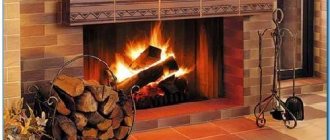
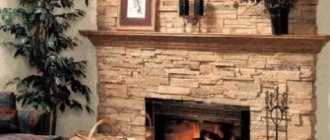
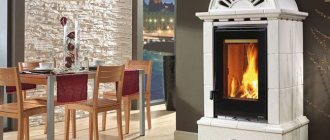
As for decorative fireplaces, their plastering is carried out primarily for aesthetic purposes. Typically, marble plaster for the fireplace, Venetian plaster or composition with the “travertine” effect are used. If the fireplace has an exhaust system and is actually used to heat the room, modern heat-resistant plasters are used for its cladding, which have many advantages:
- ease of application, low consumption;
- increased fire safety, non-flammability;
- high adhesion to any materials;
- increasing the heat capacity of the fireplace, long-term heat retention.
Fireplace finishing with marble plaster
Types of building materials
Today there are several compositions for lining the furnace. Let's look at the types and their features in the table.
| Types of building materials | Peculiarities |
| · Simple clay | low price, ease of manufacture, long drying. |
| Lime-gypsum | availability, short drying time, plasticity, difficulty of preparation. |
| · A mixture of cement, clay, sand | affordable price, long drying time. |
| · Lime-clay sand | difficult to prepare, high strength. |
Finding the right mixture for plastering stoves is quite difficult. Several criteria should be taken into account. The first is the purpose of the room. The stove can be placed in a bathhouse, in the kitchen, in the living room, or in the bedroom. Each type of room has its own parameters. The second is the humidity in the room. Not all of the solutions listed can reliably withstand high humidity. If this parameter is increased, it is better to give preference to more durable and expensive mixtures. The third criterion is finishing. After plastering, the stove can be whitewashed, painted, or tiled. The type of plaster required depends on the type of finishing.
The final result will depend on the quality of materials
Features of mixtures for plastering stoves and fireplaces
Not every building mixture is suitable as plaster for a stove. It must meet a number of requirements, otherwise it will quickly become unusable, since it is operated in extreme conditions. There is a large temperature difference inside the furnace and on its surface during combustion, and after cooling there is a sharp temperature drop. As a result, the plaster regularly expands and contracts, and in the absence of certain properties it begins to become covered with cracks.
Only special heat-resistant plaster with high elasticity will not deteriorate from such operating conditions. The material should easily withstand temperature changes, adhere securely to the base and not crumble. It is important that the heat-resistant plaster is environmentally friendly, without the admixture of toxic components, drying oil, or oil paints. When heated, harmful substances will decompose and have a negative effect on the body of residents.
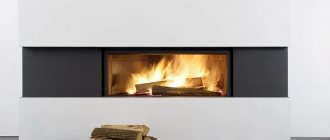
Heat-resistant mixtures are used for finishing fireplaces and stoves
How to plaster a chimney?
The chimney also needs lining. However, standard cladding is not suitable for it. It is necessary to find a material with high heat resistance. When choosing a mixture, you should also pay attention to environmental friendliness. When heated, no harmful substances should be released into the air. It is not worth saving on purchasing such a mixture.
For plastering pipes, it is worth selecting mixtures with increased heat resistance
If there are no financial opportunities, then the solution can be made on your own. To do this, mix one part clay, two parts sand, one part cement, and 0.1 parts asbestos. The pipe must be reinforced before applying the mixture. A budget option for strengthening is burlap. If a reinforcing mesh is used, it must be secured with self-tapping screws. The use of plastic dowels for this is strictly prohibited. They will melt from high temperature. In other nuances, the process of applying the solution to the pipe is identical to the process of plastering the stove itself.
How to plaster a stove without cracks
In order for the plaster coating of the furnace to serve for a long time and not give shrinkage cracks, it must adequately respond to the process of expansion of the furnace when heated. Of all the compositions existing on the construction market, several types of clay-based products meet this requirement. In addition to clay of a certain fat content, gypsum is suitable for this purpose, but it is used much less frequently, since it also cracks without the introduction of certain additives. It is better to use gypsum as an additional binder in a ready-made clay mortar to speed up its setting and drying time.
In addition to gypsum, asbestos fiber is used as additives to clay. It helps make the plaster more flexible and durable, resistant to moisture and fireproof. This component can be added to any oven finishing product, regardless of its other composition. Instead of asbestos fiber, cheaper straw chaff is sometimes used.
Fireproof compositions for plaster
Clay-sand mixture
The most inexpensive and popular mortar for plastering stoves is clay-sand. The main raw material - clay for plaster - can be collected independently and completely free of charge if there is a quarry nearby. The main thing is that it is clean, without debris, grass, roots and other impurities. Typically, 2 parts sand are added to 1 part clay; if desired, 1/10 part asbestos is added.
The finished plaster is quite plastic, easy to apply to surfaces, and can be easily repaired if damaged. The mass is considered practically waste-free, because it can be removed, soaked and reapplied. The plaster is non-flammable, 100% environmentally friendly, and vapor permeable.
The thermal conductivity of the mixture is low, so it retains the heat of the oven for a long time. The clay hardens quite slowly, which allows you to work with it without much haste (this is very important for beginners). The disadvantages of this type of mixture for plastering stoves include the need to apply a fairly thick layer. If it is less than 1 centimeter, it will gradually fall off.
Cement-clay-sand mixture
This fire-resistant plaster has a more complex composition, but the finished coating is even stronger and more reliable. First, cement is mixed with sand (1:4-1:8), mixed well and paste-like clay is added until the mass of the desired consistency is obtained. This type of plaster is less easy to install than regular clay plaster, but lasts longer. To further enhance its strength characteristics, 1 part of liquid glass is added to the composition. As a result, the plaster layer will not be susceptible to cracks at all.
Lime-clay-sand plaster
Adding lime to a clay-sand mortar provides increased adhesion, strength, ductility, as well as resistance to cracking and biodeterioration. Usually, to make plaster, slaked lime (1 part) is added to the finished clay-sand composition (2 parts). To improve properties, it is allowed to introduce 1/10 of asbestos fiber. The use of such plaster will be even more effective if, instead of ordinary clay, it is made on the basis of fireclay, which is obtained by firing kaolin at a temperature of about +1500 degrees with further grinding.
Preparation of the solution
There are many recipes for plaster solutions in the world. You need to know how to make your own plaster. Below is the composition of the highest quality and most popular of them (proportions in parts):
- Sand – 2, cement – 1, clay – 1, asbestos – 0.1;
- Clay – 1, sand – 2, asbestos – 0.1;
- Gypsum - 1, lime - 2, sand - 1, asbestos - 0.2 (in this case, asbestos can be replaced with fiberglass in the same proportion).
Now in more detail about each component:
Clay is an important part of any plaster; some stove makers soak it in water the day before finishing work so that it can swell and become saturated with liquid.
Preparation of the solution
It is best to use river sand. Before use, you should clean it of debris (shells, stones, etc.), if any, and dry it to accurately determine the proportions of the future solution.
Lime is an excellent component of such a mixture, because... ensures its secure grip on the surface. However, do not forget that a solution containing lime will take longer to harden than usual.
The same goes for cement. If you are going to use it, be prepared that setting will take at least 12 hours to complete, and final strength will not be achieved until 20-30 days later. A high-quality plaster solution should be easily applied to the oven walls.
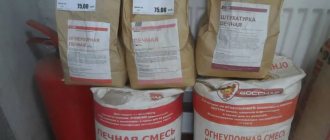
Popular ready-mixes
In construction stores you can find ready-made plasters, sold in the form of dry construction mixtures and ideal for finishing stoves:
- Plaster for stoves and fireplaces “Pechnik”. It is fire-resistant up to +600 degrees, made on the basis of clay, sand, cement, gypsum, mineral and polymer additives. Has low consumption - only 1 kg/1.4-1.5 sq. m.
- Plitonit "Superfireplace Fireproof". Suitable for plastering stoves and fireplaces made of brick, since it is close to this material in terms of thermal expansion coefficient. Made on the basis of clay, cement and heat-resistant fibers. Characterized by high moisture-holding capacity.
- The Terracotta mixture is heat-resistant. Mineral plaster based on kaolin clay with a smooth texture, applied in a layer of 2.5-8 mm. Terracotta plaster can withstand heating up to +400 degrees, so it is excellent for finishing and leveling stoves, fireplaces, barbecues, and barbecue areas.
- Modeling plaster TSP-4. Contains mineral granules 0.5-1 mm in size, designed specifically for plastering stoves with the last (finishing) layer. Ideal for thin layer finishing. Withstands heating up to +200 degrees. It is highly resistant to cracking due to the presence of liquid glass.
- Plaster for fireplace KODRU. It is not afraid of heating up to +1270 degrees, does not shrink and does not crack. Due to its high elasticity, it is suitable for any heated areas, including stoves, fireplaces, and pipes.
Fireproof mixtures for fireplaces KODRU
Process Features
So, when you have decided on the choice of plaster, and the necessary tools are already at the ready, all that remains is to start creating. However, in order to properly plaster the stove, you need to follow a certain technology and sequence of processing steps.
Surface preparation
Preparatory work is an important process that ensures the quality and durability of plastering. So that all your work does not turn out to be in vain, first of all, you need to perform the following actions:
- Remove old layers of cladding using a hammer and chisel, and then clean the surface of dirt and remaining substances with a brush.
- If the stove is new, you should also clean the masonry.
- Deepen all seams by 0.5–1 cm and remove dust from them.
- Prime the walls, including the seams.
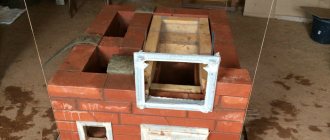
It is very important not to start cladding a structure if it has just been built. You need to wait at least 3 months for the stove to “settle” and for the materials from which it consists to adapt to operating conditions.
Preparing the mixture
The solution must be prepared after all the preparatory measures have been completed, otherwise the plaster may harden and become unusable.
Homemade oven plaster mortar
If you wish, you can make plaster for the stove yourself. It is only important to properly prepare the clay in advance. The raw materials are soaked in water for 5 days, then washed again, removing any floating debris. Then do the following:
- the water is finally drained, but if there is small debris left in the clay, it is first filtered through a sieve;
- mix the clay until smooth, remove any lumps (they will cause cracks);
- River sand is prepared separately - sifted, washed, dried;
- fluff up asbestos, prepare milk from lime by mixing with water (if these additives are planned to be added to the plaster);
- connect the main components together, add water until you get plaster with the desired texture (like thick sour cream).
Experienced plasterers add table salt to the finished composition - 200 g per bucket of finished plaster. Salt prevents the solution from cracking, slightly slows down the hardening of the mass, and allows the coating to dry evenly. If the stove is heated with coal or peat briquettes, it is advisable to add a little fireclay clay to the plaster, which will give the mixture additional heat resistance.
Rules for reinforcement and application of mortar
- You can start applying the solution only after warming up.
- Reinforcement is a mandatory step. You shouldn't ignore him. Reinforcement will increase the strength of the coating, the service life of the cladding, and level the surface.
- The structure can be strengthened with burlap only after it has been soaked for a long time. The burlap should be kept in the clay solution for at least several hours.
- The burlap should be applied overlapping.
- It is better to secure the reinforcing mesh with wire. It's much easier. However, if there is no wire, then metal rods can be used. They are driven into the masonry. The mesh itself is attached to the free ends.
- The plaster solution must be applied from top to bottom. The pulp should be distributed evenly.
- When the plaster has set a little, it should be rubbed. For this it is better to use a wooden grater. The surface should be rubbed in a circular motion.
Reinforcement is a mandatory step
Tools for applying plaster
In order to apply the plaster mixture efficiently, prepare all the necessary tools in advance, and during the work process use those that are more convenient to use. They also buy a primer that will enhance adhesion to the mortar and strengthen the masonry, metal corners, tile adhesive, beacons, and some gypsum plaster.
Here is a list of accessories that may be useful to the master:
- trowel, trowel - for applying and distributing the mortar over the surface of the oven;
- spatulas of different sizes - for applying, leveling, smoothing the composition, especially in corners and other hard-to-reach places;
- construction grater, trowel or trowel - for leveling and rubbing the surface;
- brushes and rollers - for painting dried plaster;
- chisel - for making notches on the surface before plastering, if it is too smooth and does not adhere well to the mortar, and reinforcement has not been carried out;
- hammer - for quickly beating off old mortar;
- metal scissors - for cutting reinforcing fabric;
- level and rule (plumb) - for proper leveling of the coating;
- a construction mixer and a suitable container for mixing plaster;
- hard metal brush - for removing old plaster and cleaning joints.
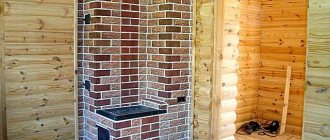
Mantel
If facing work is planned after masonry, it is necessary to wait until the structure has completely dried, and only then begin to transform it.
Final work - finishing the erected fireplace
- The first thing they do when starting this process is to apply a special plaster to the masonry, perfectly leveling the walls. When they dry, mark them and only then begin cladding.
- Surface finishing starts from the corners. If possible, it is better to purchase special corner tiles for these areas, which will make the work easier and faster. In addition to marking on the planes of the fireplace walls, for the evenness of the rows and maintaining the thickness of the seams between brick-shaped tiles, special calibration devices are used in the form of crosses or tubes of the required thickness.
- A special adhesive is used to lay the tiles. It is applied in such a way that after pressing the tile it does not protrude on the sides.
- When the glue dries, the seams are sealed with a special mixture intended for this (heat-resistant fugue). This must be done very carefully, trying not to get the solution on the surface of the tile. If this happens, it should be wiped off immediately with a soft cloth.
For greater clarity, a video about building a fireplace with your own hands
This is not to say that folding a fireplace is completely simple, and a beginner will not encounter difficulties during the process. But with a strong desire and a detailed ordering scheme, this can be done. Cladding a structure is a more creative work, after which the building will be transformed and acquire its own “face.” This is what makes it interesting - after finishing laying the tiles, you can admire your work of art.
How to plaster a stove: instructions
Before starting work, carefully prepare the base, because the quality and service life of the plaster layer will depend on this. The walls of the stove or fireplace are freed from the old coating - knock it down with a chisel and hammer. The seams are well cleaned with a brush to remove pieces of plaster and sweep away dust. If the masonry is fresh, remove any adhering and escaped drops of mortar, which can lead to detachment of the new plaster.
The old paint is completely removed. Irregularities and cracks in the bricks are covered up, masonry joints, on the contrary, are deepened by 5-10 mm. If the base is too smooth, small notches are made on it. The walls of the stove or fireplace are primed 2-3 times. The seams are especially well coated with primer.
Reinforcement
If the oven walls are uneven, you will have to apply several layers of plaster. In this case, the frame must be reinforced, otherwise the solution may peel off and crack. Purchase a mesh made of metal or fiberglass with medium-sized cells (1.5-2 cm). The metal material is secured using nails with wide heads, driving them directly between the bricks.
Reinforcing mesh for oven
Fiberglass is attached to a mortar or heat-resistant tile adhesive. To ensure perfect alignment, steel or aluminum corners with perforations are glued to the corners of the stove. In case of sharp unevenness of the walls, plaster is carried out along beacons, which are placed on top of the reinforcing mesh on small piles of gypsum mixture. Beacons are installed according to the level, having previously determined the point of greatest deviation of the plane.
Spray
To properly level the walls, it is necessary that the plaster layer be at least 8-10 mm - this is the only way to get rid of significant distortions. After the mesh is fixed to the surface and the beacons are placed, the oven is heated to a warm state.
Then spray the walls of the oven with water using a wide brush and make a spray. This is the first layer of plaster, up to 4-5 mm thick, which is literally thrown onto the wall. The spray solution has the consistency of medium thick sour cream. After filling the entire area, the plaster is leveled without much effort, but paying attention to the high-quality filling of masonry joints. Allow the composition to dry thoroughly.
Leveling and covering
After the first layer has dried, further work begins. Apply the solution with a spatula or trowel between the beacons, starting from the bottom of each wall, and immediately level it using a small rule. After treating one area, proceed to the next until the entire surface is covered with the solution. Allow the leveling layer to dry, then proceed to covering.
The covering layer is only 1.5-2 mm thick, so the solution for it is made more liquid. It is needed to perfectly level the surface before painting. If you plan to glue tiles, covering is not necessary. As this stage of work is completed, the beacons are removed and the holes are sealed with plaster mixture. The corners are carefully treated with an angle spatula, rounded for your own safety.
Grout
While the surface has not yet completely dried, they begin grouting work. Grinding is carried out with a construction float or matting, not forgetting to regularly moisten the device with water. Move the tool in a circular motion, increasing the pressure in the depressions and decreasing it in the pits. To reduce the risk of cracking of the layer, experienced craftsmen, after finishing plastering work, cover the oven with damp burlap. As a result, it dries more evenly, which improves the quality of the result.
Preparing for work
Work on applying the putty mixture to the fireplace or stove should be carried out in strict accordance with the technology.
First, measure the planes that will be processed in order to calculate their area. Based on the obtained figures, the amount of material will be calculated. The approximate consumption of the putty mixture is indicated in the instructions on the packaging - it will help you get your bearings.
In addition to the finishing fire-resistant material, you will need:
- spatula for applying plaster and leveling it;
- utensils for mixing the composition;
- building level.
First, the surface is cleaned. On old stoves, the old layer of plaster is completely removed and the joints between the bricks are cleaned 10-15 mm deep. Then everything is cleaned of dust.
Before starting plastering work, it is advisable to lightly heat the oven. The putty adheres well if the surface temperature is between 30-50 ℃.
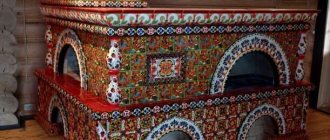
Decorative design of the stove
For the final lining of the stove, you can use a wide variety of materials - from inexpensive to luxury. When it comes to a fireplace in a country house, marble, granite in the form of slabs, stones, as well as coils or onyx are often used. The ideal material for fireplaces and stoves is marble, which is not afraid of sudden temperature fluctuations and has a long service life. More economical finishing options include whitewashing, painting, painting or gluing tiles.
Painting and whitewashing the stove
The simplest method of finishing a stove is whitewashing. To carry out whitewashing, prepare a solution of 100 liters of liquid lime and 100 g of non-iodized salt, you can also drop a little blue. A more modern option is to paint the stove with heat-resistant water-based paints. Oil-based paints and varnishes are not used for this purpose - they quickly darken, and can also release toxins when heated. Before whitewashing or painting, the surface of the plastered stove is primed.
Decorative plaster for stoves and fireplaces
Decorative plaster is another easy-to-work and beautiful material that can be used to decorate a stove or fireplace. It is important to pay attention to the quality of the mixture and its suitability for finishing stoves, since not all brands are suitable for this purpose. There are heat-resistant decorative compositions from different manufacturers on sale. Also, instead of specialized products, you can choose plaster for exterior work, which is not afraid of sudden temperature changes.
Mineral-based decorative plasters can withstand high temperatures when heated, with mixtures based on clay or lime being the most suitable. Silicone or silicate compounds are also suitable for the job. As it dries, a layer of paint, varnish or wax can be applied to the decorative plaster.
Tile
To finish the stove after plastering, terracotta or ceramic tiles are often used. It is glued to heat-resistant tile adhesive, which is designed to work with very hot substrates. The usual adhesive composition for tiles will not work - the material will quickly peel off from the stove. There are even special corner ceramic elements on sale that simplify work and make the stove beautiful and stylish.
Finishing the stove with terracotta tiles
Decorative finishing of the stove
The structure can be finished with the following decorative materials:
- special putty followed by painting;
- natural stone (marble, granite tiles);
- decorative plaster;
- with imitation stones;
- metal sheets;
- glass with heat-resistant characteristics;
- porcelain stoneware;
- ceramic tiles;
- decorative bricks.
It must be taken into account that putty for stoves and other finishing materials must be resistant to high temperatures.
Tips for plastering stoves
Professionals point out a number of important nuances that need to be taken into account when facing a stove or fireplace yourself:
- When the structure is heated strongly and regularly, it is important to select a special primer for the job that is heat-resistant. The use of ordinary primers may cause the mortar to detach from the oven.
- Plastering can only begin after some time has passed since the construction of the stove. It is better if it lasts at least 2-3 months, and the stove must be regularly heated throughout this period. This will reduce the risk of the coating shrinking in the future.
- After completing finishing activities, the stove can be warmed up after 3 days, when the coating stops being pressed through with a finger. For the first time, they do not heat at full power, then gradually increase the heating temperature. After heating, the vent is not closed to ensure natural evaporation of moisture from the plaster.
- Whitewashing, tiling or painting of the stove begins about a month after plastering.
How to light the stove for the first time?
During the first combustion the oven
should be heated with two kilograms of dry firewood, then, every two days, the initial rate should be increased by
1
kg.
If the process occurs in winter, drying the oven
in forced mode should be carried out for 2-3 weeks.
Interesting materials:
How to prime the floor? How to paint baseboards on the floor? How to cover a floor with Yacht varnish? How to install a vapor barrier on a wooden floor? How to get 3rd category in electrical safety? How to obtain an electrical safety permit? How to use concrete screws? How to use a paint-by-number fixer? How to change the default printer in Windows 7? How to place a painting by numbers in a frame?
Repair of stove plaster
If cracks do appear on the stove coating, this means a violation of the plastering technology or improper operation of the structure (overheating, loosening of doors, etc.). In difficult cases, you will have to reposition the stove, but most often, “cosmetic” repairs help. The work is carried out in the following sequence:
- Completely remove old plaster and whitewash from the surface of the damaged area, remove soot, otherwise the latter will appear from under the layer of mortar in the form of rusty spots.
- Cracked bricks are restored with a special repair mixture or the cracks are filled with heat-resistant mastic. If repairs are impossible, the bricks are replaced with new ones, but plastering begins no earlier than after 7 days.
- Apply the primer with a brush and let it dry.
- Prepare the plaster composition and apply it to the area moistened with water by throwing it on. After leveling the solution, rub it with a construction trowel.
- Loose doors are reinforced with wire, and a clay composition is also applied around the fastening area. Let the stove dry.
If the plaster is made correctly, finishing the stove or repairing it can be done with your own hands. The costs of such work will be small, and the savings on wages for invited craftsmen will be significant.
Conclusion
What is the best way to plaster a stove? No specialist can answer this question for you. Each stove maker has his own secrets and mortar compositions for plastering the surfaces of brick heaters at home.
You can make it from a mixture of clay and sand or knead a ready-made dry solution. This is a purely individual question. The main thing is to properly mix and apply a layer of plaster on the surface of the stoves.