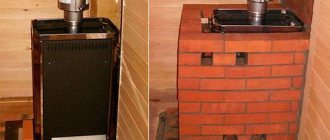
Sometimes situations arise when it is necessary to heat a small space (garage, workshop or warehouse) as efficiently and quickly as possible without significant material costs. An excellent solution to the problem would be a compact potbelly stove made by yourself, the creation of which requires ingenuity, desire, tools and metal.
- 1 Introductory video on the operation of the furnace
- 2 Rectangular stove with reflector
- 3 Simple potbelly stove from a can 3.1 Video - another option for making a stove
A simple potbelly stove can be built from materials that are at hand. You can use a regular can or a thick-walled barrel. Many years of practice have shown that very thick metal (over 8 mm) is too difficult to heat. Thus, the efficiency decreases and most of the heat is not used for heating.
If the metal is too thin, under the influence of high temperatures it will begin to deform and quickly lose its original shape. The best option is walls of about 3-4 mm.
Obvious advantages of a potbelly stove
In its design, a potbelly stove is an ordinary stove; it is a very simple design, the operational efficiency of which has been proven by a huge number of its uses. That is why furnaces operating on mining have still not lost their demand. Do-it-yourself potbelly stove drawings and their subsequent implementation is an activity that everyone can do.
Modern manufacturers, in some cases, still produce factory models that can please the demanding owner. Potbelly stoves made by the owners themselves are often used. It should be noted that ratings from users of such models are much higher than ratings of factory models that owners purchase.
The following is a list of the most significant characteristics of a homemade heating device; this information will help to form a list of those points that you must pay attention to in the process of creating a potbelly stove.
The main positive characteristics are the following:
- Simplicity. The design of a potbelly stove is extremely clear; a craftsman of any level of training can build it using available materials and tools.
- Mobility. The final product is very compact, given that it contains a fairly large thick sheet of metal or lining.
- Heating efficiency. This is facilitated by metal walls. For this reason, a potbelly stove is suitable for a summer house or garage.
- Budgeting. Both furnace parts and fuel are low in cost. Plus, potbelly stoves often work during mining.
When asking the question “How to make a potbelly stove with your own hands,” you need to be aware of a number of disadvantages of such a device. Due to the limited degree of heat capacity, it warms the room only at the moment of combustion itself. In addition, you need to behave extremely carefully near the stove, because its walls get very hot during operation.
How long can you heat continuously?
Several factors influence the duration of the fire:
- the house's ability to retain heat;
- what type of fuel is used;
- if heating is provided, then what kind;
- and finally the owner himself, and his preferences for indoor temperature.
If the winter is not very cold, then a house measuring 6x6, it is enough to heat it once a day, and the temperature will be within 20 o C. For example, after heating the stove in the morning, the house will be hot (about 24 o C), then by the next in the morning it will drop to about 18 o C.
Material used to create the furnace
In the manufacturing process, high-quality steel is often used, less often and in special cases - cast iron. Depending on the type of metal, elements from natural stones are added or not.
Cast iron provides fairly low heat capacity, the material is difficult to find in the public domain, and it is also difficult to use for cooking. This is the main reason why the choice falls on steel; it lends itself to deformation during operation much more readily.
In this case, the further service life of a self-made gas stove depends on the thickness of the material.
When assembling a device for use in rare special cases, such as in the event of a failure with the heating system, it is better to shave iron with a thickness of 1 mm.
To create a stove, you will need factory-made fittings; standard doors, valves, burners and grates will do. If desired, these parts can be made by hand from steel.
Who are the authors of homemade products?
Many Russians are sure that this is only a simple Russian invention. And a few are wrong. In the USA, the same homemade products have been used for centuries, called “fat bellies”, in Japan - “daruma”.
The revival of potbelly stoves occurred in Russia in the second half of the 20th century due to the massive appearance of garages and garden plots, where they were the only means of heating thin-walled buildings.
After these mini-ovens were improved, they were also used for cooking: a pot or frying pan was placed on a stove attached on top.
Until they were replaced by a centralized supply of methane, gas-cylinder stoves or wood-burning brick stoves. They were also useful in the crisis years of the 90s due to interruptions in gas and other types of fuel. It’s good that at least there was plenty of firewood.
Case: material and shape
If you decide to carry out the work process according to a drawing or photo, then you need to use a metal sheet, which is then cut out. In addition to this you will need:
- square pipe;
- rods;
- fittings;
- necessary corners;
- molded profiles.
The above will be needed to create a furnace body. Thanks to the rectangular shape and the presence of planes, the stove will have all the ergonomic properties, that is, the stove will be extremely stable, the process of processing and covering it will be extremely simple. The stove will be extremely easy to attach to any other structure or part.
For the base, you can use existing metal products, such as a box or any other cabinet product. Often objects have the shape of a cylinder: a can, a cylinder, a large pipe.
The work process will also include welding. Drills, bolts and screws are useful only if the thickness of the metal is not particularly large.
It doesn’t matter at all which model the master chooses. Although the work seems simple, you need to have a drawing in any case.
About the temperature in the garage
In such a room it is not easy to equip a traditional heating system, and all this will be quite expensive. On the other hand, the optimal air temperature must be maintained in the garage, because it is not recommended to store the car at temperatures less than +5 degrees , while a minimum of +18 degrees .
Typically, compact, economical stoves with fairly high efficiency and good heating of the room are used to heat garages. It is also important that the stove warms up the garage quickly and is safe at the same time. It’s a big plus if the fuel can be various types of waste – wood, for example, or recycled motor oil. This will make heating your garage even cheaper.
Potbelly stove round
Note! Portable electric heaters for garages are almost never used because they are ineffective. They are also unsafe and should not be left unattended. And no one wants to spend the night in the garage to look after all this.
Operating principle of an electric convector
Garages are rarely well insulated using high-quality thermal insulation materials, and therefore heat loss in such rooms is usually high. In addition, to heat a small area, sometimes much more energy is needed than to heat a house. On average, a heating device with a power of 2.5 kW is enough to heat a garage with a standard area. To maintain a constant temperature of about +16 degrees, you will need a 2 kW oven. Quite often, owners, trying to save money, do not heat the entire garage, but only the area where they work.
The oven allows you to create optimal temperature conditions in the garage
On a note! If you properly insulate gates and walls, as well as seal all cracks, you can reduce heat loss and thus save money, since it will be easier to maintain the required temperature.
Work on the combustion chamber
A larger oven size will provide more heat. This means that the bottom of the chamber will require a lot of space. But in the future it will be possible to conveniently place firewood there. This determines the required shape of the stove: cylindrical, laid on its side.
Even a rectangular oven must still be horizontal. Verticality is only possible with a particularly large size.
What types of fuel can be used
When it comes to the heating system for a temporary premises, such as a workshop or garage, two aspects are usually taken into account - economic feasibility and safety. In terms of economic feasibility, the most affordable type of fuel today is wood. Liquid fuel, such as diesel fuel or used engine oil, is used for heating mainly utility rooms; in residential areas, the use of this fuel is limited because it has a specific odor. Coal is usually not used for long-burning furnaces of handicraft production; it is intended for heating boilers and stationary brick furnaces.
Thus, the most acceptable type of fuel is firewood or pallets - fuel from wood processing waste. And here lies the whole secret of long-burning furnaces. The fact is that to get maximum effect you need to use only dry firewood. In ordinary, freshly cut firewood, the wood contains a large amount of moisture; during combustion, it turns out that two processes occur in parallel - burning of wood fibers and drying, releasing a large amount of water vapor. The result is a large amount of unburned fuel and combustion at a low temperature. These processes do not allow obtaining the maximum amount of heat.
It's a different matter with dry firewood. The moisture content in them is minimal, which means that when the temperature rises to 300 degrees, the process of decomposition of wood into simple substances begins. This allows you to significantly increase heat transfer, as a result of which the firewood burns completely with minimal formation of soot and ash.
The process of working on the ash pit
This element is present from time to time, since ash can be removed directly from the space of the fuel chamber. You will need holes in the door to supply air.
If you plan to have a stove with a garage for an ash pit, then the stove is given the shape of a box. This will avoid using the combustion chamber area. The metal will be thin. Welding is also not needed, screws will suffice.
Operation technology
When using a potbelly stove, you should follow important rules:
- maintain a safe distance between the stove and the walls;
- the chimney should only be taken outside;
- the place where the pipe goes outside is covered with solutions;
- It is recommended to place a box of sand and hang a fire extinguisher next to the device.
These recommendations will extend the life of the stove and improve safety.
Safe installation of the heating device
It is extremely important to follow fire safety rules when installing a potbelly stove. The best place is the far corner of the room, opposite the gate
The chimney is led only to the street.
If the garage walls are made of wood, then the stove is installed at some distance. The wall itself near the device is covered with a metal sheet or concreted. It would be correct to attach a metal sheet at the base of the stove.
6e162aebc95ce3c564df48f7a0fbfc69.jpe
a7d0d3647671b60020d0593c1475a9b9.jpe
Preparation of heating material
A popular fuel for potbelly stoves is wood. They need to be thoroughly dried and sawn. The size of the firewood should be approximately 25 cm. Store the firewood in a dry, ventilated area, protected from precipitation. Oak, birch, apple, and cherry warm up the room well. Do not use spruce or pine. They produce little heat and produce a lot of soot during combustion.
Cleaning the oven
The stove should be cleaned periodically to prevent dirt and soot from accumulating in the chimney. For the work, purchase a special chimney brush. But you can make the device yourself. A brush with stiff bristles is attached to the end of the stick:
- Before starting work, cover the opening in the firebox with a rag.
- Initially, make several movements in the chimney.
- Then they take out all the accumulated garbage.
All actions are carried out carefully so as not to damage the surface of the structure.
Door and openings
These parts are most often metal, made from residual material after the main work. Welding will be needed to attach the parts to the body. It is extremely important to install a locking device. This could be a deadbolt or a latch.
For openings you need to know the dimensions according to the standard: firebox - 250x50 mm; blower - 100x250 (width by height). Canopies at a distance of 10 cm.
Smoke outlet
For this you need a pipe with a diameter of 150 mm. It will be constantly involved in thermal conductivity, so it requires steel and no insulation. The pipe is mounted on the side or on the stove. Pipes inside the house go along long lines and to the farthest point. This will increase the amount of heat received.
Following the information on the drawings, chimney pipes must always be equipped with valves (rotary or along a guide). With them you can influence the process of warming up and smoke removal by closing the chimney at the time of combustion.
Barrel stove
It will correct the situation, and on this potbelly stove you can even cook borscht and fry cutlets. Not only an old barrel will do, but it’s better if it’s a discarded 50-liter gas cylinder.
Its walls are thicker, they will heat up a little longer, but they will also retain heat more. This is an ideal sauna stove. And if you cover it with sea or river pebbles or other strong stones, it will be easy to raise steam in the room.
It will stand vertically. There will also be enough space for the blower, and you can put a lot of firewood in the firebox above it. You can make the exhaust pipe not straight, but with elbows for greater release of thermal energy in the steam room.
If a potbelly stove is needed for a country house, then weld a metal platform on top, and you will cook food and tea on it.
Combustion enhancement parts
The photo of a self-made potbelly stove shows all the elements. In order for the combustion process to be long, in addition to the pipes, a suspended load is useful. A metal pancake is suitable for these purposes.
The video of making a potbelly stove with your own hands also discusses all the points that need to be taken into account. By sticking to the plan, the desired result will be quickly achieved.
Rocket stove with a cylinder for combustion of exhaust gases
The conventional lightweight rocket stove is quite easy to recognize from photographs due to its unusual design. Three round or square pipes welded at one point and having a common internal space are perhaps the simplest design for a camp fireplace.
But, like an ordinary cast iron stove, the rocket has a very large appetite. On the other hand, the rocket furnace simply has enormous heat transfer from the fuel; it is not for nothing that this design is recognized as the most efficient compared to other projects.
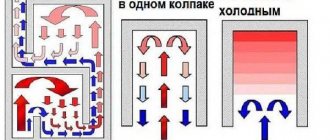
It is this property of rocket-like emission of flame that is used in the design of long-burning potbelly stoves with a cylinder. The fact is that the flame coming out of the firebox is used ineffectively. The video of the operation of such a furnace shows that the flame comes out with great pressure. But along with the flame, a large amount of unburned gases also comes out. The idea of using this potential is to install a large cylinder after the rocket furnace, with the entrance window located on one side and the exit window on the other.
The flame with unburned combustion products, entering the cylinder, continues to burn until complete splitting. Thus, further combustion of flammable gases occurs in the cylinder itself, and smoke and other combustion products are removed through the outlet window.


