Expanded polystyrene, both regular and extruded, has become widespread as an insulating material. Its use is due to its affordable price and excellent thermal insulation properties.
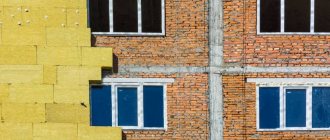
Proper use of this material (fixing it to the walls outside the house) allows you to retain heat and prevent the formation of mold and mildew indoors.
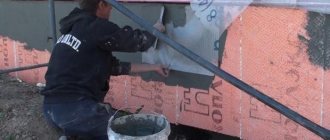
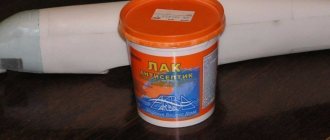
To protect the insulation itself from the destructive effects of the external environment, polystyrene foam plaster is used. In this way, you can extend its service life several times.
Insulation process
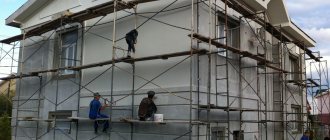
Following a certain order will help you understand exactly how to insulate external walls with polystyrene foam. That is why the first stage should be the installation of panels on an already cleaned and carefully prepared, primed wall.
The correctness of fastening can be checked using a special level. And only after this can the structure be hammered with dowels.
A special adhesive developed for slabs will help guide you on the question of how to glue polystyrene foam to the wall. It is applied with a notched trowel evenly over the entire working area. Do not forget that the insulation thickness is selected depending on the purpose:
- Indicators from 30 to 50 millimeters for residential premises;
- Indicators of 60 millimeters for walls of other industrial structures.
Disc-shaped dowels will be an excellent assistant in all work, since it is necessary to attach polystyrene to the wall as securely as possible.
Plastering walls made of polystyrene foam helps to level and decorate the formed surface.
By following all technologies when carrying out insulation work, you can achieve the highest quality result, as well as avoid possible heat loss. Do not expose the surface to sunlight or high temperatures.
What is expanded polystyrene
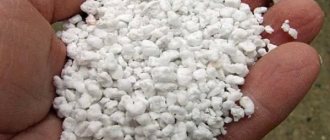
Expanded polystyrene (EPS) is a material consisting of a mass of gas-filled sealed granules soldered into a single conglomerate during the manufacturing process. In this case, the granules themselves are not destroyed, but are only glued together by their walls.
Depending on the initial size of the granules and the temperature during manufacturing, EPS has different densities and hardness. The finer the grains, the denser the structure and stronger the material. The most important physical property of EPS is its extremely low thermal conductivity : a layer of EPS with a thickness of 3 cm is equal in thermal resistance to a layer of concrete with a thickness of 123 cm.
The following types of expanded polystyrene exist:
- PS. Press.
- PSB. Pressless.
- EPPS. Extruded.
- PSB S. Pressless suspension.
In addition, there are subtypes of material that have a special purpose, for example PSB-S 25F - façade expanded polystyrene with a density of 25.
Material Specifications
The density of the material has a fairly wide range of values depending on the brand.
Samples available with densities:
- PSB-S 15.
- PSB-S 25.
- PSB-S 35.
- PSB-S50, where the last digits are the value in kg/cub.m.
Advantages:
- An excellent heat insulator.
- Effective sound insulator.
- The light weight of the material allows for widespread use.
- Self-extinguishing material (free burning time - 3 seconds).
- It is practically impenetrable to steam and moisture, depending on the density (there is a slight absorption of moisture through capillaries - micro-gaps between welded granules).
- Low price.
Flaws:
- Low plasticity; when deformed, the material crumbles or breaks.
- It does not tolerate contact with solvents such as gasoline, acetone, etc.
- When exposed to flame, it emits large amounts of toxic gases, although in itself it is not dangerous in terms of fire protection.
- It is impermeable to air, which makes it difficult to remove moisture that has seeped through the capillaries.
The capabilities of teaching staff have been tested and confirmed by many years of practice. The material is a leader among other insulation materials due to its low cost, ease of processing and other advantages.
IMPORTANT!
Currently there is a new GOST in force , in which the designations of expanded polystyrene grades look different. For example, PSB-S 25F according to the new standard is designated as PPS-16F.
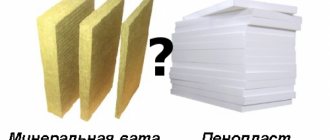
The chemical basis for all types of polystyrene foam is the same, but the difference in production technology significantly changes their properties. The most different from the usual types are extruded options (EPS, penoplex, etc.).
Comparison of the thickness of materials with the same thermal conductivity
During manufacturing, this material is mixed , causing the structure to change and turn into a homogeneous frozen foam, most similar in appearance to foam rubber, but much more rigid and durable.
EPS is an excellent material for insulation and waterproofing; it is completely impervious to water or steam and is good for working in difficult and difficult conditions - for example, for insulating foundations or other buried structures.
Reinforcement of façade and wall surfaces
Alkaline mesh for reinforcing the facade surface with a density of 160 g/sq.m.
Plaster reinforcing mesh is necessary to ensure that the applied mixture is fixed to the heat insulator.
For materials such as penoplex and expanded polystyrene, it is recommended to use an alkaline mesh. It has a higher cost, but it certainly will not cause the plaster to collapse before its allotted time.
In the case of facade work, the mesh is usually applied with a density of 140 to 160 g/sq.m. You can choose a higher density, in which case the plaster layer will only be smoother. There is only one limitation in this case - the dense mesh is inconvenient for gluing corners.
If sticking a grid on planes does not raise any questions, then when working on corners everything is a little more complicated. In addition, you should start from the corners.
Metal corners can be used to reinforce corners
First of all, you need to separate the strip with a long side of a meter and a wide side of 0.3 m. In the center, this strip is bent - after bending, there should still be a residual edge on its surface.
Then, using a suitable spatula, the plaster solution is applied to the corners of the building - the thickness of the application layer (excluding the mesh) should be about two to three millimeters. Once the described process is completed, a mesh is attached to our wall, which is pressed with a spatula, and then carefully smoothed with gestures down, to the left and to the right of the corner being processed.
After gluing the corners, they move on to the planes of the walls. The roll of mesh is cut into pieces of 1 meter each - this size is due to the fact that larger pieces are simply not very easy to glue - the plaster may dry out before you finish distributing it.
To apply the façade plaster mixture, use a 35 cm spatula. The thickness (excluding dried layers) of the plaster is 3 mm, the width of the strip is 90 cm, the length is 1 m. Gaps of five centimeters should be left along the edges for gluing the borders.
When applying the mesh to penoplex or polystyrene foam, it is most convenient to use a wide spatula
After the above steps, the mesh is applied and smoothed from top to bottom, starting from the central part
It is important that the mesh is pressed into the solution and not placed on top. For this, you can use a little extra mixture
After finishing with one vertically oriented strip, without waiting for it to dry, move on to the next one, installing overlapping mesh elements. Otherwise, the joints may not be glued. Near the corners, the joints are also glued one on top of the other.
After this, once the mesh is completely glued in, it is necessary to rub it in an undeniable manner. A similar method is used in wet facade technology using foam plastic, when the reinforcing mesh is rubbed down using building mixtures and plaster.
This process is done using sandpaper and a plastic grater. And do not forget that grouting is done over already dried material. Grouting should be done in a circular motion with slight pressure on the surface. The direction of movement is counterclockwise.
Prepare the solution.
Compositions for plastering synthetic insulation are usually sold in dry form. Suitable for all three types of material - foam plastic, penoplex and expanded polystyrene. They need to be diluted, making sure to follow all the manufacturer’s recommendations. It is possible to plaster polystyrene foam with your own hands.
Expert advice: To glue construction mesh, the compositions are diluted thinner than the product manufacturer advises. For the leveling layer you need an even thinner consistency.
Preparatory work
To carry out correct work, you must know how to properly insulate walls with polystyrene foam. That is why it is worth adhering to some fundamental steps:
- Assessment of the overall scope of work, calculation of the required material, determination of insulation volumes, preparation of consumables and elements (accessories, tools, etc.);
- Careful preparation of wall surfaces:
- Cleaning from dirt;
- Leveling out unevenness;
- Plastering cracks and obvious potholes;
- Attaching polystyrene to the wall requires a preliminary primer to improve the adhesion of the surface to the glue.
Finishing
Before applying facade plaster to a finished and primed surface, it is necessary to prepare it. Mix the acrylic thoroughly enough to make it homogeneous. Dilute mineral water as indicated in the instructions. After this you can start working.
Using a wide spatula, apply the plaster to the surface. Do not forget - the maximum layer thickness is 40 mm. The thicker one will either fall off or crack when drying.
Grouting can begin when the layer is already securely attached to the base, but has not yet completely hardened. If you want to give your plaster a unique texture, now is the time. If you need a smooth surface, then regular grout will do. After 3-5 days (the exact period depends on air temperature, humidity, wind and other factors), the plaster will gain sufficient hardness.
As you can see, applying facade plaster over foam plastic is a fairly simple job. If you have studied the whole process in theory, then, having the simplest tools, you can easily put it into practice. This way you will gain an interesting and useful skill, while at the same time saving a lot of money by refusing the services of professionals.
Important nuances
Since creating high-quality and beautiful facades requires a flat surface, the walls must be leveled before attaching the insulation. Protruding parts are removed; in some cases, additional plastering of the building outside may be required in order to achieve the desired result. Differences of 1-2 cm are allowed. This difference can be compensated for by the adhesive composition.
In addition, the following points should be taken into account:
- Fixing with disc dowels can only be done after the glue has completely dried. If they are installed early, there is a possibility that the thermal insulation slab may move to the side or be pressed inward. This will lead to increased consumption of decorative plaster;
- Before attaching the reinforcing mesh, the plastic caps of fungi - umbrellas need to be puttied;
- If there is a need to insulate a house in two or three layers, the sheets are arranged strictly in a checkerboard pattern. Stitches stacked on top of each other are not allowed. Fixation is performed only to the main surface of the load-bearing walls;
- The panels are joined only with cut sides. So, the gap between them will be minimal. The resulting seam is sealed with liquid foam. The use of polyurethane foam is strictly prohibited; its use may lead to peeling of sheets from the surface of the walls and, accordingly, damage to the thermal insulation layer.
Installation of the reinforcing mesh and puttying is carried out only on the last layer, on the one located outside the structure. There is no need to process internal ones.
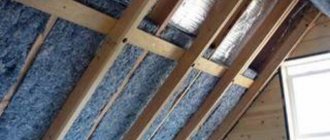
We insulate slopes
Windows and doorways are the main areas of the area where significant heat loss occurs. Therefore, it is necessary to organize thermal insulation of slopes. This process consists of several steps:
- cleaning the surface from contamination;
- primer of slopes in two layers to improve adhesion;
- leveling by grouting;
- cutting insulation;
- applying a layer of glue;
- installation of slabs;
- foaming the resulting cracks;
- plastering.
Pasting the cornice
Before insulation, the cornice should be treated
It is important to follow several rules:
- choose a material of minimal thickness so that it can adhere to the adhesive layer;
- you need to start gluing the insulation strips from the wall;
- First, the vertical elements are fixed, and then the horizontal ones.
When the cornice is covered, they move on to organizing vapor and waterproofing.
Plastering on polystyrene foam technology of work
Therefore, in order for the plaster to adhere firmly to the foam plastic, a special plastic mesh is used, which is attached to the foam plastic, and a layer of plaster is applied to it.
First, the mesh must be glued to the corners of the building. Using a wide spatula, apply the mixture approximately 3 mm thick onto the foam. Apply the mesh and carefully smooth the mixture so that the mesh is completely covered with it. After all corners have been covered with mesh, you can begin gluing it onto the planes of the walls. One strip of mesh should overlap the previous one, and all joints should be thoroughly coated with the mixture.
The mesh glued in this way should be rubbed with a grater and emery cloth. Grouting is done using a dried mixture. In this case, some force should be applied, circular movements should be directed counterclockwise.
Now you need to apply a leveling plaster layer about 3 mm thick. After a day, the leveling layer should be rubbed in the same way as the mesh was rubbed. It should be remembered that it will be much more difficult to rub down a dry leveling layer. At this stage, it is necessary to achieve the most even surface possible; the quality of the decorative finish will depend on this.
The next step should be priming the surfaces of the building walls, which is done with a short-nap roller.
And the final stage of finishing the facade using foam plastic is the application of decorative plaster. A layer of plaster is applied to a certain area with a spatula, and then a decorative texture is formed using a sponge, spatula or grater. After complete drying, the surface can be painted with facade paint.
The process of plastering foam plastic: stages of work
There are several steps to follow. But first you will need to prepare the tools: a plaster grater, a drill with a mixer, a painting mesh, a building level, sandpaper for grouting, a spatula and a trowel. Consumable materials will require plaster mixture, primer, decorative plaster (mineral or acrylic). Now you can move on to the work itself.
Plastering foam plastic: stages of work
Tools and materials for work
You should prepare in advance:
- short-haired roller (needed for priming);
- construction mixer;
- spatulas with a metal plate;
- trowel or trowel;
- plastic grater with sandpaper attached;
- plastic corners with reinforcing mesh;
- notched spatula;
- scissors for cutting mesh;
- level;
- containers for solution and water;
- brush;
- plaster mixture (or several types);
- primer;
- fiberglass mesh;
- masking tape.
Plastering materials are purchased in a volume sufficient to carry out the entire work (with a reserve). You should purchase products from the same company, preferably from the same batch (this is especially important for decorative color compositions).
We recommend: Do-it-yourself ceiling plaster: advantages, types of mixture and alignment according to beacons
It is better to take a trowel and spatula with rounded corners. This is especially important for applying decorative plasters.
Leveling the base
Before you putty the foam base, you need to carry out some preparation. Initially, you need to level the level of all joints between the panels, for which you use a rule or a wide spatula. Such differences must be eliminated first, since this defect cannot be eliminated using mixtures.
The joints are removed using polyurethane foam. This material allows you to achieve maximum tightness. As soon as the foam has dried, its excess is cut off with a stationery knife. After this, the surface is cleaned of dirt and passed several times with a needle roller. Thus, the adhesion of materials is increased and the mixture will adhere better to the foam.
Sealing joints and seams
Preparation of the solution
For beginning builders, it is better to pay attention to universal mixtures (glue-plaster). This solution is used both for fixing foam plastic to the wall and for plastering. The companies Ecomix and Ceresit have proven themselves to be excellent.
For processing 1 sq.m. the surface requires approximately 4 kg of mixture. Each package contains instructions from the manufacturer. For this stage, any plastic or metal container is used, and the stirring itself is best done using a drill with a “mixer” attachment. This will not only create a uniform consistency of the solution, but will also significantly save effort and time on mixing.
Advice! Professional craftsmen recommend preparing a solution of a thinner consistency for gluing the reinforcing mesh than that specified in the instructions. This will allow all pores on the foam to be treated, and therefore increase the adhesion of materials.
Preparing the base
Responsible stage. The evenness and service life of the plaster “shell” depend on the quality of the work performed.
Before gluing the insulation sheets, the wall is prepared as usual:
- remove unusable old coating, knock down large protrusions;
- chips and cracks are “healed”;
- clean the base from stains of various origins (wash with water, dry, treat with special means);
- Dust is removed from the surface, remaining metal objects are insulated with oil paint;
- install the base profile according to the level;
- install foam sheets (using glue and fastening with dowels).
Sequence of preparation of the foam base:
- check the evenness of the entire surface (joining sheets of PPS must be at the same level) by running a rule along the wall;
- the protrusions are carefully cut off, the joints are cleaned with sandpaper;
- remove dirt and dust from the surface;
- To increase adhesion, the top of the foam plastic is rolled with a needle roller (the solution will penetrate into the holes formed during plastering).
Beginners often wonder: is it necessary to prime the foam before plastering? If plastering is done with special mixtures for PPS or mixtures from Knauf, then no primer is required.
But where mechanical loads can be increased (to the height of a person’s height), a primer for foam plastic will not be superfluous. You can cover the walls themselves with concrete contact or Ceresite. After plastering (for finishing), the insulated wall is primed.
Installation of plaster mesh
In order for the plaster to adhere securely to the foam, a reinforcing mesh is pre-installed on it. This layer provides protection against cracking and provides additional surface strengthening.
It is best to purchase dense meshes, since the mixture holds more securely on them. The best option is a mesh with a density of 130-160 g/sq.m., moreover, it must be resistant to alkali, which is present in the mixtures.
But you need to know how to apply such material to the corners correctly. The work has the following sequence:
- the mesh is cut into strips of 1 m, with a width of 30 cm;
- a bend is made exactly in the middle of the segment, which will be used to insert the tape into the corner;
- using a wide spatula, apply the solution to an angle in accordance with the length of the tape, but at the same time apply the mixture along the width an additional 5 cm on each side to create an overlap;
- the segment is applied to the treated surface and smoothed with a spatula (direction - from top to bottom and from the center to the edges).
Processing external corners
Processing the remaining sections of the walls occurs in a similar way. Since the mixture dries quickly, it is recommended to apply it in small areas - 90x100cm. A mesh is placed over the mixture and processed with a spatula so that it sinks into the solution. If this does not happen, then it is permissible to apply more putty on top. The mesh is installed with an overlap.
Closing seams
The seams between the EPS sheets must be filled with polyurethane foam to prevent the formation of cold bridges. If the mounting foam at the joints protrudes above the EPS, it is cut off (the seams must be completely filled). If the seams are large, they are filled with strips of polystyrene foam of the required width, placed on the foam.
Grouting stage
Each putty has its own drying time, which is indicated by the manufacturer on the packaging - 3-4 hours in summer, 20-24 hours in winter. Using sandpaper or a plastic grater, treat all surfaces.
Grouting is carried out in a circular motion - counterclockwise. If the sandpaper comes into contact with an area with undried mixture, you will need to change the paper immediately.
Surface grinding
Applying primer and leveling
Next, you need to prepare the surface for the finishing coat. To do this, you can use two different mixtures or one universal one. But in the first case, before priming the surface of the foam, you need to level it.
The process will require the following steps:
- Using a spatula (35cm wide), the solution is applied to the walls - if the walls are grouted well, a layer of 2mm will be enough;
- as soon as the layer is completely dry, the surface is sanded - it is recommended to start this stage 3-4 days after puttying;
- then, using a foam rubber or fluffy (short pile) roller, apply a primer that will increase the adhesion of the materials - it is best to use a mixture with antifungal properties in order to increase the protection of the walls.
Advice! It is recommended to ensure that the joint points of the leveling layer do not intersect with the joints of the reinforcing mesh. If this condition is met, then seams will not be noticeable on the surface.
It is recommended to apply the primer in two layers, but each subsequent coat is applied only after the previous coat has dried. As soon as the priming is completed, the finishing begins.
We recommend: Profile pipe 40*40 and 50*50
Decorative finishing
For external work, there are special facade plasters, which are designed taking into account that they will regularly experience temperature changes and the effects of climate change. Each manufacturer adds binders and additional components to the composition, on which the further performance properties of the plaster depend. Therefore, before puttingtying the foam, it is necessary to familiarize yourself with the filling of the selected mixture and correlate it with the climatic characteristics of the region.
Applying the final layer
Decorative plaster is applied as follows:
- the solution is prepared - if you have to work with a large area, it is best to prepare it in portions so that the mixture does not have time to harden (it is not recommended to re-dilute the plaster);
- the plaster is applied in two layers, each of which should not be thicker than 4 cm - a new layer is applied only after the previous one has dried;
- as soon as the mixture is half dry, start grouting - at this stage they begin to form a pattern on the surface.
Painting finishing plaster
Important! The selection of tools depends on the planned structure. A specially shaped roller is used for this. But texture can also be created using improvised means, for example, a notched trowel.
In order for the final stage to pass efficiently, it is necessary to carry out all the work under certain weather conditions: temperature ranging from 5 to 25 degrees, with humidity no more than 65-70%. It is advisable that there is no strong wind outside.
Plastering polystyrene foam is not such a difficult task, which can be done with your own hands. The main thing is to choose the right materials and follow all stages of the process.
Features of insulation
You can save a little on heating costs by insulating your home with polystyrene foam. How exactly? Let's take foam plastic for this.
Polystyrene foam has many uses these days:
- It is used to make packaging for transporting fragile and easily breakable items;
- life jackets are made from it;
- in refrigerators it is used as a heat insulator.
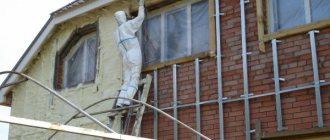
Recently, polystyrene foam has been widely used to insulate the walls of buildings, since it is a good heat and sound insulator, very easy to install and relatively inexpensive. It is attached to the insulated surface using a special adhesive mixture or plastic fasteners, popularly called “umbrellas”. They can be seen in the photo.
After the foam is attached to the walls of the house, it will need to be plastered.
Which polystyrene foam is suitable for plastering?
The advantageous characteristics of polystyrene foam: light weight, low thermal conductivity, environmental friendliness, low cost, allow you to insulate the facade of a building quickly and efficiently. According to production technology, it is divided into two types - pressless and pressed.
- Pressless expanded polystyrene is not recommended for finishing facades under plaster, as it has a more fragile structure and is capable of accumulating moisture, which will negatively affect the quality of the plaster layer.
- Press insulation is a more durable material. Special types of insulation for plaster are produced, made using press technology.
Preparing the mixture
Making your own dry mixture using a construction mixer
The construction market is rich in a huge range of different materials; vapor-permeable plaster alone is produced by a number of manufacturers.
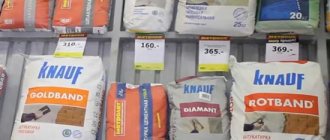
Which facade plaster to choose? The most popular brands are Ceresit, Ecomix and Stolit. In any case, when carrying out work it is necessary to use plaster from only one manufacturer, since differences in the properties of mortar from different manufacturers can be detrimental to the entire finish.
Facade plastering on polystyrene foam or other materials must be carried out strictly according to the instructions from the manufacturer - while a general description of the process can be found in many places, specific figures for certain cases are indicated in the official instructions.
Unless otherwise indicated in the latter, the plaster solution is applied over the plaster mesh in a lower concentration than indicated by the product manufacturer.
Different manufacturers may produce more than one mixture for finishing insulation. If there is only one mixture in the set, it means it is universal; if there are two of them, then one is needed for gluing foam plastic and installing a protective layer, and the second is needed for gluing foam plastic to the base.
In the following, we will consider only the universal mixture.
Ready-made plaster mixtures brand Ceresit
Calculation of facade plaster must be made from the fact that per 1 square meter on average up to 4 kg of material is required for installing the mesh, as well as no more than 6 kg for subsequent leveling of the wall planes.
Let us repeat that more accurate figures may be indicated in the manufacturer's instructions. They can also vary depending on the thickness of the applied layer.
Construction practice shows that the consistency of wet facade plaster should be slightly more liquid than the manufacturer indicates. The recommended concentration will not worsen anything, but will increase the consumption of the mixture. In the process of preparing plaster for leveling walls, the mixture must be of such a concentration that it viscously flows down from the working tool.
You can find out how to apply decorative bark beetle plaster on the walls and facade of a building in the corresponding material.
Tools and materials used
To plaster polystyrene foam surfaces, you need to use a certain set of tools. The necessary tools and their purpose are described in the table.
| № | Tool name | Purpose |
| 1 | construction mixer | designed for stirring the solution to the required consistency; |
| 2 | set of spatulas | used for applying the mixed composition to the work surface; |
| 3 | construction float | removal of minor irregularities, grinding; |
| 4 | set of containers | under water, for solution; |
| 5 | construction knife, hacksaw | cutting slabs and fiberglass mesh, applying notches; |
After preparing the tools, the question arises about choosing plaster.
The materials offered differ in price and composition. To carry out finishing work, you will need special plaster (facade) for polystyrene foam.
Its most common types with brief characteristics are presented in the following table.
| № | Type of mixture (by composition) | Characteristics |
| 1 | mineral compounds | They are sand-cement mixtures with the addition of various fillers; very low cost; the quality is much lower than that of analogues; Now |
| 2 | acrylic plaster materials | main components – acrylic resins, chemical additives; excellent quality (they are created specifically for finishing insulated facades); There is no special need to prepare extruded foam plastic for plastering; fits well on the surface being treated; allow you to create decorative elements and textured images on the facade |
Choose fire-resistant mixtures
This is not a complete list. Modern manufacturers offer a large selection. Some samples may differ in only one or two of their components.
Mixtures such as “Ceresit”, “Polyrem”, “Kreisel” have gained particular popularity (for example, brands of universal adhesives “CeresitCT-85№”, “Coral SP-141”, “PoliminP-19”).
When choosing, you should pay attention to the fire-resistant properties of the compositions, because most polystyrene foams have an average degree of flammability; it is recommended to use plastering materials that are more fire-resistant.
Plaster is produced for sale (mostly) in bags of 15 to 25 kg weight.
It is not recommended to carry out plastering work with a solution of cement and sand. Such surfaces will not last long.
The mesh will strengthen the mixture on the wall.
You will also need water and fiberglass mesh (prevents the formation of cracks, holds the plaster).
You can easily calculate the volume of material needed for work yourself:
- according to the consumption data indicated on the packaging per 1 sq. m of treated surface;
- purchase (approximately) mixtures for one wall;
- After plastering, calculate the practical consumption and purchase more for the required area.
Mesh installation
To significantly increase sound and heat insulation in a private home, it is advisable to apply the plaster in a thick layer. But the low adhesion of polystyrene foam does not allow a thick layer to be firmly fixed; the plaster will fall off faster than it has time to harden. Even if it dries, a slight blow to the wall can cause it to peel off and fall off. That is why installing the mesh is an important step in plastering if you choose to finish the facade with foam plastic.
First of all, this element is installed on corners and difficult areas around window and door openings. Measure the width and length of the desired area, cut the appropriate piece of mesh.
Now apply the first layer of plaster to the wall - a relatively small one, a couple of millimeters is enough. Level it out. You need to act quickly, because a thin layer will set in a matter of minutes; if you don’t have time to do all the work in this time, you will end up with unnecessary trouble.
Immediately after this, press the cut mesh against the wall covered with plaster and press with a wide spatula from top to bottom. The mesh will be pressed into the soft plaster, covered on all sides with an even layer of the mixture and will provide a reliable base for the subsequent thick layer of plaster.
After this, the work is done in exactly the same way on the rest of the surface. The process of installing the mesh is simple, the main thing is to do it quickly and in small areas - you should not hope that you will have time to apply plaster to the entire surface of the facade, and then install the mesh.
When installing two parallel meshes, it is necessary to make a slight overlap, 3-5 centimeters is enough for reliable fixation. At the same time, it is undesirable to leave even small areas of the mesh without a layer of plaster; after applying the final finish they will be noticeable.
Laying polystyrene foam with your own hands
- If there is a sheathing, the PPS is cut into appropriate pieces .
- If it is not available, laying is done in whole slabs (if possible), since factory ones are smoother and more accurate than self-cut ones.
- The glue can be applied in stripes around the perimeter and in the center of the sheet, dotted or in a continuous layer.
- Installation of PPS on the wall. The slab is pressed against the wall with little effort; you can move it slightly from side to side for better adhesion of the glue to the wall material.
- After installation, the plate should be secured with a dowel . This will save time by pressing the slab against the wall while the adhesive sets.
- All subsequent slabs are installed in a similar manner.
- Work is carried out in horizontal rows from the corner (or opening) of the building.
Sheet fastening
Fixation with dowels
For tightness or with uneven edges of the slabs, you can coat the joints with glue.
Prices for services for finishing facades with expanded polystyrene
Specialists carry out facade work using various materials. We carry out finishing work using a layer of insulation, decorative elements and foam panels using aerial platforms, lifts, scaffolding, and also using the industrial climbing method.
To accurately determine the cost of facing work and inspect the facade of the building, our employee travels to the client free of charge.
A specialist visit can be ordered by phone. or by sending a request by email
The cost of installing a thermal insulation layer depends on the thickness of polystyrene foam. The price of decor installation is affected by its type. More accurate prices for façade finishing with polystyrene foam can be seen here.
Advantages of polystyrene foam finishing
Expanded polystyrene has replaced fragile gypsum and massive concrete. Practical and almost weightless foam plastic allows you to decorate any building without creating additional load on the enclosing structures and foundation. In addition to its versatility of use, polystyrene foam is distinguished by:
- low cost;
- variety of architectural elements;
- simple installation on the facade;
- light weight;
- resistance to mold and rot;
- non-flammability;
- moisture resistant.
Decorative elements can be made of any shape and size. They can be selected from standard models or ordered individually.
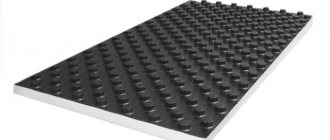
In addition to decorative facade elements, manufacturers offer effective polystyrene foam panels with a hard coating (thermal siding or thermal siding), which provide facade finishing and thermal insulation.
Expanded polystyrene thermal siding is a high-tech material with an even protective layer of quartz sand, which is easy and convenient to install on the facade. Such panels prevent walls from freezing and provide significant savings on heating costs. Expanded polystyrene boards are easy to cut. The material is mounted on the facade using adhesive solutions. Thermal siding provides sound insulation and protects the building from precipitation.
You can decorate a building, giving it style and individuality, using moldings, cornices, platbands, balconies, columns, pilasters and other decorative elements made of foam plastic.
It should immediately be noted that all these elements decorate the facade and provide sealing of individual areas, but do not carry any supporting loads. This is decor in its purest form. The most commonly used products are moldings, cornices, window sills, platbands and pilasters.
Molding is an overhead convex strip that is used to decorate walls, door and window openings. With the help of molding you can disguise facade defects and poor finishing. A reinforcing layer of a protective impact-resistant coating is applied on top of the decor.
Decorative cornices are special projections on the wall that are used at different levels of the building to protect the facade from precipitation. Cornices can be crowning (main) and intermediate. The main ones are installed on top of the facade with a significant eaves overhang. Intermediate ones are mounted on the wall in areas of interfloor ceilings.
Pilasters are flat vertical projections on the surface of the facade. I install them to give the building more impressive shapes and stylistic originality.
Advantages and disadvantages of polystyrene foam when insulating a house
In polystyrene foam, the bulk of the material is gas. This determines its main advantages: light weight and good thermal insulation properties. Polystyrene foam is also a good sound insulator, since its structure dampens sound vibrations. In addition, the advantages of the material include:
- environmental friendliness - complies with environmental standards and does not harm humans and the environment;
- durability - resistant to mold, rot and corrosion;
- light weight - easy to transport, no additional load on the foundation;
- ease of processing and installation;
- affordable price.
We recommend: A variety of types of workwear from the manufacturer TD SoyuzSpetsodezhda
In addition to the advantages, there are also disadvantages:
- Low strength. This is the main reason why the insulation layer is covered with additional material, since under mechanical stress its structure is easily damaged and it loses its thermal insulation qualities.
- Incompatibility with nitro-based paints and varnishes. These substances can corrode the foam mass.
- Does not allow air to pass through. Poor vapor permeability does not allow its use in interior decoration of residential premises. Without good ventilation, the house turns into a thermos.
- Rodents and insects are partial to foam that is not protected by plaster or a durable finish.
- Fire hazard - burns and releases hazardous substances.
Consumables
Insulating walls outside with polystyrene is not a complicated process. However, like any other activity, it requires certain knowledge in installation.
The structure under consideration is endowed with its primary positive qualities:
- Affordable price;
- Reduced level of thermal conductivity;
- Good resistance to moisture;
- Increased vapor permeability;
- Long service life;
- No risk of rotting:
- Ease of operation and so on.
Of course, insulating external walls with polystyrene cannot contain exclusively good features. Each activity and material has individual disadvantages:
- Poor fire resistance;
- Formation of acrid smoke, that is, toxicity;
- Possible exposure to damage from small rodents.
Methods for attaching polystyrene foam to the wall
Installation of PPS can be done in the following ways:
- Tight fit between sheathing strips.
- Fastening on special dowels with wide caps - “fungi”.
- Glue installation.
CAREFULLY!
When installing tension between the lathing, there may be cases of broken pieces of material or crumbled areas . These places must be filled with polyurethane foam; gaps or holes should not be allowed.
Installation on “fungi” is done in addition to gluing; it is not recommended as an independent method of fastening.
Ready-made mixtures are used as glue , which are diluted with water and mixed immediately before installing the material. There are also synthetic types of adhesives produced in cylinders like polyurethane foam, but they are more expensive.
Installation using a dowel
Applying glue
Grouting on plaster mesh
The mesh must be thoroughly rubbed to obtain a smooth surface suitable for further plastering. Of course, this work should be done only after the plaster has completely dried. On a sunny, warm and dry day, a few hours are enough for drying. If the temperature is not too high, then it is better to wait a day.
To complete this step you will need a plastic grater with an emery cloth. If there are areas that are not completely dry, the cloth clogged with the mixture will have to be replaced. Therefore, it is better to wait enough time to be faithful. Grouting is done in a circular motion with strong pressure.
How to reinforce corners?
In order for the plastered surface of the penoplex to be smooth, it is necessary to secure the corners with a mesh. Slopes and window openings are also covered.
This is important: if you disturb the order, it will be problematic to obtain a good quality finish, since finishing corners and slopes after the walls are covered is much more difficult.
When gluing the mesh to the corners of the walls, it is worth considering some important nuances and following a proven scenario:
- cut a strip, thirty centimeters wide, and the length is equal to the length of the slope or about a meter;
- the strip is folded in the middle, smoothing the fold thoroughly;
- using a spatula, apply the solution to the corner; its thickness is approximately two to three millimeters;
- it is placed on the wall, pressed on with a spatula and smoothed, running the tool from the corner - along the sides and down;
- When the material is glued to the corners, they begin to glue it to the rest of the wall surface.
Choosing a mixture for high-quality plaster
On the construction market, many companies offer their products for working with foam plastic; the leading ones are: Ceresit, Ecomix, Stolit, etc. Manufacturers produce a separate line suitable for insulation. Some mixtures are designed for gluing foam plastic to various surfaces, others - for arranging cladding.
Accordingly, when choosing what to plaster foam on the outside with, you should pay attention to universal compounds. Such a mixture will be needed during the process for gluing reinforcing mesh and plaster walls, while the solution consumption is 4 kg/m2 and 6 kg/m2, respectively
Prepare the mixture in accordance with the manufacturer's instructions. However, experienced craftsmen recommend adding more water when gluing the mesh and making a fairly liquid mixture for plastering the foam. Due to the specific surface, the solution should almost flow off the spatula
Such a mixture will be needed during the process for gluing reinforcing mesh and plaster walls, while the solution consumption is 4 kg/m2 and 6 kg/m2, respectively. Prepare the mixture in accordance with the manufacturer's instructions. However, experienced craftsmen recommend adding more water when gluing the mesh and making a fairly liquid mixture for plastering the foam. Due to the specific surface, the solution should almost flow off the spatula.
Another important tip is to use the same brand of material, because each manufacturer can make changes to the composition of the product. As a result, after the work done, you will end up with a surface with a different result.
Decorative plaster
The soil has dried, we proceed to applying a decorative plaster layer. The solution is prepared in accordance with the instructions, the dry mixture is combined with water and mixed. It is recommended to apply the solution with a tool with a wide blade, moving from bottom to top and ensuring uniform distribution of the material.
The thickness of the applied solution in most cases is determined by its grain size, and the manufacturer indicates such information on the packaging material.
To ensure that the surface looks uniform and has no stains, plastering is done at one time, breaks are taken only for mixing the next portion of the mortar mixture.
Having distributed the plaster, we begin to form a relief surface. This is done with special graters, brushes, sponges and even a spatula. The main thing is to achieve a uniform texture throughout the entire area, avoiding noticeable transitions. If the shade of the plaster can be covered with paint, then the relief of the surface remains always visible.
Facade plaster on penoplex and polystyrene foam preparation, grouting and application technology
Facade plaster on penoplex and expanded polystyrene
The insulation of any important element of the structure is carried out taking into account technological standards and is aimed at reducing the impact of the insulated surface from the environment. But few homeowners and careless builders think about the fact that the thermal insulation layer itself also needs reliable protection
But few homeowners and careless builders think about the fact that the thermal insulation layer itself also needs reliable protection.
Facade plaster on penoplex and expanded polystyrene is one of the ways to protect heat-insulating boards from the harmful effects of low temperatures and increase their service life.
The fact is that although insulation can be a good heat insulator, its other properties still leave much to be desired. For example, exposure of some insulation materials to precipitation and moisture can lead to a drop in their properties to zero.
To protect penoplex and expanded polystyrene, the best, if not the only worthy option, is warm facade plaster.
General scheme for finishing the facade and walls with plaster mortar and insulation
In this article we will try to talk about the entire technology of plastering over insulation, starting from preparing the mixture and ending with the finishing touches. Read about the thermal insulation technology itself in the corresponding article on insulating facades with polystyrene foam.
So, facade plaster on penoplex is applied in the following sequence:
- Preparation of plaster mortar;
- Installation of the reinforcing layer;
- Grouting over the reinforcing mesh;
- Leveling surfaces with plaster;
- Grouting the plastered surface;
- Primer;
- Application of decorative finishing.
Acrylic and mosaic.
Acrylic-based foam plaster also includes stone chips. Ingredients that improve quality are added to it - in the form of modifiers and plasticizers. As a result, the acrylic mixture has higher elasticity values. They are less susceptible to abrasion and mechanical stress.
This type of plaster on polystyrene foam lasts from fifteen to twenty-five years. It costs more than mineral compounds, but it pays off. It is important to take into account that acrylic coating loses color quite quickly. This deficiency must be corrected by simply painting the surface with appropriate paint.
Most often, facade plaster on polystyrene foam and polystyrene foam is finished using various types of mosaic compositions.