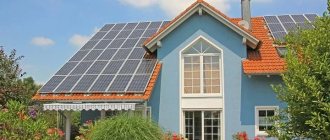
Among the types of alternative energy, solar air heating of individual housing occupies a special place. You will not need complex installation work or permission from the regional energy inspectorate. All you need is as much sun as possible and unused roof/wall space. The rest is available for DIY.
General principles of air heating by ultraviolet solar rays
Solar heating refers to a renewable energy system that collects energy from the sun in the form of heat rather than using it to produce electricity, such as using solar photovoltaics.
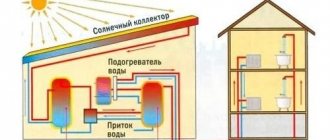
Such heating systems are used for local heating of water and air. Heating technologies circulate heated air or fluid in a radiant heating system through ducts in walls or floors so that the heat can naturally warm interior spaces.
There are two types of systems that use the energy of ultraviolet solar rays:
- Active heaters . Here, solar energy is used to drive heat pumps, which, in turn, circulate water or other coolant. Such heaters are structurally more complex, since they require the presence of mechanical moving units;
- Passive heaters . By heating outside air, which is then circulated indoors, these systems heat the rooms of your home using renewable energy. Passive solar heating systems have no mechanical parts.
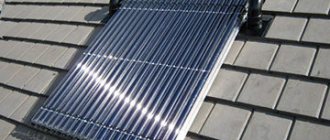
Passive heaters can have two designs - collectors and plates. The plates generate energy using photo-semiconductor elements, which is used to drive a pump that circulates the coolant. The air solar collector heats the air in the pipes, from where it moves to the heat exchanger and tank due to the difference in volumes. Next, the heated air either naturally or forcedly enters the premises.
Read about how swimming pool heating works, solar collectors that can be used for this and how to assemble the entire structure.
Connection
The collector is fixed to the roof using a bracket and connected to two air ducts leading into the room. A fan with a capacity of about 150 cubic meters should be installed on the inlet air duct. m/h.
Factory-made solar panels are very expensive, and they will not pay off soon. Do-it-yourself solar panels are much cheaper to manufacture, and assembling the structure is not so difficult.
Types of solar panels for home heating are presented in this review. And also about the pros and cons of each option.
How to calculate the thermal efficiency of a solar air collector
Obviously, a block of airborne solar collectors is more compact than solar panels, and is characterized by lower losses that occur when converting one type of energy into another.
This type of “green” energy becomes profitable when the ratio of collected solar energy to that available in a given area is maximum.
The total amount of energy is expressed in kWh/(m²×day). It is believed that on a clear sunny day the average amount of direct solar energy available per 1 m² of area per hour should be at least 1 kW. But the collector is a thin pipe made of metal with high thermal conductivity, so heat losses in the collector itself are minimal. Therefore, the efficiency of the air manifold will depend on:
- The active area of the collector (that which is exposed to sunlight).
- Number of collector pipes.
- Location of collectors relative to the main direction of the rays.
- The length and complexity of the heated air transportation route.
In the case of independent installation of air collector heating, the efficiency of the collector can only be measured using a high-temperature thermometer. Next (since it is risky to hope for spontaneous displacement of heated air with an increased volume into the premises), a fan will be required. Since the system will have an open circuit, the heat collected by the collector per unit will be directly proportional to the temperature difference and the heat capacity of the air over time. Multiplying this value by the duration of operation of the collector and neglecting radiation losses from the grazing action of the rays, we obtain the total value of the heat flux density. By comparing it with the nominal one (1 kW), we will find out the efficiency of the collector.
Now all we need is a pyranometer to check the intensity of sunlight. The presence of this device will eliminate labor-intensive measurements of collector efficiency in various weather conditions. The most convenient pyranometers are the ICB200-03 type, which can be purchased or rented.
Revolutionary invention
Engineering thought does not stand still. Recently, developers have proposed a revolutionary version of the solar air collector, which, due to its ease of manufacture and high efficiency, seems awkward.
However, this system works productively, utilizing solar heat even in winter.
- SolarWall doesn't even have a coating, and the price of a solar air collector is minimal.
- The heat absorber is made in the form of a corrugated metal sheet with thousands of small holes.
- From the inside, these holes open into a system of air channels. The smallest holes receive sunlight and rays reflected from the snow, and additional heating occurs due to the heated wall.
The effectiveness of the almost toy-like SolarWall system is such that it is ranked among the greatest creations of the industrial era. In Canada, more than half of infrastructure and commercial buildings are heated using these collectors.
What does a solar collector consist of?
A number of designs have been developed and patented:
- Flat.
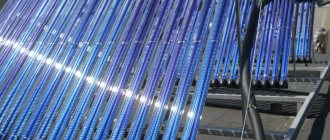
- Tubular.
- Vacuum tubes.
- Thermosyphons.
The easiest way to make a solar collector with your own hands is in a flat or tubular design.
We recommend reading: what are vacuum solar collectors, principles of their operation and types.
How to assemble the installation? One collector block (their number is already approximately known from calculations performed using the above method) consists of the following elements:
- A set of copper or aluminum tubular elements;
- Absorbent plate;
- Sealed thermally insulated housing;
- Covers that can be made from transparent heat-resistant polymer or tempered glass.
The effectiveness of the insulation determines the efficiency of the collector. It can be increased if a storage circuit is included in the design, which can provide heat on cloudy days or for the operation of cooling systems.
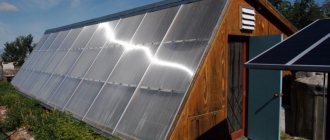
The process of manufacturing and subsequent installation of solar collectors is possible not only for the roof, but also for the southern walls of the building. In this case, the housings are equipped with perforations to facilitate air flow. When the heated air rises to the top of the wall, it is directed into the building's ventilation ducts for subsequent distribution.
Video description
Video example of the applied use of a solar collector for a country house:
- The light-absorbing panel should not be subject to shadows from nearby objects - houses, trees, pipes, fences, etc.
- When placing the device on the roof of a house, it is necessary to design a mount for it in advance.
- To avoid the accumulation of precipitation on the work surface, the device must be installed as close to a vertical plane as possible, but with minimal damage to capture sunlight.
- For optimal operation throughout the year, the device must be installed on the south side with an angle equal to the latitude of the area.
Reference! It will not be possible to create a completely autonomous heating system based on a solar collector. Since to ensure maximum efficiency, the circuit will need to be equipped with a circulation pump, automation and other equipment that runs on electricity. However, significantly reducing the consumption of the main energy resource - gas, electricity, coal - with its help is a completely feasible task.
Manufacturing and installation
Below we consider a budget option for obtaining a solar heating collector, using a microfan, empty Pepsi-Cola cans, metal casings of used lighting fixtures (preferably from fluorescent lamps), tempered glass and black paint. You will also need a glass cutter, silicone sealant (with a gun), aluminum tape, a thermometer with a temperature sensor, metal scissors, self-tapping screws, an electric drill, a hammer, a screwdriver and a marker. You must wear protective gloves when assembling and making components. It only takes 7 steps:
- Making the body: cut the lamp box to a predetermined size and wrap it with aluminum tape.
- Sealing the case: we fasten the corners with self-tapping screws and carefully seal all cracks, grooves and possible cracks with silicone. We paint the entire structure black.
- We mark with a marker and cut out the safety glass (instead of glass, you can use a polymer sheet material suitable for transparency).
- We cut and install the cans into the body, connect them together and seal them. We bring the ends of the pipes outside the sealed housing, while agreeing on the method of connecting the inlet holes of the microfan. We paint the jars with black paint.
- On the opposite side of the case we get ventilation holes. We provide the opportunity to make additional holes if testing of the collector shows a defect. The location of the holes should take into account the overall dimensions of the fan.
- We seal the gaps between the protective glass and the body.
- Attach the microfan to the rear holes of the case. Before doing this, you need to make sure that the fan connection is correct and it will work for suction.
- We check the efficiency of the assembled collector. To do this, we place a loose block on a selected section of the wall or on the roof, turn on (after some time) the fan and, using a thermometer, find out the temperature of the air heated by the sun.
Tests are carried out throughout the daylight hours, at regular intervals (in summer, for example, from 9.00 to 17.00, every hour). If the air temperatures recorded by the sensor are from 45 °C to 70 °C, then the collector is manufactured correctly, otherwise the number of blocks should be increased. The finished structure is installed near the ventilation openings of the house.
Options for increasing furnace efficiency
Increased efficiency due to the air circuit
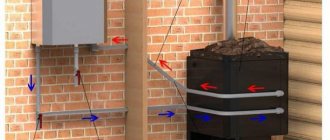
Throughout history, many tricks have been invented to increase the efficiency of the stove. One of them is the arrangement of an additional air circuit around the furnace. To do this, the furnace walls are covered with an additional layer.
For these purposes, by the way, you can use not refractory, but ordinary double silicate brick M 150. But when lining the stove, you should make a gap between the masonry sufficient for air circulation. Typically this distance is approximately 5 cm.
Furnace air circuit
For air circulation in the air space between the firebox and the outer layer, holes are provided in the upper and lower parts of the outer masonry of the brick fireplace stove. They are necessary for air circulation. They are created by loosely fitting bricks together.
They are performed starting from the second row of masonry. In this case, the instructions instruct to do them in no more than three rows, both at the top and at the bottom. There should be no holes in the upper part, or more precisely in the last two rows of masonry.
The initial process of laying a furnace
It is worth noting that when laying the outer layer, you should be careful not to accidentally cover these holes with mortar.
Due to the natural circulation of air in the gaps of the circuit, heat exchange occurs between the air and the masonry of the first layer. This almost doubles the heating area of the stove, which significantly increases its efficiency.
Increasing the efficiency of the stove due to additional chimney passages
Another fairly common way to increase the efficiency of boilers is to create additional flue passages. But this action must be performed only after careful calculation. Since an increase in the number of strokes leads to a decrease in thrust, and this circumstance can lead to the impossibility of the combustion process.
Brick heating stoves for summer cottages are usually made with no more than three gas duct strokes. This allows you to heat the room as much as possible using natural draft. A larger number of strokes may require installation of forced flue gas removal.
